morse 285A-BP User manual

Category
Battery chargers
Type
User manual
Copyright 2016 - Morse Mfg. Co., Inc. Form OM391-P (0616-____) (Updated October 10, 2016 4:04 PM) 1
The Specialist In Drum Handling Equipment
Part # 391-P
Battery Charger
Morse Part # 391-P Battery Charger
Model AC 1212 Amp
Input Voltage (Vac) 100 / 220 +/- 10% Auto Switch
Input Frequency 50 / 60 Hz
Output Current 12 Amp
Output Equalizer Voltage 14.7 Vdc +/- 0.2 V
Output Float Voltage 13.5 Vdc +/- 0.2 V
Transfer Current 1.4 Amp
Battery Application Lead Acid Battery
Dimensions (L x W x H) 7.32” x 3.46” x 1.87” (186 x 88 x 47.5 mm)
Weight 1.76 Lb. (0.8 kg)
Troubleshooting
Problem and Symptoms Possible Reason Solution
If power LED indicator is off and there is no
output voltage when charger is plugged into
socket.
No AC input1.
Charger malfunction2.
Check AC power source1.
Notify service center2.
If commercial power is normal, but charging
indicator LED (equalizer) is off when
charging.
The polarity connection may be reversed1.
The output connection may be short or open2.
Output DC fuse loose3.
Charger malfunction4.
Check output cable1.
Check output cable2.
Check output DC fuse3.
Notify service center4.
If commercial power is normal, but charging
indicator LED (equalizer) is lit for a long
time.
Battery malfunction1.
Charger malfunction2.
The battery can’t charge normally. Please 1.
stop charging and have battery replaced.
Notify service center2.
If the charging indicator turns immediately
from OFF to ON (fully charged).
Battery is fully charged3.
Battery malfunction4.
Battery is not fully charged, it may be
defective. Please have battery replaced.
Caution
Before using the battery charger, please read all instructions and 1.
cautionary markings.
Use the battery charger in a well ventilated area - for indoor use only.2.
To avoid the risk of injury, charge only lead-acid or gel cell type 3.
rechargeable batteries.
Beware incorrect polarity.4.
Beware slight heat on the exterior while charging.5.
Avoid exposure to heat.6.
Remove the plug from AC power outlet after charging. 7.
Charging Procedure Instructions
Connect correct polarized clips to battery terminals.1.
Connect to power supply and switch on. Then charging starts, 2.
indicated by Orange LED light.
When green light turns on, keep charging for a couple more hours to 3.
ensure complete charge.
When charging is nished (Green LED), disconnect from power 4.
supply and remove clips from battery.
Charging can continue in “Float stage” without harming the battery. 5.
LED Indication
LED1 RED = Power on1.
LED2 ORANGE = Charging2.
LED3 GREEN = Fully charged 3.
Fan Control
Fan of fast speed (Bulk / Absorption Charge)1.
Fan on slow speed (Float Charge)2.
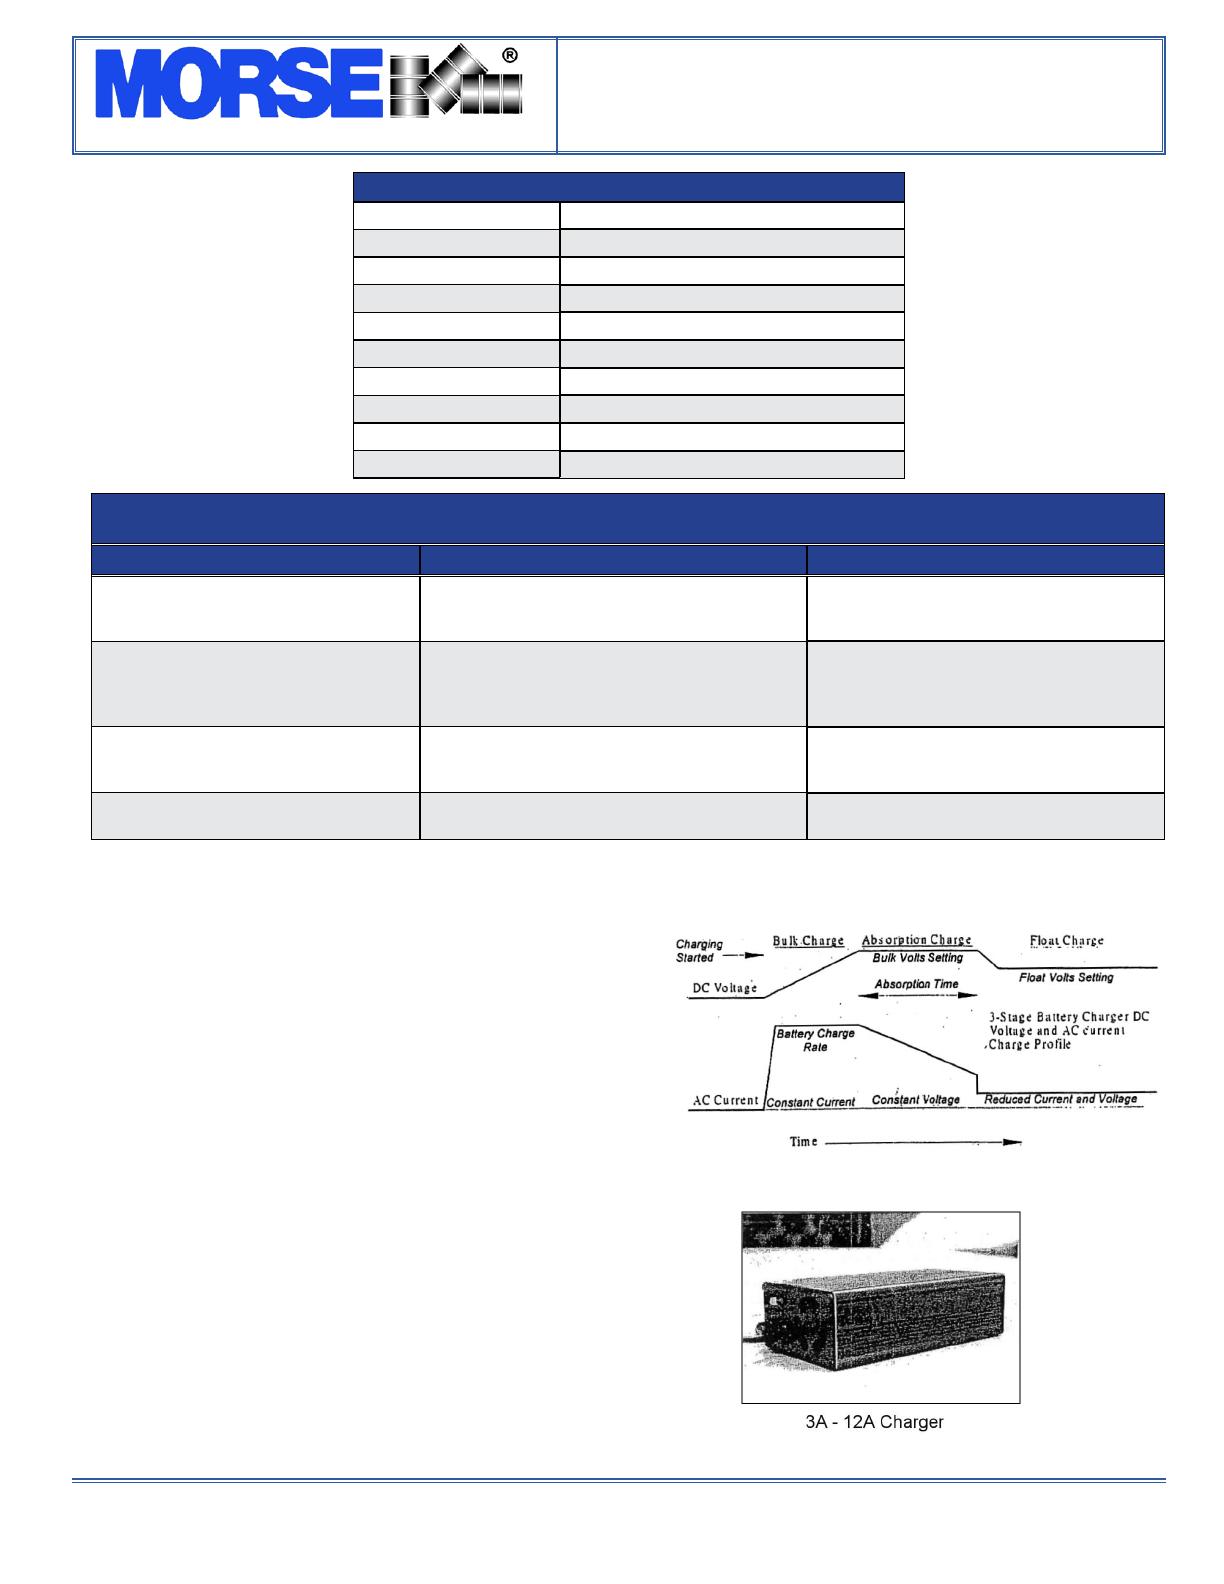
Charging Curve
Case Drawing
Operating Instructions
Copyright 2016 - Morse Mfg. Co., Inc. Form OM391-P (0616-____) (Updated October 10, 2016 4:04 PM) 2
The Specialist In Drum Handling Equipment
Part # 391-P
Battery Charger
SCHAUER
3210 Wasson Rd.
Cincinnati, OH 45209
Phone: (513) 791-3030
Fax: (513) 791-7192
Schauer Battery Charger Warranty:
If you have a defective battery charger, you must return it to us (you pay freight to us). We will evaluate the
charger and x the battery charger or replace the battery charger, if the charger is still in the warranty period.
You should check the fuse in the battery charger before sending the charger to us. If you return the battery
charger to us and nothing is wrong with the charger or nothing is wrong other than a blown fuse, we reserve
the right to bill you for checking the battery charger and you will be responsible for return freight.
If we would determine that the customer did something to the battery charger to cause damage,
we would notify the customer that warranty is void. Listed are a few things that would void the
warranty.
If the customer would modify the battery charger (if you open the charger and change it, you could
void the warranty).
If the customer would get the inside of the battery charger wet.
If the customer damages the battery charger such as running over the charger causes damage to
the outside of the charger.
The charger must get proper air ow and should not be put in an enclosed area.
If the customer would not apply the charger correctly. This could be putting a connector on incorrectly or trying
to charge too large a battery with the charger or using it for something that it was not intended. A battery
charger’s DC current rating should be between 10% to 20% of the amp hour ratings of your battery. If your
batteries are connected in series you only consider the amp hour rating of one battery. If your batteries are in
parallel you add the amp hour rating of all your batteries to determine the DC current rating of your charger.
When checking the setting on our battery chargers, you must use an electronic load that has been calibrated
within the past year.
If you have any questions, please call (513) 791-3030 or email us at: [email protected] before using
the battery charger.
Fuses for the battery charger can be found at any electronic house. You want a 5mm by 20mm glass fuse,
which is FAST ACTING, NOT slow blow. For a 12 amp charger, you need a 15 amp 250 volt fuse. There are
many national distributors that handle these (we do not endorse any) such as:
Allied (800) 433-5700
Digi-Key (800) 344-4539
Newark (800) 463-9275
Mouser (800) 346-6873
. . .or simply put the type of fuse you need into an internet search engine to nd several distributors.
  • Page 1 1
  • Page 2 2

morse 285A-BP User manual

Category
Battery chargers
Type
User manual

Ask a question and I''ll find the answer in the document

Finding information in a document is now easier with AI