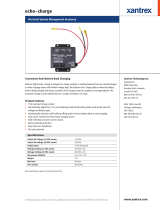
Xantrex Technology Trace SW2612A User manual

Category
Power adapters & inverters
Type
User manual
2001 Xantrex Technology, Inc.
5916 - 195th Street N. E.
Arlington, WA 98223
Telephone: 360/435-8826
Fax: 360/435-2229
www.traceengineering.com
SW Series Inverter/Charger
Part No. 2031-5
Rev. C: February 2001
SW Series Inverter/Chargers
With Revision 4.01 Software
Owner’s Manual
2001 Xantrex Technology, Inc.
5916 - 195th Street N. E.
Arlington, WA 98223
Telephone: 360/435-8826
Fax: 360/435-2229
www.traceengineering.com
SW Series Inverter/Charger
Part No. 2031-5
Rev. C: February 2001
2001 Xantrex Technology, Inc.
5916 - 195th Street N. E.
Arlington, WA 98223
Telephone: 360/435-8826
Fax: 360/435-2229
www.traceengineering.com
SW Series Inverter/Charger
Part No. 2031-5
Rev. C: February 2001
PRODUCT MATERIALS PACKAGE
Thank you for choosing Xantrex products to meet your powering needs. We make every effort to ensure
that your inverter/charger is properly packaged for shipping including the following:
q Owners Manual;
q Battery Temperature Sensor (BTS);
q Red and black battery terminal covers with attaching hardware;
q Hardware package (AC access panels with screws, crimp-on terminals);
q Trace bumper sticker;
If any of the above listed materials are missing from your package, or if it is unsatisfactory in any manner,
please contact our Service department at 360-435-8826; or, fax this page explaining the discrepancy to
360-474-0616. Please provide:
Model Number: ________________________________
Serial Number: ________________________________
Comments:
Visit our web site at www.traceengineering.com for more information and answers to frequently asked
questions.
2001 Xantrex Technology, Inc.
5916 - 195th Street N. E.
Arlington, WA 98223
Telephone: 360/435-8826
Fax: 360/435-2229
www.traceengineering.com
SW Series Inverter/Charger
Part No. 2031-5
Rev. C: February 2001
TABLE OF CONTENTS
2001 Xantrex Technology, Inc.
5916 - 195th Street N. E.
Arlington, WA 98223
Telephone: 360/435-8826
Fax: 360/435-2229
www.traceengineering.com
SW Series Inverter/Charger
Part No. 2031-5
Rev. C: February 2001
TABLE OF CONTENTS
IMPORTANT SAFETY INSTRUCTIONS ..................................................................................................... 1
GENERAL PRECAUTIONS....................................................................................................................................1
SPECIAL NOTICES................................................................................................................................................2
PERSONAL PRECAUTIONS..................................................................................................................................3
INTRODUCTION .......................................................................................................................................... 5
UNIT IDENTIFICATION................................................................................................................................ 7
MODEL NUMBER...................................................................................................................................................7
CONTROLS, INDICATORS AND COMPONENTS...................................................................................... 9
CONTROL PANEL..................................................................................................................................................9
AC SIDE ...............................................................................................................................................................12
DC SIDE...............................................................................................................................................................14
INSTALLATION.......................................................................................................................................... 15
QUICK INSTALL...................................................................................................................................................16
COMPLETE INSTALL...........................................................................................................................................17
FUNCTIONAL TEST .................................................................................................................................. 31
MENU SYSTEM.......................................................................................................................................... 33
OVERVIEW ..........................................................................................................................................................33
USER MENU MAP................................................................................................................................................34
SETUP MENU MAP..............................................................................................................................................35
USER MENU ........................................................................................................................................................36
SETUP MENU ......................................................................................................................................................44
OPERATION............................................................................................................................................... 57
THEORY OF OPERATION...................................................................................................................................57
POWER VS. EFFICIENCY...................................................................................................................................59
INVERTER CAPACITY VS TEMPERATURE .......................................................................................................60
OPERATING MODES...........................................................................................................................................61
INVERTER MODE................................................................................................................................................62
CHARGER MODE ................................................................................................................................................64
INVERTER/CHARGER MODE.............................................................................................................................69
GENERATOR SUPPORT MODE .........................................................................................................................71
AUTOMATIC GENERATOR CONTROL MODE ...................................................................................................73
UTILITY BACKUP MODE.....................................................................................................................................81
UTILITY INTERACTIVE MODE ............................................................................................................................83
ENERGY MANAGEMENT MODE.........................................................................................................................90
PEAK LOAD SHAVING MODE.............................................................................................................................92
IN BRIEF...............................................................................................................................................................92
LOW BATTERY TRANSFER (LBX) MODE..........................................................................................................93
USING MULTIPLE INVERTERS...........................................................................................................................95
TECHNICAL INFORMATION..................................................................................................................... 99
BATTERY TYPE...................................................................................................................................................99
BATTERY SIZING...............................................................................................................................................101
BATTERY BANK SIZING....................................................................................................................................102
BATTERY CARE AND MAINTENANCE.............................................................................................................104
BATTERY INSTALLATION.................................................................................................................................106
BATTERY HOOK-UP CONFIGURATIONS.........................................................................................................107
BATTERY CABLE INDUCTANCE......................................................................................................................110
APPLICATIONS..................................................................................................................................................111
TROUBLESHOOTING GUIDE............................................................................................................................112
INVERTER/CHARGER TERMINOLOGY............................................................................................................115
SPECIFICATIONS AND FEATURES (60 Hz Models)........................................................................................118
SPECIFICATIONS AND FEATURES (50 Hz Models)........................................................................................119
DIMENSIONS.....................................................................................................................................................121
INSTALLATION DIAGRAMS ..............................................................................................................................121
USER SETTINGS WORKSHEETS.....................................................................................................................123
TABLE OF CONTENTS
2001 Xantrex Technology, Inc.
5916 - 195th Street N. E.
Arlington, WA 98223
Telephone: 360/435-8826
Fax: 360/435-2229
www.traceengineering.com
SW Series Inverter/Charger
Part No. 2031-5
Rev. C: February 2001
APPENDIX................................................................................................................................................ 128
OPTIONS ........................................................................................................................................................... 128
OTHER PRODUCTS.......................................................................................................................................... 129
REFERENCE TABLES AND GRAPHS.............................................................................................................. 130
STORAGE CHECKLIST..................................................................................................................................... 133
WARRANTY/REPAIR INFORMATION .................................................................................................... 135
LIMITED WARRANTY........................................................................................................................................ 135
WARRANTY REGISTRATION...........................................................................................................................135
LIFE SUPPORT POLICY.................................................................................................................................... 135
WARRANTY OR REPAIR SERVICE REQUIRED.............................................................................................. 136
INDEX ....................................................................................................................................................... 137
TABLE OF CONTENTS
2001 Xantrex Technology, Inc.
5916 - 195th Street N. E.
Arlington, WA 98223
Telephone: 360/435-8826
Fax: 360/435-2229
www.traceengineering.com
SW Series Inverter/Charger
Part No. 2031-5
Rev. C: February 2001
INDEX OF FIGURES
Figure 1, Identification Label .................................................................................................................. 7
Figure 2, SW Series Inverter/Charger.................................................................................................... 9
Figure 3, Control Panel........................................................................................................................... 9
Figure 4, AC Side................................................................................................................................. 12
Figure 5, Internal Components and Indicators ..................................................................................... 13
Figure 6, Aux and Gen Control Relays................................................................................................. 14
Figure 7, DC Side................................................................................................................................. 14
Figure 8, Air Flow Intake Location........................................................................................................ 18
Figure 9, AC Input/Output Power Connection......................................................................................19
Figure 10, Warning Label..................................................................................................................... 21
Figure 11, Battery to Inverter Cable Connection .................................................................................. 24
Figure 12, Neutral-To-Ground Bond Switching: No External AC Source Connected........................... 27
Figure 13, Neutral-To-Ground Bond Switching: External AC Source Connected ................................ 28
Figure 14, Neutral-To-Ground Bond Switching: Neutral Bonded To Ground....................................... 28
Figure 15, Multiple Point Ground System............................................................................................. 29
Figure 16, Single Point Ground System ............................................................................................... 29
Figure 17, Trace SW Series Inverter Simple Block Diagram ........................................................... 57
Figure 18, Trace SW Series Inverter Output Waveform................................................................... 58
Figure 19, Trace SW Series Efficiency Curves.................................................................................. 59
Figure 20, Inverter Capacity vs. Temperature...................................................................................... 60
Figure 21, Three-Stage Battery Charging ............................................................................................ 64
Figure 22, BTS (Battery Temperature Sensor) .................................................................................... 65
Figure 23, Two Wire Start Wiring Diagram .......................................................................................... 76
Figure 24, Three Wire Start Wiring Diagram (HONDA Type).............................................................. 77
Figure 25, Three Wire Start Wiring Diagram (ONAN Type)................................................................. 77
Figure 26, Relay RY7 and RY8 Sequence...........................................................................................78
Figure 27, Selling Power From A DC Charging Source; Hypothetical Time Of Day Oper. History...... 85
Figure 28, Selling Power Stored In The Batteries; Hypothetical Time Of Day Operational History...... 86
Figure 29, Utility Interactive Line-Tie System With Battery Backup Flow Diagram.............................. 88
Figure 30, Overvoltage Protection for Battery...................................................................................... 89
Figure 31, Series Configuration: 6-Volt Battery Wiring....................................................................... 107
Figure 32, Series Configuration: 12-Volt Battery Wiring..................................................................... 107
Figure 33, Parallel Configuration: 12-Volt Battery Wiring................................................................... 108
Figure 34, Series-Parallel Configuration: 6-Volt Battery Wiring.......................................................... 109
Figure 35, Series-Parallel Configuration: 12-Volt Battery Wiring........................................................ 109
Figure 36, AC Waveforms.................................................................................................................. 116
Figure 37, SW Series Dimensions: With AC Access Covers Showing Knockout Sizes................. 120
Figure 38, Installation Diagram, 120 VAC, 1 Phase, Grid Connected, Generator Backup ................ 121
Figure 39, Installation Diagram, 240 VAC, 3 Wire, Grid Connected, Generator Backup................... 122
Figure 40, AWG Wire Size................................................................................................................. 131
TABLE OF CONTENTS
2001 Xantrex Technology, Inc.
5916 - 195th Street N. E.
Arlington, WA 98223
Telephone: 360/435-8826
Fax: 360/435-2229
www.traceengineering.com
SW Series Inverter/Charger
Part No. 2031-5
Rev. C: February 2001
INDEX OF TABLES
Table 1, AC Input and Output Wiring Connections .............................................................................. 19
Table 2, Minimum Recommended Battery Cable Size vs. Cable Length............................................. 22
Table 3, Battery Cable To Maximum Breaker/Fuse Size ..................................................................... 23
Table 4, Charging Setpoints For Common Battery Types.................................................................... 67
Table 5, Typical Wattage Of Common Appliances ............................................................................ 101
Table 6, Battery Charging: Charging Setpoints.................................................................................. 104
Table 7, Battery State of Charge Voltage........................................................................................... 105
Table 8, Battery Cable Inductance ..................................................................................................... 110
Table 9, Power Consumption Of Common Appliances...................................................................... 130
Table 10, AWG to Metric Wire Conversion Chart .............................................................................. 130
Table 11, Minimum Recommended Battery Cable Size vs. Cable Length......................................... 131
Table 12, Battery Cable to Maximum Breaker/Fuse Size................................................................... 131
Table 13, Recommended Minimum AC Wire Sizes (75° C)............................................................... 132
Table 14, Knockout/Hole Size To Conduit Size Required.................................................................. 132
Table 15, Safety Ground Wire Sizes.................................................................................................. 132
IMPORTANT SAFETY INSTRUCTIONS
2001 Xantrex Technology, Inc.
5916 - 195th Street N. E.
Arlington, WA 98223
Telephone: 360/435-8826
Fax: 360/435-2229
www.traceengineering.com
SW Series Inverter/Charger
Part No. 2031-5
Rev. C: February 2001
Page
1
IMPORTANT SAFETY INSTRUCTIONS
SAVE THESE INSTRUCTIONS!
This manual contains important safety and operating instructions as prescribed by UL Standards for the
Trace SW Series Inverter/Chargers for use in residential and commercial applications. This manual
specifically covers products with the revision 4.01 software.
The 120 VAC/60 Hertz models of the SW Series Inverter/Chargers are ETL listed to UL Standard 1741
(Draft), Static Inverters and Charge Controllers for use in Photovoltaic Systems. The 12 and 24 VDC,
120 VAC/60 Hertz models of the SW Series Inverter/Chargers are ETL listed to UL standard 458, Power
Converters/Inverters and Power Converter/Inverter Systems for Land Vehicles and Marine Craft.
The 120 VAC/60 Hertz models of the SW Series Inverter/Chargers are also ETL listed to Canadian
Standard CSA - C 22.2 No. 107.1 - M1, Commercial and Industrial Power Supplies.
The following Model Numbers of the SW Series Inverter/Chargers listed above comply with the following
EU directives:
89/336/EEC, “Council Directive of 3 May 1989 on the approximation of the laws of Member States
relating to Electromagnetic compatibility (EMC)
73/23/EEC, Council Directive of 19 February 1973 on the harmonization of the laws of Member
States relating to electrical equipment for use within certain voltage limits (LVD)
SW2612E SW4548AHC SW4548EPV SW2612A
SW3048E
SW2612EHC SW4548EHC SW2612AHC SW3048AHC SW4548E3PH
SW3024E
SW3048EHC SW3024E SW3048EPV SW3048E3PH
SW3048E
SW3024AHC SW3024A SW3048APV SW4548APV
SW3048A SW3024EHC SW3048E SW4548E SW4548A
The compliance of the above mentioned products with the Directives is confirmed through the
application of the following essential requirements:
Emissions and Immunity Safety
EN 50091-1
EN 50091-2 and
EN 60950
NOTE: To achieve compliance to EN50091-1, Conducted RF emissions, product must not be
connected to AC mains. Compliance is assured for off-grid applications only.
As the manufacturer we declare under our sole responsibility that the above mentioned products comply
with the above named directives.
GENERAL PRECAUTIONS
1. Before using the SW Series Inverter/Charger, read all instructions and cautionary markings on:
(a) the inverter/charger; (b) the batteries and; (c) all appropriate sections of this manual.
WARNING - To reduce risk of injury, charge only deep-cycle lead acid, lead antimony, lead calcium,
gel cell, absorbed glass mat, or NiCad/NiFe type rechargeable batteries. Other types of batteries
may burst, causing personal injury and damage.
2. Do not expose inverter/charger to rain, snow or liquids of any type. The inverter is designed for indoor
mounting only. Protect the inverter from splashing if used in vehicle applications.
IMPORTANT SAFETY INSTRUCTIONS
Page
2
2001 Xantrex Technology, Inc.
5916 - 195th Street N. E.
Arlington, WA 98223
Telephone: 360/435-8826
Fax: 360/435-2229
www.traceengineering.com
SW Series Inverter/Charger
Part No. 2031-5
Rev. C: February 2001
3. Use of battery cable or custom attachment not recommended or sold by Xantrex Technology Inc. for
the SW Series Inverter/Charger may result in a risk of fire, electric shock, or injury to persons.
4. Do not disassemble the inverter/charger. Take it to a qualified service center when service or repair is
required. Incorrect re-assembly may result in a risk of electric shock or fire.
5. To reduce risk of electric shock, disconnect all wiring before attempting any maintenance or cleaning.
Turning off the inverter will not reduce this risk. Solar modules produce power when exposed to light.
Cover them with opaque material before servicing any connected equipment.
WARNING RISK OF EXPLOSIVE GASSES
(a) WORKING IN VICINITY OF A LEAD ACID BATTERY IS DANGEROUS. BATTERIES
GENERATE EXPLOSIVE GASES DURING NORMAL BATTERY OPERATION. FOR THIS
REASON, IT IS OF UTMOST IMPORTANCE THAT EACH TIME BEFORE SERVICING
EQUIPMENT IN THE VICINITY OF THE BATTERY, YOU READ THIS MANUAL AND
FOLLOW THE INSTRUCTIONS EXACTLY.
(b) To reduce risk of battery explosion, follow the instructions in this manual and those published
by the battery manufacturer as well as manufacturer of any additional equipment used in the
vicinity of the battery. Review all cautionary markings on these products.
SPECIAL NOTICES
1. Tools required to make AC and DC wiring connections: Wire strippers; 1/2" (13MM) open-end or
socket wrench; Phillips #2 screwdriver; flat blade 1/4" (6MM) screwdriver.
2. No terminals or lugs are required for hook-up of the AC wiring. AC wiring must be copper wire and
rated for 75°C or higher. The maximum wire size for the AC terminals is #6 AWG (4.11 mm diameter).
Battery cables must be rated for 75°C or higher. Crimped and sealed copper ring terminal lugs with a
5/16 hole should be used to connect the battery cables to the DC terminals of the inverter/charger.
Soldered cable lugs are also acceptable.
3. Torque all AC wiring connections to 20 inch-pounds. Torque all DC cable connections to 10-15 foot-
pounds. Avoid dropping metal tools onto the batteries. A short-circuit could result in a spark, fire or
possible explosion.
4. This inverter/charger is designed for use with a battery supply with a nominal voltage that matches the
last two digits of the model number (e.g., 12 Volt with an SW2512).
5. For instructions on mounting, see the MOUNTING section on page 17 of this manual.
NOTE: Do not use the keyhole mounting slots for permanent installations. For battery installation
and maintenance refer to the battery manufacturer’s instructions.
6. No AC or DC disconnects are provided as an integral part of this inverter. Both AC and DC
disconnects must be provided as part of the system installation. Refer to the INSTALLATION section
beginning on page 15 for more information.
7. No overcurrent protection for the battery supply is provided as an integral part of this inverter.
Overcurrent protection of the battery cables must be provided as part of the system installation. Refer
to the INSTALLATION section beginning on page 15 and the DC DISCONNECT AND
OVERCURRENT PROTECTION section on page 23 for more information.
8. No over current protection for the AC output wiring is provided as an integral part of this inverter.
Overcurrent protection of the AC output wiring must be provided as part of the system installation. Refer to
the INSTALLATION section on page 15 and the AC WIRING section on page 18 for more information.
9. The AC output neutral conductor and DC negative conductors are not connected (bonded) to the
inverter chassis. Both the input and output conductors are isolated from the enclosure and each other.
System grounding, if required by sections 690-40, and 690-42 of the National Electric Code,
ANSI/NFPA 70-1996, is the responsibility of the system installer. All installations must comply with
local and national electrical codes and standards.
IMPORTANT SAFETY INSTRUCTIONS
2001 Xantrex Technology, Inc.
5916 - 195th Street N. E.
Arlington, WA 98223
Telephone: 360/435-8826
Fax: 360/435-2229
www.traceengineering.com
SW Series Inverter/Charger
Part No. 2031-5
Rev. C: February 2001
Page
3
10. GROUNDING INSTRUCTIONS - This inverter/battery charger should be connected to a grounded,
permanent wiring system. For most installations, the negative battery conductor should be bonded to
the grounding system at one (and only one point) in the system. All installations should comply with
national and local codes and ordinances. Refer to the SYSTEM GROUNDING section on page 26 for
more information.
PERSONAL PRECAUTIONS
1. Someone should be within range of your voice or close enough to come to your aid when you work
near batteries.
2. Have plenty of fresh water and soap nearby in case battery acid contacts skin, clothing, or eyes.
3. Wear complete eye protection and clothing protection. Avoid touching eyes while working near
batteries. Wash your hands when done.
4. If battery acid contacts skin or clothing, wash immediately with soap and water. If acid enters eye,
immediately flood eye with running cool water for at least 15 minutes and get medical attention immediately.
(a) Baking soda neutralizes lead acid battery electrolyte.
(b) Vinegar neutralizes spilled NiCad and NiFe battery electrolyte.
(c) Keep a supply on hand in the area of the batteries.
5. NEVER smoke or allow a spark or flame in vicinity of a battery or generator.
6. Be extra cautious to reduce the risk of dropping a metal tool onto batteries. It could short-circuit the
batteries or other electrical parts that may result in a spark which could cause an explosion.
7. Remove personal metal items such as rings, bracelets, necklaces, and watches when working with a
battery. A battery can produce a short-circuit current high enough to weld a ring or the like to metal,
causing severe burns.
8. NEVER charge a frozen battery.
9. If necessary to remove the battery, make sure all accessories are off. Then, remove the grounded
terminal from the battery first.
10. If a remote or automatic generator
control system is used, disable the automatic starting circuit and/or
disconnect the generator from its starting battery while performing maintenance to prevent accidental
starting.
11. Provide ventilation to outdoors from the battery compartment. The battery enclosure should be
designed to prevent accumulation and concentration of hydrogen gas in pockets at the top of the
compartment. Vent the battery compartment from the highest point. A sloped lid can also be used to
direct the flow to the vent opening location.
12. Clean battery terminals. Be careful to keep corrosion from coming in contact with eyes.
13. Study all the battery manufacturers specific precautions, such as removing or not removing cell caps
while charging and recommended rates of charge.
14. For flooded lead acid batteries, add distilled water in each cell until the battery acid reaches the level
specified by the battery manufacturer. This helps purge excessive gas fumes from the cells. Do not
overfill. For a battery without cell caps, carefully follow the manufacturers recharging instructions.
IMPORTANT SAFETY INSTRUCTIONS
Page
4
2001 Xantrex Technology, Inc.
5916 - 195th Street N. E.
Arlington, WA 98223
Telephone: 360/435-8826
Fax: 360/435-2229
www.traceengineering.com
SW Series Inverter/Charger
Part No. 2031-5
Rev. C: February 2001
INTRODUCTION
2001 Xantrex Technology, Inc.
5916 - 195th Street N. E.
Arlington, WA 98223
Telephone: 360/435-8826
Fax: 360/435-2229
www.traceengineering.com
SW Series Inverter/Charger
Part No. 2031-5
Rev. C: February 2001
Page
5
INTRODUCTION
Congratulations! You are the proud owner of the finest inverter on the market today - and one very
complex piece of equipment. The Trace Sine wave (SW Series) Inverter/Charger has many features
and capabilities previously either non-existent, or found only in separate products.
With proper installation, the inverter will operate satisfactorily for many applications straight out of the box,
using the factory default settings. To fully utilize the inverter's generator interactive, or utility interactive
capabilities, it is necessary to understand the way the inverter operates and then tailor its operation via the
Control Panel and the USER and SETUP menu systems. This manual will provide the necessary
information. However, it is recommended that you consult with your authorized dealer to ensure correct
installation and maximum utilization of the numerous features of this product. If you do not understand any
aspect of installation, contact your authorized Xantrex dealer/installer for assistance.
If you intend to operate the inverter in a utility interactive mode, in which power will be sold to the utility,
you must contact the local utility office and get their approval. The utility may require additional information
that may not be included in this manual. Please contact your authorized Xantrex dealer/installer for
assistance.
As a minimum, you should read the sections of the manual that relate to your type of installation. The
MENU SYSTEM section, beginning on page 33, explains how to make changes to the inverters
user/setup menus. The OPERATION section, beginning on page 57, explains how the inverter works in
each of its different operating modes. Focus on the operating modes that relate best to your type of
installation and make the appropriate selections and adjustments. Installation diagrams are provided for
many of the various applications. This menu system provides control of the inverter, allows features to be
enabled, and allows setting of operating parameters.
This is a long manual and much of it is fairly technical. Throughout this manual terms may be used that
are unfamiliar, see the INVERTER/CHARGER TERMINOLOGY glossary on page 115 for clarification. If
you are an insomniac, properly used, this manual is guaranteed to provide several good nights of sleep.
Note: This manual is specific to the REVISION 4.01 software. Some features discussed may not
be included in previous software revisions provided in inverters manufactured before March
1996.
You can verify that the inverter is using REVISION 4.01 software by checking under the TRACE
ENGINEERING (3) menu heading. The second menu item should read REVISION 4.01. If your inverter
includes a previous software version, please contact your authorized Xantrex dealer regarding upgrade
options.
INTRODUCTION
Page
6
2001 Xantrex Technology, Inc.
5916 - 195th Street N. E.
Arlington, WA 98223
Telephone: 360/435-8826
Fax: 360/435-2229
www.traceengineering.com
SW Series Inverter/Charger
Part No. 2031-5
Rev. C: February 2001
UNIT IDENTIFICATION
2001 Xantrex Technology, Inc.
5916 - 195th Street N. E.
Arlington, WA 98223
Telephone: 360/435-8826
Fax: 360/435-2229
www.traceengineering.com
SW Series Inverter/Charge
r
Part No. 2031-5
Rev. C: February 2001
Page
7
UNIT IDENTIFICATION
This section describes the marking and location of the model and serial numbers for SW Series
Inverter/Chargers. Use this section to determine the type and model of your inverter/charger. The unit
identification label on the left side panel of the inverter/charger will show the serial number, model
number, listings, ratings, and date of manufacture.
Figure 1, Identification Label
MODEL NUMBER
The Model Number of your inverter determines the different features your unit may have. Consider the
following unit with a SW4024 model number:
SW 40 24 *
Model Power Nominal DC
Voltage
AC Voltage/Options
Model: The first letter(s) (SW) indicate the model, in this case the SW Series.
Power: The first and second positions in the model number indicate the continuous AC power output in
hundreds of VA (Volt-Amps). Power levels available start at 2500 up to 5500 Volt-Amps with different DC
voltages. In the example above, 40 would stand for a 4000 VA (4 kVA), continuous-output inverter.
Input/Output DC Voltage: The number (24) following the power rating indicates an inverter/charger that
is designed to convert 24 VDC input to an AC voltage
output, and charge 24 VDC batteries when
powered by the same AC voltage. Available DC voltages are 12, 24 and 48 volt models.
Input/Output AC Voltage/Options: The letter following the power rating indicates what AC voltage and
frequency or particular option this inverter/charger is specifically designed to provide. No letter after the
DC voltage number indicates an AC voltage of 120 VAC/60 Hz and requires the same AC voltage and
frequency (120 VAC/60 Hz) to charge the inverter batteries. Available voltages range from 105 to 240
VAC at 50 or 60 Hz.
See the SPECIFICATIONS AND FEATURES section, on page 121, for the different models available.
AC Input/Output
Phase,
Waveform,
Frequency and
Voltage
DC Input Voltage
Operating Range
Model Number
Quarter and Year of
Manufacture
Product Code and Serial
Number
UNIT IDENTIFICATION
Page
8
2001 Xantrex Technology, Inc.
5916 - 195th Street N. E.
Arlington, WA 98223
Telephone: 360/435-8826
Fax: 360/435-2229
www.traceengineering.com
SW Series Inverter/Charger
Part No. 2031-5
Rev. C: February 2001
CONTROLS, INDICATORS AND COMPONENTS
2001 Xantrex Technology, Inc.
5916 - 195th Street N. E.
Arlington, WA 98223
Telephone: 360/435-8826
Fax: 360/435-2229
www.traceengineering.com
SW Series Inverter/Charger
Part No. 2031-5
Rev. C: February 2001
Page
9
CONTROLS, INDICATORS AND COMPONENTS
The SW Series Inverter/Chargers have an integral, full function Control Panel with LED status indicators.
The following components are also included: inverter/charger circuit breaker; battery temperature sensor
(BTS) port, remote port, and a stacking port.
Figure 2, SW Series Inverter/Charger
CONTROL PANEL
The Control Panel, on the front of the SW Series Inverter/Charger, provides the controls and displays
needed to adjust, control and monitor the operation of the unit. The control panel is operational whenever
DC power is applied to the inverter DC input terminals.
Figure 3, Control Panel
Eight pushbuttons are used to select the various menus, menu items and operating setpoint values for the
unit, including the ability to turn the inverter on and off. A Liquid Crystal Display (LCD) presents the various
system settings and data as selected by the operation of the MENU BUTTONS on the control panel. Eight
LED indicators are provided to show the operating condition of the inverter, battery charger, AC inputs and
self-protection systems.
DISPLAY
The Liquid Crystal Display (LCD) displays data as selected by the menu buttons. Refer to the USER
MENU, beginning on page 36, and the SETUP MENU, beginning on page 44, for specific information on
the Menu Items, functions and display information.
Control Panel
DC Side
AC Side
Stacking Interface
Remote Interface
BTS Sensor Input
Circuit Breaker
CONTROLS, INDICATORS AND COMPONENTS
Page
10
2001 Xantrex Technology, Inc.
5916 - 195th Street N. E.
Arlington, WA 98223
Telephone: 360/435-8826
Fax: 360/435-2229
www.traceengineering.com
SW Series Inverter/Charger
Part No. 2031-5
Rev. C: February 2001
CONTRAST CONTROL
The CONTRAST adjustment enables you to adjust the contrast of the LCD display screen to accommodate
changing lighting conditions. Less contrast is usually preferable in brighter lighting conditions.
RESET TO FACTORY DEFAULTS BUTTON
The RESET TO FACTORY DEFAULTS button returns all of the inverter settings (except for the TIME OF
DAY settings) to the factory default values. The default values will be re-entered only when this button is
pushed from a specific menu item in the USER MENU. You must first select the TRACE ENGINEERING
(3) menu heading and then go to the first menu item, which will display PRESS RESET NOW FOR
DEFAULTS. Once this reset button is pressed from this menu item, you must reprogram all settings
required by your installation into the inverter.
Removing DC power from the inverter will also return the inverter to the factory default values
(including the TIME OF DAY settings). You must then reprogram the inverter with the required settings
for proper operation of your system. Recording your settings on the USER SETTINGS WORKSHEET, in
the TECHNICAL INFORMATION section of this manual, will make the reprogramming of the inverter
much easier.
The reset button is also used to re-synchronize the remote control (SWRC) display if the characters become
jumbled. Pressing the reset button anywhere in the menu system (except the PRESS RESET NOW FOR
DEFAULTS menu item) will re-synchronize the display, but the default values will not be reset.
MENU BUTTONS
ON/OFF MENU BUTTON (Red)
Pressing the red ON/OFF MENU button at any time will take you directly to the SET INVERTER menu
item of the INVERTER MODE (1) menu heading. There are four options available from this menu item.
The first letter of the selected item will be underlined. Pressing the red ON/OFF MENU button will move
the cursor one position to the right, selecting the next item. You can also use the SET POINTS buttons to
move either right or left.
GEN MENU BUTTON (Green)
Pressing the green GEN MENU button at any time will display the SET GENERATOR menu item of the
GENERATOR MODE (2) menu heading. There are four options available from this menu. The first letter
of the selected item will be underlined. Pressing the green GEN MENU button will move the cursor one
position to the right, selecting the next item. You can also use the SET POINTS buttons to move either
right or left.
MENU ACCESS/ADJUSTMENT BUTTONS (Black)
The MENU HEADING buttons are used to move either up or down through the selection of menu
headings. Once a menu heading is selected, the MENU ITEM buttons are used to move up or down
through the list of related menu items. The SET POINTS buttons change the value of a parameter or
select a mode, for the selected menu item.
LED STATUS INDICATORS
The Control Panel features eight colored LED indicators that identify the various operating conditions of
the inverter. Unless otherwise indicated, the LEDs will be "solid" in appearance, when illuminated.
LINE TIE (Yellow)
Selecting SELL from the GRID USAGE menu item under the INVERTER SETUP (9) menu heading will
enable sell mode. This should only be done with utility connected systems and after you have received the
approval of the local utility. This mode allows excess power to be sent into the utility grid.
INVERTING (Yellow)
The inverter is operational and AC output is available. If this LED is blinking, the inverter is in the search
mode and is looking for an AC load greater than the SET SEARCH WATTS setting.
CONTROLS, INDICATORS AND COMPONENTS
2001 Xantrex Technology, Inc.
5916 - 195th Street N. E.
Arlington, WA 98223
Telephone: 360/435-8826
Fax: 360/435-2229
www.traceengineering.com
SW Series Inverter/Charger
Part No. 2031-5
Rev. C: February 2001
Page
11
AC1 IN GOOD (Green)
Indicates that AC power is present at the AC HOT IN 1 and NEUTRAL IN 1 input terminals. This input is
intended for utility power. When an AC source is connected to the input terminals, it will start to blink slowly
(once a second) to show the AC voltage has been detected. After the inverter has connected to the AC
source, the LED will be solid. If the LED starts to blink during operation, utility power has been dropped.
AC2 IN GOOD (Green)
Indicates that AC power is present at the AC HOT IN 2 and NEUTRAL IN 2 input terminals. This input is
intended for generator power. When an AC source is connected to the input terminals, it will start to blink
slowly (once a second) to show the AC voltage has been detected. After the inverter has connected to the
AC source, the LED will be solid. If the LED starts to blink during operation, generator power may have been
dropped.
This LED will also blink slowly (once a second) when the automatic generator control system is enabled.
When the generator has started, it will continue to blink slowly until the generator has been connected. If the
generator does not successfully start, the AC 2 IN GOOD LED will stop blinking and the red ERROR LED will
turn on. The ERROR CAUSES (5) menu heading will indicate a GENERATOR SYNC ERROR condition.
BULK (Yellow)
This indicator will be on to indicate the inverter is in the Bulk or Absorption charge stage. This indicator will
go off and the FLOAT indicator will illuminate when the battery voltage has been held near the SET BULK
VOLTS DC setting for the time period determined by the SET ABSORPTION TIME setting from the
BATTERY CHARGING (10) menu heading.
If the EQ mode is selected from the SET GENERATOR menu item under the GENERATOR MODE (2)
menu heading, the BULK LED will slowly blink while the charger completes the equalization process.
FLOAT (Green)
This indicator will be on when the battery voltage has reached the Float Stage of the charging process. It
will now regulate the charging process to the SET FLOAT VOLTS DC setting from the BATTERY
CHARGING (10) menu heading. The SET FLOAT VOLTS DC setting provides a maintenance charge to
the battery until another Bulk Charge Cycle is initiated or the AC source is disconnected. If a generator is
manually controlled and powering the battery charger, the FLOAT indicator will come on to indicate that
the generator should be turned off, since the battery is now fully charged.
This indicator is also used to indicate the regulation setpoint when the inverter is operating as an Utility
Interactive Inverter (SELL mode). The indicator will blink slowly to indicate the battery is regulated to the
SET BATTERY SELL VOLTS DC setting from the BATTERY SELLING (17) menu heading, and the
indicator will be solid to indicate the battery is regulated to the SET FLOAT VOLTS DC setting from the
BATTERY CHARGING (10) menu heading.
ERROR (Red)
Indicates that an operating error has occurred (refer to the ERROR CAUSES (5) menu heading for a list
of possible causes). To reset the inverter, press the red ON/OFF MENU button and then select OFF and
then ON with the SET POINTS buttons or by pressing the red button several times.
This indicator will blink slowly to indicate that the AC source frequency is not well-adjusted (3 to 7 hertz
from nominal). You can use the LED blink to help adjust the AC source frequency. Once the frequency is
within 3 hertz of your nominal frequency, the LED will turn off.
OVERCURRENT (Red)
The load requirement has exceeded the inverters maximum output AC amps. A sustained overcurrent
condition will require a manual reset by pressing the red ON/OFF MENU button and then selecting OFF
and then ON with the SET POINTS buttons or by pressing the red button several times. Momentary
flashing of the red OVERCURRENT indicator means that the inverter has reached it maximum output AC
amps and has automatically reset itself. This may occur during motor startups and is acceptable.
CONTROLS, INDICATORS AND COMPONENTS
Page
12
2001 Xantrex Technology, Inc.
5916 - 195th Street N. E.
Arlington, WA 98223
Telephone: 360/435-8826
Fax: 360/435-2229
www.traceengineering.com
SW Series Inverter/Charger
Part No. 2031-5
Rev. C: February 2001
AC SIDE
Figure 4 shows the components located on the AC side of the inverter. The removable AC Access Panels
cover and protect the Internal Components and Indicators, such as the AC Terminal Block, BTS
Connection, LED status indicators (for the AC1 and Gen Control relays) and the Aux and Gen Control
relay terminals. Refer to the INSTALLATION section beginning on page 15, for all wiring connections.
Figure 4, AC Side
REMOTE PORT
The SW Series Inverter/Charger can be controlled remotely from the unit by plugging in a Sine wave
Remote Control (SWRC) or Sine wave Communications Adapter (SWCA).
The SWRC remote control is a full function, programmable remote control with backlit LCD which
duplicates the functions of the integral Control Panel.
The SWCA serial communications interface adapter allows for remote setup, adjustment, monitoring and
troubleshooting of SW Series Inverter/Chargers from a personal computer and allows modem access
monitoring over long distances.
See the APPENDIX, OPTIONS section, starting on page 128, for a complete description of the SWRC
Remote Control and SWCA Serial Communications Adapter.
STACKING PORT
The stacking port allows multiple SW Series Inverter/Chargers to be used in the same system. The
inverters can be used in a SERIES configuration to operate 240 Vac loads and to connect to
120/240 Vac power systems. A series stacking interface cable (SWI) is required to connect the series
stacking ports of the inverters. This port is also used to connect two units in a PARALLEL configuration.
The parallel stacking interface cable (SWI/PAR) allows two inverters to be connected to provide twice the
continuous and surge capability at the same AC voltage. See the USING MULTIPLE INVERTERS section
on page 95 for more information.
INVERTER/CHARGER CIRCUIT BREAKER
This circuit breaker protects the units internal wiring while the unit is inverting or charging. It is not used
for the pass-through current. This is not a branch-circuit rated breaker, separate output breakers are
required. Press the breaker to reset (to reset on 48-volt units, move the breaker handle to the ON
position).
Remote
Port
Stacking
Port
Inverter/
Charger
Circuit Breaker
Knockouts
(Also On Side}
Three
Removable
Access Panel
(One Panel on
Side)
Identification
Label
  • Page 1 1
  • Page 2 2
  • Page 3 3
  • Page 4 4
  • Page 5 5
  • Page 6 6
  • Page 7 7
  • Page 8 8
  • Page 9 9
  • Page 10 10
  • Page 11 11
  • Page 12 12
  • Page 13 13
  • Page 14 14
  • Page 15 15
  • Page 16 16
  • Page 17 17
  • Page 18 18
  • Page 19 19
  • Page 20 20
  • Page 21 21
  • Page 22 22
  • Page 23 23
  • Page 24 24
  • Page 25 25
  • Page 26 26
  • Page 27 27
  • Page 28 28
  • Page 29 29
  • Page 30 30
  • Page 31 31
  • Page 32 32
  • Page 33 33
  • Page 34 34
  • Page 35 35
  • Page 36 36
  • Page 37 37
  • Page 38 38
  • Page 39 39
  • Page 40 40
  • Page 41 41
  • Page 42 42
  • Page 43 43
  • Page 44 44
  • Page 45 45
  • Page 46 46
  • Page 47 47
  • Page 48 48
  • Page 49 49
  • Page 50 50
  • Page 51 51
  • Page 52 52
  • Page 53 53
  • Page 54 54
  • Page 55 55
  • Page 56 56
  • Page 57 57
  • Page 58 58
  • Page 59 59
  • Page 60 60
  • Page 61 61
  • Page 62 62
  • Page 63 63
  • Page 64 64
  • Page 65 65
  • Page 66 66
  • Page 67 67
  • Page 68 68
  • Page 69 69
  • Page 70 70
  • Page 71 71
  • Page 72 72
  • Page 73 73
  • Page 74 74
  • Page 75 75
  • Page 76 76
  • Page 77 77
  • Page 78 78
  • Page 79 79
  • Page 80 80
  • Page 81 81
  • Page 82 82
  • Page 83 83
  • Page 84 84
  • Page 85 85
  • Page 86 86
  • Page 87 87
  • Page 88 88
  • Page 89 89
  • Page 90 90
  • Page 91 91
  • Page 92 92
  • Page 93 93
  • Page 94 94
  • Page 95 95
  • Page 96 96
  • Page 97 97
  • Page 98 98
  • Page 99 99
  • Page 100 100
  • Page 101 101
  • Page 102 102
  • Page 103 103
  • Page 104 104
  • Page 105 105
  • Page 106 106
  • Page 107 107
  • Page 108 108
  • Page 109 109
  • Page 110 110
  • Page 111 111
  • Page 112 112
  • Page 113 113
  • Page 114 114
  • Page 115 115
  • Page 116 116
  • Page 117 117
  • Page 118 118
  • Page 119 119
  • Page 120 120
  • Page 121 121
  • Page 122 122
  • Page 123 123
  • Page 124 124
  • Page 125 125
  • Page 126 126
  • Page 127 127
  • Page 128 128
  • Page 129 129
  • Page 130 130
  • Page 131 131
  • Page 132 132
  • Page 133 133
  • Page 134 134
  • Page 135 135
  • Page 136 136
  • Page 137 137
  • Page 138 138
  • Page 139 139
  • Page 140 140
  • Page 141 141
  • Page 142 142
  • Page 143 143
  • Page 144 144
  • Page 145 145
  • Page 146 146
  • Page 147 147
  • Page 148 148
  • Page 149 149
  • Page 150 150
  • Page 151 151
  • Page 152 152

Xantrex Technology Trace SW2612A User manual

Category
Power adapters & inverters
Type
User manual

Ask a question and I''ll find the answer in the document

Finding information in a document is now easier with AI