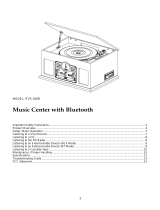
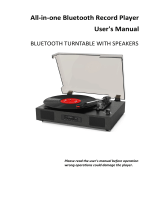
Lenoxx CD114BL Instructions Manual

Category
CD players
Type
Instructions Manual

This manual is also suitable for

Lenoxx CD114BL is a versatile device that combines the functionality of a turntable, cassette player, CD player, and radio in one unit. It allows you to play and record music from various sources, including vinyl records, cassettes, CDs, and external audio devices. The Bluetooth connectivity feature enables you to stream music wirelessly from your Bluetooth-enabled devices. The device also has a built-in FM/AM radio tuner for listening to your favorite radio stations.

Lenoxx CD114BL is a versatile device that combines the functionality of a turntable, cassette player, CD player, and radio in one unit. It allows you to play and record music from various sources, including vinyl records, cassettes, CDs, and external audio devices. The Bluetooth connectivity feature enables you to stream music wirelessly from your Bluetooth-enabled devices. The device also has a built-in FM/AM radio tuner for listening to your favorite radio stations.

Model: CD114BL / CD114BR
Batch: PR4098
PLEASE READ AND RETAIN THESE INSTRUCTIONS FOR FUTURE REFERENCE.
The illustrations used in this manual are to illustrate the operation method and product
structure of the product. Where there is a small difference between the physical item and
the illustrations, please take the physical as the standard.
CAUTION:
To reduce the risk of fire or electric shock, do not expose this product, it’s power cord and
remote to rain or moisture; do not use it anywhere near water or where water splashes or
drips; do not touch the plug with wet hands.
In the event of water or other liquids entering the device, unplug it immediately and clean
and dry it as best as possible. Then have it checked for damage by a qualified technician or
contact the after-sales support line.
SAFETY INSTRUCTIONS:
Read and understand this entire manual before using this product. Keep these instructions
for future reference.
1) This product should be operated only by the type of power source indicated on the
marking label or in this instruction manual.
2) Protect the power cord from being walked on or kinked, where the plug is fitted and at
the point where it exits from the apparatus.
3) Do not overload the wall power outlet, extension cords, or integral convenience
receptacles as this can result in a risk of fire or electric shock.
4) Never push objects of any kind into this product through openings as they may touch
dangerous voltage points or short-out parts that could result in a fire or electric shock.
5) Never spill liquid of any kind on the product.
6) Do not attempt to service this product yourself as opening or removing covers may
expose you to the dangerous voltage or other hazards. Refer all servicing to qualified
service personnel.
7) Change or modifications to this unit not expressly approved by the party responsible for
compliance could void the user’s authority to operate the equipment.
8) Do not use attachments not recommended by the product manufacturer as they may
cause hazards.
9) A product should be moved with care. Quick stops, excessive force, and uneven surfaces
may cause the product and cart combination to overturn.
10) Slots and openings in the cabinet are provided for ventilation and to ensure reliable
operation of the product and to protect it from overheating. Do not block or cover
these openings.
11) Unplug this apparatus during lightning storms or if plan not to use for long period.
REMOTE CONTROL BATTERY WARNING:
This product contains a coin/button cell battery inside.
If swallowed, go straight to a hospital emergency room.
WARNING - KEEP BATTERIES OUT OF REACH OF CHILDREN
Swallowing may lead to serious injury in as little as 2 hours or death,
due to chemical burns and potential perforation of the oesophagus.
If you suspect your child has swallowed or inserted a button battery immediately call the
24-hour Poisons Information Centre on 13 11 26 (in Australia) or 24-hour National Poisons
Centre on 0800 764 766 (in New Zealand) for fast, expert advice.
Examine devices and make sure the battery compartment is correctly secured, e.g. that
the screw or other mechanical fastener is tightened. Do not use if compartment is not
secure.
Dispose of used button batteries immediately and safely. Flat batteries can still be
dangerous.
Tell others about the risk associated with button batteries and how to keep their children
safe.
ITEMS IN THIS PACKAGE:
Before throwing away any packaging materials, please check thoroughly and make sure you
find the following items that come along with this package:
• Turntable
• Remote control
• Speakers
Please contact customer service if there is any accessory missing from the package.
Retain the original packaging materials for exchange or return purpose.
PREPARATIONS FOR USE:
• Carefully remove the unit from the carton and box and remove all packing material from
the unit.
• Unwind the AC power cord and extend it to its full length.
• Unwind the FM Antenna wire and extend it to its full length when necessary.
• Place the unit on a stable, level surface, convenient to an AC outlet, out of direct sunlight,
and away from sources of excess heat, dust, moisture, humidity or strong magnetic fields.
• Remove the opaque white plastic stylus cover from the phonograph stylus by sliding it
forward and down.
• Remove the twist-tie that was used to secure the tone arm during shipment.
• Release the tone arm lock lever.
• Connect the plug to your AC outlet.
LOCATION OF CONTROLS AND INDICATORS
1. Dust Cover
2. LCD Screen
3. Bluetooth Indicator
4. Cassette Door
5. Record Button - cassette
6. Play Button - cassette
7. Rewind Button - cassette
8. Fast Forward Button - cassette
9. Stop/Eject Button - cassette
10. Pause Button - cassette
11. CD Tray
12. SD Card Slot
13. USB Port
14. Aux in Jack
15. Headphone Jack
16. CD Door Open/Close Button
17. AM Button
18. FM Button
19. Record Button
20. Delete Button
21. Program Button
22. Repeat Button
23. Play/Pause Button
24. Phono/Aux/Bluetooth Button
25. Stop Button
26. CD Button
27. Backward Skip Button
28. Forward Skip Button
29. Tape Button
30. USB/SD Button
31. On/Off-Volume Knob
32. Tuning Knob
PHONOGRAPH:
33. Turntable Spindle
34. Turntable Platter
35. 45 RPM Adapter
36. Tonearm Lever
37. Auto Stop Switch
38. Hold down Clip
39. Tonearm Rest
40. Speed Switch
41. Tonearm
REAR PANEL:
RCA Line out jack (L&R)
FM wire antenna
External speakers’ clips.
RCA Jacks
The RCA Jacks output analog line-level signals and could be connected directly with a
pair of active/powered speakers or the appropriate input of your stereo system.
The Red plug connects with the Right channel and the White plug connects with the Left
channel.
Note: The RCA Jacks are not designed to be connected directly to the passive/unpowered
speakers. If connected to the passive speakers, the volume level will be very low.
Spring clip speaker terminals
The spring clip speaker terminals deliver amplified, speaker-level signals as output and
should be connected with the passive speakers
REMOTE CONTROL:
Mute button
Program button
Repeat button
Mode button
Play/Pause button
Previous button
Folder down button
Record button
Stop button
Next button
Folder up button
NOTE: The remote control works with the modes:
CD/ BT /USB /Card (SD/MMC) /FM / AM.
First-time use:
The unit has a pre-installed lithium CR2025 battery. Remove the protective tab to activate
the remote-control battery.
Replace the Remote-Control Battery
1. Pull out the battery tray and remove the old battery.
2. Place a new CR2025 battery into the battery tray with correct polarity (+/-) as indicated.
3. Insert the battery tray back into the slot.
Note: If the Remote Control is operated near other products which generate infrared rays, or
if other remote-control devices using infra-red rays are used near the unit, it may operate
incorrectly. Conversely, the other products may operate incorrectly.
TURNTABLE OPERATION:
1. Rotate the on/Off Volume Knob to turn on the power.
2. Press the Phono/AUX/BT button to set the unit to Phono mode.
3. Set the Speed Switch accordingly.
4. Place the record on the turntable. Use the 45 RPM Adapter if necessary.
5. Remove the stylus protector from the stylus assembly.
Note: To avoid stylus damage, make certain the included stylus protector is in place
whenever the turntable is being moved or cleaned.
6. Release the tonearm Hold down Clip.
Note: When the turntable is not in use, remember to lock back hold down clip.
7. Use the Tonearm Lever to lift the tonearm.
8. Gently move the tonearm over the record where play is desired to begin. Set the Tonearm
Lever back to the down position, the tonearm will descend slowly onto the record and begin
to playback.
9. When the record is finished playing or to suspend the playback, use the Tonearm Lever
again to raise the tonearm and return it to the Tonearm Rest. Release the lever to lower the
tonearm back to its rest.
10. Lock the Tonearm Clip to secure the tonearm.
PLATTER AUTO STOP:
If the Auto-stop Switch is set to ON position, the platter will stop spinning automatically
when the record plays to the end. In some rare occasion, if the turntable stops playing
before the end of the record, set the switch to OFF position the turntable should overcome
this issue.
NEEDLE REPLACEMENT:
Removing Needle
1. Gently pull down the front edge of the needle.
2. Pull needle forward.
3. Pull out and remove.
Installing Needle
1. Position the needle with its tip facing down.
2. Line up the back of the needle with the cartridge.
3. Insert the needle with its front end at a downward angle and gently lift the front of the
Needle upward until it snaps into place.
RADIO OPERATION:
1. Rotate the on/Off Volume Knob to turn on the power.
2. Press the AM Button or FM Button to the desired band.
3. Rotate the Tuning Knob for desired radio station.
Note:
The unit is equipped with a FM wire antenna. To improve FM reception, fully extend and
move the wire around until the reception is clear without interferences. Do not connect the
wire to any additional antenna.
The AM antenna is built inside the unit. If AM reception is poor, try to rotate the unit for
better reception.
BLUETOOTH OPERATION:
1. Rotate the on/Off Volume Knob to turn on the power.
2. Press the Phono/AUX/BT button to set the unit to Bluetooth mode, you will hear an
activation sound from the unit.
3. Turn on the Bluetooth feature of your audio device, search for “CD114” and pair.
4. Once your device is successfully paired with the unit, you will hear a short confirmation
sound from the unit.
5. Play and stream music from your device to the unit.
Note: Bluetooth version - *5.0 *
CD PLAYBACK:
1. Rotate the on/Off Volume Knob to turn on the power.
2. Press the CD Button to set the unit to CD mode.
3. Press the Open/Close button to open the CD tray and put the CD in the tray with the
labeled side facing up.
4. Press the Open/Close button again to close the tray. The LCD display will show “READING
for a few seconds, then the total number of tracks on the CD and the CD will automatically
start playing. If it is a blank CD or an unrecognizable CD, it will show “00”.
5. During the playback, press the Play/Pause button to pause. Press it again to resume
playback.
6. To skip to the next or previous track, press the Forward Skip or Backward Skip button
correspondingly
7. To search fast forward or backward a track, press and hold the Forward Skip or Backward
Skip button correspondingly until you reach the desired time. Release the button and the
playback will resume.
8. To repeat a specific track, press Repeat button once while that track is playing. To repeat
all the tracks, press the Repeat button twice. To repeat random tracks, press the Repeat
button three times. To cancel repeat function, press the Repeat button.
Shown on the LCD screen for repeating a specific track.
Shown on the LCD screen for repeating all tracks.
Random: shown on the screen, the disc will continually play random tracks until the Stop
button is pressed.
9. Press the Stop button if you want to completely stop playback.
Programmed Playback
1. Press the Stop Button before starting, press the Program button once to enter program
mode. Program Indicator will start flashing. The LCD display will flash “01” as the track
sequence which is to be edited.
2. Press the Forward Skip or Backward Skip buttons to select the desired track that you
would like to program. The LCD’s number will turn steady instead of flashing, showing the
soundtrack number at selection.
3. Press the Program button to confirm the selected track. The LCD’s number will start
flashing again showing the next track sequence which is to be edited.
4. Repeat steps 2 & 3 for additional soundtracks that you would like to program. The tracks
can be in any number and repeated. A maximum of 20 tracks can be programmed at one
time.
5. Press Play/Pause button to start the programmed playback. The tracks will play in the
same sequence that you programmed earlier.
6. To exit the program mode, press the Stop button twice and the Program Indicator will be
off.
CASSETTE OPERATION:
1. Rotate the on/Off Volume Knob to turn on the power.
2. Press the Tape button to set the unit to Tape mode.
3. Press the Stop/Eject button to open the cassette door.
4. Insert the prerecorded cassette into the cassette tray and press the Play button.
5. To fast forward, press the Fast Forward button in. To stop fast forwarding, press Play
button or Stop/Eject button. Press the Play button to play.
6. To rewind, press the Rewind button in. To stop rewinding, press Play button or Stop/Eject
button. Press the Play button to play.
7. To stop the playback, press the Stop/Eject button once. To eject the cassette, press the
Stop/Eject button again.
Note: Remove the cassette from the cassette holder when it is not in use.
CASSETTE RECORDING:
RADIO to TAPE
1. Press the AM Button or FM button to the desired band.
2. Insert a cassette tape and press the RECORD and PLAY button (for Cassette) to record the
sounds from the radio.
3. To pause recording, press the Pause button. Press it again to resume recording.
4. To stop recording, press the Stop/Eject button.
USB/SD to TAPE
1. Press the USB/SD button to set the unit to USB or SD mode.
2. Insert a cassette tape, and press the RECORD and PLAY button (for Cassette) to record the
sounds from USB/SD.
3. To pause recording, press the Pause button. Press it again to resume recording.
4. To stop recording, press the Stop/Eject button.
PHONO to TAPE
1. Press the Phono/AUX/BT button and set the unit to phono mode.
2. Lower the tone arm to start playback of the record.
3. Insert a cassette tape and press the RECORD and PLAY button (for Cassette) to record the
sounds from record.
4. To pause recording, press the Pause button. Press it again to resume recording.
5. To stop recording, press the Stop/Eject button.
CD to TAPE
1. Press the CD button to set the unit to CD mode.
2. Insert and play a CD.
3. Insert a cassette tape and press the RECORD and PLAY button (for Cassette) to record the
sounds from the CD.
4. To recording, press the Pause button. Press it again to resume recording.
5. To stop recording, press the Stop/Eject button.
AUX IN to TAPE
1. Connect the 3.5mm auxiliary cable between your audio device and the Aux in Jack of this
unit
2. Press the Phono/AUX/BT button to set to Aux In mode and start playing.
3. Insert a cassette tape, and press the RECORD and PLAY button (for Cassette) to record the
sounds from your audio device
4. To pause recording, press the Pause button. Press it again to resume recording.
5. To stop recording, press the Stop/Eject button.
Bluetooth to TAPE
1. Press the Phono/AUX/BT button and set the unit to Bluetooth mode.
2. Turn on the Bluetooth feature of your audio device, search for “CD114” and pair.
3. Play and stream music from your device to the unit.
4. Insert a cassette tape and press the RECORD and PLAY button (for Cassette) to record the
sounds from the Bluetooth device.
5. To pause recording, press the Pause button. Press it again to resume recording.
6. To stop recording, press the Stop/Eject button.
Note: To prevent accidental recording, break off the
cassette tab from side A or B.
USB/SD PLAYBACK:
1. Rotate the on/Off Volume Knob to turn on the power.
2. Press the USB/SD button to set the unit to USB/SD mode.
3. Insert a USB device into the USB port or a SD memory card into the SD card slot.
4. To fast forward or rewind, press the Forward Skip Button or Backward Skip button in and
release.
5. To stop the playback, press the Stop button.
Note: Only use 32 GB or smaller USB or SD memory card
Folder/album playback
If your USB or SD is separated into folders, follow the steps below to access the folders.
1. While the device is stopped, press the Folder Up or the Folder Down buttons on the
remote to advance forward or backwards through the folders.
2. Once the desired folder is reached, use the Forward Skip or the Backward Skip buttons to
select the desired track.
3. Press the Play button to begin playback of the selected track.
Deleting files
The system can erase files stored on the USB drive or SD card. You can delete a single
file/track, a folder of files/tracks, or all files/tracks on the storage medium.
Deleting a single file/track
1. Insert the USB device or SD card, then select USB or SD mode.
2. Press the delete DEL button during the playback of the track you want to delete: “ONE”
will be flashing on the display.
3. Press the delete DEL button again to confirm.
4. “DELETEwill show on the display while the file/track are being deleted until the deletion
is complete.
Deleting a folder
1. Insert a USB device and SD card, then select USB or SD mode
2. When the system has recognized the device, press the stop button.
3. Press the Folder Up/Folder Down buttons on the remote to advance through folders.
4. Press the delete DEL button:ONE” will be flashing on the display. Press the Forward or
Backward Skip button and select “DIR”.
5. Press the delete DEL button again to confirm.
6. “DELETE” will show on the display while the folder is being deleted until the deletion is
complete.
Deleting all files/tracks
1. Insert a USB device or SD card, then select USB or SD mode.
2. When the system has recognized the device, press the stop button.
3. Press the delete DEL button:ONE” will be flashing on the display. Press the Forward or
Backward Skip button and select “ALL.
4. Press the delete DEL button again to confirm.
5. “DELETEwill show on the display while the files/tracks are being deleted until the
deletion is complete.
USB/SD RECORDING:
The recording format is preset at MP3 bit rate 128 kbps.
RADIO to USB/SD RECORDING
1. Press the AM or FM button to the desired band.
2. Insert a USB device or an SD memory card and press the record button.
3. Press the Backward or Forward Skip button to select USB or SD for recording and press the
record button to confirm the desired media.
4. When you have finished recording, press the Stop button.
CASSETTE to USB/SD RECORDING
1. Press the Tape button and set the unit to Tape Mode.
2. Insert a USB device or an SD memory card and press the record button.
3. Press the Backward or Forward Skip button to select USB or SD for recording and press the
record button to confirm the desired media.
4. Insert a cassette and press the play button.
5. When you have finished recording, press the Stop button.
PHONO to USB/SD RECORDING
1. Press the Phono/AUX/BT button and set the unit to Phono mode
2. Insert a USB device or an SD memory card and press the record button.
3. Press the Backward or Forward Skip button to select USB or SD for recording and press the
record button to confirm the desired media.
4. Put a vinyl record on the platter and follow the process to play the record.
5. When you have finished recording, press the Stop button.
CD to USB/SD RECORDING
1. Press the CD button and set the unit to CD mode.
2. Insert CD and press the stop button.
3. Insert a USB device or an SD memory card.
4. Press the record button. “ONE” will be shown on the screen to record the first song. Press
the Backward or Forward Skip button to selectALL” and record the entire CD.
5. Press the record button to confirm when your selection of ONEor ALLis shown on the
screen.
6. Press the Backward or Forward Skip button to select USB or SD for recording and press the
record button to confirm the desired media.
7. When you have finished recording, press the Stop button.
AUX to USB/SD RECORDING
1. Connect the 3.5mm auxiliary cable between your audio device and the Aux in Jack of this
unit.
2. Press the Phono/AUX/ BT button to set to Aux In mode.
3. Insert a USB device or an SD memory card and press the record button.
4. Press the Backward or Forward Skip button to select USB or SD for recording and press the
record button to confirm the desired media.
5. Play the audio from your device.
6. When you have finished recording, press the Stop button.
Bluetooth to USB/SD RECORDING
1. Press the Phono/AUX/ BT button and set the unit to Bluetooth mode.
2. Turn on the Bluetooth feature of your audio device, search for “CD114” and pair.
3. Insert a USB device or an SD memory card and press the record button.
4. Press the Backward or Forward Skip button to select USB or SD for recording and press the
record button to confirm the desired media.
5. Play and stream music from your device to the unit.
6. When you have finished recording, press the Stop button.
TROUBLESHOOTING:
Problems with sound
Clockwise rotate the power/volume knob to increase the volume.
Make sure the units power cord is connected to an appropriate electrical outlet.
Make sure the wall socket is switched on.
Make sure the function switch is set to your desired function.
When playing records, make sure you’ve selected correct speed (33, 45, 78 rpm).
When playing a cassette, make sure it is properly inserted.
When playing a CD, make sure the CD is dealt face up.
When playing a CD via the AUX IN connection, make sure the cable is firmly
connected, all controls on the CD player are properly set, the disc tray is closed, and
the disc is clean and undamaged.
When playing music from USB device (or SD/MMC card), make sure the memory
device is properly inserted in USB port (SD/MMC card slot) and correct MODE is
selected.
Problems with radio reception
Make sure you are in an area that can receive signals for your selected radio station.
If AM reception is weak, rotate or re-position the equipment to improve reception.
If FM reception is weak, try the following to improve reception:
Completely unravel the wire aerial at the back of the cabinet.
Slightly move the wire aerial for better reception.
If none of these measures improve stereo reception, try the same station on the
FM (mono) band.
Try moving your radio to an alternative location to see if the reception improves.
Check that you do not have other electrical equipment too close to your radio,
which may cause interference.
SPECIFICATIONS:
Power 220V-240V, 50HZ
Power consumption 28W
Speaker 4Ω 15W X 2
Turntable Speed 33 1/3, 45, 78 RPM
USB/SD card max capacity 32 GB
  • Page 1 1
  • Page 2 2
  • Page 3 3
  • Page 4 4
  • Page 5 5
  • Page 6 6
  • Page 7 7
  • Page 8 8
  • Page 9 9
  • Page 10 10
  • Page 11 11
  • Page 12 12
  • Page 13 13
  • Page 14 14

Lenoxx CD114BL Instructions Manual

Category
CD players
Type
Instructions Manual
This manual is also suitable for

Lenoxx CD114BL is a versatile device that combines the functionality of a turntable, cassette player, CD player, and radio in one unit. It allows you to play and record music from various sources, including vinyl records, cassettes, CDs, and external audio devices. The Bluetooth connectivity feature enables you to stream music wirelessly from your Bluetooth-enabled devices. The device also has a built-in FM/AM radio tuner for listening to your favorite radio stations.

Ask a question and I''ll find the answer in the document

Finding information in a document is now easier with AI