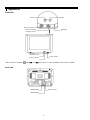
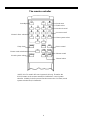
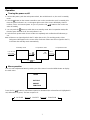
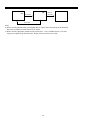
Palsonic 5169M is a 51cm (20-inch) color TV receiver that offers a wide range of features for an enjoyable viewing experience. With its hyperband and voltage synthesized system, it provides clear and stable reception of TV signals. The auto/manual search function allows you to easily find and store your favorite channels, while the 100 preset channels provide ample storage space.
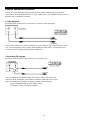
Palsonic 5169M is a 51cm (20-inch) color TV receiver that offers a wide range of features for an enjoyable viewing experience. With its hyperband and voltage synthesized system, it provides clear and stable reception of TV signals. The auto/manual search function allows you to easily find and store your favorite channels, while the 100 preset channels provide ample storage space.


-
 1
1
-
 2
2
-
 3
3
-
 4
4
-
 5
5
-
 6
6
-
 7
7
-
 8
8
-
 9
9
-
 10
10
-
 11
11
-
 12
12
-
 13
13
-
 14
14
-
 15
15
-
 16
16
-
 17
17
-
 18
18
-
 19
19
-
 20
20


Palsonic 5169M is a 51cm (20-inch) color TV receiver that offers a wide range of features for an enjoyable viewing experience. With its hyperband and voltage synthesized system, it provides clear and stable reception of TV signals. The auto/manual search function allows you to easily find and store your favorite channels, while the 100 preset channels provide ample storage space.
Ask a question and I''ll find the answer in the document
Finding information in a document is now easier with AI