Page is loading ...

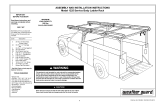
ASSEMBLY AND OPERATING INSTRUCTIONS FOR MODELS SD1200 AND SD2000
WARNING: The watercraft ramp you have purchased has certain hazards associated with it’s use. Never stand
behind a watercraft while it is on the ramp.
Never allow anyone in or on the watercraft while it is on the ramp.
Never allow anyone to operate the ramp unless they are familiar with all of the instructions and
warnings contained herein.
Never try to stop a free wheeling winch handle. (Always keep a firm grip on the handle while the
ratchet pawl is not fully engaged.)
Never allow watercraft to roll free down the ramp. Injury may occur or damage to watercraft or ramp
may occur.
Before beginning, read the entire Assembly and Operating instructions to determine the suitability of this kit for
your application.
Congratulations on the purchase of your ShoreDocker
®
watercraft ramp. The following instructions provide guidelines for
the construction of your model. Remember that with a little planning you may customize this kit to work perfectly for you
situation. The Model SD1200 is designed for boats up to 1200 lbs. and personal watercraft (PWCs, Jet Skis etc). The
Model SD2000 is designed for boats up to 2000 Lbs. The capacity includes the weight of the watercraft, motor, fuel and
any gear onboard.
PARTS LIST FOR MODEL SD1200
Qty Description Qty Description
8 Side brace 1 Galv carriage bolt - 1/2" x 8"+ nut & washer
24 Mod 1200 roller bracket (2 /roller) 45 Galv 3/8" nuts
1 Winch post brace - right side 2 Galv 3/8" flat washers
1 Winch post brace - left side 45 Galv 3/8" split washers
1 1100 lb winch 30 Box hot-dipped galv. 3" deck screws
1 cable keeper kit
1 33 ft (10 m)' galvanized cable with hook
12 Rollers - polyurethane
12 Roller spanner bushing
Fasteners
12 Stainless steel nylock nut - 3/8"
Suggested Customer Supplied Lumber
12 S.S. hex bolt - 3/8" x 2 1/2" 2 Pressure treated 2" x 6" x 16' *
30 Galvanized 3" deck screws 6 Pressure treated 2" x 4" x 20-36" *
18 Galv carriage bolts - 3/8" x 2 1/2" 1 Pressure treated 4" x 4" x 8 *
24 Galv hex bolts - 3/8" x 2 1/2" * Customize as necessary
3 Galv hex bolts - 3/8" x 4 1/2"
PARTS LIST FOR MODEL SD2000
QTY Description QTY Description
12 Side brace 32 Galv. 10d x 1 1/2" nails
8 Mod 2000 axle bracket 26 Galv carriage bolts - 3/8" x 2 1/2"
8 Mod 2000 axle 3 Galv hex bolts - 3/8" x 4 1/2"
1 Winch post brace - right side 1 Galv carriage bolt - 1/2" x 8"+ nut & washer
1 Winch post brace - left side 29 Galv 3/8" nuts
0 Beam end connector bracket ** 2 Galv 3/8" flat washers
1 1600 lb winch 29 Galv 3/8" split washers
1 cable keeper kit
1 33 ft (10 m)' galvanized cable with hook
16 4 inch Wobble Rollers - polyurethane
Fasteners
8 Stainless steel nylock nut - 5/16"
Suggested Customer Supplied Lumber
8 S.S. hex bolt - 5/16" x 1 1/2" 2 Pressure treated 2" x 8" x 16' *
32 Galv. flat washer - 3/4" 8 Pressure treated 2" x 6" x 24-42" *
16 Stainless steel 1/8" x1" cotter pin 1 Pressure treated 4" x 4" x 8 *
38 Galvanized 3" deck screws * Customize as necessary

First you will build the basic framework.
STEP 1: DETERMINE THE LENGTH AND LUMBER DIMENSIONS NEEDED. You will likely want to store
your watercraft all the way out of the water and away from any wave action. Also remember that a few feet of the
ramp will extend into the water so that the rollers first engage the hull below the bow. For the side rails or main
supporting beams of the Model 1200 it is recommended that you use 2 x 6s with 2 x 4s for the cross members. For
the Model 2000 use 2 x 8s with either 2 x 4s or 2 x 6s for the cross members. Use pressure treated lumber for longer
life. If possible use single length boards for the side rails. If you must join lengths end-to-end, instructions for doing
so are included at the end of the assembly instructions.
IMPORTANT: The side rails must be strong enough so as not to deflect much from the weight of the boat. This is
especially important when lowering the boat into the water with longer ramps. If the side rails deflect, the boat transom
may hang up on the rollers directly behind it. NEVER TRY TO FREE A HUNG UP BOAT FROM BEHIND. ALWAYS
TAKE OUT SLACK FROM THE WINCH HANDLE AND HAVE THE WINCH MANNED WHEN FREEING BOAT!
The best way to eliminate deflection of the ramp is by using supporting blocks or installing supporting legs as outlined
below.
STEP 2: DETERMINE THE WIDTH of the ramp you need. By looking at the shape of your hull at the transom,
decide where you want the rollers to align. Consider having the rollers fall in line with a flatter area of the hull.
Support need not be as wide as on a boat trailer as there are not the same side forces as encountered on the open road.
IMPORTANT: Consider that a narrower spacing of the rails will help when loading your boat onto the ramp. The bow
will be less likely to bottom out on the ground or cross members as the boat starts to angle up to the ramp.
IMPORTANT: Consider leaving the cross members longer than needed for a couple of reasons. You may want the wider
support especially if on uneven ground and/or blocking is necessary and secondly, you may change your mind and change
the side rail spacing. (In that case you would need to re-cut another winch post base).
STEP 3: Cut the boards and assemble the crossmembers to the rail as shown. You may want to cut an angle out of
the water end of the side beams as shown below, but it isn’t necessary. If you do, attach the end crossmember a few
inches from the end so that the top of the side brace makes full contact with the side rail. Attach all of the end
crossmembers first and then equally space the remaining crossmembers. Use the 3 inch screws provided.
Install the side braces. Hold or clamp them in place to drill 3/8” holes through the side rails and crossmembers.
Attach using 3/8” x 2 ½” carriage bolts, nuts and lock washers.

STEP 4: INSTALL THE WINCH SYSTEM. Referring to the Figures below, from 4” x 4” lumber, cut the
winch post base and the winch post. It is recommended to leave the post extra long for now and cut the top off
later. 48 inches should be plenty for now. The winch post base should be cut to fit snuggly between the side rails.
Next drill the ½ inch holes for joining the bottom of the winch post to the center of the winch post base. Also drill
the 3/8 inch hole in the winch post for attaching the top ends of the angle braces. The hole should be 13 ½” from
the lower end of the post and pass squarely through the side at its centerpoint..
IMPORTANT: Make a good effort to drill these holes square with the lumber. If possible use a drill press if possible, or, many
hand drills come with a fixture for drilling holes at a right angle. If you don’t have these tools, don’t fret… a small square and
a good eye should be good enough.
Now install the winch post base between the side rails at the location as shown. The top edge of the winch post
base should be 14 ½” from the end of the side rail and be flush with the top of the side rail. The face of the 4 x 4
should be at a 45° angle to the top edge of the side rail.
IMPORTANT: For now just use a single 3 inch screw in each end of the 4 x 4. You will want the option of rotating the 4 x 4 to
allow a perfect fit of the angle braces with the end crossmember. Install the two screws in the same relative position for each
end of the winch post base, i.e. the “upper center.”
Next attach the upper ends of the angle braces (the smaller end tab) to the winch post using a 3/8” x4 ½” hex bolt,
lock washer and nut. Attach the winch post to the winch post base with the ½” x 8” carriage bolt, flat washer and
nut.
Clamp the lower ends of the angle braces in place on the front cross member. Before drilling the 3/8” holes in the
front crossmember check that:
The winch post is at a right angle to the winch post brace.
The lower tabs are essentially flat with the crossmember.
The lower tabs are approximately the same distance from the respective side rails.
If things don’t line up, check the position of the winch post base and re-locate as necessary. Drill the holes and
attach the bottom of side braces with 3/8” x 2 ½” carriage bolts, lock washers and nuts.

STEP 5: INSTALL THE WINCH AND CABLE AS SHOWN IN THE FIGURE BELOW. The eventual height
of the winch will be determined after you crank the boat up for the first time. For now, use your best judgment
and maybe you’ll be lucky! If you have no idea, try making the top of the winch 32 – 36 inches form the bottom
of the post. Additional information and warnings are included with winch literature.
IMPORTANT: The objective in selecting winch post height is to have a pull on the boat such that the cable is parallel to the
side rails. This is particularly important when the bow is near the winch. It is preferable to not having the winch either pulling
up or down on the bow eyelet.
* 4 ½” Carriage bolts may be
substituted with hex bolts and
flat washers.
STEP 6: After the ramp framework and winch mounting are complete, install roller assemblies as shown. Assemble
as shown in the figures below. Consider the following criteria when selecting the location of the roller assemblies:
a. Assemblies should obviously be in pairs, i.e. identical location on both the right and left rail.
b. The first pair (from the water end of the ramp) should be close to the water end of the rail.
c. Roller assembly pairs should be spaced more closely together where watercraft weight is greater. Pay
particular attention those areas below the motor. If you have constructed a ramp with extended length be aware
that a heavy stern may pass over several feet of the ramp. Additional roller assemblies are available for purchase.
d. Generally speaking, your watercraft will be totally supported over the aft 2/3s to 3/4s of the hull. This is
because the bow starts sloping upward and also the weight of the motor results in a center of gravity more toward
the stern.
e. If you have a trailer you may use the location of the bunks as a general guide.
f. If you have a Model 1200, be sure to line up apex of the bracket angle to the top of the board as shown. Try to
drill at a perpendicular angle to th e face of the board. Many drills come with a square angle guide.
HINT: If you have a Model 2000, do not set the axle bracket nails fully until you have made a final determination for
the location of the roller assemblies. The Model 1200 assemblies are more easily relocated.

JOINING SIDE RAILS END-TO-END
IMPORTANT: When joining side rails end-to-end, they should be kept in line with each other. If you form an angle that
makes a “valley” the boat transom will not bass over the rollers behind it. If the angle forms a “crest”, the weight if the
entire boat will fall upon a single pair or row of rollers as the center of gravity pivots over the crest.
Join ends of rails as shown below.
(Hardware not included.)

ATTACHING SUPPORTING LEGS
• Concrete Blocks work best for supporting or “leveling” your ramp.
• Extra long cross members can help make the ramp more stable.
• Keep leg height to a minimum. Shore Docker is not responsible for customized designs. Be safe!
• Keep legs VERTICAL TO THE HORIZON regardless of the ramp angle.
Install legs as shown below. (Hardware not included)
SETTING UP AND OPERATION OF SHORE DOCKER BOAT RAMP
Because Shore Docker is a kit, you are responsible for the safe construction, setup and operation of your ramp. Shore
Docker only supplies parts and general guidelines. There are many types of boats and shorelines. You must make the
decision of the suitability of this kit for your situation.
L
ocate the ramp with the water end deep enough to easily engage your hull. Hook the end of the winch cable to the
eye on your bow. Read the literature supplied with the winch before operating.
• Read all warnings on page one.
• Never drive the boat onto ramp. The boat must be cranked up.
• Never release handle or let winch free-wheel when lowering boat. Always crank boat down.
SPECIAL SET UP FOR MODEL SD2000
Before loading boat onto ramp slightly tighten the pivot bolts for the roller axles. They should be tight enough to hold
position, yet be movable. After the boat has run up and down once, tighten the pivot bolts so the angle is more firmly
held.
FOR BOTH MODELS – Re-mount the winch if necessary.
The winch height should be such that the cable comes off the drum at about the same height as the bow eye. This will
minimize the unnecessary forces on the winch, post, ramp and your boat.
WARRANTY
The manufacturer warrants for a period of one year from the date of purchase, the workmanship of all parts.
The warranty is limited to the repair and/or replacement of parts ShoreDocker parts only. The manufacturer
does not warrant the suitability of this product for any specific or general application. All warranty claims
must be submitted to the manufacturer, not the reseller. Claims must include the damaged parts and a copy
of the original sales receipt, postage prepaid.
Manufactured by:
RNG Corporation.
6549 Harbor Place
Prior Lake, MN 55372
(952) 233-5253 Fax (952) 233-5787
www.shoredocker.com
© 2006 RNG Corp. All Rights Reserved.
/