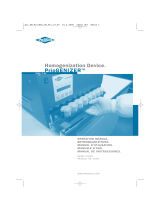
Ohaus HOHTDG Owner's manual

Type
Owner's manual

This manual is also suitable for

Instruction Manual
HT Lysing Homogenizer, HOHTDG
Revision 4
01/13/2019
EN - English ......... 1
1
Service information
If the troubleshooting section does not resolve or describe your problem, contact your
authorized OHAUS service agent. For service assistance or technical support in the
United States call toll-free 1-800-672-7722 ext. 7852 between 8:00 AM and 5:00 PM EST.
An OHAUS product service specialist will be available to provide assistance. Outside the
USA, please visit our web site, www.ohaus.com to locate the Ohaus office nearest you.
Serial Number: _______________________________________________________
Date of Purchase: ____________________________________________________
Supplier: ____________________________________________________________
table of contentS
Package Contents . . . . . . . . . . . . 1
Service Information . . . . . . . . . . . . 1
Introduction . . . . . . . . . . . . 2
Installation . . . . . . . . . . . . 2
Intended Use . . . . . . . . . . . . 2
Maintenance & Servicing . . . . . . . . . . . . 2
Environmental Conditions . . . . . . . . . . . . 2
Equipment Disposal . . . . . . . . . . . . 2
Safety Instructions . . . . . . . . . . . . 3
Standards & Regulations . . . . . . . . . . . . 3
Specifications . . . . . . . . . . . . 4
Control Panel . . . . . . . . . . . . 5
Operating Instructions . . . . . . . . . . . . 6-8
Troubleshooting . . . . . . . . . . . . 9
Package contentS
HT Lysing Homogenizer
Sample Tube Kit, 14 Samples
Tube Rack
Allen wrench
Wrench
Power cord
Instruction manual
Warranty card
EN
2
The Ohaus HT Lysing Homogenizer is a homogenizer specifically designed for high throughput
sample processing in a microplate, deep well plate, or sample tube format. Animal tissue,
seeds, tubers, leaf punches, soil and sediment samples, insects, and microbial cultures can all
be effectively homogenized in a 96-well or microplate, deep well plate, or sample tube format. The
high speed linear motion of the homogenizer allows for rapid sample processing; in most cases
two (2) minutes or less.
Samples are placed in a tube, vial or well with a grinding media and extraction buffer (seeds
can be ground dry), sealed with a cap or press-on mat, placed in the HT Lysing Homogenizer,
and processed. Homogenized samples can be subsequently handled manually or in automated
systems making use of the standard plate format. The HT Lysing Homogenizer is suitable for
the isolation of protein, DNA, RNA, viruses, and any other biological components released during
homogenization. The unit is also useful for pulverizing dry samples for chemical analysis and
solubility studies.
inStallation
Upon receiving the Ohaus HT Lysing Homogenizer, check to ensure that no damage has
occurred in shipment. It is important that any damage that occurred in transport is detected at the
time of unpacking. If you do find such damage the carrier must be notified immediately.
Turn unit on side to expose the bottom of the unit. Remove the bolts which hold the shipping
plate to the bottom on the unit. Store the plate and bolts in a plastic bag incase the unit must be
shipped to another location. Running the unit with the plate attached can cause permanent
damage. Also shipping the unit without the shipping items can also cause permanent
damage.
Clean bench or table top that the HT Lysing Homogenizer will be placed on and place in its
permanent position on the bench. Always place the unit on a level, sturdy work surface. Press
down on the unit housing to fasten suction cup feet to bench. Position unit so it is easy to reach
and unplug the power cord from the back of the unit.
The HT Homogenizer is supplied with a power cord that is inserted into the IEC connector on the
back of the unit first, then it can be plugged into a properly grounded outlet. The 120V unit plugs
into a 120 volt, 50/60 Hz source. The 230V unit plugs into a 230 volt, 50/60 Hz source.
intended USe
NOTE: The Ohaus HT Lysing Homogenizer is intended for General Laboratory Use. Safety
cannot be guaranteed if used outside of the intended use.
introdUction
The HT Lysing Homogenizer is built for long, trouble-free, dependable service. No lubrication or
other technical user maintenance is required. It needs no user maintenance beyond keeping the
surfaces clean after each day’s use. The unit should be given the care normally required for any
electrical appliance. Avoid wetting or unnecessary exposure to fumes. Do not use a cleaning
agent or solvent on the front panel which is abrasive or harmful to plastics, nor one which is
flammable. Always ensure the power is disconnected from the unit prior to any cleaning. If the
unit ever requires service, contact your Ohaus representative.
environmental conditionS
Operating Conditions: Indoor use only.
Temperature: 5 to 40°C (41 to 104°F)
Humidity: 20% to 85% relative humidity, non-condensing
Altitude: 0 to 6,562 ft (2000 M) above sea level
Non-Operating Storage:
Temperature: -20 to 65°C (-4 to 149°F)
Humidity: 20% to 85% relative humidity, non-condensing
Installation Category II and Pollution Degree 2 in accordance with IEC 664.
eqUiPment diSPoSal
This equipment must not be disposed of with unsorted waste. It is your responsibility
to correctly dispose of the equipment at life-cycle-end by handing it over to an
authorized facility for separate collection and recycling. It is also your responsibility
to decontaminate the equipment in case of biological, chemical and/or radiological
contamination, so as to protect the persons involved in the disposal and recycling of
the equipment from health hazards.
For more information about where you can drop off your waste of equipment, please contact your
local dealer from whom you originally purchased this equipment. By doing so, you will help to
conserve natural and environmental resources and you will ensure that your equipment is recycled
in a manner that protects human health.
maintenance & Servicing
EN
3
Please read entire instruction manual before operating the units.
WARNING! DO NOT use the HT Lysing Homogenizer in a hazardous
atmosphere or with hazardous materials for which the unit was not designed.
WARNING: DO NOT replace the cord with an inadequately rated main supply
cord.
WARNING! The protection provided by the HT Lysing Homogenizer may be
impaired if it is used with accessories not provided or recommended by the
manufacturer or used in a manner not specified by the manufacturer.
This unit is designed for intermittent use only. Always operate unit on a level
surface for best performance and maximum safety.
DO NOT lift unit by the lid. DO NOT run the unit with the lid open, this will
create hazardous conditions. DO NOT run the unit without the rubber suction
cup feet firmly attached.
CAUTION! To avoid electrical shock, completely cut off power to the unit by
disconnecting the power cord from the unit or unplug from the wall outlet.
Disconnect unit from the power supply prior to maintenance and servicing.
Spills should be removed promptly. DO NOT immerse the unit for cleaning.
DO NOT operate the unit if it shows signs of electrical or mechanical damage.
The HT Lysing Homogenizer is designed to be operated in dry conditions.
Use of Hearing Protection is strongly advised when using this product.
Earth Ground - Protective Conductor Terminal
Alternating Current
Safety inStrUctionS StandardS & regUlationS
Compliance to the following standards and regulations is indicated by the corresponding mark
on the product.
Mark Standards and Regulations
The HT Homogenizer complies with directives EN 61010-1:2010-10, EN 61010-
2-051:2015-04
The full text of the EU declaration of conformity is available at the following
address www.Ohaus.com/WEEE
This product complies with directive 2012/19/EU. Please dispose of this product
in accordance with local regulations at the collecting point specified for electrical
and electronic equipment.
For disposal instructions in Europe, refer to www.ohaus.com/weee.
EN 61326-1
CAN/CSA C22.2 No. 61010-1:2012-05
CAN/CSA C22.2 No. 61010-2-051:201510
UL 61010-1:2012-05
Supplemented by EN 61010-1:2010-10, EN 61010-2-051:2015-04
Global Notice
Warning: This is a Class A product. In a domestic environment this product may cause radio
interference in which case the user may be required to take adequate measures.
Canada Notice
This Class A digital apparatus complies with Canadian ICES-003.
FCC Notice
NOTE: This equipment has been tested and found to comply with the limits for a Class A digital
device, pursuant to Part 15 of the FCC Rules. These limits are designed to provide reasonable
protection against harmful interference when the equipment is operated in a commercial envi-
ronment. This equipment generates, uses, and can radiate radio frequency energy and, if not
installed and used in accordance with the instruction manual, may cause harmful interference to
radio communications. Operation of this equipment in a residential area is likely to cause harmful
interference in which case the user will be required to correct the interference at his own expense.
Changes or modifications not expressly approved by Ohaus Corporation could void the user’s
authority to operate the equipment.
EN
4
Overall dimensions (L x W x H): 17.5 x 11.5 x 20.5” (44.3 x 28.8 x 51.8cm)
Electrical (50/60 Hz): 120 volts AC: 3.2 amps, 450 watts
230 volts AC: 2.1 amps, 450 watts
Fuses: 120 volts, 5mm x 20mm, 6.3 amp slo-blow fuse
(250V Rated)
230 volts, 5mm x 20mm, 3.15 amp slow blow fuse
(250V Rated)
Speed range: 300 to 1600rpm (in 1 rpm increments)
Timer: 1 second to 10 minutes
(1 second increments)
Reciprocal strokes: 1.2” (3.1cm)
Capacity: 1 deep well plate, 4 stacked
standard well plates; 300 gram
maximum; any matrix that will fit in the
4 x 5 x 2.5” (10.2 x 12.7 x 6.4 cm) holder
Controls: ON/OFF Switch, Standby, Speed
UP/DOWN, Speed ON, Time UP/DOWN,
Program Buttons
Ship weight: 120 volts, 82lbs (37.2kg)
230 volts, 98lbs (44.5kg)
Net weight: 120 volts, 59lbs (26.8kg)
230 volts, 75lbs (34.0kg)
SPecificationS
EN
5
control Panel - Ht lySing Homogenizer
The front panel of the HT Lysing Homogenizer contains all the controls and displays
needed to operate the unit
A. Power Switch: This is the main switch for the system. The unit will not function
unless this switch is in the on position. Switch to the on (-) position to power the unit.
Switch to the off position (o) to remove power from the internal electronic components
B. Standby button/standby indicator light: The standby indicator light will illuminate
when the main power switch is in the ON position. Press the standby button to take
the unit out of “Standby Mode”. The standby indicator light will shut off. Press the
standby button again and the unit will once again be in standby mode.
C. Speed display: Displays the speed of the homogenizer D. Up/down arrows: For
set-point control. ON/OFF button starts/stops reciprocal motion function.
E. Time Display: Displays the set time (before the unit is started) or remaining time
(once unit is running or if the unit is paused). The display range is from 00:00 to 10:00
minutes in 1 second increments. The display indicates minutes and seconds. This
unit can be only be used in timed (countdown) mode only.
F. Up/Down Buttons: For Set-point control Up/Down Arrows for set point control.
G. Program Buttons: Factory set buttons for common time and speed combinations
based on sample type. See page 7 for details. When a preset button is active, the
corresponding settings cannot be changed.
B.
C.
A.
D.
E.
F.
G.
EN
6
oPerating inStrUctionS
IMPORTANT: This unit is designed for intermittent use only. After every 10 minute cycle
it must have at least 1 minute cool down period. Before processing any samples, it is
advisable to perform a dry run with your plates or tubes with appropriate grinding material
to determine whether they are durable for your homogenization process.
1. Getting ready:
a. Place unit on a sturdy surface.
i. If this surface is permanent, you can remove the plastic covers from the
inner rubber feet. These will adhere to the surface.
ii. If this is not the permanent location for the unit, simply leave the plastic on
the rubber feet.
b. Plug cord into a properly grounded outlet.
c. Switch the power switch to the ON position by pressing the side of the switch
labeled with a dash (-).
d. Press the STANDBY button:
i. An LED will light over the button and the LED screens will illuminate.
2. Load plate:
a. Turn the lid latch counter clock wise to unlock the lid.
b. Open lid.
c. Loosen the sample clamp by pushing the black clamp lock knobs and turning
the handle counter clock wise until the clamp is fully up.
d. Place sample under the clamp.
e. Tighten by turning the handle clockwise until tight.
i. You will hear the clicking of the screw lock. If the lock does not click, pull
the black lock knobs forward to engage the lock.
f. Close the lid and lock it in place.
i. Turn the lid latch clockwise to secure lid.
IMPORTANT: If the locking arm is at the wrong height for the sample, it can be adjusted
up or down by removing the black hex head screw with Allen wrench included and, with the
lock screw loose, repositioning it to a different hole on the vertical arm. DO NOT run the
unit without the black hex head screw through one of the holes in the vertical arm.
3. Setting unit:
THE LID MUST BE CLOSED AND LOCKED FOR UNIT TO BE SET OR TO FUNCTION.
a. Standard Set:
i. Press the speed up or down buttons to reach the desired speed.
1. Note: Hold down the speed buttons for quick setting.
ii. Press the time up or down buttons to reach the desired time.
1. Note: Hold down the time buttons for quick setting.
iii. Once the desired speed and time is set, press the speed ON/OFF
button to start unit function.
iv. Timer must be set in order for unit to run. If time is set to 00:00, unit
will not function.
NOTE: IF THE LID IS OPENED AT ANY TIME DURING OPERATION, THE UNIT
WILL STOP AND REQUIRES THE USER TO PRESS START AGAIN TO RESTART
FUNCTION.
EN
7
oPerating inStrUctionS
b. Factory Preset Program buttons:
i. The Program buttons have been designed to effectively grind various
types of samples and cannot be re-programmed.
1. To enter a program, press any of the program buttons.
a. An LED indicator will light over the selected program.
2. To exit program, press any other button.
3. Press the speed ON/OFF button to start program.
4. When the selected program has finished, the unit will turn off.
5. When the program is over, the display will reset itself to the
beginning of the program.
NOTE: IF THE LID IS OPENED AT ANY TIME DURING OPERATION, THE
UNIT WILL STOP AND REQUIRES THE USER TO PRESS START AGAIN TO RESTART
FUNCTION.
c. To interrupt a timing cycle, press Speed ON/OFF power button to OFF. IMPORTANT:
To completely cut off power to the unit, disconnect the power cord from the unit or
unplug from the wall outlet. If your unit does not shut off when the lid is opened,
switch the unit off and contact your Ohaus representative for repairs.
d. When the unit is not being used flip the ON/OFF power switch to the OFF position.
NOTE: IF RUNNING LESS THAN A FULL RACK OF SAMPLES, IT IS IMPORTANT TO
HAVE SAMPLES BALANCED STARTING FROM THE CENTER OF THE RACK.
IMPORTANT: To prevent unnecessary wear on the HT Lysing Homogenizer, microwell
plates and vial sample should not exceed 300 grams. A typical deep well plate with grinding
media, sample, and extraction buffer will weigh less than 200 grams.
Using sample tubes in a small tube rack with the HT Lysing Homogenizer is essentially the
same as using deep well plates. The amount of head space is very important for efficient
sample homogenization. Generally the harder the substance to be ground, the less can be
added to each tube or well. The samples must be firmly locked into the homogenizer prior
to grinding, as described under ‘Operating Instructions’ (see above).
Grinding times and speeds must be determined empirically.
IMPORTANT: The 4 center positions must always have tubes in them.
Tube
Color
Sample Type Tube
Size
Speed Time
Program 1 White
Yellow
Blue
Bacteria
Fungi
Yeast
2mL 1500rpm 5 minutes
Program 2 Orange Soft Sample 2mL 1500rpm 2 minutes
Program 3 Red
Green
Animal Tissue
Plant Material
2mL 1300rpm 3 minutes
Program 4 Brown Soil and
Environmental
Samples
2mL 1500rpm 4 minutes
Program 5 Cryogenically
Frozen Samples
Polycar-
bonate
4mL &
15mL
1600rpm 1 minute
*The preset programs are not limited to the tubes listed. You should run a test to determin the optimal
settings for other size tubes.
EN
8
OPERATING TIPS
Many protocols, especially with RNA isolation, call for up to 1mL of extraction buffer with as
little as 20mg of tissue. When using 96 deep well plates, this volume is impractical. In such
situations, it is suggested that the homogenizing be performed in a smaller volume initially
and then the balance of the buffer being added after the homogenization.
The plate holder can accommodate one (1) deep well plate, four (4) stacked standard
well plates or any matrix that will fit in the 4 x 5 x 2.5” (10.2 x 12.7 x 6.4 cm) holder. Do
not run unit with any cracked or broken sample tubes or lids. In all cases, the durability
of the sample container should be tested prior to processing samples. Many brands of
polypropylene microwell plates are constructed of very thin plastic which may not tolerate
full speed with some types of grinding media.. Most deep well plates are sufficiently durable
for standard homogenizing applications.
To move the HT Lysing Homogenizer, lift it from one side until the rubber suction cup foot
on that side comes off the surface. Continue lifting on this side until all four (4) feet have
separated and the homogenizer is lying completely on its side. The homogenizer is now
ready to mount in a new location. Never run the homogenizer without the rubber suction
cup feet firmly attached. If damaged, replacement feet are available from your Ohaus
representative.
oPerating inStrUctionS
EN
9
Error Cause of Error How to fix
E1 The circuit board does not “see” any speed input. This could be
caused by a complete motor stoppage, a mechanical issue that
causes the mechanism not to pass through the sensor or by an
electrical issue such as a sensor malfunction.
1. Check to make sure there is no mechanical obstruction causing the mechanism to become
stuck. The tray should move up and down with little resistance. NOTE: At the top and bottom of
the “stroke” there will be a point where the mechanism will be difficult to move when stopped.
This is not a problem for the motor.
2. Cycle power by turning the ON/OFF switch to the Off position, leaving it for 30 seconds and
then switching it back to the ON position.
3. If this does not fix your issue, contact your Ohaus representative.
E2 This Error code means that the unit “sees” a speed that is
different than the set speed, or that the unit cannot maintain
a consistent speed. This could be caused by the unit being
overloaded or jammed, by an inconsistent or low power source
or by an internal electrical issue.
1. Check that the power source that the unit is plugged into matches the electrical requirements of
the unit.
2. Check to make sure there is no mechanical obstruction causing the mechanism to become
stuck. The tray should move up and down with little resistance. NOTE: At the top and bottom of
the “stroke” there will be a point where the mechanism will be difficult to move when stopped.
This is not a problem for the motor.
3. Cycle power by turning the ON/OFF switch to the Off position, leaving it for 30 seconds and
then switching it back to the ON position.
4. If this does not fix your issue, contact your Ohaus representative.
Unit has
no power
Blown Fuse 1. Replace the fuse with the supplied spare. If issue reoccurs, see # 2
2. Check to make sure there is no mechanical obstruction causing the mechanism to become
stuck. The tray should move up and down with little resistance. NOTE: At the top and bottom of
the “stroke” there will be a point where the mechanism will be difficult to move when stopped.
This is normal.
3. If this does not fix your issue, contact your Ohaus representative.
Unit will
not run
Lid is not latched properly 1. Unsecure and re-secure lid latch
2. If this does not fix your issue, contact your Ohaus representative.
troUbleSHooting
EN
Ohaus Corporation
7 Campus Drive
Suite 310
Parsippany, NJ 07054 USA
T
el: +1 (973) 377-9000
Fax: +1 (973) 944-7177
With ofces worldwide.
www.ohaus.com
© 2019 OHAUS Corporation, all rights reserved
  • Page 1 1
  • Page 2 2
  • Page 3 3
  • Page 4 4
  • Page 5 5
  • Page 6 6
  • Page 7 7
  • Page 8 8
  • Page 9 9
  • Page 10 10
  • Page 11 11

Ohaus HOHTDG Owner's manual

Type
Owner's manual
This manual is also suitable for

Ask a question and I''ll find the answer in the document

Finding information in a document is now easier with AI