Page is loading ...

Users Instructions
Installation &
Servicing
Instructions
THESE INSTRUCTIONS
TO BE RETAINED
BY USER
Vokèra is a licensed member of the Benchmark scheme
which aims to improve the standards of installation and
commissioning of domestic hot water systems in the UK.
evolve
High efciency combi boiler
evolve 24C G.C. N° 47-364-37
evolve 28C G.C. N° 47-364-38
evolve 32C G.C. N° 47-364-39
evolve 36C G.C. N° 47-364-40
evolve 42C G.C. N° 47-364-41

2
1. THINGS YOU SHOULD KNOW ...................................................3
2. GETTING STARTED .................................................................... 5
3. HOW TO.... ................................................................................. 12
4. WHAT IF .....................................................................................13
SECTION 1 - DESIGN PRINCIPLES AND OPERATING
SEQUENCE ...................................................................................15
SECTION 2 - TECHNICAL DATA ..................................................16
SECTION 3 - CONTROL PANEL (REC10) .................................... 19
SECTION 4 - GENERAL REQUIREMENTS (UK) .........................25
SECTION 4A - GENERAL REQUIREMENTS (EIRE) ....................26
SECTION 5 - INSTALLATION .......................................................28
SECTION 6 - COMMISSIONING ...................................................34
SECTION 7 - SERVICING INSTRUCTIONS ..................................48
SECTION 8 - CHECKS, ADJUSTMENTS AND FAULT FINDING .... 55
SECTION 9 - LPG INSTRUCTIONS .............................................. 60
Commissioning checklist ............................................................61
Benchmark ...............................................................................62-64
RANGE RATED
This boiler can be adapted to the heat requirements of the system,
and in fact it is possible to set the range rated parameter as shown
in the specic paragraph.
After setting the desired output report the value in the table on the
back cover of this manual, for future references.

3
1.1 GAS APPLIANCES
Gas Safety (Installation and Use) Regulation (UK).
In the interests of your safety and that of others it is a legal
requirement that all gas appliances are installed and correctly
maintained by a competent person and in accordance with the
latest regulations.
1.2 ELECTRICAL SUPPLY
Please ensure that this appliance has been properly connected
to the electrical supply by means of a double pole isolator or
un-switched socket, and that the correct size of fuse (3 AMP)
has been tted.
Warning: this appliance must be earthed!
1.3 WARRANTY REGISTRATION
Please take the time to register the appliance warranty using
the documentation provided, call 0800 479 0754 (UK) or 056
7755055 to obtain your warranty conrmation code (please
have your appliance warranty card to hand).
1.4 APPLIANCE COMMISSIONING CHECKLIST
(UK only)
The Benchmark checklist section can be found at the rear of
the appliance installation booklet. This important document
must be completed during the installation/commissioning of
your boiler. All GAS SAFE registered installers carry a GAS
SAFE ID card, and have a registration number. These details
should be recorded in the Benchmark commissioning checklist
section within the installation booklet. You can check your
installers details by calling GAS SAFE direct on 08004085500.
Failure to install and commission the appliance in accordance
with the manufacturers instructions will invalidate the warranty.
This does not affect your statutory rights.
1.5 HOW DOES IT WORK?
Your evolve boiler supplies heated water to your radiators
and hot water to your hot water taps. The central heating is
controlled via a time clock and any thermostats that your installer
may have tted. The boiler will light when it receives a request
from the time clock via any thermostat that may be installed, or
whenever a hot water outlet (tap) is opened. Your evolve boiler
lights electronically and does not have a pilot light.
In the unlikely event of a fault developing with your boiler, the
supply of gas to the burner will be terminated automatically.
USERS INSTRUCTIONS
Dear Customer
Your Vokèra evolve boiler has been designed to meet and exceed the very latest standards in gas central heating technology,
and if cared for, will give years of reliable use and efciency. Please therefore take some time to read these instructions carefully.
Do’s and Don’t’s
- Do ensure that the system pressure is periodically checked
- Do ensure that the boiler is not used by children or unassisted disabled people
- Do ensure that you know how to isolate the appliance in an emergency
- Do ensure that you are familiar with the appliance controls
- Do ensure that your installer has completed the appliance log book section
- Do not attempt to remove the appliance casing or gain internal access
- Do not hang clothes etc. over the appliance
- Do not forget to have the appliance serviced annually.
INTRODUCTION
1. THINGS YOU SHOULD KNOW
1.7 CLEARANCES REQUIRED
ABOVE 100mm*
BELOW 100mm^
LEFT SIDE 2mm
RIGHT SIDE 2mm**
FRONT 4mm***
evolve 24C - 28C 32C - 36C - 42C
HEIGHT 740 mm 740 mm
WIDTH 420 mm 420 mm
DEPTH 275 mm 350 mm
1.6 DIMENSIONS
* 100mm if rear-ue outlet is used or 25mm above ue bend if top
ue outlet is used. Consideration should be given to providing
reasonable clearance for the insertion of a FGA probe.
** Disconnection of adjacent components may be required in order
to facilitate syphon removal.
*** Provided that a door or removal panel enables 450mm access for
maintenance.
^ Can be reduced to 5mm if a removal panel enables 100mm for
maintenance.
100
25
2
2
100
1.8 FROST PROTECTION SYSTEM
The evolve is equipped with a built-in frost protection system,
this enables the boiler to over-ride the time controls – even if
switched off – and operate the burner and/or pump, should
the temperature within the appliance drop below 5 °C. Please
note that the frost protection system is designed to protect the
appliance only, should frost protection be required for the heating
system, additional controls may be required.
NOTE
The frost protection system is reliant on the appliance having a
permanent electrical supply, and being in a non-fault condition.
1.9 APPLIANCE STATUS INDICATORS
Your appliance incorporates the REC 10 UI (User Interface),
that displays information on appliance status and condition.
This booklet is an integral part of the appliance. It is therefore necessary to ensure that the booklet is handed to the person responsible
for the property in which the appliance is located/installed. A replacement copy can be obtained from Vokèra customer services.
At the end of its life, the product should be not be disposed of as solid urban waste, but rather it should be handed over to a
differentiated waste collection centre.

4
Depending on the type of application, some of the functions described in this manual might not be available.
The REC 10 UI is a multi-functional control that
enables you to view the operating status of your
appliance at a glance; and is also used to adjust/set
the various ‘User’ settings, including temperature set-
points.
The REC 10 UI also incorporates an embedded timer
that - if enabled - can be used to program and control
the ON/OFF times for your central heating. Please
consult you installer for further advice on this function.
The REC 10 UI features a backlit liquid crystal display.
LED
Light signal indicating the operating status of the boiler. Can be red or green (see specific paragraph)
REC10
Boiler control panel
Key area
ok= confirm
back= ret
urn to the previous screen
cancel selection
return to the main screen (press > 2 sec.)
up= allows you to choose between the options PLANT-STATE-SET-INFO-MENU and to
surf through the
submenus
scrolling upwards
down= allows you to choose between the options PLANT-STATE-SET-INFO-MENU and to
surfe through the
submenus
scrolling down
This icon indicates that the OFF operating status mode has been set. Each ignition request is ignored except for the frost-protection
function. The pump anti-lock, 3-way valve and frost-protection function remain active.
This icon indicates that WINTER mode has been selected (HEATING function enabled). If a heating request from the main zone is in
progress, the icon will be flashing.
This icon indicates that the circuit for domestic hot water production is enabled. When a domestic hot water request is in progress, the
icon flashes. The “P” at the top of the domestic hot water icon indicates that the boiler preheating function is enabled; the “P” when
flashing indicates that a preheating request is in progress.
When the “central heating programming timing” is enabled this icon indicates that the system heating (main zone) is in AUTOMATIC
mode (the management of the heating requests follows what has been set with the timer).
If the heating function is not enabled during the current time frame, the icon will be crossed out.
When the “central heating programming timing” is enabled this icon indicates that the system heating (main zone) is in MANUAL mode
(the management of the heating requests does not follow what has been set with the programming timing, but it is always active).
OFF
This icon indicates that the system (main zone) has been set to off (not active).
This icon indicates that the system is detecting the presence of a flame.
This icon indicates the presence of an anomaly or fault condition, and is always flashing.
Note:
The temperature of the hot water sensor is shown at the centre of the main screen. The value’s meaning is indicated at the bottom of the display.
Whenever a heating request is in progress, the value displayed at the centre of the screen refers to the system’s ow sensor, with the relative
indication.
The value expressed in bar refers to the system’s water pressure.
The top of the screen shows the current date and time, as well as the outdoor temperature, if available.
System Icons may appear on both the left and right of the display; and they signify the following condition/status:
LED
REC10
FRI
18/05/2013 12:17
MENU
INFO SET
PLANT
HOT WATER TEMPERATURE
STATE
42
°C
P
1.3
bar
CONTROL PANEL (REC10)
Fig. 1

5
2. GETTING STARTED
2.1 BEFORE SWITCHING ON
Be
fore switching the appliance on, please familiarise yourself with:
- how to isolate the appliance from the gas, water, and electricity
supplies;
- how to check and top-up – if necessary – the system water
pressure;
- any external thermostats and their functions;
- the appliance controls.
2.2 APPLIANCECONTROLS(seeg.1)
The appliance controls are concealed behind the front ap of
the appliance.
NOTE
The appliance frost protection is active in all the boiler modes.
The control panel functions can be used to vary the
temperature of the water that circulates around your radiators
and the water that ows from your hot water taps.
The heating temperature range can be adjusted between 20C
- 40C (low temperature) or 40C - 80C (high temperature) this
range is congured by your installer and the default is the high
temperature range. The hot water temperature range can be
adjusted between 37C - 60C.
Please Note: the actual delivery temperature is also conditional
upon the incoming water temperature and the actual ow-rate
at the outlet.
Refer to the main appliance status table for fault indicator and
boiler status.
2.3 LIGHTING THE BOILER
Ensure the gas and electrical supply to the boiler are
turned on.
After completing all operations required to prepare
commissioning, proceed as follows to start the boiler.
2.4 START SCREEN
When the appliance is first connected to the electrical supply,
the REC 10 may require you to set the time and date (see
2.9.1), and the appliance will enter its ‘pre-purge’ mode that
will last for several minutes. On completion of the ‘pre-purge’
phase, the appliance will enter its ‘standby’ mode unless a
heating or HW request has been made.
By pressing the “up” and “down” keys it is possible to move
the selection of the functions in this order:
- PLANT
- STATE
- SET
- INFO
- MENU.
By pressing the “ok” key you can access the settings of the
selected function (except for PLANT).
The “back” key is inactive (except for PLANT).
18/05/2013 12:17
MENU
INFO SET
42
°C
1.3
bar
FRI
PLANT
HOT WATER TEMPERATURE
STATE
2.5 PLANT
The PLANT menu only becomes available if additional zones
have been added and congured with this system via the
REC10 H.
In order to change zones (see above), highlight PLANT if
necessary pressing the “up” and “down” keys.
Then, pressing the “ok” and “back” keys, it will be possible
to select the other zones in this sequence (only if added and
congured with the REC10 H):
- PLANT
- MAIN ZONE
- ZONE 1
- ZONE 2.
The TIME AND DATE, LANGUAGE and BACKLIGHT settings
are are related to the appliance only. The information contained
in the INFO menu is related to the appliance.
No domestic hot water parameters can be set if MAIN, ZONE 1
or ZONE 2 is selected.
2.6 STATE
The STATE function can be used to set the BOILER and
MAIN ZONE operating modes.
To do this, it is necessary to highlight the desired entry using
the “up” and “down” keys and then pressing “ok” to conrm
the selection.
Pressing “back” takes you back to the initial screen without
making any selection.
BOILER
STATE
MAIN ZONE
2.6.1 Boiler
This function can be selected in order to set the boiler’s status,
by choosing one of the following options:
- OFF
- SUMMER
- WINTER.
The highlighted status is that which is currently selected. In
order to select a different status highlight it using the “up” and
“down” keys and then press “ok” to conrm the selection.
Once the selection has been validated, the display returns to
the STATE screen.
Press “back” to return to the start screen without making any
selection.
OFF
SUMMER
BOILER
WINTER
OFF: if OFF is selected, the system enters the standby mode,
whereby only the standby functions remain active.
SUMMER: if SUMMER is selected, the system produces
domestic hot water. Heating is disabled.
WINTER: if WINTER is selected, the system produces
domestic hot water and activates the heating function.
2.6.2 Main zone
Selecting this function allows you to set the main zone’s
status, by choosing one of the following options:
- if the embedded time clock is disabled (default):
- ZONE ON: boiler responds to heating request
- ZONE OFF: boiler does not respond to any request for
heating

6
ZONE ON
MAIN
ZONE OFF
- if the embedded time clock has been enabled:
- AUTO
- MANUAL
- HEAT OFF.
AUTO
MANUAL
MAIN
HEAT OFF
In order to select a different status highlight it using the “up”
and “down”keys and confirm the selection by pressing “ok”.
Once the selection has been validated, the display returns
to the STATE screen. Press “back” to return to the STATE
screen without making any selection.
ON: if ON is selected, the zone heating requests are met.
AUTO: if AUTO is selected, the zone heating requests will be
managed based on the scheduled programme.
MANUAL: if MANUAL is selected, the zone requests will be
managed based on the selection set by the user.
HEAT OFF: If HEAT OFF is selected, the zone heating
requests will be ignored.
NOTE: if you want to deactivate the zone in SUMMER or in
WINTER, you must select the required season (SUMMER or
WINTER in the BOILER menu) and set the zone concerned
to OFF.
2.7 SET
With the SET function it is possible to congure the HEATING,
HOT WATER and PREHEATING setpoints.
To do this, it is necessary to highlight the desired entry using
the “up” and “down” keys and then pressing “ok” to conrm
the selection. Pressing “back” takes you back to the initial
screen without making any selection.
HEATING
SET
HOT WATER
PREHEATING
2.7.1 Heating
Press the “up” and “down” keys to change the heating
setpoint temperature and conrm the selection by pressing
“ok”. Press “back” to return to the SET screen without
making any selection.
SET
HEATING
78,0
°C
When an outdoor temperature sensor is installed, the outlet
setpoint temperature is automatically adjusted by the system,
in order to maintain the ambient temperature according to any
variations in the outdoor temperature. If you want to adjust
the outlet temperature, raising it or lowering it with respect
to that automatically calculated by the boiler, it is possible to
change the HEATING setpoint selecting the desired comfort
level within the range (-5 ÷ +5).
The user is then asked to confirm the setpoint setting: select
CONFIRM or CANCEL using the “up” and “down” keys, and
confirm the selection pressing “ok”.
Once the selection is confirmed, the display returns to the
SET screen.
If the selection is cancelled or the “back” key is pressed you
return to the previous SET screen.
SET
THE PARAMETER
WILL BE CHANGED
CONFIRM CANCEL
CONFIRM OR DELETE
SELECTION
2.7.2 Hot water
Press the “up” and “down” keys to change the boiler’s
domestic hot water setpoint. Press “ok” to conrm the
selection. Press “back” to return to the SET screen without
making any selection.
SET
HOT WATER
58,0
°C
The user is then asked to conrm the setpoint setting: select
CONFIRM or else CANCEL using the “up” and “down” keys
and conrm with “ok”.
Once the selection is conrmed, the display returns to the
previous SET screen. If the selection is cancelled or the
“back” key is pressed you return to the SET screen.
SET
THE PARAMETER
WILL BE CHANGED
CONFIRM OR DELETE
SELECTION
CONFIRM CANCEL
2.7.3 Preheating
This function keeps the water in the domestic hot water
exchanger hot, to reduce standby times when a request is
made.
When the preheating function is enabled, the symbol P
comes on with a steady light at the top of the domestic hot
water icon. During burner ignition following a preheating
request, the symbol P starts flashing.
It is possible to access the PREHEATING function selecting
SET on the main screen of the REC10. Setting PREHEATING
= 1 the boiler’s domestic hot water function activates.
To deactivate the preheating function, set the parameter to
PREHEATING = 0, the symbol P switches off.
The function is not active when the boiler is OFF.

7
TERMOSTATI SAN
PREHEATING
0
THE PARAMETER
WILL BE CHANGED
CONFIRM CANCEL
CONFIRM OR DELETE
SELECTION
2.8 INFO
The INFO function can be used to display a series of data
regarding the system.
ATTENTION - The displayed data is for information only and
cannot be modied.
Press the “up” and “down” keys to go through the list of
information available, in this order:
- SCREED HEATER OPERATING HOURS (*)
- CH PROBE
- RETURN PROBE
- DHW PROBE
- EXHAUST PROBE
- OUTDOOR TEMPERATURE SENSOR (*)
- EXT T FOR THERMOREG (*)
- FLOWMETER
- FAN SPEED
- ZONE 1 DELIVERY (*)
- ZONE 2 DELIVERY (*)
- EXHAUST PROBE HOURS
- MAIN ZONE SET-POINT
- SET MAIN ZONE
- ZONE 2 SET-POINT (*)
- WATER PRESSURE.
The “ok” key is inactive.
The “back” key allows you to return to the initial screen.
(*) In the absence of additional zones or if the screed heater
function is not operating, the relative information will not be
displayed.
2.9 MENU
Using the MENU it is possible to access the conguration of
the SETTINGS and the TIME SCHEDULE (available only if
the embedded timer is enabled (POR=1).
To do this, it is necessary to highlight the desired entry using
the “up” and “down” keys and then pressing “ok” to conrm
the selection.
Pressing “back” takes you back to the initial screen without
making any selection.
MON
18/11/2013 12:17
SETTINGS
MENU
SELECT OPTION
TIME SCHEDULE
2.9.1 Settings
Select this function to modify the following settings:
- TIME AND DATE
- LANGUAGE
- BACKLIGHT.
To access the desired setting, it is necessary to highlight it
using the “up” and “down” keys and then pressing “ok”
to conrm the selection. Press “back” to return to the start
screen without making any selection.
TIME & DATE
LANGUAGE
SETTINGS
SELECT OPTION
BACKLIGHT
TIME AND DATE
Press “ok” to highlight in sequence HOURS, MINUTES, DAY,
MONTH, YEAR and press the “up” and “down” keys to
change the desired values.
Once the sequence has nished by pressing “ok”, the settings
will be saved and the display will return to the initial screen.
By pressing “back” at any time the system will return to the
SETTINGS cancelling the changes that were made.
12 17:
ENTER TIME AND DATE
TIME & DATE
USE THE ARROWS TO MODIFY
18 / 11 / 2013
LANGUAGE
Press the “up” and “down” keys to select the desired
language. Pressing “ok” the language selection is conrmed
and the display returns to the initial screen.
Pressing “back” the system returns to the SETTINGS screen
without changing the system’s language.
ENGLISH
LANGUAGE
SELECT LANGUAGE
ITALIANO
BACKLIGHT
The screen saver display (backlight off) is automatically
activated when the time, that has been set in parameter \
MENU \ SETTINGS \ BACKLIGHT, elapsed without having
pressed any buttons.
In the screen saver the current time is normally displayed.
“ ” symbol and the number of days to STOP appear if the
AUTOSTOP function is active.
When there is a heat request, the current time is replaced with
the boiler ow temperature and turns on the icon concerning
the type of request in progress.
A system efciency indicator is also displayed at the top of
the screen:
- HIGH EFFICIENCY (if the average value of the return probe
> 55°C)
- OPTIMUM EFFICIENCY (if average value of the return
probe < 55°C).

8
: 30 days
05:11
42
OPTIMUM EFFICIENCY
°C
: 30 days
P
2.9.2 Time schedule
This function can only be selected if the embedded clock has
been enabled (POR=1), it is possible to change the following:
- MAIN.
To access the desired timer programme, it is necessary to
highlight the relevant zone, e.g. MAIN, using the “up” and
“down” keys and then pressing “ok” to conrm the selection.
Press “back” to return to the start screen without making any
selection.
For a detailed description of the scheduled programming timer,
please refer to the section
“2.10 TIME SCHEDULE”
.
MON
18/11/2013 12:17
MAIN
SCHEDULE
SELECT THE ZONE
2.10 TIME SCHEDULE
Select the desired day using the “up” and “down” keys.
A table will be displayed indicating the day and the time
settings that have been pre-programmed. Press “ok” to
access the programming for the selected day.
Pressing “back” takes you back to the initial screen without
making any selection.
SELECT
A DAY
START
MAIN
THURSDAY
07:30
11:30
18:00
END
08:30
13:30
22:30
ZONE SCHEDULE
Once the selection has been made, the user can choose from
among the following options:
- ADD: you can add up to four start & end periods
- MODIFY
- DELETE
- COPY.
2.10.1 Add
This function serves to add a new time frame to the selected
day (up to a maximum of 4).
Press “ok” to select the function, after having highlighted it (if
necessary) using the “up” and “down” keys.
START
MAIN
ADD
THURSDAY
MODIFY
DELETE
COPY
07:30
11:30
18:00
END
08:30
13:30
22:30
SELECT OPTION
Press the “up” and “down” keys to increase or decrease
by 30 minutes the start time and press “ok” to conrm the
selection.
START
MAIN
THURSDAY
ADD
PERIOD
ENTER
START TIME
14:00
07:30
11:30
18:00
END
08:30
13:30
22:30
USE THE ARROWS TO MODIFY
Press the “up” and “down” keys to increase or decrease
by 30 minutes the end time and press “ok” to conrm the
selection.
START
MAIN
THURSDAY
ADD
PERIOD
ENTER
END TIME
15:00
07:30
11:30
18:00
END
08:30
13:30
22:30
USE THE ARROWS TO MODIFY
14:00
In order to conrm that the operation has been completed
successfully, the display will show the table with the new time
frame ashing.
MAIN
USE THE ARROWS TO MODIFY
START
THURSDAY
07:30
11:30
14:00
END
08:30
13:30
15:00
18:00 22:30
ADD
MODIFY
DELETE
COPY
2.10.2 Modify
This function serves to edit a time frame already present for
the selected day.
Press “ok” to select the function, after having highlighted it (if
necessary) using the “up” and “down” keys.
START
MAIN
ADD
THURSDAY
MODIFY
DELETE
COPY
07:30
11:30
18:00
END
08:30
13:30
22:30
SELECT OPTION
Press the “up” and “down” keys to select the desired time
band and press “ok” to conrm the selection.

9
START
MAIN
THURSDAY
SELECT
PERIOD TO
MODIFY
07:30
07:30
11:30
18:00
END
08:30
13:30
22:30
USE THE ARROWS TO MODIFY
Press the “up” and “down” keys to increase or decrease
by 30 minutes the start time and press “ok” to conrm the
selection.
START
MAIN
THURSDAY
11:30
07:30
11:30
18:00
END
08:30
13:30
22:30
USE THE ARROWS TO MODIFY
ENTER
START TIME
Press the “up” and “down” keys to increase or decrease
by 30 minutes the end time and press “ok” to conrm the
selection.
START
MAIN
THURSDAY
14:00
07:30
11:30
18:00
END
08:30
13:30
22:30
USE THE ARROWS TO MODIFY
ENTER
END TIME
In order to conrm that the operation has been completed
successfully, the display will show the table with the new time
frame ashing.
At this point the user can select a new time frame to be
modied, or else can press “back” to return to the previous
TIME SCHEDULE screen.
START
MAIN
THURSDAY
SELECT
PERIOD TO
MODIFY
07:30
07:30
11:30
18:00
END
08:30
14:00
22:30
USE THE ARROWS TO MODIFY
2.10.3 Delete
This function serves to delete a time frame already present for
the selected day.
Press “ok” to select the function, after having highlighted it (if
necessary) using the “up” and “down” keys.
START
MAIN
THURSDAY
07:30
11:30
18:00
END
08:30
13:30
22:30
SELECT OPTION
ADD
MODIFY
DELETE
COPY
Press the “up” and “down” keys to select the desired time
band and press “ok” to conrm the selection.
START
MAIN
THURSDAY
SELECT
PERIOD TO
DELETE
07:30
11:30
18:00
END
08:30
13:30
22:30
USE THE ARROWS TO MODIFY
To conrm or cancel the selection made, highlight the
corresponding option and conrm it by pressing “ok”.
In order to conrm that the operation has been completed
successfully, the display will show the table with the selected
time frame ashing just before deleting it from the table.
START
MAIN
THURSDAY
ARE YOU SURE
TO DELETE
THE PERIOD ?
END
CONFIRM OR DELETE SELECTION
07:30
11:30
18:00
08:30
13:30
22:30
CONFIRM
CANCEL
2.10.4 Copy
This function serves to copy the same scheduled programme
for other days of the week.
Press “ok” to select the function, after having highlighted it (if
necessary) using the “up” and “down” keys.
START
MAIN
THURSDAY
07:30
11:30
18:00
END
08:30
13:30
22:30
SELECT OPTION
ADD
MODIFY
DELETE
COPY
Press the “up” and “down” keys to select the day on which
to copy the hourly schedule to and press “ok” to conrm the
selection.
CONFIRM
MON TUE WED THU
SAT SUN
FRI
MAIN
SELECT DAYS ON WHICH YOU WANT
TO COPY SCHEDULE OF THURSDAY
USE THE ARROWS TO MODIFY
The day will be highlighted and others can be selected using
the same procedure.
When nished highlight CONFIRM and press “ok”.
CONFIRM
MON TUE WED THU
SAT SUN
FRI
MAIN
SELECT DAYS ON WHICH YOU WANT
TO COPY SCHEDULE OF THURSDAY
USE THE ARROWS TO MODIFY
In order to conrm that the operation has been completed
successfully, the display will show the list of days to which the
scheduled programme has been copied.

10
MAIN
SCHEDULE OF THURSDAY
WILL BE COPIED ON THE DAYS :
TUESDAY
USE THE ARROWS TO MODIFY
2.11 FAULTS
Should a fault occur, a screen will appear on the display
indicating the relative error code and a brief alphanumeric
description of the fault. Pressing the “back” button it is
possible to return to the main screen, where a fault is signalled
by this ashing icon .
The user can return to the fault description screen by using
the “up” and “down” keys and then pressing the “ok” key.
The faults description screen is automatically displayed once
the display illumination time has elapsed without any button
being pressed.
Press the “up” and “down” keys to display the descriptions
of any other faults that may be present.
FRI
18/05/2013 12:17
MENU
INFO SET
PLANT
HOT WATER TEMPERATURE
STATE
42
°C
For fault E041
If the pressure drops below the safety threshold of 0.3 bar the
boiler displays the fault code “E041 - WATER TRANSDUCER
LOAD THE SYSTEM” for a transitional time of 10 min during
which it is possible to open the external lling tap until the
pressure is between 1 and 1.5 bar.
E041
WATER TRANSDUCER
LOAD THE SYSTEM
b
If the pressure drops frequently, contact the Technical
Assistance Centre.
For fault E091
The boiler has an auto-diagnostic system which, based on
the total number of hours in certain operating conditions, can
signal the need to clean the primary heat exchanger. The
intervention of the Technical Assistance Centre is necessary.
Boiler faults list
ERROR
CODE
ERROR MESSAGE RED LED GREEN LED RED and GREEN
DESCRIPTION OF
ALARM TYPE
E010 ame lockout/ACF electronic fault ON nal
E011 extraneous ame
ashing
0.2 sec. on/0.2 off
temporary
E020 limit thermostat
ashing
0.5 sec. on/0.5 off
nal
E030 fan fault ON nal
E040 water transducer - check system water pressure ON nal
E041 water transducer - check system water pressure
ashing
0.5 sec. on/0.5 off
temporary
E042 water transducer fault ON nal
E060 domestic hot water probe fault
ashing
0.5 sec. on/0.5 off
temporary
E070
fault ow sensor
overtemperature ow sensor
ow/return sensor differential alarm
ON
temporary
nal
nal
E077 main zone water thermostat ON temporary
E080
fault return line probe
return line probe overtemperature
outlet/return line probe differential alarm
ON
temporary
nal
nal
E090
fault ue gases probe
ue gases overtemperature probe
ashing
0.5 sec. on/0.5 off
temporary
nal
E091 clean primary heat exchanger
ashing
0.5 sec. on/0.5 off
temporary

11
List of combustion faults
ERROR
CODE
ERROR MESSAGE
LED
RED
LED
GREEN
DESCRIPTION OF TYPE OF ALARM
E021 iono alarm ON
These are temporary alarms that if they occur 6 times in an hour they
become denitive; the alarm E097 is displayed and is followed by post-
purging for 45 seconds at the fan’s maximum speed.
It is not possible to release the alarm before the end of the post-purging
unless the boiler’s power supply is switched off.
E022 iono alarm ON
E023 iono alarm ON
E024 iono alarm ON
E067 iono alarm ON
E088 iono alarm ON
E097 iono alarm ON
E085 combustion fault/high CO ON
These are temporary alarms that if they occur 3 times in an hour they
become denitive; the last error to occur is displayed and is followed by a
post-purging of 5 minutes at the fan’s maximum speed.
It is not possible to release the alarm before the end of the post-purging
unless the boiler’s power supply is switched off.
E094 combustion fault/high CO ON
E095 combustion fault/high CO ON
E058 mains voltage fault ON
These are temporary faults that restrict the ignition cycle.
E065 current modulation alarm ON
E086 obstruction fumes alarm ON
Temporary fault reported during the post ventilation. It is maintained a post
ventilation of 5 min at maximum fan speed
Warning lights
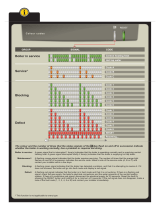
BOILER STATUS RED LED GREEN LED RED and GREEN NOTES
Power-on
ashing
0.5 sec. on/0.5 sec. off
The red and green LEDs come on at the same
time
Vent cycle
ashing
0.5 sec. on/1 sec. off
ashing
0.5 sec. on/1 sec. off
The red and green LEDs come sequentially one
at a time
OFF status
ashing
0.3 sec. on/0.5 sec. off
No heat request (stby)
ashing
0.3 sec. on/0.5 sec. off
Transitional ignition/
overtemperature
ashing
0.3 sec. on/0.5 sec. off
Presence of ame ON
Chimney sweep ON Only if the ame is present
Screed heater
ashing
1 sec. on/1 sec. off
ashing
1 sec. on/1 sec. off
The red and green LEDs come on alternately
-- water pressure low - verify the system pressure
ashing
0.5 sec. on/0.5 off
temporary
-- water pressure high check system
ashing
0.5 sec. on/0.5 off
temporary
-- boiler board communication lost ON temporary
-- BUS 485 communication lost ON temporary

12
3.1 HOW TO TOP-UP THE SYSTEM PRESSURE
The system pressure must be checked periodically to ensure
the correct operation of the boiler. The system pressure is
shown at the top of the LCD display or can be read on the
gauge located on the underside of the appliance. When the
boiler is at room temperature, the system pressure should be
approximately 1.0 bar.
If the pressure requires ‘topping-up’ use the following instructions
as a guide.
- Locate the lling valve connections (usually beneath the
boiler, see g. 1).
- Attach the lling loop to both connections.
- Open the lling valve slowly until you hear water entering the
system.
- Close the lling valve when the pressure gauge (on the boiler)
reads between 1 and 1.5 BAR.
- Remove the lling loop from the connections.
3.2 HOW TO RESET THE APPLIANCE
Reset function
In order to reset the boiler’s operation in the event of a fault,
it is necessary to access the fault description screen. If the
lockout is of a non-volatile type that requires a reset procedure,
this will be indicated on the screen, and can be carried out by
pressing the “ok” button on the REC10.
E020
LIMTIT THERMOSTAT
PRESS OK RESET
At this point, if the correct operating conditions have been
restored, the boiler will restart automatically.
If the attempts to reset the fault do not restore the boiler’s
functionality, please contact your local Customer Support
Service.
Up to a maximum of 3 reset attempts can be made using the
REC10, after which the machine must be disconnected from
the power supply to reset the number of attempts available.
b
Request the intervention of the Technical Assistance
Centre.
E020
LIMIT THERMOSTAT
REC10 ATTEMPTS EXHAUSTED
3. HOW TO...
3.3 HOW TO SHUT DOWN THE SYSTEM FOR
SHORT PERIODS
If necessary the boiler status can be switched to the OFF
position during short periods of absence.
BOILER
OFF
SUMMER
WINTER
Provided that the electrical and gas supplies remain switched
ON to the appliance, the following frost-protection functions
will remain active in order to protect the appliance:
- heating frost-protection: this function is activated if the
temperature measured by the flow sensor drops below 5°C.
A heat request is generated in this phase with the ignition of
the burner at minimum output, which is maintained until the
outlet water temperature reaches 35° C;
- DHW frost-protection: the function starts if the temperature
measured by the DHW sensor falls below 5°C. A heat request
is generated in this phase with the ignition of the burner at
minimum output, which is maintained until the outlet water
temperature reaches 55° C.
b
The activation of the FROST-PROTECTION function
is indicated by a scrolling message at the base of the
REC10 display.
- pump anti-blocking: the circulating pump is energised
for a 30-second period if it remains inactive for more than
24-hours.
3.4 HOW TO SHUT DOWN THE SYSTEM FOR
LONG PERIODS
If the boiler will not be in used for a prolonged period of time,
the following operations must be carried out:
- switch the boiler to OFF
- isolate the appliance from the gas and electricity supplies.
In this case, the frost-protection and anti-blocking systems
are deactivated. Drain both the heating and domestic water
systems to avoid any risk of freezing.
BOILER
OFF
SUMMER
WINTER
ON
OFF

13
4.1 WHAT IF I SUSPECT A GAS LEAK
If you suspect a gas leak, turn off the gas supply at the gas
meter and contact your installer or local gas supplier. If you
require further advice please contact your nearest Vokèra ofce.
4.2 WHAT IF I HAVE FREQUENTLY TO TOP-UP
THE SYSTEM
If the system regularly requires topping-up, it may be indicative
of a leak. Please contact your installer and ask him to inspect
the system.
4.3 WHAT IF THE APPLIANCE IS DUE ITS
ANNUAL SERVICE
Advice for tenants only
Your landlord should arrange for servicing.
Advice for homeowners
Please contact Vokèra Customer Service (0844 3910999 (UK)
or 056 7755057 (ROI) if you would prefer a Vokèra service
engineer or agent to service your appliance. Alternatively your
local GAS SAFE registered engineer may be able to service
the appliance for you.
4.4 WHAT IF I NEED TO CALL AN ENGINEER
If you think your boiler may have developed a fault, please contact
your installer or Vokèra Customer Services (0844 3910999 (UK)
or 056 7755057 (ROI) have all your details to hand including
full address and postcode, relevant contact numbers, and your
appliance log book. It is a requirement of your warranty terms
& conditions that your Benchmark logbook has been lled out
correctly and is fully up to date.
4. WHAT IF...
3.5 HOW TO CARE FOR THE APPLIANCE
To clean the outer casing use only a clean damp cloth. Do not
use any scourers or abrasive cleaners.
control
valve
temporary
connection
control
valve
supply pipe
double
check valve
ow/return
pipe
Fig. 1

14
All installers are asked to follow the Benchmark Scheme by
adhering to the Code of Practise, which can be obtained from
www.centralheating.co.uk.
The evolve has a new ACC (Active Combustion Control) system.
This new control system ensures functionality, efciency and
low emissions under any conditions.
The ACC system uses an ionisation sensor immersed in the
burner ame, whose information allows the control board to
operate the gas valve that regulates the fuel.
This sophisticated control system provides the auto-regulation
of the combustion, so there is no need for an initial calibration.
The ACC system is able to adapt the boiler to operate with
different gas compositions, different outlet pipes lengths and
different altitudes (within the specied design limits).
The ACC system can also perform an auto-diagnostic operation
that locks out the burner before the permitted upper emission
limit is exceeded.
The comprises a range of high-efciency combination boilers.
These appliances – by design – incorporate electronic ignition,
circulating pump, expansion vessel, safety valve, pressure
gauge and automatic by-pass.
The range is produced as room sealed, category II2H3P
appliances, suitable for internal wall mounting applications only.
Each appliance is provided with a fan powered ue outlet with
an annular co-axial combustion air intake that can be rotated
– horizontally – through 360 degrees for various horizontal or
vertical applications.
These appliances are designed for use with a sealed system
only; consequently they are not intended for use on open
vented systems.
This booklet is an integral part of the appliance. It is therefore
necessary to ensure that the booklet is handed to the person
responsible for the property in which the appliance is located/
installed. A replacement copy can be obtained online from the
Vokèra website - www.vokera.co.uk.
The boiler complies with basic requirements of the following
Directives:
- Regulation (EU) 2016/426;
- Yield directive: Article 7(2) and Annex III of directive 92/42/
EEC;
- Electromagnetic compatibility directive 2014/30/EU;
- Low-voltage directive 2014/35/EU;
- Directive 2009/125/EC Ecodesign for energy-using
appliances;
- Regulation (EU) 2017/1369 Energy labeling;
- Delegated Regulation (EU) No. 811/2013;
- Delegated Regulation (EU) No. 813/2013;
- Delegated Regulation (EU) No. 814/2013.
At the end of its life, the product should be not be disposed
of as solid urban waste, but rather it should be handed over
to a differentiated waste collection centre.
Fig. 2
General layout
1 Analogue pressure gauge
2 Drain valve
3 Diverter valve
4 DHW exchanger
5 Safety valve
6 Pump
7 Lower auto air vent
8 Return sensor
9 Burner
10 Inlet conveyor
11 Fan
12 Mixer
13 Ignition transformer
14 Top ue outlet
15 AAV hose
16 Upper auto air vent
17 Limit thermostat
18 Flow sensor
19 Ignition electrode
20 Detection electrode
21 Expansion vessel
22 Main heat exchanger
23 Pressure transducer
24 Injector
25 Gas valve
26 DHW sensor
27 Siphon
28 Flowmeter
R Heating return connection
F Heating ow connection
G Gas connection
O Hot water outlet
I Cold water inlet
INTRODUCTION
INSTALLATION AND SERVICING INSTRUCTIONS
R F G O I
24C - 28C 32C - 36C - 42C
R F G O I

15
1.1 PRINCIPLE COMPONENTS
• A fully integrated electronic control board featuring electronic
temperature control, anti-cycle control, pump over-run, self-
diagnostic fault indicator, full air/gas modulation
• Aluminium heat exchanger
• Electronic ignition with ame supervision
• Integral high-head pump
• Fan
• Expansion vessel
• Water owmeter
• Flue sensor
• Pressure transducer
• Safety valve
1.2 MODE OF OPERATION (at rest)
When the appliance is at rest and there are no requests for
heating or hot water, the following functions are active:
• frost-protection system: the frost-protection system protects
the appliance against the risk of frost damage both for CH
and DHW. For CH line, if the main temperature falls to 5°C,
the appliance will function on minimum power until the
temperature on main reaches 35°C.
Moreover if the DHW temperature falls to 5°C, the appliance
will function on minimum power until the temperature on main
reaches 55°C.
• anti-block function: the anti-block function enables the pump
and divertor valve actuator to be energised for short periods,
when the appliance has been inactive for more than 24-hours.
1.3 MODE OF OPERATION (Heating)
When there is a request for heat via the REC/or any external
control, the pump and fan are started, the fan speed will modulate
until the correct signal voltage is received at the control PCB.
At this point an ignition sequence is enabled.
Ignition is sensed by the electronic circuit to ensure ame stability
at the burner. Once successful ignition has been achieved, the
electronic circuitry increases the gas rate to 75% for a period of
15 minutes. Thereafter, the boiler’s output will either be increase
to maximum or modulate to suit the set requirement. When
the appliance reaches the desired temperature the burner will
shut down and the boiler will perform a three-minute anti-cycle
(timer delay).
When the request for heat has been satised the appliance
pump and fan may continue to operate to dissipate any residual
heat within the appliance.
1.4 MODE OF OPERATION (Hot water)
When there is a request for DHW via a hot water outlet or tap,
the pump and fan are started, the fan speed will modulate until
the correct signal voltage is received at the control PCB. At this
point an ignition sequence is enabled.
Ignition is sensed by the electronic circuit to ensure ame
stability at the burner. Once successful ignition has been
achieved, the electronic circuitry increases the gas rate to
maximum or will modulate output to stabilise the temperature.
In the event of the appliance exceeding the desired temperature
(set point) the burner will shut down until the temperature drops.
When the request for DHW has been satised the appliance
pump and fan may continue to operate to dissipate any residual
heat within the appliance.
SECTION 1 - DESIGN PRINCIPLES AND OPERATING SEQUENCE
1.5 SAFETY DEVICES
When the appliance is in use, safe operation is ensured by:
• a pressure transducer that monitors system water pressure
and will de-activate the pump, fan, and burner should the
system water pressure drop below the required minimum
value;
• fan speed sensor to ensure safe operation of the burner;
• a high limit thermostat that over-rides the temperature control
circuit to prevent or interrupt the operation of the burner;
• ame sensor that will shut down the burner when no ame
signal is detected and/or when incomplete combustion or
high emissions are detected;
• ue sensor that will shut down the burner if the ue threshold
temperature is exceeded;
• a safety valve which releases excess pressure from the
primary circuit.
NOTE
When the appliance is rst switched ON or when the electrical
supply is interrupted then restored, the appliance will enter a
short ‘purge’ cycle whereby the pump cycles ON & OFF for
approximately 2-minutes. Only when the ‘purge’ cycle has been
completed, will the appliance go through an ignition sequence.
Fig. 3
Expansion
vessel
Pump
Return
temperature
sensor
Main heat
exchanger
Lower
AAV
DHW heat
exchanger
Diverter
valve
Drain
valve
DHW
temperature
sensor
Flow temperature
sensor
Upper AAV
Automatic
by-pass
DHW
non return
valve
CH
return
CH
ow
DHW
inlet
DHW
outlet
Flow restrictor
DHW
owmeter
Analogue
pressure
gauge
Safety
valve
Pressure
transducer
High limit
thermostat

16
SECTION 2 - TECHNICAL DATA
2.1 Central Heating evolve 24C evolve 28C evolve 32C evolve 36C evolve 42C
Heat input (kW) 18.00 24.00 30.00 32.00 35.00
Maximum heat output (kW) 60/80°C 17.60 23.54 29.37 31.39 34.30
Minimum heat output (kW) 60/80°C 3.61 4.19 4.74 4.99 5.87
Maximum heat output (kW) 30/50°C 19.17 25.56 31.77 34.08 37.21
Minimum heat output (kW) 30/50°C 3.99 4.58 5.26 5.28 6.32
Heat input RANGE RATED (Qn) (kW) 18.00 24.00 30.00 32.00 35.00
Minimum heat input RANGE RATED (Qm) (kW) 6.70 4.30 4.90 5.10 6.00
Minimum working pressure 0.25-0.45 bar
Maximum working pressure 2.5 bar
Minimum ow rate 350 l/h
2.2 Domestic Hot Water
Heat input (kW) 26.00 30.00 34.60 36.00 42.00
Flow Rate: ΔT35°C 10.6 12.3 14.2 14.7 17.2
Maximum inlet pressure 8 bar
Minimum inlet pressure 0.2 bar
Minimum ow rate 2 l/min
Flow regulator 9 l/min 10 l/min 12 l/min 12 l/min 15 l/min
2.3 Gas Pressures
Inlet pressure (G20) 20.0 mbar 20.0 mbar 20.0 mbar 20.0 mbar 20.0 mbar
Heating maximum gas rate (m
3
/hr) 1.90 2.54 3.17 3.38 3.70
DHW maximum gas rate (m
3
/hr) 2.75 3.17 3.66 3.81 4.44
Minimum gas rate (m
3
/hr) 0.39 0.45 0.52 0.54 0.63
Injector size (mm) 4.3 4.3 5.2 6.0 6.0
2.4 Expansion Vessel
Capacity 8 litres 9 litres
Maximum system volume 74 litres
Pre-charge pressure 1 bar
2.5 Dimensions
Height (mm) 740
Width (mm) 420
Depth (mm) 275 350
Dry weight (kg) 35 36 38 39 39
2.6 Clearances required for maintenance
Sides 2mm*
Top 100mm** from casing or 25mm above ue elbow (whichever is applicable)**
Bottom 100mm^
Front 450mm^^
* It may be necessary to remove adjacent components if component removal/replacement is required
** Consideration should be given to providing reasonable clearance for the insertion of a FGA probe.
^ This can be reduced to 4mm if a removal panel enables the required 100mm
^^ When installed in a cupboard, this dimension can be reduced to 4mm provided that the required 450mm
is available when the door is opened/removed.
2.7 Connections
Flow & return 22mm
Gas 15mm
DHW hot & cold 15mm
Safety valve 15mm
Condense 21mm
2.8 Electrical
Power consumption CH (Watts) 54 65 79 93 85
Power consumption DHW (Watts) 86 89 94 103 110
Voltage (V/Hz) 230/50
Internal fuse 4 A T (for PCB) - 3.15A F (for connections block)
External fuse 3A
2.9 Flue Details (concentric 60-100)
Maximum horizontal ue length (60/100mm) 10.0 m 10.0 m 8.0 m 6.0 m 5.0 m
Maximum vertical ue length (60/100mm) 11.0 m 11.0 m 9.0 m 7.0 m 6.0 m
2.10Efciency
SEDBUK (%) 90.16 90.30 90.21 90.30 90.25
2.11 Emissions
CO2 @ maximum output (%) (*) 9.2 9.0 9.0 9.0 9.0
CO2 @ minimum output (%) (*) 9.1 8.9 9.1 8.8 9.1
CO @ maximum output (ppm) 140 150 220 160 220
CO @ minimum output (ppm) 10 10 20 20 15
NOx rating class 6 class 6 class 6 class 6 class 6

17
NOTE (if the outdoor temperature sensor or the control panel, or even both devices, are present in the boiler)
With reference to the Delegated Regulation (EU) No. 811/2013, the information in the table can be used for completing the product
data sheet and the labelling for room heating appliances, for mixed heating appliances, for all those appliances for enclosed space
heating, for temperature control devices and solar devices:
ADDED DEVICES CLASS BONUS
OUTDOOR TEMPERATURE SENSOR II 2%
CONTROL PANEL* V 3%
OUTDOOR TEMPERATURE SENSOR + CONTROL PANEL* VI 4%
(*) Set as ambient regulator
(*) CO2 tolerance= +0.6% -1%
2.12 Fan rotations
Number of fan rotations with slow ignition (rpm) 5,500 5,500 5,000 5,000 5,000
Maximum number of heating fan rotations (rpm) 5,600 6,500 6,900 8,000 7,000
Minimum number of heating fan rotations (rpm) 1,500 1,500 1,500 1,700 1,600
Maximum number of DHW fan rotations (rpm) 7,900 7,900 7,800 9,000 8,400
Minimum number of DHW fan rotations (rpm) 1,500 1,500 1,500 1,700 1,600
Parameter Symbol evolve
24C
evolve
28C
evolve
32C
evolve
36C
evolve
42C
Unit
Seasonal space heating energy efciency class - A A A A A -
Water heating energy efciency class - A A A A A -
Rated heat output Pnominal 18 24 29 31 34 kW
Seasonal space heating energy efciency ηs 94 94 94 94 94 %
Useful heat output
At rated heat output and high-temperature
regime (*) P4 17.6 23.5 29.4 31.4 34.3 kW
At 30% of rated heat output and low-temperature
regime (**) P1 5.9 7.9 9.8 10.5 11.5 kW
Usefulefciency
At rated heat output and high-temperature
regime (*) η4 88.2 88.3 88.1 88.2 88.2 %
At 30% of rated heat output and low-temperature
regime (**) η1 98.9 98.9 98.6 98.6 98.5 %
Auxiliary electricity consumption
At full load elmax 28.0 37.0 40.0 31.4 34.3 W
At part load elmin 14.0 14.0 14.0 10.5 11.5 W
In Stand-by mode PSB 3.0 3.0 3.0 3.0 3.0 W
Other parameters
Stand-by heat loss Pstby 42.0 42.0 37.0 46.0 42.0 W
Pilot ame energy consumption Pign - - - - - W
Annual energy consumption QHE 37 42 52 56 62 GJ
Sound power level, indoors LWA 51 53 54 52 51 dB
Emissions of nitrogen oxides NOx 46 33 41 48 44 mg/kWh
For combination heaters
Declared load prole XL XL XXL XXL XXL
Water heating energy efciency ηwh 87 87 85 86 85 %
Daily electricity consumption Qelec 0.152 0.148 0.165 0.159 0.167 kWh
Daily fuel consumption Qfuel 22.216 22.411 28.358 28.227 28.405 kWh
Annual electricity consumption AEC 33 32 36 35 37 kWh
Annual fuel consumption AFC 17 17 22 22 22 GJ
(*) High-temperature regime means 60 °C return temperature at heater inlet and 80 °C feed temperature at heater outlet.
(**) Low temperature means for condensing boilers 30 °C, for low-temperature boilers 37 °C and for other heaters 50 °C
return temperature (at heater inlet).

18
Key Location Minimum distance
A Below an opening (window, air-brick, etc.) 300 mm
B Above an opening (window, air-brick, etc.) 300 mm
C To the side of an opening (window, air-brick, etc.) 300 mm
D Below gutter, drain-pipe, etc. 25 mm
E Below eaves 25 mm
F Below balcony, car-port roof, etc. 25 mm
G To the side of a soil/drain-pipe, etc. 25 mm (60mm for 80/125mm)
H From internal/external corner 25 mm (60mm for 80/125mm)
I Above ground, roof, or balcony level 300 mm
J From a surface or boundary facing the terminal 600 mm*
K From a terminal facing a terminal 1200 mm
L From an opening in the car-port into the building 1200 mm
M Vertically from a terminal on the same wall 1500 mm
N Horizontally from a terminal on the same wall 300 mm
P From a structure to the side of the vertical terminal 300 mm
Q From the top of the vertical terminal to the roof ashing As determined by the xed collar
of the vertical terminal
R To the side of a boundary 300 mm
S To the side of an opening or window on a pitched roof 600 mm
T Below an opening or window on a pitched roof 2000 mm
V From a vertical terminal to an adjacent opening (window, air-brick, etc.) (call Vokera technical for advice)
W From a vertical terminal to an adjacent vertical terminal 300 mm (only if both terminals are the same height)
Fig. 4
2.13 PUMP DUTY
Fig. 4 shows the ow-rate available – after allowing for pressure loss through the appliance – for system requirements. When
using this graph, apply only the pressure loss of the system.
Flow rate (l/h)
Residual head (mbar)
0
50
100
150
200
250
300
350
400
450
500
550
600
0 100 200 300 400 500 600 700 800 900 1000 110 0 1200
Portata impianto (l/h)
Prevalenza (mbar)
Fig. 5
*The possibility that this may be deemed as causing a nuisance, should be considered

19
The REC10 is a fully functional UI (User Interface)
that acts as a visual reference for the appliance and
system status; and can also be used to view, input
and adjust relevant system parameters and functions.
The centre of the UI will normally display the current
operating temperature (according to the mode of
operation); however when the screensaver is active,
the current time will be displayed.
The value expressed in bar refers to the system’s
water pressure.
The top of the screen shows the information regarding
the current date and time, as well as the outdoor
temperature, if available.
On the left and right sides are displayed the icons
indicating the status of the system; their meaning is
as follows.
FRI
18/05/2013 12:17
MENU
INFO SET
PLANT
HOT WATER TEMPERATURE
STATE
42
°C
P
1.3
bar
LED
REC10
SECTION 3 - CONTROL PANEL (REC10)
This icon indicates that the OFF operating status mode has been set. Any ignition request is ignored except for the frost-protection function.
The pump anti-lock, 3-way valve and frost protection functions remain active.
This icon indicates that WINTER mode has been selected (HEATING function enabled). If a heating request from the main zone is in pro-
gress, the icon will be flashing.
This icon indicates that the circuit for domestic hot water production is enabled. When a domestic hot water request is in progress, the icon
flashes. The P at the top of the domestic hot water icon indicates that the boiler preheating function is enabled; the P when flashing indicates
that a preheating request is in progress.
When the “embedded clock ” is enabled this icon indicates that the system heating (main zone) is in AUTOMATIC mode (the management
of the heating requests follows the ON/OFF times that have been programmed).
If the heating function is not enabled during the current time frame, the icon will be crossed out.
When the “central heating programming timing” is enabled this icon indicates that the system heating (main zone) is in MANUAL mode (the
management of the heating requests does not follow what has been set with the programming timing, but it is always active).
OFF This icon indicates that the system (main zone) has been set to off (not active).
This icon indicates that the system is detecting the presence of a flame.
This icon indicates the presence of an anomaly, and is always flashing.
Pressing the keys
“up” and “down”
it is possible to choose
from among the following options:
• PLANT: the display will indicate the temperature of the
domestic hot water sensor rather than the flow sensor of
the boiler
• STATE/BOILER: enables access to choose the operating
mode of the appliance: OFF, Summer, Winter
• STATE/MAIN ZONE (if embedded clock disabled): enables
access to choose the operating mode (On or OFF) of the
main heating zone
• STATE/MAIN ZONE (if embedded clock is enabled):
enables access to choose operating mode of the embedded
clock (AUTO, MANUAL, OFF)
• SET: to view or adjust the heating or hot water setpoint
value or to enable or disable preheating
• INFO: to view the current values or status of the various
appliance inputs/sensors
• MENU: to access the system’s configuration menus
The configuration MENU is organised with a multi-access
level tree structure. With the “ok” key you can access the
selected submenu, with the
“up” and “down”
keys it is
possible to navigate through the submenus, while the “back”
key takes you back to the previous level.
An access level has been fixed for each submenu: USER level,
always available; TECHNICAL level, password protected.
Below is a summary of the MENU tree structure of the REC10.
b
Some of the information might not be available on the
REC10 depending on the access level, the status of the
machine or the system conguration.
LED
Light signal indicating the operating status of the boiler. Can be red or green (see specific paragraph)
REC10
Boiler control panel
Key area
ok= confirm
back= ret
urn to the previous screen
cancel selection
return to the main screen (press > 2 sec.)
up= allows you to choose between the options PLANT-STATE-SET-INFO-MENU and to
surf through the
submenus
scrolling upwards
down= allows you to choose between the options PLANT-STATE-SET-INFO-MENU and to
surfe through the
submenus
scrolling down

20
MENU
DEFAULT VALUE
MINIMUM
VALUE
MAXIMUM
VALUE
ACCESS LEVEL
NOTES
SET
VALUE
SETTINGS USER
TIME & DATE USER
LANGUAGE ITALIANO / ENGLISH USER
BACKLIGHT 5 min 1 min 15 min USER
T
I
ME SCHEDULE U
SER
MAIN
USER
Only if POR = 1
ZONE1
USER
Only if POR = 1
ZONE2
USER
Only if POR = 1
DHW USER
DHW HEAT PUMP USER
TECHNICAL INSTALLER
INSTALLATION INSTALLER
ZONES MANAGER INSTALLER
MODIFY ZONE MAIN MAIN / ZONE1 / ZONE2 INSTALLER
ACTUATION TYPE
ITRF05/AKM ITRF05/AKM BE16
INSTALLER
Only MAIN zone
REQUEST TYPE THERMOSTAT
THERMOSTAT / TEMPERATURE PROBE /
REC10 MASTER / REC10 SLAVE
INSTALLER
BE1
6
ADDRESS - - 1 6
INSTALLER
Only zones with
ACTUATION = BE16
HYDRAULIC CONF DIRECT ZONE DIRECT ZONE MIXING ZONE
INSTALLER
Only zones with ACTUATION = BE16
ZONE TYPE HIGH TEMP. HIGH TEMP. LOW TEMP. INSTALLER
MIN CH SET
20°C (AT)
20°C (BT)
20°C MAX CH SET INSTALLER
MAX CH SET
80,5°C (AT)
45°C (BT)
MIN CH SET
80,5°C (AT)
45°C
(BT)
INSTALLER
CHANGE NAME INSTALLER
PI - PROPORTIONAL 5 0 99
SERVICE
O
nl
y mixing zones with A
CT
UA
TION=BE16
PI - INTEGRAL 10 0 99
SERVICE
Only mixing zones with ACTUATION=BE16
VALVE RUN 120 sec 0 sec 240 sec
SERVICE
Only mixing zones with ACTUATION=BE16
CLOSING AT POWER ON 140 sec 0 sec 240 sec
SERVICE
Only mixing zones with ACTUATION=BE16
OUTLET OVER 55°C 0°C 100°C
SERVICE
Only BT zones with ACTUATION =BE16
OUTLET OVER TEST TIME 0min 0min 240min
SERVICE
Only BT zones with ACTUATION =BE16
OUTLET OVER WAIT TIME 2min VALVE RUN 240min
SERVICE
Only BT zones with ACTUATION =BE16
OUTLET OVER REST TIME 2min 0min 240min
SERVICE
O
nl
y
BT z
o
nes with ACTUATION =BE16
F
R
EEZE PROT TEMP 6°C -20°C 50°C
SERVICE
Only zones with ACTUATION = BE16
FREEZE PROT OFFSET ZONE 5°C 1°C 20°C
SERVICE
Only zones with ACTUATION = BE16
FREEZE PROT T EXT 10°C 0°C 100°C
SERVICE
Only zones with ACTUATION = BE16
POR
0 (1 if REC10
in the AMBIENT)
0 1 INSTALLER
ADD ZONE INSTALLER
DELETE ZONE INSTALLER
SENSOR CALIBRATION 0,0°C - 6,0°C 6,0°C INSTALLER
SYSTEM RESET INSTALLER
FACTORY SET
/