Page is loading ...

PLANAR LCD TV XP17WSA MANUAL www.planar.com

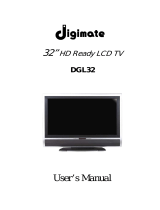
TM-17
User’s Manual
Thank you for using our product.
This manual explains the use of our TFT LCD product TM-17 and
important points. Please read through this manual before use and use
as instructed. Please save this manual for future reference.
.Built-in TV channel selector for TV viewing.【P18】
.Simultaneous display of PC and TV images.【P19】
.Connectable to PC’s analog RGB port and digital port.
.Built-in S-Video, Composite Video, and TV OUT.
.Built-in auto-adjust function for automatic adjustment of screen display.
【P17】
.Smoothing function enables display of smooth texts and graphics even if
image with resolution lower than 1280x768 pixels is magnified.【P11】
Use of Remote Control 2
Package Contents 3
Parts and Functions 4
Connecting to PC 7
Connecting to TV Antenna / Cable TV and AV System 10
Image Adjustment 13
TV Viewing 18
Display of TV or VCR Images on PC Screen 19
Product Care 19
Troubleshooting 20
Specifications 26
Compatible Modes
27
1

Use of Remote Control
This product comes with a remote control, which can be used to view TV and switch
channels. Please see below for names and functions of control buttons.
(Air+CATV)
[Tip] Please point the remote control at the receiver of LCD screen during use.
■ About the battery
The remote control in the package is not installed with batteries. Please open the
case on the back of remote and load the 2 AAA batteries before use.
※ Make sure to match the polarity of the battery (+ and -) when installing it.
When the batteries are used up, replace with AAA battery available on the
market.
2

Package Contents
Your TFT-LCD package should contain the following items. If
any item is missing, please contact your dealer.
● TFT-LCD……………………………………………1
Remote Control Receiver
Speakers
LCD Panel
Panel Controls
● Remote control ...................................................................................... 1
● Dry-cell battery (AAA) ............................................................................ 2
● Analog video cable (D-Sub 15 pin) ........................................................ 1
● Digital video cable (DVI 24 pin) ............................................................. 1
● AC power adapter.................................................................................. 1
● AC power cord ....................................................................................... 1
● Stereo audio cable (ψ3.5 jack).............................................................. 1
● USB cable.............................................................................................. 1
● Audio cable ............................................................................................ 1
● Jack conversion cable(ψ3.5 jackÅÆRCA pin jack) ............................. 1
● Video cable (RCA pin jack) .................................................................... 1
● User’s Manual........................................................................................ 1
※ Please follow any additional information enclosed in the package.
3

Parts and Functions
■ Front Panel
Control Symbol Function
Open the Menu
Execute
OSD MENU
.Access the OSD menus.
.Execute the selected option in OSD
menu.
Close (restore) OSD
menus
Mute the speakers
MUTE
EXIT
.Close the OSD menu.
.Restore to OSD main menu from
sub-menu.
.Mute the speakers when OSD menu is
not turned on.
Select adjustment item
Set value of adjusted item
Adjust volume
VOLUME
ef
.Move the highlighted option to the left.
.
A
djust speaker volume when OSD menu
is not opened.
Select adjustment item
Select channel
-
.Change the setting (down).
.Select TV channel (down).
Select adjustment item
Select channel
+
.Change the setting (up).
.Select TV channel (up).
Switch input INPUT Switch input. Please use remote control to
switch to PC or TV screen when PIP is on.
【P2】
(PC D-SUB, PC DVI-D, TV, Video1,
Video2)
Power Power On/Off.
4

■ Back
Handle
Connector Box
(Underneath the cover)
○
1
DC-IN
Connect the power cord.
○
2
DIGITAL
Connect the digital video cable (DVI 24pin).
○
3
ANALOG
Connect the analog video cable (D-sub15pin).
○
4
AUDIO-IN
Connect PC-Out using the attached audio cable.
○
5
Earphone
Connect the earphone.
○
6
USB Port (USB1.1; Type A)
Connect the USB equipment (mouse or keyboard).
○
7
USB Port (USB1.1; Type B)
Connect with PC using the attached USB cable.
5

■ Connector Box
TV-IN
S-VIDEO
VIDEO
AUDIO L
AUDIO R
VIDEO
AUDIO L
AUDIO R
AUDIO
VIDEO
○
1
TV-IN
Connect the antenna or cable TV.
○
2
S-VIDEO (S-Video In)
Connect the S-VIDEO cable.
○
3
VIDEO (Video-In)
Connect VCR cable.
(May be used as S-VIDEO as well. Use the [VIDEO] button
on the remote to switch input).
○
4
AUDIO L (Audio-In (Left))
Connect the stereo audio cable.
○
5
AUDIO R (Audio-In (Right))
Connect the stereo audio cable.
○
6
VIDEO (Video-In)
Connect the VCR cable.
○
7
AUDIO L (Audio-In (Left))
Connect the stereo audio cable.
○
8
AUDIO R (Audio-In (Right))
Connect the stereo audio cable.
○
9
AUDIO (TV Sound Out)
Connect the attached audio cable.
○
10
VIDEO (TV Image Out)
Connect the VCR cable.
6

Connecting to PC
Make sure the power of your PC is turned off before performing the following steps.
1. Remove the hinge cover on the back of LCD.
Push in the direction of arrow and
then pull towards you to remove the
cover.
2. Connect the attached LCD cables (analog or digital) to LCD.
Make sure to use PC-supported cables.
3. Connect the power cord to the LCD.
7

Watch the stand of LCD when installing the power cord.
Be careful that the sharp edges don’t cut your fingers.
Caution! Sharp!
4. Connect one end of AC power cord to AC adapter and the other end to the power
outlet.
5. Use the attached audio cable to connect the AUDIO-OUT of sound card to
AUDIO-IN of LCD.
6. Put the hinge cover back.
8

7. Connect the attached USB cable to
PC and LCD.
The connecting to PC is completed.
To connect the LCD to TV antenna or
VCR, please see the section of
“Connecting to TV Antenna and AV
System.”
8. Turn on the power of LCD and the power of PC.
When the LCD power is on, the power LED light is in green.
※ The power LED light is in orange and the screen does not have image under
the following conditions:
. When there is no image from the PC.
. When image signals transmitted are not supported by the LCD.
. When the LCD is in “suspend” mode.
The “suspend” mode may be removed when pressing any key of the keyboard or
moving the mouse.
9. During cable connection
Make sure the power of this product is off when connecting the LCD cables,
antenna or VCR cables. The screen display will become messed up if the cables
are connected under Power On state.
10. When not in use for a long duration
Do not leave the LCD in the state of no-signal (screen pitch dark) for a long period
of time. When in standby mode, the upper right corner of the screen will continue to
show the display mode (S-VIDEO, VIDEO 1 or VIDEO 2) and “residual image”
phenomenon might occur (※). If the LCD is not in use for a long duration, turn off
its power.
※ Residual image phenomenon means there is residue of previous image even
when other images are displayed.
9

Connecting to TV Antenna / Cable TV and AV System
1. Remove the side cover on the back of LCD.
2. Connect antenna or Cable TV coax wire to TV-IN.
3. Connect the AV equipment (VCR, DVD Player, etc.) to corresponding jacks
(S-VIDEO, VIDEO, AUDIO, etc.)
4. Put back the side cover.
The connection to TV antenna / Cable TV or AV system is completed.
10

About the Product
● This TFT-LCD monitor is made by precision technology. It is common to have
black spots (lack of pixels) or luminous spots on the panel. Such condition is not
a product defect or failure.
● About interfering stripes on the screen (moire pattern)
If the screen shows parallel adjoining streaks or latticed pattern in 2~3 colors, it is
called the moire pattern. It is the result of interference between luminous colors,
not a defect. When interfering stripes appear, adjust the image according to the
instructions in “When the screen shows interfering stripes/noise” to obtain
optimum image quality. 【P21】
● The recommended resolution of this product is 1280×768 pixels. Some graphic
cards do not support 1280×768 pixels. In such case, set the resolution at
1024x768 pixels, press the “Full Screen” button on remote to adjust to normal
display.
● If the LCD stands still for a long duration, there might be “residual image”
phenomenon even when other images are displayed.
To avoid this problem, use the screensaver in the operating system.
If residual image phenomenon has occurred, keeping the screen in white for a
long time might correct it.
● About the “smoothing” function
In situation where Full Screen display is set, the image
will be magnified when the resolution is less than 1280
×768 pixels. At this time, the product will automatically
fill the voids with neutral colors (smoothing) to allow
the display of smooth characters and graphics. As a
result, the characters or graphics might look spread out
or feathered. It is not a defect.
Also, if the black characters against white background
look blurred, adjust the contrast.【P14 , P15】
Examples
A
With Without
smoothing smoothing
● Power saving
To cut down power consumption, the power saving function will kick in
automatically if the computer is not in use for a period of time.
Once the product is in power saving state, the power LED will change to orange
color, the image will disappear and there is no sound output. Under the standby
mode, power consumed will be reduced to less than 3W.
To reactivate the screen, move the mouse or press any key on the keyboard.
※ Power saving mode is enabled only when it is set in the PC with built-in
DMPS(VESA) function.
11

● About digital connection
Digital connection to some computers, such as Macintosh may result in abnormal
display image. In such event, use analog connection.
● About images in TV/VCR mode
Some green noises might appear under the following circumstances. This is not
an image quality problem.
.When TV channel does not have image playing.
.When the VCR tape is being forwarded or rewound.
Note: Viewing the screen in dark environment or for a long period of time might
cause eye fatigue. We suggest viewing the screen in properly bright
environment and let your eyes rest from time to time.
12

Image Adjustment
Use OSD function to adjust the image display.
About OSD
The OSD (On Screen Display) control lets you adjust the image settings.
Adjustment can be made using the panel buttons or remote control.
■OSD Main Menu
Press the OSD MENU button (or MENU on
the remote). The initial OSD menu opened
is as shown on the right. The options are
indicated by icons.
Usee/f( or Å/Æ on the remote) to
highlight to desired Main Menu option.
Then press the OSD MENU (or MENU on
the remote) to open the sub-menu.
Basic
Color Sound Other
PIP
PC
1280X768 75Hz
Ver.1.21
Basic Setting
■OSD Sub-menu
When pressing OSD MENU (or MENU on
the remote) again in OSD Main Menu, the
following sub-menu as shown on the right
appears.
Use e/f (or Å/Æ on the remote) to
highlight the desired Sub-menu option.
Then use the -/+ buttons (or↓/↑ on the
remote) to adjust.
Basic
Color Sound Other
PIP
PC
1280X768 75Hz
Ver.1.21
Auto Adjust
Run
How to operate the OSD menu
1. Press the OSD MENU button (or MENU on the remote) to display the Main
Menu.
2. Usee/f buttons (or Å/Æ on the remote) to highlight the desired option.
Press OSD MENU button again (or MENU on the remote) to display the
selected sub-menu.
3. Use e/f buttons (or Å/Æ on the remote) to decide the option to be
adjusted. Then use -/+ buttons (or↓/↑on the remote) to change the setting.
4. Press MUTE EXIT (or EXIT on the remote) twice to close the menu window.
13

■ OSD Functions in PC Mode (Digital)
Menu Function Setting Range
Basic menus
Brightness Adjust the brightness of image. 0~100
Contrast Adjust the contrast of image. 0~100
Color
Color temperature
Adjust to give red or blue tone to white component
of the image; it may be done before printing or photo
retouch.
User/5700/
6500/9300/sRGB
Red (*1) Adjust the red color of image.
Green (*1) Adjust the green color of image.
Blue (*1) Adjust the blue color of image.
0~100
Sound
Volume Adjust speaker volume. 0~100
Treble Adjust the high frequency audio. -50~+50
Bass Adjust the low frequency audio. -50~+50
Balance Adjust the balance of left and right sound track. L~R
Mute Eliminate the sound. NO/YES
PC/PIP Select the PC sound or PIP sound. PC/PIP
Others
OSD language (*2) Select the display language. Japanese/English
OSD horizontal
position
OSD vertical
position
Adjust the display position of OSD window. 0~100
Smoothing Choose whether to activate the smoothing function. NO/YES
Zoom To magnify the image. NO/YES
Selection of WXGA
and XGA (*3)
Used when image display is abnormal during
resolution switch. Auto adjust in case of digital input.
Auto
Reset Return to the factory default settings. ---
PIP
PIP OFF/ON Select the OFF/ON of PIP window. OFF/ON
PIP size Select the size of PIP window. 0~100
PIP horizontal
position
PIP vertical position
Change the PIP window position. 0~100
PIP source Select the PIP video source. TV/SVideo/Video1/Video2
*1 Settable only when “User” is selected under “Color Temperature.”
*2 The language of OS or applications will not change.
*3 Digital input will activate the Auto Mode that will not allow the manual
selection of WXGA or XGA.
14

■ On Screen Display (OSD) Functions in PC Mode (Analog)
Menu Function Setting Range
Basic menus
Auto adjust
Automatically adjust the image position, phase and
clock.
---
Brightness Adjust the brightness of image. 0~100
Contrast Adjust the contrast of image. 0~100
Phase*(1)
Adjust the image when there is noise or fuzzy
characters.
0~100
Clock (*1) Adjust the image when moire pattern appears. 0~100
Horizontal position
Vertical position
Adjust the image position. 0~100
Color
Color temperature
Adjust to give red or blue tone to white component
of the image; it may be done before printing or photo
retouch.
User/5700/
6500/9300/sRGB
Red (*2) Adjust the red color of image.
Green (*2) Adjust the green color of image.
Blue (*2) Adjust the blue color of image.
0~100
Sound
Volume Adjust speaker volume. 0~100
Treble Adjust the high frequency audio. -50~+50
Bass Adjust the low frequency audio. -50~+50
Balance Adjust the balance of left and right sound track. L~R
Mute Eliminate the sound. NO/YES
PC/PIP Select the PC sound or PIP sound. PC/PIP
Others
OSD language (*3) Select the display language. Japanese/English
OSD horizontal
position
OSD vertical
position
Adjust the display position of OSD window. 0~100
Smoothing Choose whether to activate the smoothing function. NO/YES
Zoom To magnify the image. NO/YES
Selection of WXGA
and XGA
Used when image display is abnormal during
resolution switch. Auto adjust in case of digital input.
Auto
Reset Return to the factory default settings. ---
PIP
PIP OFF/ON Select the OFF/ON of PIP window. OFF/ON
PIP size Select the size of PIP window. 0~100
PIP horizontal
position
PIP vertical position
Change the PIP window position. 0~100
PIP source Select the PIP video source. TV/SVideo/Video1/Video2
15

*1 Use manual adjustment only when auto adjust does not bring
satisfactory results.
*2 Settable only when “User” is selected under “Color Temperature.”
*3 The language of OS or applications will not change.
About the「sRGB」option under color temperature
sRGB is a mode to reproduce the standard color specifications in different
computers or monitors.
The color displayed in the PC monitor is relative color. When monitor is
changed, the image color changes as well. For example, the
“yellow-green” might look like “yellow”, “light blue” or “green” due to the
settings of the monitor. To address this problem, this LCD has built-in
sRGB mode to display the color close to that of the actual image.
■ On Screen Display (OSD) Functions in TV Mode (VCR)
Menu Function Setting Range
Display settings
Brightness Adjust the brightness of screen. 0~100
Color Adjust the color of screen. -50~+50
Contrast Adjust the contrast of screen. 0~100
Sharpness Adjust when the profile of images are fuzzy. 0~100
Format Aspect Ratios
1:1
4:3
Full (16:9)
Stretch
Auto Program (*1) Set the channels automatically ---
Tuner Source Antenna / CATV Switching AIR / Cable
Initialize Return to the factory default settings. ---
Sound
Volume Adjust the speaker volume. 0~100
Treble Adjust the high frequency audio. -50~+50
Bass Adjust the low frequency audio. -50~+50
Balance Adjust the balance of left and right sound tracks. L~R
Mute Eliminate the sound. NO/YES
MTS (*1) Switch sound. MONO/Stereo/SAP
*1 Programmable only on TV screen.
16

Auto-Adjust (in case of analog connection only)
This product has built-in auto adjust function to obtain the best image display.
If the LCD has analog connection, perform auto adjust first.
※ No auto adjust is necessary in case of digital connection.
1. Turn on the power in the sequence of peripherals (including this product)
Æ computer.
2. Press the OSD MENU button.
OSD Main Menu is displayed.
3. Use e/f button to select the desired “basic setting”, then press OSD
MENU again.
4. Use e/f to select AUTO, then press + button.
The product will carry out auto adjust.
※ In case of Macintosh, boot the operating system and perform steps 2 ~
4 above after the screen display becomes still.
※ The auto adjust will take a few seconds, during which you won’t be able
to perform OSD function. If the effect of auto adjust is not satisfactory,
carry out manual adjustment.
17

TV Viewing
This product has built-in TV channel selector. You
can watch TV by connecting the antenna to the LCD.
Settings for TV Viewing
To watch TV, set the channels by performing the following steps:
1. Make sure antenna or cable TV is connected to TV-IN and then turn on the
LCD.
2. Press INPUT (or TV on the remote) to switch to TV mode.
3. Press OSD MENU button (or MENU on the remote) to display OSD Main
Menu.
4. Use e/f buttons (or Å/Æ on the remote) to highlight the “Display
Settings” option, then press OSD MENU (or MENU on the remote) again.
5. Use e/f buttons (or Å/Æ on the remote) to select “Auto Program” option,
then press + (or↑on the remote).
TV channels are set automatically.
Change Volume
1. Press e button (or ← on the remote) to display the volume setting menu.
2. Use -/+ buttons (or↓/↑ on the remote) to adjust volume.
Change Channel
Use -/+ (or↑↓on the remote) to change channels.
Use the numeric numbers 0-9 & 100 + to change to specific
channels
For channels 1-9
1. Push any number 1-9.
For channels 10-99
1. Push any two numbers 0-9.
For channels 100+
1. Push “100+” followed by two numbers 0-9.
18

Displaying TV or VCR Images on PC Screen
You can use PIP (Picture In Picture) function to show TV or VCR images on
PC screen.
Activate the PIP Function
Take the following steps to activate the PIP function:
1. Press INPUT button (or TV on the remote) to switch to TV mode.
2. Press OSD MENU button (or MENU on the remote) to display OSD Main
Menu.
3. Use e/f buttons (or Å/Æ on the remote) to select “PIP” option. Then
press OSD MENU button (or MENU on the remote) again.
4. Use e/f button (or Å/Æ on the remote) to select [Turn picture ON/OFF],
then press + button (or↑on the remote).
A small picture is displayed on the PC screen.
Change the PIP settings
1. Press OSD MENU (or MENU on the remote) to display OSD Main Menu.
2. Usee/f button (or Å/Æ on the remote) to select PIP option, then press
OSD MENU button (or MENU on the remote).
3. Use e/f button (or Å/Æ on the remote) to highlight the option to be
changed, then use -/+ buttons (or↓/↑ on the remote) to change the
setting.
Product Care
Precaution
The panel of this product has a special coating. Use cleaning cloth
when cleaning the panel surface. Use of neutral detergent or
detergent bought on the market might cause the peeling of coating.
■ Before cleaning, disconnect the power plug from the AC outlet.
■ Perform cleaning on a stable desktop or flat floor.
19
/