Page is loading ...

TECHNICAL
MANUAL
This manual should remain with the unit.
R-200A Digital Controller
A new standard of reliability
R-200B Digital Controller

IMPORTANT SAFETY INSTRUCTIONS
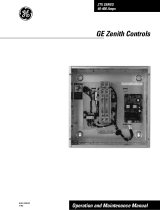
R-panel Technical Manual
SAVE THESE INSTRUCTIONS – The manufacturer suggests that these rules for safe operation be copied and posted in
potential hazard areas. Safety should be stressed to all operators and potential operators of this equipment.
Study these SAFETY RULES carefully before installing, operating,
or servicing this equipment. Become familiar with this manual and
all literature pertaining to the generator set and related equipment.
This equipment can operate safely, efficiently, and reliably only if
it is properly installed, operated, and maintained. Many accidents
are caused by failing to follow simple and fundamental rules or
precautions.
The manufacturer cannot anticipate every possible circumstance
that might involve a hazard. The warnings in this manual, and
on tags and decals affixed to the equipment, are, therefore, not
all-inclusive. If using a procedure, work method, or operating
technique the manufacturer does not specifically recommend,
ensure that it is safe for others. Also make sure the procedure,
work method, or operating technique utilized does not render the
equipment unsafe.
GENERAL HAZARDS
For safety reasons, the manufacturer recommends that this •
equipment be installed and serviced by an Authorized Service
Dealer or other qualified electrician or installation technician
who is familiar with applicable codes, standards, and regula-
tions. The operator also must comply with all such codes,
standards, and regulations.
When working on this equipment, remain alert at all times. •
Never work on the equipment when physically or mentally
fatigued.
Inspect the equipment regularly, and promptly repair or replace •
all worn, damaged or defective parts, using only factory-
approved parts.
Before performing any maintenance on the generator or any •
related equipment, disconnect the generator’s battery cables
and remove panel fuse to prevent accidental startup. Disconnect
the cable from the battery post, indicated by a NEGATIVE, NEG,
or (–) first. Reconnect that cable last.
ELECTRICAL HAZARDS
Generators produce dangerous electrical voltages and can •
cause fatal electrical shock. Avoid contact with bare wires,
terminals, connections, etc., while the generator and related
equipment are running. Ensure all appropriate covers, guards,
and barriers are in place before operating the equipment. If
working around an operating unit, stand on an insulated, dry
surface to reduce potential shock hazards.
Do not handle any kind of electrical device while stand-•
ing in water, while barefoot, or while hands or feet are wet.
DANGEROUS ELECTRICAL SHOCK MAY RESULT.
If people must stand on metal or concrete while installing, •
operating, servicing, adjusting, or repairing this equipment,
place insulative mats over a dry wooden platform. Work on the
equipment only while standing on such insulative mats.
Wire gauge sizes of electrical wiring, cables, and cord sets •
must be adequate to handle the maximum electrical current
(amperage) to which they will be subjected to.
Before installing or servicing this equipment, make sure that all •
power voltage supplies are positively turned off at their source.
Failure to do so will result in hazardous and possibly fatal electri-
cal shock.
When installed with an automatic transfer switch, the genera-•
tor may crank and start anytime, without warning. To prevent
injuries caused by sudden start-up, disable the generator’s
automatic start circuit before working on, or around, the unit.
Then, place a “Do Not Operate” tag on the generator control
panel and on the transfer switch.
In case of an accident caused by electric shock, immediately •
shut down the source of electrical power. If this is not pos-
sible, attempt to free the victim from the live conductor. AVOID
DIRECT CONTACT WITH THE VICTIM. Use a nonconducting
implement, such as, a rope or board, to free the victim from the
live conductor. If the victim is unconscious, apply first aid and
get immediate medical help.
Never wear jewelry when working on this equipment. Jewelry •
can conduct electricity, resulting in electric shock, or may get
caught in moving components, causing injury.
FIRE HAZARDS
For fire safety, the generator and related equipment must be •
installed and maintained properly. Installation always must
comply with applicable codes, standards, laws, and regula-
tions. Adhere strictly to local, state, and national electrical
and building codes. Comply with regulations the Occupational
Safety and Health Administration (OSHA) has established. Also,
ensure that the equipment is installed in accordance with the
manufacturer’s instructions and recommendations. Following
proper installation, do nothing that might alter a safe installation
and render the unit in noncompliance with the aforementioned
codes, standards, laws, and regulations.

Table of Contents
R-panel Technical Manual
1
Safety Rules ................................. Inside Front Cover
Table of Contents .......................................................1
General Information ...................................................2
Introduction ..............................................................................2
Control Board Dip Switch & Jumper Settings .............................2
Generator Operation ..................................................................3
Utility Failure .............................................................................3
Manual Mode ........................................................................3
Auto Mode ............................................................................3
Exercise Mode .......................................................................3
Utility Restored .........................................................................3
Initial Cranking ..........................................................................5
Active Alarm .............................................................................5
Re-crank ...................................................................................5
Normal Exercise Mode ..............................................................5
Low Speed Exercise ..................................................................5
Auto Start .................................................................................6
Manual Start .............................................................................6
System Ready (Green LED Indicator) ........................................6
Low Fuel Pressure (Yellow LED Indicator) ..................................6
Low Battery (Red LED Indicator) ...............................................6
Low Oil Pressure (Red LED Indicator) .......................................6
High Coolant Temp (Red LED Indicator).....................................6
Low Coolant Level (Flashing Red
High Coolant Temp LED Indicator) .........................................6
Overspeed (Red LED Indicator) .................................................7
RPM Signal Failureb (Flashing Red
Overspeed Indicator) ..............................................................7
RPM Signal Failure During Cranking .......................................7
RPM Signal Failure During Running ........................................7
Overcrank (Red LED Indicator) ..................................................7
Ignition Module Fault (Flashing Red
Overcrank Indicator) ..............................................................7
Invalid Dip Switch Setting (All Red LED's On) ............................7
Alarm Cancel ............................................................................7
Automatic Transfer Switch (ATS Mode) .....................................7
Engineered Transfer Switch (2-wire Start
GTS Mode) ............................................................................8
Voltage Regulator Adjustment ..................................................10
R-200B J1 Connector (23 Pin,
Gray=1800 rpm, White=3600 rpm) ................................10
R-200B J2 Connector (14 Pin White) ..................................10
2.5A Battery Charger ..............................................................10
Hourmeter ..............................................................................11
2.4L Ignition Module Description .............................................11
Fuel Select Connector ..........................................................11
Diagnostic Blink Patterns (Red LED
Located on the Ignition Control Board ...............................11
Notes .........................................................................12
Table of Contents

INTRODUCTION
The R-200B Controller incorporates the generator control circuitry,
and the interface circuitry to an external governor driver. Unlike
other versions of the R-series controller, the R-200B requires an
external ignition coil driver module. The module is designed to
provide independent ignition coil drive for each cylinder, regardless
of engine size. See the generator manual for details.
The R-200B Controller can control a:
4-cylinder, 2.4L, 1800 rpm or 3600 rpm engine•
6-cylinder, 4.2L, 1800 rpm engine•
The R-200B controller will monitor the utility voltage to determine
if stand-by power is required. Should the utility voltage fail, the
unit will start and run, detaching from the utility and supplying the
customer load from the generator.
These generators are field configurable for either LP vapor or
Natural Gas (NG). See the generator manual for details.
The output frequency of the generator can be set to either 50 Hz
or 60 Hz. This is accomplished via a DIP switch on the controller
PCB. The generator output rating is lower for 50 Hz. The setting
should be set and verified at installation and not changed after that
time.
CONTROL BOARD DIP SWITCH
SETTINGS
The Switch "ON" position location is marked on the DIP switch
housing (see Figure 1). To activate the DIP Switch settings place
the AUTO/OFF/MANUAL switch in the OFF Mode, make the DIP
switch changes and then push and hold the Set Exercise Switch
for five seconds.
DIP Switch Position 1: Selects the generator output frequency.
When OFF, standard 60 Hz operation is selected. When ON, 50 Hz
is selected if the generator is capable.
DIP Switch Position 2: Selects the type of transfer switch to be
used with the generator. When an "HS" or RTS-type transfer switch
is used (ATS Mode) this DIP Switch should be in the OFF Position.
When a W-type transfer switch is used (GTS Mode) the generator
2-wire start inputs can be used to control the generator operation.
The 2-wire start inputs are labeled as 178 and 183 on the wiring
terminals inside the generator's customer connection panel.
DIP Switch Position 3: Selects the engine operating speed in
exercise mode.
DIP Switch Position 4: Selects the generator fuel type. When OFF,
the generator should be using LP vapor fuel. When ON, natural gas
fuel should be used.
DIP Switch Position 5: Reserved for future use. The position of
this DIP switch does not affect generator operation.
DIP Switch Position 6: Selects the alternator kW rating. When
ON, 36kW turbocharged is selected for 1800 rpm and 60kW tur-
bocharged is selected for 3600 rpm. When OFF, 22kW or 27kW is
selected for 1800 rpm and 45kW is selected for 3600 rpm.
DIP Switch Position 7: This switch operates for 1800 rpm only.
When ON, 4.2L displacement is selected. When OFF, 2.4L dis-
placement is selected. For 3600 rpm, this switch has no effect, it
is unused.
DIP Switch Position 8: Reserved for future use. The position of
this DIP switch does not affect generator operation.
Switch OFF Switch ON
Position 1 60 Hz 50 Hz (where applicable)
Position 2 ATS Mode GTS Mode
Position 3 Low Speed Exercise Normal Speed Exercise
Position 4 LP Vapor Fuel Natural Gas Fuel
Position 5 Reserved Reserved
Position 6 22/27kW (1800 rpm)
45kW (3600 rpm)
36kW Turbo (1800 rpm)
60kW Turbo (3600 rpm)
Position 7 2.4L (1800 rpm) 4.2L (1800 rpm)
Position 8 Reserved Reserved
Figure 1 — Dip Switch Settings
S2
ON
8 7 6 5 4 3 2 1
DIP
SWITCH
U6
S1
J5
J1
J2
C13C14C15
RL1
S2
U12
POS OFF ON DESCRIPTION
1
2
3
4
5
6
7
8
22/27/45kW
AT S
LOW SPD
GTS
NORMAL
36/60kW
RESERVED
kW RATING
EXERCISE MODE
ENGINE SELECT FOR 1800 RPM
FUEL TYPE
TRANSFER SW. MODE
2.4L 4.2L
60 Hz
50 Hz
FREQUENCY
RESERVED
S1 Switch Settings
LP NG
NOTE:
DIP switch S2 on the PCB has no function.
If the DIP switch settings are not set correctly,
the generator engine may run rough, not start or
not provide rated power.
LED Indicators visible through front panel (see Table 1 and Figure
2).
General Information
R-panel Technical Manual
2

3
Table 1
System Ready Green LED•
Low Fuel Pressure Yellow LED•
Low Battery Red LED•
Low Oil Pressure Red LED•
Hi Coolant Temp/Low Coolant Level Red LED•
Over Speed/RPM Sensor Loss Red LED•
Over Crank Red LED•
Figure 2 — LED Indicators on Front Panel
OVERCRANK
OVERSPEED
LOW COOLANT LEVEL
HI COOLANT TEMPERATURE
LOW OIL PRESSURE
LOW BATTERY
LOW FUEL PRESSURE
SYSTEM READY
GENERATOR OPERATION
The R-200B controller monitors the front panel switch position and
reads the DIP switch position settings when the control board is
initially powered-up.
With the switch In the OFF position, the controller exercise timer
will be keeping time; the controller will also be monitoring the bat-
tery voltage and low fuel pressure sensor.
In the MANUAL position the controller will start and run the gen-
erator.
In the AUTO position the controller will go into a "standby" mode,
where the controller will monitor the utility voltage and the exercise
timer, and determine if the generator needs to be started and the
load transferred.
Battery voltage is continuously monitored and a warning LED is
lit if the battery voltage drops below approximately 12.2 volts for
longer than one (1) minute. The LED will turn off when the battery
voltage goes back above approximately 12.5 volts.
If the battery voltage drops below 6V during cranking, or 8V when
the generator is running, the low battery LED will stay lit.
While starting and running the engine, the controller will monitor
the engine condition and shut the engine down on;
Over Crank•
Over Speed•
High Coolant Temperature•
Low Coolant Level•
Low Oil Pressure•
Engine Speed Signal Loss/RPM Sensor Loss (the overspeed •
LED flashes to indicate this fault)
Dead Battery (battery voltage < 6V during cranking or 8V when •
the generator is running)
Ignition Module Fault•
UTILITY FAILURE
When the utility fails, a 15 second timer will start. If the utility is still
gone when the timer expires the engine will crank and start. Once
started a 10 second engine warm-up timer will be initiated. When
the warm-up timer expires, the R-200B controller will transfer the
load to the generator (ATS Mode). The transfer of load when the
generator is running is dependent upon the operating conditions
as follows:
MANUAL MODE
When utility is present the unit will start and run, but not transfer
to standby. If running in standby (utility is lost) and utility returns
above 80% of nominal for > 15 seconds, the unit will transfer
to Utility and continue to run until the switch is turned OFF. If the
utility drops below 60% of nominal for > 15 seconds the unit will
transfer to standby.
AUTO MODE
If utility is present the unit will not run or transfer. If the utility volt-
age drops below 60% of nominal for > 15 seconds, the unit will
start, run and transfer to standby (after the 10 second warm-up).
When utility returns and voltage is > 80% of nominal for > 15
seconds, the unit will transfer to utility, and will stop the engine
after a one minute cool-down.
EXERCISE MODE
The unit will not exercise if the generator is already running (in
manual or auto mode). The generator will only transfer if the utility
fails during the exercise period for >15 seconds, and the switch
is in the AUTO mode above.
UTILITY RESTORED
When the utility returns, a 15 second timer will start. At the
completion of this time, if the utility supply has been above 80%
of nominal voltage for the previous 15 seconds, the control will
transfer the load back to the utility. When the load is transferred a
one (1) minute cool down timer will start, after which the engine
will be shutdown.
INITIAL CRANKING
The initial crank cycle will be a 15 second crank followed by a
seven (7) second rest. This will be followed by 5 additional cycles
of seven (7) second cranks followed by seven (7) second rests.
If the engine still fails to start, the overcrank LED will be illumi-
nated.
Based on the above, the maximum number of engine crank events
is six (6), which is approximately 90 seconds, prior to illuminating
the overcrank LED.
ACTIVE ALARM
Low Oil Pressure, High Coolant Temp, Low Coolant Level,
Overspeed, Overcrank, Engine Speed Signal Loss and a Dead
Battery indication will all be latched shutdowns. In the event one of
these conditions occurs, the unit will be shut down, the appropri-
ate LED will be illuminated, and the unit will not start again without
manual intervention (see Re-Crank).
General Information
R-panel Technical Manual

4
General Information
R-panel Technical Manual
Switch Position
Condition System Low Low Low High Over Over Manual Auto Off
Ready Fuel Bat Oil Temp Speed Crank
Generator Switch is OFF @ X OFF OFF OFF OFF O
in the OFF Mode
System Ready for ON @ X OFF OFF OFF OFF O
Automatic Start
Generator Switch is OFF @ X OFF OFF OFF OFF O
in the MANUAL Mode
Weekly Exerciser X @ Flashing Flashing Flashing Flashing Flashing O O O
is not Set (Note A) (---------------------------------------1 sec rate -------------------------------------)
Battery Voltage <12.2V X @ ON O O O
for > 1 minute (Non-Latching)
Battery Voltage <8V OFF @ ON O O
Unit Shutdown due OFF @ X ON O O
To Low Oil Pressure
Unit Shutdown due OFF @ X ON O O
To High Coolant Temp
Unit Shutdown due OFF @ X ON O O
To Engine Overspeed
Unit Failed to Start OFF @ X ON O O
During it's Crank Cycle
Utility Voltage is Flashing @ X O O
< 60% of Nominal 1 sec rate
Unit Shutdown due OFF @ X Flashing O O
To Low Coolant Level
Engine Speed Signal OFF @ X Flashing O O
Fault/RPM Signal Loss
Unit Shutdown due to OFF @ X Flashing O O
Ignition Module Fault
Control Board is Flashing @ X O O O
In GTS Mode 5 sec ON, 1 sec OFF
DIP Switch #6 & #7 OFF @ ON ON ON ON ON O O O
not set correctly
@ = Low Fuel Pressure is a Yellow LED and will be ON when fuel pressure is less than 5 inches Water Column
X = indicates that the LED can be ON or OFF depending on the Operating Mode (i.e. Manual, OFF or Auto)
Note A: a RED LED fault indication has priority over the flashing LED's used to indicate exercise time not set

5
RE-CRANK
If an engine speed signal failure occurs while the generator is
running the engine will shutdown and then attempt a re-crank. A
maximum of two re-cranks will be attempted after which the over-
crank LED will be set. If the engine speed signal failure occurred
during the engine exercise mode the exercise timer will continue
from where it was at the start of the re-crank and is not reset.
NORMAL EXERCISE MODE
To select this mode, place DIP switch position 3 in the ON posi-
tion.
In Normal Exercise Mode the generators will exercise at their nor-
mal running speed.
The R-200B controller will start and run the generator once every
seven (7) days for approximately 12 minutes. If the utility fails
during the exercise period, this exercise period is aborted and
the R-200B Controller transfers the load to the generator output,
assumes automatic operation and continues to run until the utility
is returned.
The weekly exercise cycle is set as follows:
1. Place the AUTO/OFF/MANUAL switch in the AUTO position.
2. Press and hold the "Set Exercise Time " switch for five (5)
seconds and then release.
At this time all five (5) red LED's will flash for 10 seconds, then
the engine will start and run for it's 12 minute exercise period,
then shut down. The generator will now start and run each week
at approximately the same time.
If battery power to the R-200B Controller is lost, the weekly exer-
cise time setting will be lost. This is indicated by all five (5) red
LED's continually flashing in ATS mode. In this state the generator
will still start and run in MANUAL mode, or automatically start and
run if utility voltage is lost while in AUTO mode, but it will NOT
perform a weekly exercise cycle.
In the event of a failure while running in this mode, the five (5) red
LED's will stop flashing, the individual fault LED will turn on and the
engine will be shut down. Once the AUTO/OFF/MANUAL switch is
switched to OFF, the individual fault LED will turn off and the five
(5) red LED's will begin flashing to show that the exercise mode
has not yet been set.
LOW SPEED EXERCISE
To select this mode place DIP switch position 3 in the OFF posi-
tion.
In Low Speed Exercise mode the normal speed 3600 rpm genera-
tors will exercise at 1800 rpm. The normal 1800 rpm generators
will exercise at 1400 rpm in this mode.
If the utility fails during the low speed exercise period, a 10 second
timer will start. If the utility returns to a normal operating level, dur-
ing this 10 second time interval the low speed exercise operation
will continue. If the utility is still not present (i.e. utility voltage less
than 60% of nominal) when the above 10 second timer expires
then the low speed exercise mode is terminated and the engine
will ramp up to its normal running speed within five (5) seconds.
If the utility returns during the five (5) second ramp-up period the
generator will terminate the exercise mode. If the utility is still not
present, once the generator is up to its normal running speed, then
the controller will transfer the load to the generator. When the utility
returns the generator will shutdown.
If battery power to the R-200B Controller is lost, the weekly exer-
cise time setting will be lost. This is indicated by all 5 red LED's
continually flashing in ATS mode. In this state the generator will still
start and run in MANUAL mode, or automatically start and run if
utility voltage is lost while in AUTO mode, but it will NOT perform
a weekly exercise cycle.
In the event of a failure while running in this mode, the five (5) red
LED's will stop flashing, the individual fault LED will turn on and the
engine will be shut down. Once the AUTO/OFF/MANUAL switch is
switched to OFF, the individual fault LED will turn off and the five
(5) red LED's will begin flashing to show that the exercise mode
has not yet been set.
AUTO START
This unit is designed to automatically start in the event of a utility
failure. A utility failure is defined as the utility voltage being less
than approximately 60% of nominal, while the utility is considered
good when it is restored to approximately 80% of its nominal
value.
If the generator is already running under exercise when an auto
start is required, it will simply transfer the load after a 15 second
delay and then switch to auto operation.
DANGER
With the switch set to AUTO, the engine can
crank and start suddenly without warning.
Such automatic start up normally occurs when
utility source voltage drops below a pre-set
level. To prevent possible injury that might be
caused by such sudden starts, set the AUTO/
OFF/MANUAL switch to OFF and remove the
NEGATIVE battery cable from the battery before
working on or around the unit. Then, place a
“DO NOT OPERATE” tag on the control console.
MANUAL START
Allows the user to start and run the generator manually. Transfer
of the load to the generator will occur if the utility is lost while the
engine is running in the manual mode.
SYSTEM READY (GREEN LED
INDICATOR)
Is a positive status indicator and dependent upon the following
conditions being true:
1. Switch in the AUTO position.
2. No other warning indicator present.
3. Controller is functional.
General Information
R-panel Technical Manual

6
General Information
R-panel Technical Manual
The System Ready LED will also indicate if utility voltage is present
at the control board. The system ready LED will flash every second
(at a 0.5 second ON and a 0.5 second OFF rate) when utility volt-
age is not present at the control board when the switch is in either
the AUTO or MANUAL position. This function is ONLY available
with DIP Switch Position 2 in the OFF position (ATS application).
The system ready LED will also indicate if the generator is in the
GTS Mode (i.e. DIP Switch Position 2 in the ON Position). The
system ready LED will flash at a five (5) seconds ON and one (1)
second OFF rate in GTS Mode.
LOW FUEL PRESSURE (YELLOW LED
INDICATOR)
The yellow low fuel pressure LED will turn ON if the fuel supply
pressure drops below approximately five (5) inches water column
(i.e. occurs when the low fuel pressure sensing switch on the fuel
regulator opens). This is a non-latched fault (visual LED warning
only) and does not trigger the controller alarm output. Low fuel
pressure sensing is active in all generator operating modes (i.e.
MANUAL, OFF and AUTO).
LOW BATTERY (RED LED INDICATOR)
The R-200B controller continually monitors the battery voltage
and turns on the low battery LED if the battery voltage falls below
approximately 12.2VDC for one minute. A low battery voltage is a
non-latching alarm and will not shut down the engine, however, it
is a possible indication of a potential issue with the battery or bat-
tery charger and should be investigated.
The low battery LED will automatically turn off if the battery voltage
rises above approximately 12.5VDC. If the engine is running when
the low battery condition occurs, the engine will continue to run
as long as possible.
If the battery voltage drops below 6V at any time during cranking,
or 8V when the generator is running, the crank cycle will be termi-
nated and the low battery LED will remain lit. This is a latched fault
and will shut down the engine.
LOW OIL PRESSURE (RED LED
INDICATOR)
Occurs if the oil pressure switch closes while the engine is running
after the 10 second hold off timer expires. This is a latched fault
and will shutdown the engine.
HIGH COOLANT TEMP (RED LED
INDICATOR)
Occurs if the high coolant temp switch closes. Checks are made
after the 10 second hold off timer expires. This is a latched fault
and will shutdown the engine.
LOW COOLANT LEVEL (FLASHING
RED HIGH COOLANT TEMP LED
INDICATOR)
Occurs if the coolant level is low. Checks are made after the 10
second hold off timer expires. This is a latched fault and will shut-
down the engine.
OVERSPEED (RED LED INDICATOR)
An overspeed shutdown will occur if the engine speed is greater
than 4300 rpm for a 3600 rpm engine; 2160 rpm for an 1800 rpm
engine; 2250 rpm for an 1800 rpm engine, for three (3) seconds.
An overspeed condition will shutdown the engine and activate the
over speed LED. An immediate overspeed shutdown will occur
if the engine speed is greater than 4500 rpm for a 3600 rpm
engine.
RPM SIGNAL FAILURE (FLASHING
RED OVERSPEED INDICATOR)
If the R-200B controller does not receive a signal from the engine
flywheel sensor, the R-200B controller cannot maintain the genera-
tor output frequency or monitor for an overspeed condition. If this
signal is lost the R-200B controller will shut down the engine as
follows:
RPM SIGNAL FAILURE DURING CRANKING
The engine control board (R-200B controller) will monitor the
engine speed signal during engine cranking. If the control board
does not see a valid signal within the first four seconds of each
crank cycle it will stop the crank cycle, lock out on a shut down
fault and flash the overspeed LED.
RPM SIGNAL FAILURE DURING RUNNING
Running mode is handled differently because there is always the
possibility the engine could slow down or stop running due to a
temporary overload. To avoid shutting down and latching out on a
temporary problem the following is done. If the engine is up and
running, and the control board stops receiving a valid engine speed
input signal it will respond as follows:
1. It will close the throttle.
2. It will shut down the engine by turning off the fuel supply.
3. It will wait for 15 seconds to ensure the engine has stopped.
4. It will then energize the starter and monitor the engine speed
signal.
A. If the control board does not see the engine speed signal
it will stop the crank cycle, lock out on fault, and flash the
overspeed LED.
B. If the control board does see the engine speed input signal
during cranking it will start and run the engine normally. If the
engine speed signal is again lost while running it will repeat
the above procedure one more time.
C. If the failure should repeat a third time, the control board will
shut down the engine, lock out on fault, and flash the over
speed LED.

7
OVERCRANK (RED LED INDICATOR)
Occurs if the engine has not started within the total 90 second
crank cycle. This is a latched fault and will shut down the engine.
IGNITION MODULE FAULT (FLASHING
RED OVERCRANK INDICATOR)
If the Ignition Module detects a fault, this indicator will flash and the
engine will be shut down.
INVALID DIP SWITCH SETTING
(ALL RED LED’S ON)
All five (5) RED LED’s on the front panel will be ON all the time if
DIP switch positions 6 and 7 are both ON for an 1800 rpm unit.
ALARM CANCEL
When the generator is shut down on a latched fault or latching
alarm, the AUTO/OFF/MANUAL switch must be set to the OFF
position to turn off the corresponding fault LED. Prior to mov-
ing the switch to the OFF position, record which LEDs are ON or
FLASHING and the date on the back cover of this manual.
AUTOMATIC TRANSFER SWITCH (ATS
MODE)
When this generator, along with an RTS-type or HS-type automatic
transfer switch has been installed and connected, a circuit board in
the generator control panel constantly monitors the utility voltage
and controls the operation of the transfer switch.
To implement this mode of operation, Position 2 of the eight-
position DIP switch, which is located on the generator circuit board
(see Figures 1 and 2), must be in the OFF position. In ATS Mode
utility voltage sensing, weekly exercising, and load transferring is
under the control of the generator.
Should the utility voltage drop below a preset value, and remain at
this low voltage for a preset amount of time, the generator cranks
and starts. After the generator starts, the transfer switch transfers
the load circuits to the generator so the generator can power them.
When the utility source voltage has been restored, the transfer
switch re-transfers the load circuits back to the utility source volt-
age and the generator shuts down.
The transfer switch is controlled by the generator circuit board
via control wires 23 and 194. Wire 23 connects the collector of
an NPN transistor on the generator circuit board to the “low side”
(Terminal 23) of the transfer relay coil in the transfer switch. Wire
194 connects positive battery voltage from the generator circuit
board to the “high side” (Terminal 194) of the transfer relay coil in
the transfer switch.
In order for the generator utility voltage sensing function to work, it
is necessary to provide a 5 amp fused 240VAC for 240V or 480V
systems or 208VAC utility source connection (depending on the
generator being used) from the transfer switch main N1 and N2
terminals to the generator wiring panel N1 and N2 terminals (See
Figure 3).
General Information
R-panel Technical Manual
FROM UTILITY
TO LOAD
FEEDER CIRCUITS
LOAD
DISTRIBUTION
PA N EL
GENERATOR
194
23
178
183
N2 N1
E1 E2 (E3)
194
23
N1 N2 (N3)
N1
N2
FUSE
FUSE
RTS-TYPE
OR
HS-TYPE
TRANSFER
SWITCH
T1
T2
(T3)
MAIN LINE
CIRCUIT
BREAKER
OR FUSE
LINE
NEU
GND
CHARGER
120 VAC
E1 E2 (E3)
Figure 3 - Connection Diagram (ATS Mode)

8
Be very careful when connecting high-voltage
wires labeled N1 and N2 and low-voltage wires
labeled 23 and 194 in both the generator wiring
panel and the transfer switch wiring panel. The
control board will be damaged if these wires are
not connected correctly.
In order for the generator battery charger function to work, it is
necessary to provide a 120VAC utility source connection to the
generator wiring panel LINE, NEUTRAL and GND terminals (see
Figure 3).
ENGINEERED TRANSFER SWITCH
(2-WIRE START GTS MODE)
When required, the generator can be installed with an engineered
W-type transfer switch which controls utility voltage sensing,
weekly exercising and load transferring.
When Position 2 of the eight-position DIP switch, which is located
on the generator circuit board (see Figure 1), is in the ON position
then utility voltage sensing, weekly exercising and load transfer-
ring is under the control of the engineered W-type transfer switch
(GTS Mode).
Generator control board DIP switch position 2 ON = 2-wire Start
GTS Mode:
The generator control board will NOT monitor the utility.•
The generator control board will NOT perform a weekly exer-•
cise. (In GTS mode the green system ready LED will be ON for
five (5) seconds and OFF for one (1) second).
The generator control board will NOT activate the transfer •
output.
The generator control board WILL monitor all engine conditions •
and shut down on all the faults listed in this document.
For the W-type transfer switch to control utility voltage sensing,
weekly exercising and load transferring, suitable wiring must also
be connected from the transfer switch 178 and 183, 2-wire start
terminals to the corresponding generator 178 and 183 2-wire start
terminals. Recommended wire gauge sizes for the 2-wire start wir-
ing depend on the length of the wire (see wiring length chart).
MAXIMUM WIRE LENGTH
RECOMMENDED WIRE
SIZE
460 feet (140M) No. 18 AWG.
461 TO 730 feet (223M) No 16 AWG.
731 to 1,160 feet (354m) No 14 AWG.
1,161 to 1,850 feet (565m) No 12 AWG.
Route the 2-wire start control wires through suitable, approved
conduit which is separate from the AC power leads. Connection
of wire 178 to wire 183 by relay contact closure action (volt free
switch contacts) in the transfer switch must result in generator
engine cranking and startup (see Figure 4).
Do NOT connect battery voltage, utility voltage
(N1/N2) or load voltage (T1/T2) to either the
178 or the 183 2-wire start terminals as this will
damage the generator control board.
In order for the generator battery charger function to work, it is
necessary to provide a 120Vac utility source connection to the
generator wiring panel LINE, NEUTRAL and GND terminals (see
Figure 4).
When in GTS mode, the control board will respond as follows
based on the AUTO/OFF/MANUAL switch position.
OFF: The generator will not start and run in this position. Only the
System Ready LED and the Low Battery LED are active in the GTS
OFF mode.
MANUAL: The control board will start and run the generator when-
ever the switch is in the manual position.
AUTO: The control board will monitor the 2-wire start circuit. When
the 2-wire start wire 178 is connected to 2-wire start wire 183, via
a relay contact closure in the W-type transfer switch, the control
board will start and run the generator. When the 2-wire start wire
connection is opened the control board will stop the generator.
When the control board is in AUTO, MANUAL or OFF (GTS mode)
the GREEN System Ready LED will flash (five (5) seconds ON, one
(1) second OFF) to indicate that the transfer switch is performing
the utility monitoring and transfer functions.
VOLTAGE REGULATOR ADJUSTMENT
Although adjustment potentiometers are provided on the volt-
age regulator installed in the control panel, the voltage regulator
potentiometers have been set at the factory and should NOT be
re-adjusted.
R-200B J1 CONNECTOR (23 PIN, GRAY=1800RPM,
WHITE=3600RPM)
Pin #
1 Governor 12V Supply
2 Oxygen Sensor Return (when equipped)
3 GND-B to Governor Driver
4 Hi-Coolant Temp Input
5 0V to Governor Driver
6 5V Supply to Governor Driver
7 Reserved
8 Low Coolant Level Input
9 Crank Signal Input
10 Crank Signal Return
11 Low Fuel Pressure Input
12 Governor Position Feedback Input
13 Oxygen Sensor Input (when equipped)
14 Reserved
15 Reserved
General Information
R-panel Technical Manual

9
16 Reserved
17 Reserved
18 Governor PWM Output
19 Reserved
20 Lo Oil Pressure Input
21 2.4L Flywheel Sensor Screen
22 Reserved
23 Reserved
R-200B J2 CONNECTOR (14 PIN WHITE)
Pin #
1 Air/Fuel Solenoid Output (when equipped)
2 Start (Crank) Relay Driver Output (minimum coil resis-
tance is 90 ohms)
3 Fuel (Run) Relay Driver Output (minimum coil resistance
is 90 ohms)
4 2-wire Start Input (from relay contact in W- type transfer
switch)
5 Momentary Open Switch Input (B+)
6 2-wire Start Return (from relay contact in W-type trans-
fer switch)
7 Manual/Auto Input (+BS)
8 19.5VAC Utility Sense Input
9 Reserved
10 Transfer Switch Relay Driver Output (minimum coil resis-
tance is 60 ohms)
11 Manual Input
12 19.5VAC Utility Sense Return
13 Emission Control Enable
14 GND-B (Battery Ground)
Refer to the individual generator wiring dia-
grams and schematics for additional informa-
tion.
General Information
R-panel Technical Manual
FROM UTILITY
TO LOAD
FEEDER CIRCUITS
LOAD
DISTRIBUTION
PANEL
GENERATOR
194
23
178
183
N2 N1
178
183
W-TYPE
TRANSFER
SWITCH
MAIN LINE
CIRCUIT
BREAKER
OR FUSE
LINE
NEU
GND
CHARGER
120 VAC
E1 E2 (E3)
N1 N2 (N3)
T1
T2
(T3)
E1 E2 (E3)
Figure 4 - Connection Diagram (GTS Mode)

10
2.5A BATTERY CHARGER
The 2.5 Amp battery charger is a "float" type charger. A "float" type
charger will charge the battery at its maximum output current rat-
ing until the battery voltage reaches a "float" voltage and then the
charge current will decrease to maintain the battery at that "float"
voltage.
The 2.5 Amp charger is UL recognized for use in the R-panel enclo-
sure and are not to be operated outside the R-panel enclosure.
DANGER
Storage batteries give off explosive hydrogen
gas. This gas can form an explosive mixture
around the battery for several hours after charg-
ing. The slightest spark can ignite the gas and
cause an explosion. Such an explosion can
shatter the battery and cause blindness or other
injury. Any area that houses a storage battery
must be properly ventilated. Do not allow smok-
ing, open flame, sparks or any spark producing
tools or equipment near the battery.
Battery electrolyte fluid is an extremely corro-
sive sulfuric acid solution that can cause severe
burns. Do not permit fluid to contact eyes, skin,
clothing, painted surfaces, etc. Wear protective
goggles, protective clothing and gloves when
handling a battery. If fluid is spilled, flush the
affected area immediately with clear water.
Do not use any jumper cables or booster battery
to crank and start the generator engine. If the
battery has completely discharged, remove it
from the generator for recharging.
Be sure the AUTO/OFF/MANUAL switch is set to
the OFF position, before connecting the battery
cables. If the switch is set to AUTO or MANUAL,
the generator can crank and start as soon as
the battery cables are connected.
Be sure the utility power supply to the battery
charger is turned off, or sparking may occur at
the battery posts as the cables are attached and
cause an explosion.
HOURMETER
The front panel hourmeter is a real-time clock that displays gen-
erator run time in hours and tenths of hours. This meter is active
whenever the generator is run and is not able to be reset. It pro-
vides a convenient and accurate reference for routine maintenance
logs.
IGNITION MODULE DESCRIPTION
The Ignition Module operates with either a 4-cylinder, 2.4L engine
or a 6-cylinder 4.2L engine. With the 2.4L engine, it uses the same
flywheel mag pick-up signal as the R-200B controller. The configu-
ration of the 4.2L engine does not require the shared signal.
FUEL SELECT CONNECTOR
For the 2.4L units, this connector is located in the engine harness
behind the R-Panel. It is not used with the 4.2L units.
Engine timing for Natural Gas (NG) Fuel is selected when this
connection is MADE (i.e. the two connector halves are plugged
together).
Engine timing for LP Fuel is selected when this connection is LEFT
OPEN. When this connector is left open the plugs, located in the
R-Panel, should be installed in these connectors to prevent mois-
ture from entering the harness connectors.
Whenever the Generator's Fuel Regulator is
converted from one Fuel type to the other, make
sure to configure the Fuel Select Connector for
the correct Fuel type.
DIAGNOSTIC BLINK PATTERNS (RED LED LOCATED
ON THE IGNITION MODULE)
During normal ignition operation the RED LED, located on the igni-
tion module, flashes at a 0.5 second ON and a 0.5 second OFF
rate. This is considered one (1) blink.
RED LED Fault Codes are described in the generator Owner's
Manual.
NOTE:
There are openings inside the customer wiring panel that allow
the RED LED inside the ignition module to be seen without
removing the ignition module.
General Information
R-panel Technical Manual

11
Notes
R-panel Technical Manual

12
Notes
R-panel Technical Manual

13
Notes
R-panel Technical Manual

Part No. 0G9375 Revision D (05/18/09) Catalog No. PDR-200-02 Printed in U.S.A.
/