Page is loading ...

SUITS
LOAD RATING
Rhino-Rack
Vortex Aero
Rhino-Rack
HD
Whispbar
HD
Rola
HD
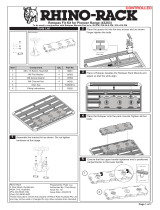
Place the bracket over the two channel nuts and x
in place with a M6 Security Bolt*, M6 Spring washer
and M6 Flat washer as shown. Leave nger tight
Remove Rubber strip and end cap of VA/HD Bars.
Slide two M6 channel nuts into the top channel of
the bar.
Ensure bolts are regularly checked and tightened to
ensure minimal bounce and maximum safety
x 2
x 2
* Note:
For VA Bars use M6 X 16 Security Screws (B061)
For HD Bars use M6 X 25 Security Screws (B137)
Side Prole
HD Bar
VA Bar
1 2
Rated for LED Lights
< 7.5KG
1 -
140mm
100mm
45mm
2 -
3 -
4 -
5 -
6 -
8 -
9 -
10 -
11 -
12 -
13 -
14 -
7 -
Item Component Name (Dual Bracket Kit) Qty Part No.
1 RH LED Light Bracket S/S 1 CA1447
2 LH LED Light Bracket S/S 1 CA1446
3 Security Allen Key 5mm 1 H021
4 M6 x 20 Socket Head Screw 2 B054
5 M6 Shake Proof Washer 2 W056
6 M8 Button Cap Screw 2 B155
7 M8 Spring Washer 2 W019
8 M8 x 17 Flat Washer 2 W020
9 M8 Shake Proof Washer 2 W033
10 M6 x 16 Security Screw 4 B061
11 M6 Spring Washer 6 W004
12 M6 x 16 x 1.6 Flat Washer 6 W031
13 M6 x 25 Security Screw 4 B137
14 M6 Channel Nut 4 N002
15 Fitting Instructions 1 R722
Page 1 of 2
43174 - VA/HD LED Light Brackets
Also compatible with Rola HD and Whispbar HD Bars
Place these instructions in the vehicle’s glove box after installation is complete.
Important: Please read these instructions carefully prior to installation.
Please refer to your tting instruction to ensure that the alloy tray is installed correctly.
Check the contents of this kit before commencing tment and report any discrepancies.
CONTROLLED

For heavy/ long LED light bars: It is possible that the LED light installed may move up or down in
off-road conditions. To prevent this, locate a suitable spot on your LED light bar that can serve as a
locking position, drill through the bracket and connect the two points with suitable hardware. Note
that variations in LED light bars will alter this step slightly. (Hardware not supplied in this kit)
Locate a suitable position for drilling. Look
to have the hole in the bracket line up with
a position on the light bar that will provide
purchase for any hardware used.
Select the appropriate hardware and x the light
bar in position.
Once the LED bar is secured between both
brackets - centre the LED Bar between the legs of
the roof racks then tighten all hardware with Allen
key supplied
Once the brackets are secured - t the LED light bar
to the brackets with the either M8 or M6 hardware
as shown.
3 4
Side View: Be sure hardware is secure before
use. Note that the VA/HD LED Light Bracket
is stainless steel, there will be no corrosion
damaged caused by drilling.
Rhino-Rack
3 Pike Street, Rydalmere, Document No: R722
NSW 2116, Australia. Prepared By: Will Davis Issue No: 03
(Ph) (02) 9638 4744 Authorised By: Chris Murty Issue Date: 18/06/2015
(Fax) (02) 9638 4822
These instructions remain the property of Rhinorack Australia Pty Ltd and may not be used or changed for any other purpose than intended.
Page 2 of 2
43174 - VA/ HD LED Light Bracket
Note:
/


