Failure to follow these warnings and the
assembly instructions could result in serious injury or death.
851-6-02
2
• NEVER LEAVE CHILD
UNATTENDED. Always keep
child in view while in stroller.
• NEVER USE STROLLER ON
STAIRS OR ESCALATORS. You
may suddenly lose control of the
stroller or your child may fall out.
Also, use extra care when going
up or down a step or curb.
• USE OF THE STROLLER with a
child weighing more than 40 lbs
(18.1 kg) or taller than 43 in
(109 cm) will cause excessive
wear and stress on the stroller.
Use the stroller with only one
child at a time.
• TO PREVENT TIPPING,
do not place more than 3 lbs
(1.4 kg) on the parent’s tray.
• TO AVOID BURNS, never put
hot liquids in the parent’s tray.
• TO PREVENT A HAZARDOUS,
UNSTABLE CONDITION, never
place purses, shopping bags,
parcels or accessory items on the
handle or canopy.
• TO PREVENT A HAZARDOUS,
UNSTABLE CONDITION, do not
place more than 10 lbs (4.5 kg)
in the storage basket.
• DO NOT use storage basket as a
child carrier.
• DO NOT ALLOW your child
to stand on the basket. It may
collapse and cause injury.
• NEVER PLACE child in the
stroller with head toward front
of stroller.
• NEVER ALLOW YOUR
STROLLER to be used as a toy.
• AVOID STRANGULATION.
DO NOT place items with a
string around your child’s
neck, suspend strings from
this product, or attach strings
to toys.
• AVOID FINGER ENTRAPMENT:
Use care when folding and
unfolding the stroller. Be certain
the stroller is fully erected and
latched before allowing your
child near the stroller.
• DO NOT USE STROLLER
WITHOUT FOOTREST
ATTACHED.
• DISCONTINUE USING YOUR
STROLLER should it become
damaged or broken.
• PRODUCT NOT INTENDED
for use with roller skates or
in-line skates.
• DO NOT INFLATE above
the maximum recommended
inflation pressure that is written
on the side of the tire. Over
inflation may cause wheel and/or
tire to blowout and could result
in serious injury.
851-6-02
31
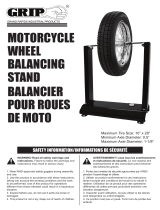
• Circle the part you need.
• Marque con un círculo el repuesto que necesita.
$13.00
$15.00
5
$18.00
2
4
6
8
$12.00—12” (30.5 cm)