Page 1
About the Rio User Guide
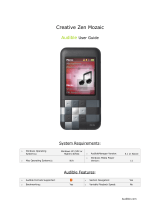
Rio 600 User Guide
About the Rio User Guide
The Rio 600 User Guide includes the following information:
Introduction
Using your Rio
Using Rio Menu options and settings
Using the Rio software
Accessories and e-store
Understanding digital audio terms
Frequently asked questions (FAQ) and troubleshooting
Warranty
Regulatory
Customer care
Index
To learn more:
• Refer to the Getting Started Guide for the basics on how to set up and start using your
Rio.
• Click the RealJukebox, AudibleManager or SoundJam software Help menus for detailed
instructions on how to use the software to convert CD tracks into compressed digital
audio formats, get audio from the Internet, or transfer tracks to your Rio.
• Visit the Rio Web site.
Navigating and printing the Rio User Guide
Important: We strongly recommend that you use Adobe Acrobat version 4.0—
available on the Rio software CD—to view and print the Rio User Guide.
The online Rio User Guide is in Adobe Acrobat (.PDF) file format. Click links
(blue underlined
text) to jump to another location in the document or to a location on the World Wide Web.
Click the Index icon at the top of any page (by the page number) to go to the index—or
you can click the Index bookmark. Click page numbers in the Index to jump to a topic.
Using Acrobat toolbar icons
Click the Show/Hide Navigation Pane icon in the Acrobat toolbar to show a list of book-
marks. Bookmarks are links to the contents of the User Guide. Click any bookmark to
jump to the page in the User Guide that contains the topic.
Click the Print icon in the Acrobat toolbar to print the User Guide. The size of the User
Guide is optimized for printing.

Page 2
About the Rio User Guide
Legal notices
Copyright © 2000-2001 SONICblue Incorporated. All Rights Reserved.
SONICblue Incorporated does not assume any responsibility for errors or omissions in this
document or make any commitment to update the information contained herein.
Rio is a registered trademark of RioPort, Inc. in the USA and/or other countries and is used
under license.
The RealPlayer and the RealJukebox are included under license from RealNetworks, Inc.
Copyright 1999. RealNetworks, Inc. Patents pending. All rights reserved.
Microsoft, Windows Media, and the Windows Logo are trademarks or reg-
istered trademarks of Microsoft Corporation in the United States and/or
other countries.
All other product names may be trademarks of the companies with which
they are associated.
First Edition, March 2001.
Part Number 75510281-005.

Page 3
Introduction
Introduction
The Rio 600 provides the ultimate listening experience while you exercise, commute or relax.
Create and mix your favorite selections on your PC or Mac for playback on your Rio. Your
player is similar in function to a portable cassette or CD player. However, it has no moving
parts, so it delivers skip-free music under any conditions. It is about the size of an audio cas-
sette or pager and weighs only a few ounces.
The Rio interfaces with your computer through the USB port. Use the software included on
the CD to:
• Organize digital audio tracks on your computer.
• Organize tracks on your Rio.
• Record (encode) your audio CDs.
• Search for tracks on your computer or on the Internet.
In addition, there are many cool accessories you can purchase separately to customize your
Rio. Go to the Accessories
section for information about accessories for your Rio 600.
Sources on the Internet for digital audio content include:
Riohome.com
WindowsMedia.com
Audible.com
—for spoken audio

Page 4
Using your Rio
Using your Rio
This section explains what you need to know about using Rio buttons and controls.
Using Rio buttons and controls
• Select: The center navigation button. In play mode, press and hold Select for about two
seconds to jump to a list of tracks you can pick from to play. To set a bookmark, press
Select while the Rio is in pause mode. In menu mode, press Select to choose a menu or
dialog option.
•
4/;: Play/Pause; the top navigation button. In play mode, press 4/; once to play a
track; press it again to pause. When paused, the play/pause icon appears as two blinking
vertical bars on the LCD. If your Rio is left in pause mode for an extended period of time,
it goes into sleep mode to conserve battery life. Press
4/; to wake your Rio from sleep
mode. In menu mode, press
4/; to navigate up through menu options.
•
<: Stop; the bottom navigation button. In play mode, press < to stop playing the current
track. Press and hold
< for about two seconds to put your Rio into sleep mode to con-
serve battery life. In menu mode, press
< to navigate down through menu options.
On/Hold/Off
Volume
Play/Pause
Forward
Stop
Select
Reverse
Menu
LCD
Multifunction port

Page 5
Using your Rio
• 8: Forward; the right navigation button. In play mode, press and release 8 to skip to the
next track on your Rio. Press and hold
8 to fast-forward through the track currently play-
ing. In menu mode, press
8 to navigate through menu options.
•
7: Reverse; the left navigation button. In play mode, press and release 7 to skip to the
beginning of the track currently playing on your Rio. Press and hold
7 to fast-rewind
through the current track. In menu mode, press
7 to navigate through menu options.
• Liquid Crystal Display (LCD): In play mode, the LCD provides the following informa-
tion—clockwise from the top left:
• Track name: Displays the title of the currently selected track. Song name scrolls if the
name is longer than the width of the display.
• Hold icon (lock): Appears if the Rio is set to Hold mode. Hold locks all settings except
the Power switch on the Rio.
• Play/Pause icon: Displays either a Play icon (triangle) or a Pause icon (two vertical
bars), to show the current action of the Rio.
• Divider line: Graphically organizes the display.
• Current song position: Displays the play location in the current track in
minutes:seconds (mm:ss) form. For Audible content the display includes hours
(hh:mm or hh:mm:ss).
• Volume level: Displays the volume setting in both digital and graphic form. The bar-
graph disappears as volume is reduced and re-appears as volume is increased.
Volume level ranges from 0-20.
• Track display: Displays the number of the currently selected track and the total
number of tracks on your Rio. If a playlist is active, the track count shows the number
of tracks in a playlist.
• Album name/track information/artist name: Displays album name, track information,
and artist name. Album name displays for a few seconds, followed by track
information, followed artist name. Press Select to scroll through album name, track
information, and artist name. Track information includes the codec type (MP3, WMA,
and so on), the bitrate (XXX kbps), and the track time (XX:XX min:sec).

Page 6
Rio Menu options and settings
Rio Menu options and settings
When the Menu button is pressed, the LCD displays Rio menu options:
• Audio
: Preset and custom equalizer settings.
• Player
: Random, repeat, delete track, pick a track, bookmark, and playlist functions.
• Prefs
: Player settings including power saving (time to sleep), time and date, LCD display
backlight, and battery level and calibration.
• About
: Various player status information including firmware version, internal and external
memory used, battery level, calendar, and codec information.
Using Audio functions
Audio functions include built-in and custom equalizer (EQ) settings. Custom EQ lets you set
the Treble and Bass values on a range from 1 (low) to 9 (high).
Selecting built-in EQ settings
1 Press Menu.
2 Press the
7 or 8 buttons to navigate to Audio.
3 Press Select.
4 The EQ settings display.
5 Press the
4/;, <, 7 or 8 buttons to highlight the desired setting.
• To save the setting press Select.
• To return to play mode without saving any changes, press Menu.
Setting the Custom EQ
1 Press Menu.
2 Press the
7 or 8 buttons to navigate to Audio.
3 Press Select.
4 The EQ settings display.
5 Press the
4/;, <, 7 or 8 buttons to navigate to Custom.

Page 7
Rio Menu options and settings
6 Press Select.
7 Press the
4/; or < buttons to navigate between Bass or Treble.
8 Use the
7 or 8 buttons to increase or decrease the Bass or Treble value from 1 (low) to
9 (high).
• To save the settings press Select.
• To return to play mode without saving any changes, press Menu.

Page 8
Rio Menu options and settings
Using Player functions
Player functions include:
• Play options
: Repeat or randomize tracks.
• Delete tracks
: Remove content from the Rio.
• Pick a track
: Select and play a track.
• Bookmarks
: Play or delete bookmarks.
• Playlist
: Create new playlists, manage playlists or remove playlists from the Rio.
Setting Repeat and Random play options
1 Press Menu.
2 Press the
7 or 8 buttons to navigate to Player.
3 Press Select.
4 Press the navigation buttons to highlight Play Options.
5 Press Select.
6 Press the
4/; or < buttons to navigate between Repeat or Random.
7 Press the
7 or 8 buttons to change the Repeat or Random setting.
Repeat settings include:
• All: All tracks repeat.
• Track: Current track repeats.
• Off: Turns off repeat function.
Random settings include:
• On: All tracks play in random order.
• Off: Turns off random function.
8 Press Select to save the settings. To return to play mode without saving any changes,
press Menu.

Page 9
Rio Menu options and settings
Deleting tracks from the Rio
1 Press Menu.
2 Press the
7 or 8 buttons to navigate to Player.
3 Press Select.
4 Press the navigation buttons to highlight Delete Tracks.
5 Press Select. A list of all tracks on the Rio displays.
6 Press the
4/; or < buttons to navigate to the track you want to delete.
7 Press Select.
• Highlight Yes on the Delete dialog, then press Select to delete the track.
• Highlight No on the Delete dialog, then press Select to return to the track list without
deleting the track.
• To return to play mode without saving any changes, press Menu.
Picking a track to play
In play mode, you can press and hold Select for about two seconds to jump to the Pick a
track list.
1 Press Menu.
2 Press the
7 or 8 buttons to navigate to Player.
3 Press Select.
4 Press the navigation buttons to highlight Pick a track.
5 Press Select. A list of tracks displays.
6 Press the
4/; or < buttons to navigate to the track you want to play.
7 Press Select. The track immediately begins playing.

Page 10
Rio Menu options and settings
Adding bookmarks
1 Press 4/; during playback to pause.
2 Press Select for to create a new bookmark. If you press and hold Select the Pick a track
list displays.
Playing or deleting bookmarks
1 Press Menu.
2 Press the
7 or 8 buttons to navigate to Player.
3 Press Select.
4 Press the navigation buttons to highlight Bookmarks.
5 Press the
4/; or < buttons to highlight Play Bookmark or Delete Bookmark.
6 Press Select.
• If Play Bookmark is selected, a list of bookmarks displays. Press the
4/; or <
buttons to highlight a bookmark. Press Select to play the bookmark.
• If Delete Bookmark is selected, a list of bookmarks displays. Press the
4/; or <
buttons to highlight a bookmark. Press Select to choose the bookmark to be deleted.
Press the
7 or 8 buttons to highlight Yes or No on the on the Delete Bookmark?
dialog. Press Select to remove the bookmark and return to the bookmark list.

Page 11
Rio Menu options and settings
Working with Playlists
Playlist options include:
• Choose: Select a playlist from playlists stored on the Rio.
• New: Build a new playlist.
• Edit: Modify an existing playlist.
• Remove: Remove a playlist from the Rio.
1 Press Menu.
2 Press the
7 or 8 buttons to navigate to Player.
3 Press Select.
4 Press the navigation buttons to highlight Playlist.
5 Press Select.
6 Press the
7 or 8 buttons to navigate to the desired playlist option.
7 Press Select.
Choosing a playlist
1 Select the Choose playlist option. Any existing playlists display.
2 Press the
4/; or < buttons to highlight the desired playlist.
3 Press Select.
Building a playlist
1 Highlight the New playlist option.
2 Press Select. New playlists are numbered in sequential order starting at “01”.
3 After a few moments, the playlist editor displays all tracks on the Rio.
4 Press the
4/; or < buttons to highlight a track.
• Press Select to assign a playlist order number to the track. This number shows the
order in which the track is played in the playlist.
• Press the
7 or 8 buttons to change the track order number.
5 When you are finished, highlight -done editing- at the bottom of the playlist editor, and
press Select to save the new playlist and exit to the playlist options menu.

Page 12
Rio Menu options and settings
Modifying a playlist
1 Highlight the Edit playlist option.
2 Press Select.
3 Press the
4/; or < buttons to navigate to the playlist.
4 The playlist editor displays tracks and their playlist order numbers in the left column.
• To add tracks or remove tracks from the playlist, highlight a track and press Select to
tag or untag the track with a number in the left column. This number shows the order
in which the track is played in the playlist.
• To change the track order, highlight a track and press the
7 or 8 buttons change the
track order number in the playlist.
5 When you are finished, highlight -done editing- at the bottom of the playlist editor and
press Select to save the new playlist and exit to the playlist options menu.
Removing a playlist
1 Select the Remove playlist option.
2 Press the
4/; or < buttons to highlight the playlist you want to delete.
3 Press Select.
• Highlight Yes on the Delete dialog, then press Select to delete the playlist.
• Highlight No on the Delete dialog, then press Select to exit without saving any
changes.
• To return to play mode without saving any changes, press Menu.

Page 13
Rio Menu options and settings
Setting Preferences
Preferences include these Rio settings:
• Power saving
(time to sleep).
• Time and date
.
• Display backlight
.
• Battery level display and calibration
.
Adjusting the power saving setting
You can adjust the time to sleep (suspend) setting from one to nine minutes. To turn off the
power saving feature, set the time to sleep setting to 0 (zero).
1 Press Menu.
2 Press the
7 or 8 buttons to navigate to Prefs.
3 Press Select.
4 Press the navigation buttons to highlight Power Saving.
5 Press Select.
6 Press the
7 or 8 buttons to adjust the setting.
• To save the setting press Select.
• To return to play mode without saving any changes, press Menu.
Setting time and date
1 Press Menu.
2 Press the
7 or 8 buttons to navigate to Prefs.
3 Press Select.
4 Press the navigation buttons to highlight Time/Date.
5 Press Select.
6 Press the
7 or 8 buttons to highlight each of the time and date fields.
7 Press the
4/; or < buttons when any of the time or date fields is highlighted to change
the value. The date field will not roll to a value that is not valid for the selected month and
year.
8 Press Select to save the time/date settings. To return to play mode without saving any
changes, press Menu.

Page 14
Rio Menu options and settings
Adjusting LCD display backlight
1 Press Menu.
2 Press the
7 or 8 buttons to navigate to Prefs.
3 Press Select.
4 Press the navigation buttons to highlight Display.
5 Press Select.
6 Press the 7 or 8 buttons to adjust the Backlight time on setting.
Backlight settings include:
• timed 1, 2, 5, or 10 seconds.
• always on.
• always off.
7 Press Select to save the setting.

Page 15
Rio Menu options and settings
Displaying battery information
1 Press Menu.
2 Press the
7 or 8 buttons to navigate to Prefs.
3 Press Select.
4 Press the navigation buttons to highlight Battery, then press Select.
5 Press the navigation buttons to highlight Power level, then press Select. Battery informa-
tion displays:
• Battery type: Rechargeable or Normal.
• Battery charge level: The battery’s charge state percentage.
• Run time estimation: The battery’s remaining play time.
• Battery level graphic: A bar graph inside a battery icon displays the approximate
remaining charge.
6 Press Menu to return to play mode.
Calibrating the battery—For use with rechargeable backpack accessories (sold
separately)
Warning: Do not remove the rechargeable battery from the backpack.
Calibrating the battery ensures accurate battery level display. The first time you charge it, it is
important to calibrate the battery backpack and give it a full charge overnight or until the cali-
bration timer expires. You do not need to charge the battery before you calibrate it.
Note: You do not have to calibrate the battery each time you charge it—only the
first time.
1 Connect the AC adapter into the rechargeable battery port at the bottom of the backpack.
2 Connect the AC adapter power cord into an electrical outlet. The charge lamp on the
backpack lights up when charging begins.
3 Slide the Rio power switch to On.
4 Press Menu.
5 Press the
7 or 8 buttons to navigate to Prefs.
6 Press Select.
7 Press the navigation buttons to highlight Battery, then press Select.
8 Press the navigation buttons to highlight Calibrate, then press Select.
9 Wait overnight or until the timer expires to give the backpack a full charge
.

Page 16
Rio Menu options and settings
Displaying About information
1 Press Menu.
2 Press the
7 or 8 buttons to navigate to About.
3 Press Select. The following information is displayed:
• Rio model number or message defined through the software.
• Firmware version the Rio is using.
• Total internal memory amount installed and a bar graph display of the amount used.
• Total external memory installed and a bar graph display of the amount used by tracks.
4 Press
< to display battery information:
• Battery type: Rechargeable or Normal.
• Battery charge level: The battery’s charge state.
• Run time estimation: The battery’s remaining play time.
• Battery level graphic: A bar graph inside a battery icon displays the approximate
remaining charge.
5 Press
< to display clock and calendar information.
6 Press
< to display codec information.
7 Press Menu to return to play mode.

Page 17
Using the Rio software
Using the Rio software
Using RealJukebox
RealJukebox audio management software is included on the software CD. Use RealJukebox
to:
• Organize digital audio tracks on your computer.
• Organize tracks on your Rio.
• Record (encode) your audio CDs.
• Search for tracks on your computer or on the Internet.
To learn more about using RealJukebox, from within the software:
• Click the Help menu or
• Click the Home button, scroll down to Real Jukebox Help, and select Using Real Juke-
box and/or Frequently Asked Questions.
Highlight tracks and
- play on your computer
- organize into playlists
- copy to your Rio
Record (encode)
your audio CDs
Organize your tracks
Find tracks on your
computer or on the Web

Page 18
Using the Rio software
Copying tracks to your Rio
1 Plug the USB cable into the multifunction port on top of your Rio.
2 Plug the other end of the cable into the USB port on your computer.
3 Slide the power switch on top of your Rio to On.
4 Click the All Tracks button on the Real Jukebox software.
5 Click the desired track(s).
6 Click the right mouse button and select Copy to Device or click Copy to > Device in the
right column on the window. Click OK on the dialog box.
7Click Copy Files in the right column on the window.
Encoding a CD
1 Put an audio CD in your computer’s CD-ROM drive.
2 Click the CD button.
3 The software prompts you and fills in track titles and other information via the Gracenote
CDDB Web site.
4 Check the desired track(s)—click the check box to the left of the song title or click Check
All in the right column on the window.
5 Recording begins...use the convenient playback controls at the top of the window to
record, play, pause, and so on.
Using AudibleManager (PC only)
The AudibleManager software supports audio books, lectures, public radio programs, news-
papers, and other spoken word audio programs.
Use AudibleManager to:
• Create an Audible.com account, where you may choose from thousands of spoken word
audio programs.
• Download audio programs from the Internet to your PC.
• Transfer audio programs to your Rio.
For more information, visit the AudibleManager Web site
.

Page 19
Using the Rio software
Using SoundJam MP (Mac only)
SoundJam MP player and encoder converts music into compressed digital quality MP3’s from
CD, MP2, AIFF, QuickTime™, SMD, Sound Designer, and WAV formats.
Master Playlist
Use the Master Playlist editor to:
• Search your audio collection stored on your Mac.
• Build and manage custom playlists.
Main Window
Use the SoundJam MP Main Window to:
• Listen to audio on your Mac.
• Play music files from your playlist or CD-ROM.

Page 20
Using the Rio software
Converter
Use the Converter window to:
• Encode audio CDs.
• Save tracks into MP3 format to be transferred to and played on your Rio.
Connector
The Connector window displays when you plug
your Rio into your Mac with the USB cable. Use
the Connector window to:
• Manage the content on your Rio.
• Export audio to your Rio. Choose the track
by selecting “Add...” or drag the desired
track to the view window.
Use the help system to learn more
The SoundJam software includes a complete
online Help manual. To learn more about using
the SoundJam MP software:
1 Click the Help Menu.
2 Select SoundJam MP Help.
• Click the topic you are interested in for detailed step-by-step instructions.
• Click How To Use This Help System to understand the basics of using the SoundJam
Help.
For more information about SoundJam, visit the SoundJam Web site.
Page is loading ...
Page is loading ...
Page is loading ...
Page is loading ...
Page is loading ...
Page is loading ...
Page is loading ...
Page is loading ...
Page is loading ...
Page is loading ...
Page is loading ...
Page is loading ...
Page is loading ...
Page is loading ...
Page is loading ...
Page is loading ...
Page is loading ...
Page is loading ...
/