Page is loading ...

Manual Revision: 06/12/2015
For the most up-to-date information, please visit: www.startech.com
DE: Bedienungsanleitung - de.startech.com
FR: Guide de l'utilisateur - fr.startech.com
ES: Guía del usuario - es.startech.com
IT: Guida per l'uso - it.startech.com
NL: Gebruiksaanwijzing - nl.startech.com
PT: Guia do usuário - pt.startech.com
Quick Start Guide
Packaging Contents
• 1 x Dual VGA USB KVM switch
• 1 x universal power adapter (NA/UK/EU/AU)
• 1 x instruction manual
System Requirements
• 1 or 2 VGA monitors (monitor, projector, TV, etc.)
• A USB keyboard and mouse
• Microphone and speakers (optional)
SV231DVGAU2A / SV431DVGAU2A
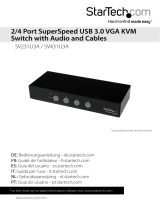
2 / 4 Port Dual VGA USB KVM Switch with Audio & USB Hub
*actual product may vary from photos
Please visit www.startech.com/SV231DVGAU2A or www.startech.
com/SV431DVGAU2A for full operating instructions and product
specications.
LED Indicators
PC Selection Indicators
Green: Connected PC detected
(powered on)
Red: Active PC
O: No PC detected
Installation
For complete operating instructions / specications, please
visit www.startech.com/SV231DVGAU2A or www.startech.com/
SV431DVGAU2A.
Note: Prior to installation, please power o all devices that will be
connected to this system.
1. Connect 1 or 2 VGA monitors to the console connectors on the
back of the KVM switch.
2. Connect a USB keyboard and mouse into the marked USB ports
on the KVM switch.
3. (Optional) Connect a microphone and set of speakers to the
console audio ports.
4. (Optional) Connect your additional USB peripherals to the USB
hub ports.
Operation
Switching Between Systems
Pushbuttons
For the 2 port (SV231DVGAU2A) version, the front button will toggle
between the two computers when pressed.
For the 4 port (SV431DVGAU2A) version, each button on the front
panel associates with a connected computer for selection.
Hotkeys
A hotkey command is a short keyboard sequence for selecting
a computer, activating a computer scan, etc. A hotkey sequence
starts with two Left Ctrl keystrokes, pressed within 0.2 seconds and
followed by one or two keystrokes to complete the command.
A built-in buzzer generates a high-pitched beep for correct hotkey
commands; otherwise, one low-pitch beep occurs to indicate errors
and the bad key sequence won’t be forwarded to the selected
computer.
Note: To disable hotkey functions, press and hold Left Shift and press
Num Lock twice, then release Shift followed by pressing Left Ctrl
once.
5. Connect a male-to-male VGA cable from the VGA port on your
computer to the PC1 VGA port. Repeat for the secondary display
if needed.
6. Connect a USB A-B cable from an available port on your
computer to the PC1 USB port.
7. (Optional) Connect a 3.5 mm audio cable from your computer to
the PC1 audio ports.
8. Repeat steps 5 to 7 for the other PC connections.

FCC Compliance Statement
This equipment has been tested and found to comply with the limits for a Class B digital device, pursuant to part 15 of the FCC Rules. These limits are designed to provide reasonable protection against
harmful interference in a residential installation. This equipment generates, uses and can radiate radio frequency energy and, if not installed and used in accordance with the instructions, may cause
harmful interference to radio communications. However, there is no guarantee that interference will not occur in a particular installation. If this equipment does cause harmful interference to radio or
television reception, which can be determined by turning the equipment o and on, the user is encouraged to try to correct the interference by one or more of the following measures:
• Reorient or relocate the receiving antenna.
• Increase the separation between the equipment and receiver.
• Connect the equipment into an outlet on a circuit dierent from that to which the receiver is connected.
• Consult the dealer or an experienced radio/TV technician for help
This device complies with part 15 of the FCC Rules. Operation is subject to the following two conditions: (1) This device may not cause harmful interference, and (2) this device must accept any
interference received, including interference that may cause undesired operation. Changes or modications not expressly approved by StarTech.com could void the user’s authority to operate the
equipment.
Industry Canada Statement
This Class B digital apparatus complies with Canadian ICES-003.
Cet appareil numérique de la classe [B] est conforme à la norme NMB-003 du Canada.
CAN ICES-3 (B)/NMB-3(B)
Use of Trademarks, Registered Trademarks, and other Protected Names and Symbols
This manual may make reference to trademarks, registered trademarks, and other protected names and/or symbols of third-party companies not related in any way to
StarTech.com. Where they occur these references are for illustrative purposes only and do not represent an endorsement of a product or service by StarTech.com, or an endorsement of the product(s)
to which this manual applies by the third-party company in question. Regardless of any direct acknowledgement elsewhere in the body of this document, StarTech.com hereby acknowledges that all
trademarks, registered trademarks, service marks, and other protected names and/or symbols contained in this manual and related documents are the property of their respective holders.
Technical Support
StarTech.com’s lifetime technical support is an integral part of our commitment to provide industry-leading solutions. If you ever need help with your product, visit www.startech.com/support and
access our comprehensive selection of online tools, documentation, and downloads.
For the latest drivers/software, please visit www.startech.com/downloads
Warranty Information
This product is backed by a two year warranty.
In addition, StarTech.com warrants its products against defects in materials and workmanship for the periods noted, following the initial date of purchase. During this period, the products may be
returned for repair, or replacement with equivalent products at our discretion. The warranty covers parts and labor costs only. StarTech.com does not warrant its products from defects or damages
arising from misuse, abuse, alteration, or normal wear and tear.
Limitation of Liability
In no event shall the liability of StarTech.com Ltd. and StarTech.com USA LLP (or their ocers, directors, employees or agents) for any damages (whether direct or indirect, special, punitive, incidental,
consequential, or otherwise), loss of prots, loss of business, or any pecuniary loss, arising out of or related to the use of the product exceed the actual price paid for the product. Some states do not
allow the exclusion or limitation of incidental or consequential damages. If such laws apply, the limitations or exclusions contained in this statement may not apply to you.
• To select a computer:
(Example: Selects the computer at port 1.)
Press Left Ctrl + Press Left Ctrl + Press 1
(Example: Selects the computer at port 2.)
Press Left Ctrl + Press Left Ctrl + Press 2
Note: Please use the numeric keys across the top row instead of the
numeric keypad on the right of the keyboard.
• To start Auto Scan:
Press Left Ctrl + Press Left Ctrl + Press F1
To stop the Auto Scan mode, press Left Ctrl twice.
When Auto Scan detects any keyboard or mouse activity, it suspends
the scanning until the activity stops; it then resumes with the next
computer in the sequence. The length of the Auto Scan interval (the
scan rate) is adjustable; see below.
• Manual Scan allows you to manually switch back and forth
between computers that are turned on:
Press Left Ctrl + Press Left Ctrl + Press F2
To select the previous or next computer, press the Up Arrow key or
the Down Arrow key in sequence.
To stop Manual Scan, press any other key.
• To adjust Scan Rate, set the duration of scan time before switching
to the next computer:
Press Left Ctrl + Press Left Ctrl + Press F3
The KVM switch generates 1 to 4 beeps indicating the duration of
the scan time for 3, 8, 15, and 30 seconds respectively.
/


