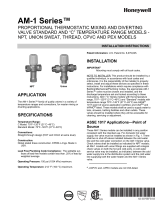
INTEGRATED MIXING DEVICE (IMD)
INSTALLATION AND OPERATING INSTRUCTION MANUAL
For your family’s comfort, safety and convenience, it is
recommended this IMD be installed and serviced by a plumbing
professional.
CAUTION
If sweat fittings are to be used, DO NOT apply heat to the fittings
on top of the water heater. Sweat the tubing to the adapter before
fitting the adapter to the water connections. It is necessary that
heat is not applied to the fittings to ensure appropriate operation.
This manual will explain in detail the installation and maintenance of the integrated
mixing device. We require that you carefully read this manual and refer to it if
questions arise.
PRE-INSTALLATION
The following steps should be taken to ensure proper conditions for operation:
Note all site parameters (pressure, temperature, etc.) and check against the
integrated mixing device (IMD) specifications listed in Table 1. All
specifications must be met prior to installing the IMD.
This IMD MUST NOT be subjected to heat during installation as this may
damage the internal parts.
The valve MUST NOT be allowed to freeze. If the IMD is installed in a
potentially freezing situation, suitable insulation must be fitted to prevent
damage.
DO NOT use excess thread sealant (in liquid, tape or other form) as this may
cause the IMD to fail. The installer must ensure that thread sealant does not
get into the internal parts.
In order to install this IMD on a unit with a blower mounted on top, it is
necessary to remove the blower prior to installation and replace the blower
after installation of this IMD, or purchase an optional nipple extender kit, p/n
239-48429-00. See Step 2a(Figure 5a) and Step 3a(Figure 6a).
If the water heater is gas-fired, the IMD must be installed before the draft hood.
This manual is meant to be used in conjunction with the installation and
operation manual (owners manual) for the water heater.
Toxic chemicals, such as used for boiler treatment, shall not be introduced into
IMD used for space heating. This IMD may never be connected to any existing
heating system or component(s) previously used with a non-potable water
heating system.
Leave a copy of this instruction manual with the water heater for future reference.
Recommend to the user that the IMD be checked annually to ensure its
continued function.
Page 1
238-47870-00E 07/10