1 / 19
THE ART OF FIRE
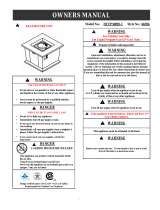
OFE102LP
!
! WARNING
IMPORTANT
SAVE THESE
INSTRUCTIONS
If the information in this manual
is not followed exactly, a fire or
explosion may result causing
property damage personal injury
or loss of life.
Installation and service must be
performed by a qualified installer,
service agency or gas supplier.
Improper Installation, adjustment,
alteration, service or maintenance
can cause injury or property
damage.
Read the installation, operation
and maintenance instructions
thoroughly before installing or
servicing this equipment.
Save these instructions for
future reference. If you are
assembling this unit for someone
else, give this manual to him or her
to read and savefor future
reference.
!
WARNING
For outdoor use only. DO NOT use
for cooking. DO NOT use under any
overhead enclosure.
C
US
!
!
WARNING
DANGER
Do not store or use gasoline or other flammable
vapors and liquids in the vicinity of this or any
other appliance.
An LP-cylinder not connected for use should be
stored in vicinity of this or any other appliance.
If you smell gas:
1. Shut off gas to the appliance.
2. Extinguish any open flame.
3. If odor continues, keep away from the appliance and
immediately call your gas supplier or fire department.
Burning Rock owner’s manual

2 / 19
Important Safety Information ------------------------------------------------------- 3
Propane (LP) Dangers and Warnings -------------------------------------------- 5
Hose & Regulator Assembl y and Replacement -------------- ----------------- 7
Parts List -------------------------------------------------------- --------------------- --- 9
Assembly Instructions -------------------------- --------------------- ---------------- 15
L
ighting Instructions ------------------ --------------------- --------------------------- 16
Care and Cleaning ------------ --------------------- ----------------------------------- 17
Gas Component C hecks ---------------------------------------------- -------------- 19
Troubl eshooting ------------------------- --------------------- ------------------ -------
Warranty -------------------- --------------------- -------------
-------------------------- 21
TABLE OF CONTENTS
!
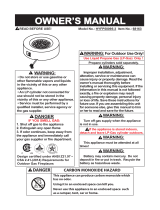
DANGER
CARBON MONOXIDE HAZARD
This appliance can produce carbon monoxide
which has no odor.
Using it in an enclosed space can kill you.
Never use this appliance in an enclosed
space such as a camper, tent, car or home.

3 / 19
IMPORTANT SAFETY INFORMATION
!
WARNING FIRE TABLE IS FOR OUTDOOR USE ONLY
IF YOU SMELL GAS
• Shut off gas supply to the fire table.
• Extinguish any open fame.
• Do not try lighting any appliance.
• Do not touch any electr ical switch; do not use any phone in your building.
• Immediately call your gas supplier from a neighbor’s phone.
• Follow the gas supplier’s instructions.
• If you cannot reach your gas supplier, call th e fire department.
• WARNING Failure to follow the dangers, warning and cautions i n this man fire department. usual
may result in serious bodily injury or death , or in a fire or an explosion causing damage to
property.
• IMPORTANT NOTICE Read and understand all warnings and precautions prior to assembl y and
use of your gas fire table. Improper installation, adjustment, alteration, service or maintenance can
cause injury or p roperty damage.
• Note The use and installation of this product must conform to local codes. In the absence of local
codes, use the Nation al Fuel Gas Code, ANSI Z21.97. Reference to Natural Gas and Pro pane
Installation code CSA B149.1 or Propane Storage and Handling code B149.2.
•Minimum Clearance from Unit to Combustible Materials 72”(182.9cm) from the top; 48” (121.9
cm) from all sides and back. Do n ot locate this fire table under any overhead enclosure.
• This gas fire ta ble a nd its individual shut off valve must be disconnected from the gas supply
piping system d uring any pressure testing of that system at test pressures in excess of 1/2 of psi
(3.5 kPa). The appliance must be isolated from t he gas supply piping system by closing its
individual manual shut off valve during any pressure testing of the gas supply piping system at test
pressures equal to or less than 1/2 psi (3.5 kPa).
• Keep these instructions for future reference. If you are assembl ing this u nit for someone else,
give this manual to him or her to read and ke ep f or futur e reference.
• This gas fire ta ble must be used ONLY ou tdoors in a well-ventilated space and shall NOT be
used inside a building , garage, or any other enclosed area.
• DO NOT use this o utdoor gas fire table for indoor heating. TOXIC carbon monoxide fumes can
accumulate and cause asphyxiation.
• NEVER L EAVE this gas fire table unattended when in using.
• Children should be alerted to the h azards of high surface temperatures and kep t at a safe
distance while your fire table is in use.
• Do not store or use gasoline or other flammabl e vapors and liquids within 25 feet (7.62m) of this
or any other appliance.
• Do not store any combustible materials in the base enclosu re.
• The use of alcohol, prescription or non-prescription drugs may impair an individual’s ability t o
properly assembl e or safely operate this outdoor fire table.

4 / 19
IMPORTANT SAFETY INFORMATION (continued)
• DO NOT use in an explosive atmosphere. Keep gas fire table area clear and free from
combustible materials, gasoline and other flammable vapors and liquids.
• This outdoor fire table is NOT to be operated by children. Young children should be closely
supervised when in the vicinity of this outdoor fire table.
• This outdoor fire table is not to be installed or used in or on recreation vehicles and/or boats.
• Always use in accordance with all applicable local, state and national codes. Contact your local
fire department for details on outdoor burning.
• Use the same precautions you would with any open fire when using this outdoor fire table.
• DO NOT burn solid fuels such as: wood, charcoal briquettes, lump charcoal, manufactured logs,
driftwood, trash, leaves, paper, cardboard, plywood, painted or stained or pressure treated wood
in this outdoor fire table.
• DO NOT use this outdoor fire table until it is COMPLETELY assembled and all parts are
securely fastened and tightened.
• DO NOT store another LP gas tank within 10 feet (3.05 m) of this outdoor fire table while it is in
operation.
• DO NOT use this outdoor fire table near automobiles, trucks, vans or recreational vehicles.
• DO NOT use this outdoor fire table under any overhead structure or near any unprotected
combustible constructions. Avoid using near or under overhanging trees and shrubs.
• Always use this outdoor fire table on a hard, level non-combustible surface such a concrete, rock
or stone. An asphalt or blacktop surface may not be acceptable for this purpose.
• DO NOT use this outdoor fire table if any part has been under water. Immediately call a qualified
service technician to inspect the fire table and to replace any part or control system and any gas
control which has been under water.
• DO NOT wear flammable or loose clothing when operating this outdoor fire table.
• DO NOT use in windy conditions.
• Keep all electrical cords away from a hot outdoor fire table.
• Certain areas of this outdoor fire table when in use will become too hot to touch. Do not touch
hot surfaces until the unit has cooled unless you are wearing protective gear such as insulated pot
holders or heat resistant gloves or mittens to avoid burns.
• DO NOT hang or place clothing or other flammable materials on or near the gas fire table.
• Any guard or other protective device removed for servicing the fire table must be replaced prior
to operating the fire table.
• DO NOT attempt to move or store this outdoor fire table until all parts are cool.
• DO NOT lean over this outdoor fire table when lighting or when in using.
• Use only the regulator and hose assembly provided. The replacement regulator and hose
assembly shall be that specified by the manufacturer.
• DO NOT attempt to disconnect the gas regulator from the tank or any gas fitting while the
outdoor fire table is in using.
• Always shout off gas supply at the tank valve and disconnect regulator from the tank when the
fire table is not in using
• DO NOT sit on the mantle when the unit is in operation.
• DO NOT throw anything onto the fire when the unit is in operation.
• Lava rocks are very hot; please keep the children or pets away at a safe distance.
• It is essential to keep the outdoor fire table valve compartment, burners, and circulating air
passages clean. Inspect outdoor fire table before each use.
•Prior to each fire table operation, check the hose for evidence of excessive abrasion or wear by
looking through the visual check hole. If the hose is damaged, cracked or cut, it must be replaced
before using the gas fire table. The hose assembly can only be replaced with a hose assembly
specified by the manufacturer.

5 / 19
IMPORTANT SAFETY INFO RMATION
(continued)
• Before each use, remove the lava rocks. Examine the burner and its components. If dirty, clea n
with a soft brush and soapy water solution. Examine the area around the burner; any dirt or
foreign material, such as spid er webs or nests in this area should b e removed. If it is evident tha t
the burner is d amaged, thefire table must not be used. The burner assembly cannot be replaced.
Please contact Ele menti at 909-985-5553 for technical support.
• Pla ce the hose out of the pathways where people may tr ip over it. Do not place the hose
in areas where it may be subjected to accidental da mage.
! WARNING This out doorfire table is for use with liquid p ropane (LP) gas only. The
conversion to or attempted use of natu ral gas in this outdoorfire table is dangerous and
could resu lt in serious personal injury, or property damage.
ATTENTION: Any alteration of the outdoorfire table that is not specifically directed in the
operations manual will void manufacturer warranty
.
PROPANE (LP) DANGERS AND W ARNIN GS
LP Gas
LP ga s is flammable and hazardous if handled improperly. Become aware of the characteristics
before using any LP gas product.
Propane Characteristics
• Flammable , explosive under pressure, heavier than air and settles in pools in low areas.
• In its natural state, propane has no odor. For your safety, an odorant has been added.
• Contact with propane could b urn your skin.
• Propane is extremely flammable and hazardous if handled improp erly.
LP GAS WARNINGS
• Cylinders must be stored outdoors in a well-ventilated area out of reach of children.
• Disconnected cylinders must have threaded valve plugs tightly installed and must not be stored
in a building, garage or any other enclosed area.
• Never use a propane cylinder with a damaged body, valve, collar or footing.
• Dented or rusted propane cylinders may be hazardous and sh ould be checked b y your propane
gas supplier.
• Be sure to use only one 20 lb (9.1 kg) LP gas cylinder with a Type 1 valve with this app liance as
required by the American National Standards Institute (ANSI) and the Canadian Standards
steering Co mmittee. Only tanks marked “propane” may be used.
• The LP gas supply tank must be constructed and marked in accordance with the specifica tions
for LP gas L P gas tanks of the U.S. Depa rtment of Transportation (DOT) or the National Standard
of Canada, CAN/CSA-B33 9, L P gas tanks, Spheres and Tubes fo r the Transportation of
Dangerous Goods and Commission.
• LP gas tank must be arr anged forvapor withdrawal.
• The LP gas tank must h ave a listed overfilling prevention device (O PD) and a QCCI or Type I

6 / 19
PROPANE (LP) DANGERS AND WARNINGS
• The LP gas tank must have a tank collar to protect the tank valve.
• LP gas cylinder must contain a shut-o valve as specified in the Standard for Compressed Gas
Cylinder Valve Outlet and Inlet Connection, ANSI/CGA-V-1-1977, CSA B96.
• The LP gas tank should not be dropped or handled roughly.
• Tanks must be stored outdoors out of the reach of children. Do NOT store in a building, garage,
or any other enclosed area.
• Never store your LP gas tank where temperatures can reachover 125°F.
• Do not store the LP gas cylinder in direct sunlight or near a source of heat or combustion.
• Never keep a filled LP gas tank in a hot car or car trunk. Heat will cause the gas pressure
to increase, which may open the relief valve and allow gas toescape.
• Place dust cap on valve outlet whenever the LP gas tank is not in use. Only install the type of
dust cap on the LP gas tank valve outlet that is provided with the LP gas tank valve. Other types
of caps or plugs may result in leakage of propane.
a. Do not store a spare LP gas cylinder under or near this appliance.
b. Never fill the LP gas cylinder beyond 80% full.
c. If the information in (a) and (b) is not followed exactly, a fire causing death or serious
injury may occur.
• LP gas cylinders should be filled only by a certified LP gas dealer.
• The pressure regulator is set for 11 inches of water column (pressure).
• The maximum inlet gas pressure for this outdoor fire table is 14 inches of water column
pressure.
• Never attempt to attach this appliance to the self-contained LP gas system of a camper trailer,
motor home or house.
• Always use the pressure regulator and hose assembly provided with the appliance to connect to
a LP gas cylinder. Never connect to an unregulated LP gas supply. For technical support contact
Elementi at 909-985-5553
• Hand turn the manual gas control valve. Never use tools. If the valve will not turn by hand, do
not try to repair it. Call a Certified Gas Technician. The use of force or any self attempted repair
may result in a fire or explosion.
Connecting your gas cylinder
Before connection, be sure that there is no debris caught in the head of the gas cylinder, head of
the regulator valve or in the head of the burner and burner ports. Connect regulator valve and
hand-tighten firmly. Disconnect the propane cylinder from the regulator valve when the fire table
is not in use. DO NOT obstruct the flow of combustion air and ventilation air to the burner.

7 / 19
HOSE & REGULATOR ASSEMBLY AND REPLACEMENT
1. This fireplace comes equipped with a standard LP gas hose and regulator including the
appliance side connection for a CGA No 791 Cylinder Connection Device. The LP gas hose
and regulator supplied with this fire table must be used. Only a hose and regulator specified
by manufacturer can be used for replacement.
a. The CGA No 791 connection incorporates a magnetic flow limiting device that acts to
limit the flow of gas if a leak is detected between the regulator and the burner valve.
b. If the burner valve is open prior to the LP gas cylinder service valve being opened, the
connection will interpret this free flow of gas to be a leak.
c. The connection safety feature will reduce gas flow from the regulator to the appliance to
a minimal level.
d. Be sure that the burner control valve is closed prior to opening the LP gas cylinder
service valve to ensure that the connection flow limiting device is not triggered mistakenly.
e. If the connection flow limiting device is triggered mistakenly, close the LP gas cylinder
service valve and the burner valve, wait 10 seconds to allow the device to reset, open the
cylinder service valve, then open the burner valve and light the fireplace as per lighting
instructions.
2. Be sure to protect the hose from any hot surfaces. Serious danger may result if the hose
contacts any hot surface
3. Regular maintenance of the hose and regulator:
a. Inspect the hose before each use of the fire table. If the hose shows signs of cracks,
abrasions, cuts or damage of any kind, do not operate the appliance. Fix or replace the
hose as required before using the appliance. For assistance with repair or replacement of
the hose, call Elementi at 909-985-5553. Use only replacement parts from the
manufacturer.
b. Inspect the seal inside the CGA No 791 service valve on the LP gas cylinder when
replacing the cylinder or at least once per year. If there is any indication of damage, have
the seal replaced by a certified gas dealer before operating the appliance.
4. Do not use tools to tighten the CGA No 791 connection nut onto the LP gas cylinder service
valve. Hand tighten only.
5. Be careful to not cross the threads on the connection when tightening the CGA No 791
connection on to the LP gas cylinder service valve.
6. “Leak Test” should always be performed after attaching the connection to the LP gas cylinder
service valve. (See “Checking for Leaks” section of this manual on page 10)
7. For the connection of the hose and regulator to the LP tank, refer to the “Connection” section of
the LP gas cylinder section above.

8 / 19
PARTS LIST
1
Fire Table 1
2 LP Regulator and Hose 1
3
Lava Rock 1

9 / 19
ASSEMBLY INSTRUCTIONS
1
Install the AAA battery as shown in the diag ram below.
Battery not included.

10 / 19
ASSEMBLY INSTRUCTIONS
2
Connecting the LP Gas Tank
Check to make sure there is no debris
in the head of the LP gas tank or in the
head of the regulator valve. Make sure you
check the burner and burner ports as well.
Connect gas line to tank by turning knob
clockwise. Hand tighten only.
3
Disconnecting the LP Gas Tank
Make sure the valve on the LP gas tank is
OFF.
Disconnect by turning the knob counter
clockwise until it is detached from the valve.

11 / 19
ASSEMBLY I NSTRUCTIONS
4
Place lava rock by hand. DO NOT dump bag out into tray to avoid clogging the
burner with dust. Position the lava rock (10kgs) to a level about 1” above the top
of the burner. Make sure that you do not block the igniter box with lava rock to
ensure proper ignition.

12 / 19
PRE-U SE INSTR UCTIONS
5
!
WARNING Before using this outdoor fire table, make sure
you have read, understand and are following all information
provi ded in the Important Safety Information section of this
manual . Failure to follow those instructions can cause death,
serious injury or property damage.
Prior to each gas fire place operation, check the hose and valve fo r evidence of
excessive abr asion or wear though the visual check hole on the side of the
base. Replace visual che ck cap prior to operating fireplace.
BURNER CONNECTIONS
Make sure the regulator valve and hose connections are securely fastened to
the bur ner and t he t ank. If your unit was assembled for you, visually check t he
connection between the burner pipe and orifice. Make sure the burner
pipe fits over the orifice.
!
WARNING Failure to inspect this connection or follow
these instr uctions could cause a fire or an explosion, which can
cause death, serious bodily injury, or damage to property
Orifi ce is located
in this connection
Please refer t o diag ram for proper installation.
If the burner pipe doe s not rest flush to the orifice please
contact Elementi a t 909 -985-5553 for assistance.
CHECKING FOR LEAKS
Make a leak check solution by mixing 1 part dish
washing soap with 3 parts water in a spray bottle.
Make sure control knob is “OFF.” Then, tu rn LP gas
tank to “ON” at valve.
Spray leak solution on valve connections paying
particular attention to the areas indica ted by arrows.
If any bubbles app ear turn LP gas tank OFF, reco nnect
and re-test. If you continue to see bubbles after several
attempts, disconnect LP gas source a nd contact
Elementi at 909-985-5553 for assistance.
If no bubbles app ear after one minute tu rn tank OFF,
wipe away solution and pr oceed.
Check for leaks at these locations

13 / 19
LIGHTING INSTRU CTIONS
Using the Ignitor
1. Read and understand all operating instructions before lighting Ensure that all protective film
has been removed from stainless burn tray prior to lighting.
2. Burner co ntrol knob must be in the “OFF” position.
3. Connect propane (LP) cylinder (see previous pages).
4. Slowly open valve on LP gas cylinder.
5. Push t o create sparks.
6. Push and turn th e cont rol knob to the “LIGHT” position
to light the burner.
7. Keep burner control knob pressed in for 15-30 seconds after gnition.
8. If ignition does not occur in 30 seconds, turn control knob to the “OFF ” position and t urn gas
off at the source, wait5 minutes until gas has cleared and repeat lighting procedure.
9. After lighting, rotate the burner control knob counter cl ockwise to “Low” setting. Observe
flame, make sure all burner ports are lit. Flame heigh t should be no higher than 13 inches tall.
10. Adjust the flame to the desired height with the control knob.
Using a Long Match o r Lighter
1. Prior to lighting, use a shovel to move lava rocks for
access to the burner.
2. Wearing heat resistant g loves, position the burning
long match or burning butane lighter near the side o f
the bur ner. DO NOT lean over the fire table while
lighting!
3. Turn control knob counterclockwise to “LIGHT”.
4. Remove long match/lon g butane lighter.
5. After lighting, use a shovel and heat resistant gloves
to careful ly move the lava rocks back into their proper
position and replace the glass pa nel.
6. After lighting, rotate the burner control knob counter
clockwise to “Low” settin g. Observe flame, make sure
all burner ports are lit. Flame height shou ld be n o
higher than 13 inches tall.
7. Adjust t he flame to the desired height with the control
knob.
!
WARNING
When using this method to light yo ur
fire table use heat resistant gloves and
follow t he step by step instructions.
Failure to do so could result in severe
injury.
Control Knob
! WARNING
If burner fame goes o ut during operation, immediately urn
the control knob “OFF” and let the gas clear a minimum of
5 minutes before attempting to re-light the fire table.
Please refer t o the trouble shooting pages for
additional support, beginning on page 18.

14 / 19
CARE AND CLEANING
Inspecting
This outd oor fire table must be inspected regularly to insure that the product is safe
to use and to extend product life.
!
WARNING
DO NOT inspect this outdoor fireplace until the fire is COMPLETELY out.
1. Check th e burner to make sure it is securely in place.
2. Check th e Ven turi tube to make sure it is clear and f ree of insects, spider nests and other debris.
3. Check all gas connections for leaks.
4. Check ign ition system to insure proper sparking.
5. Check components for any signs of damage, rust or excessive wear.
6. If da mage to any component is detected, DO NOT operate until the proper repairs have been
made
!
WARNING DO NOT tamper with this appliance. This is DANGEROUS and will void the
warranty. Any p art found to be faulty must be replaced with an approved part, confirmed by
manufacturer. For technical support contact Elementi at 909-985-5553.
General Care and Cleaning
This outd oor fireplace should be cleaned regularly t o ensure safe use and extend product life.
Note: After re peated use , a slight discoloration of the finishes may occur.
Table
1. Wipe exterior surfaces with a mild dish washing soap or baking soda, then r inse clean with
water.
Stainless Steel
1. For general cleaning use warm water, soap, ammonia, or detergent a pply with a soft cloth or
Sponge
2. For finger prin ts or smears use 3 M Stainless Steel Cleaner and Polish, Arcal 20, Lac-O-Nu,
Lumin Wash, O’Cedar Cream Polish, o r Stainless Shine, this wi ll provide a barrier file t o minimize
fingerprints.
3. For stubborn stains and discoloration use 3M Stainless Steel Cleaner and Pol ish, Allchem
Concentrated Clean er, Samae, Twinkle, Cameo Copper Cleaner, Liquid Nu Steel, Copper’s or
Revere Stainless Steel Cleaner, a pply u sing a so ft cloth in the same direction of the polish lines.
* Use of proprietary names is intended only to indicate a type of cleaner and does not constitute endorsement. Omission of any proprietary
cleanser does not imply its inadequacy. All products should be used in strict accordance with instructions on package.
Storage
!
DO NOT move or store this fire table unless the fire is COMPLETELY out and
cool to the touch.
WARNING
1. Turn gas OFF at tank connection. Remove tank and store in a cool, dry location outdoors, away
from children.
2. Carefully remove rock filler and store components flat to protect them from breakage.
3. ALWAYS cover your outdoor fire table when not in use with the cove r provided with the unit.
4. Store in a cool, dry location away from ch ildren and pets.

15 / 19
GAS COMPONENT CONNECTION CHECKS
If the burner will not light or stay lit, please perform the following checks.
1. Make sure the electrode wire is correctly connected.
Both electrode wires must be fully inserted into the igniter box.
2. Make sure that the pilot housing is unobstructed.
Clear any debris on top of the pilot housing and make sure there is no debris
between the igniter pin, thermocouple and the burner tube.
CORRECT
INCORRECT

16 / 19
Thermocouple
Igniter Pin
Valve
Thermocouple Wire
Wire should
be in line
with valve
Valve
Igniter Box
GAS COMPONENT CONNEC TION CHECKS
3. Make sure th at the igniter pin and thermocouple are correctly positioned.
- The igniter pin sh ould be pointe d straight to the the rmocouple.
- The thermocouple should be positioned 5mm a way from the bur ner tube.
Thermocouple
Wire
4. Make sure th at the thermocouple wire is correctly p ositioned. The thermocouple
wire should be in line with the valve.

17 / 19
TROUBLESHOOTING
Possible Cause 1: Electrode and burners are wet .
-Wipe dry with cloth.
Possible Cause 2: Igniter battery is dead or backwards.
-Check that the AAA battery is inserted correctly in the igniter (see page 10) or replace the
battery.
Possible Cause 3: Igniter Pin cracked or broken - sparks at crack.
-Call ELEMENTI at 909-985-5553 for technical support.
Possible Cause 1: No Gas Flow.
-Check if the LP gas t ank is empty. If empty, replace and ref ill. If
the pro pane tank is not empty, refer to “Problem: Sudden d rop in
gas flow” on the following page.
Possible Cause 2: Coupling nut and regulator not fully connected.
-Turn the coupling nut about one half to three fourths a turn, until
you feel a solid stop. Do not use tools, tighten by hand only.
Possible Cause 3: Obstruction of gas flow.
- Check for bent or kinked hose.
Possible Cause 4: Spider webs or insect nest in th
e Venturi.
- Clean the Venturi.
Possible Cause 5: Burner ports clogged or blocked.
-Reference “Problem: Irregular fla me pattern” on the following
page. Clean the burner ports as described there.
Possible Cause 1: Hose f rom gas fireplace is pinched.
-Make su re the hose is n ot pinched between the fire table and
the source of t he gas.
Possible Cause 2: Flame is being obstructed at burner ports.
-Make su re that the gas ports on the burner a re free of any lava
rocks so that the flame can flow naturally.
Possible Cause 4:
Wire loose or disconnected.
-Reference page 16, step 1, reconnect wire. Call
Elementi at 909-985-5553.
Possible Cause 5: Wire is shorting (sparking)
between igniter and electrode.
-Call ELEMENTI at 9 09-985-5553 for support.
Possible Cause 6: Igniter Pin not pointing at
thermocouple.
-Reference page 16, turn electrode to point at t he
thermocouple.
Possible Cause 7: Bad Igniter.
-Call ELEMENTI at 9 09-985-5553 for supporting.
Problem: The Fire Table emits a lot of black smoke when in use
Problem: Burner will not light with match
Problem: Burner will not light using igniter
17 / 20

18 / 19
TROUBLESHOOTING
Problem: Sudden drop in gas flow, or a reduce d flame height
Possible Cause 1: Out of gas.
-Call your local gas company.
Problem: Irregular flame pattern,flame does not run the full length o f the burner
Possible Cause 2: Excess flow saf ety device may have been activated.
-Turn control knob to “OFF”, wait 30 seconds and light outdoor fireplace. If flames are still too low reset
the excessive flow safety device by turning off the control kn ob a nd LP gas tank valve. Disconnect
regulator. Turn burner control knob to “HIGH”. Wait 1 minute. Turn burner control knob off . Reconnect
regulator and perform a leak check at tank connection. Turn L P gas tank valve on slo wly, wait 30
seconds and then light outdoor fire t able.
Possible Cause:
Burner ports are clogged or blocked.
-Clean burner ports. Do this by inserting a paperclip into each
of the burner ports to ensure they are not clogged.
WARNING: Make su re burner is not on and the gas supply
has been properly disconnected. Allow 15 minut es for unit to
cool before touching it.
Possible Cause 1: High or gusting winds.
-Increase flame to “HIGH” setting.
Possible Cause 2: Low on LP gas.
-Replace or refill LP gas tank.
Possible Cause 3: Excess fl ow valve tripped.
-Refer to “Problem: Sudden drop in gas flow”
Possible Cause 1:
Ice has built up on the outside of the LP gas tank because the vaporization process
is too low.
-Turn the control knob and the LP gas tank to “OFF”. Replace with a spare LP gas tank and resume
burning. Store the spare LP gas tank in a well ventilated area, away from children
Burner Ports
Problem: Flame blow ou t
Problem: Flam e seem s to lose he at when burnin g in cold weather-
temperature below 50°F

19 / 19
Ocean Rock USA LLC doing business as Elementi, warrants Elementi fire f eatures and
accessories to be free from defects in parts and workmanship under normal use and service for
a period of 1 year from the date of purchase. In the event of su ch defects Elementi will, at its
option, repair or replace the defective product. The foregoing is at th e discretion of Elementi.
There will be no charge for the replacement parts or product, however it will be the consumer’s
responsib
ility to return the product to the original place of purchase.
Elementi will not be responsible for consequential damages in excess of the purchase price of
the pro duct on which such liability is based and the warranty does not cover co sts including
freight, removal and reinstallation.
This warranty is non-transferable and applies only for units that are for non-commercial personal
use only.
Under this warranty agreement, all gas line s must be in stalled by a licensed gas
fitter.
Damage caused by shipping, staining and abuse are not covered under this warranty. Dings,
dents and scratches, fading and natural weathering are not covered under this warranty.
Decorative rock is not covered under th is warranty. Improper installations, repair or
modifications made by anyone other than Elementi will void this warranty and any damage
caused by such is also not covered under this warranty.
Minor chip ping, weather fading, water staining a nd non-
structural hairline cracks are typical of
the material of this product and are not covered under this warranty. Some color and texture
variation is typical of the material and finish for this product and is not covered under this
warranty.
Ocean Rock USA LLC
1300W. 9th ST, Upland, CA 91786
www.elementifire.com
Warra nty
/