Page is loading ...

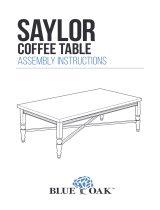
SAYLOR
SIDE TABLE
ASSEMBLY instructions

Assemble your Blue Oak™ outdoor furniture on a soft,
non-abrasive surface such as a carpet or cardboard to avoid
damaging the item. Seek assistance to assemble bulky or
heavy items (there’s no “i” in “team”). After final alignment,
make sure all the bolts are securely tightened with hex caps
pressed in place.
If you have issues, challenges or annoyances with this product,
give us a call at 1-888-444-0367.
We’re available from 8am-5pm (EST)
Monday-Thursday and 8am-4pm (EST) on Friday.
Before You Begin:
You already know this, but
it’s best to read ALL the
instructions before
assembly. Failure to do so
may result in faulty
assembly and potential
injury
(
no one wants that
kind of stain on their party
hosting record
)
.

PARTS
DESCRIPTION QTYNO.
Table Frame
A 1
Table Top
B 1
HARDWARE
DESCRIPTION QTYNO.
M8x20 Bolt
AA 4
Lock Washer
M8 Washer
Bolt Head Cap
BB
CC
DD
4
4
4
Wrench
EE
1

Assembly Instructions
Take a deep breath and keep a clear spot nearby
where you can place the small pieces.
Note: Do not fully tighten the bolts until you’ve
completed the assembly and checked to see if the
alignment is correct.
Step 2
See Figure 1. Use the wrench (EE) to attach the table
frame (A) to the table top (B) with 4 M8x20 bolts
(AA), M8 washers (CC) and lock washers (BB).
AA
BB
CC
B
A
Figure 1
Step 1
Place the table top (B) and table frame (A) on a
soft, non-abrasive surface such as cardboard
or a blanket.

You’re Finished.
Now close your eyes. Can you still picture
the table you just put together?
That means it’s true love.
Step 3
See Figure 2. Fully tighten all bolts and apply the bolt
head caps (DD) on to each bolt.
DD
A
B
Figure 2

blueoakoutdoor.com
/
