SERVICE MANUAL
FRYMASTER H14 SERIES
ELECTRIC FRYER
TABLE OF CONTENTS
WARRANTY STATEMENT..................................................................................................Page i
INTRODUCTION..................................................................................................................Page 1-1
INSTALLATION INSTRUCTIONS .......................................................................................Page 2-1
OPERATING FRYERS WITH M100B COOKING COMPUTERS........................................Page 3-1
OPERATING FRYERS WITH THERMOSTAT CONTROLLERS ........................................Page 4-1
OPERATING THE BUILT-IN FILTRATION SYSTEM ..........................................................Page 5-1
PREVENTIVE MAINTENANCE AND TROUBLESHOOTING..............................................Page 6-1
SERVICE PROCEDURES AND WIRING DIAGRAMS........................................................Page 7-1
PARTS LIST.........................................................................................................................Page 8-1
The Frymaster Corporation, 8700 Line Avenue 71106, 5489 Campus Drive 71129
P.O. Box 51000, Shreveport, Louisiana 71135-1000
PHONE 318-865-1711 FAX 318-219-7135
PRINTED IN THE UNITED STATES SERVICE HOTLINE 1-800-24-FRYER 819-5625 03/2000
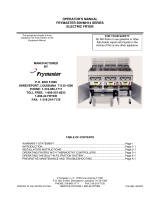
FOR YOUR SAFETY
Do Not Store or use gasoline or other
flammable vapors and liquids in the
vicinity of this or any other appliance.
This equipment chapter is to be
installed in the Fryer Section of the
Equipment Manual.
MANUFACTURED
BY
FRYMASTER CORPORATION
P.O. BOX 51000
SHREVEPORT, LOUISIANA 71135-1000
PHONE: 1-318-865-1711
TOLL FREE: 1-800-551-8633
1-800-24 FRYER
FAX: 1-318-862-2394

WARNING
IMPROPER INSTALLATION, ADJUSTMENT, ALTERATION, SERVICE OR MAINTENANCE CAN CAUSE PROPERTY
DAMAGE, INJURY OR DEATH. READ THE INSTALLATION, OPERATING AND MAINTENANCE INSTRUCTIONS
THOROUGHLY BEFORE INSTALLING OR SERVICING THIS EQUIPMENT.
WARNING
FOR YOUR SAFETY, DO NOT STORE OR USE GASOLINE OR OTHER FLAMMABLE VAPORS AND LIQUIDS IN THE
VICINITY OF THIS OR ANY OTHER APPLIANCE.
COMPUTERS
FCC
This device complies with Part 15 of the FCC rules. Operation is subject to the following two conditions:
1)This device may not cause harmful interference, and 2) This device must accept any interference received,
including interference that may cause undesired operation. While this device is a verified Class A device, it
has been shown to meet the Class B limits
CANADA
This digital apparatus does not exceed the Class A or B limits for radio noise emissions as set out by
the ICES-003 standard of the Canadian Department of Communications.
Cet appareil numerique n'emet pas de bruits radioelectriques depassany les limites de classe a et b
prescrites dans la norme NMB-003 edictee par le ministre des communications du Canada.
WARNING
THIS PRODUCT CONTAINS CHEMICALS KNOWN TO THE STATE OF CALIFORNIA TO CAUSE CANCER AND/OR
BIRTH DEFECTS OR OTHER REPRODUCTIVE HARM.
Operation, installation and servicing of this product could expose you to airborne particles of glasswool or ceramic
fibers, crystalline silica, and/or carbon monoxide. Inhalation of airborne particles of glasswool or ceramic fibers is known
to the State of California to cause cancer. Inhalation of carbon monoxide is known to the State of California to cause
birth defects or other reproductive harm.
FRYMASTER ELECTRIC FRYERS ARE MANUFACTURED FOR USE WITH THE TYPE VOLTAGE SPECIFIED ON
THE FRYER RATING PLATE LOCATED ON THE FRYER DOOR. FOR PROPER INSTALLATION PROCEDURES IN
THE UNITED STATES, REFER TO THE LATEST EDITION OF THE NATIONAL ELECTRIC CODE ANSI/N.F.P.A. NO.
70; IN CANADA, CANADIAN ELECTRICAL CODE PART 1, CSA-22.1. FOR INSTALLATION IN COUNTRIES OTHER
THAN THE UNITED STATES AND CANADA, REFER TO THE NATIONAL CODE APPROPRIATE FOR THE COUNTRY
IN WHICH THE EQUIPMENT IS BEING INSTALLED.
INFORMATION ON THE CONSTRUCTION AND INSTALLATION OF VENTILATING HOODS MAY BE OBTAINED
FROM THE LATEST EDITION OF THE "STANDARD FOR THE INSTALLATION OF EQUIPMENT FOR THE REMOVAL
OF SMOKE AND GREASE LADEN VAPORS FROM COMMERCIAL COOKING EQUIPMENT,” N.F.P.A. NO. 96.
COPIES OF THESE ELECTRICAL STANDARDS ARE AVAILABLE FROM THE NATIONAL FIRE PROTECTION
ASSOCIATION, BATTERY MARCH PARK, QUINCY, MASS. 02269

i
WARRANTY STATEMENT
Frymaster, L.L.C. makes the following limited warranties to the original purchaser only for this
equipment and replacement parts:
A. WARRANTY PROVISIONS - FRYERS
1. The Frymaster Corporation warrants all components against defects in material and
workmanship for a period of one year.
2. All parts, with the exception of the frypot, heating elements and fuses, are warranted for one
year after installation date of fryer.
3. If any parts, except fuses, become defective during the first year after installation date,
Frymaster will also pay straight-time labor costs to replace the part, plus up to 100 miles/160
km of travel (50 miles/80 km each way).
B. WARRANTY PROVISIONS - FRYPOTS
(Applies to fryers installed on or after January 1, 1995, only.)
If a frypot develops a leak within seven years after installation, Frymaster will, at its option,
either replace the entire battery or replace the frypot, allowing up to the maximum time per the
Frymaster time allowance chart hours of straight-time labor plus up to 100 miles/160 km of
travel (50 miles/80 km each way) to change the frypot.
C. WARRANTY PROVISIONS - HEATING ELEMENTS
(Applies to fryers installed on or after January 1, 1995, only.)
1. The Frymaster Corporation warrants the heating elements against defective material or
workmanship for a period of three years from the original installation date, parts only.
2. This warranty does not cover ancillary components, including the hi-limit, temperature
probe, and contactors.
D. WARRANTY PROVISIONS - COOKING COMPUTER
1. The Frymaster Corporation warrants the M-100B Cooking Computer against defective
material or workmanship for a period of one year from the original installation date, parts and
labor. Replacements for defective units during the second and third year are available at a
reduced rate.
2. During this warranty period, Frymaster will, at its option, repair or replace defective cooking
computer returned with new or factory rebuilt and functionally operative units.

ii
3. For replacement of defective computers under warranty, call your local Frymaster Factory
Authorized Service Center. All computers replaced under the Frymaster exchange program
are covered by a one-year (parts only) warranty.
E. PARTS RETURN
All defective in-warranty parts must be returned to a Frymaster Authorized Factory Service
Center within 60 days for credit. After 60 days, no credit will be allowed.
F. WARRANTY EXCLUSIONS
This warranty does not cover equipment that has been damaged due to misuse, abuse, alteration,
or accident such as:
• improper or unauthorized repair (including any frypot which is welded in the field);
• failure to follow proper installation instructions and/or scheduled maintenance procedures as
prescribed in your MRC cards. Proof of scheduled maintenance is required to maintain the
warranty;
• improper maintenance;
• damage in shipment;
• abnormal use;
• removal, alteration, or obliteration of either the rating plate or the date code on the heating
elements;
• operating the frypot without shortening or other liquid in the frypot;
• no fryer will be warranted under the seven-year program for which a proper start-up form has not
been received.
This warranty also does not cover:
• transportation or travel over 100 miles/160 km (50 miles/80 km each way), or travel over two
hours;
• overtime or holiday charges;
• consequential damages (the cost of repairing or replacing other property which is damaged), loss
of time, profits, use or any other incidental damages of any kind.
There are no implied warranties of merchantability or fitness for any particular use or purpose.

1-1
CHAPTER 1: INTRODUCTION
1.1 General
Read the instructions in this manual thoroughly before attempting to operate this equipment. This
manual covers all configurations of models MH14 and BIMH14 fryers built since July 1999. Models
designated MH14 do not have built-in filtration systems. Models designated BIH14 are equipped with
FootPrint III built-in filtration systems.
H14 Series fryers feature deep cold-zones and easy to clean, open frypots with tilt-up elements. The
fryers are controlled by multi-product cooking computers or optional thermostat controllers. Fryers in
this series come in full or split-pot arrangements, and can be purchased as single units or grouped in
batteries of up to five fryers.
1.2 Safety Information
Before attempting to operate your unit, read the instructions in this manual thoroughly.
Throughout this manual, you will find notations enclosed in double-bordered boxes similar to the ones
below.
CAUTION boxes contain information about actions or conditions that may cause or result in a
malfunction of your system.
CAUTION
Example of a CAUTION box.
WARNING boxes contain information about actions or conditions that may cause or result in
damage to your system, and which may cause your system to malfunction.
WARNING
Example of a WARNING box.
DANGER boxes contain information about actions or conditions that may cause or result in injury to
personnel, and which may cause damage to your system and/or cause your system to malfunction.
DANGER
Hot cooking oil causes severe burns. Never attempt to move a fryer containing hot
cooking oil or to transfer hot cooking oil from one container to another.

1-2
Fryers in this series are equipped with automatic safety features:
1. Two high temperature detection features shut off power to the elements should the controlling
thermostat fail.
2. A safety switch built into the drain valve prevents the elements from heating with the drain valve
even partially open.
1.3 Computer Information
This equipment has been tested and found to comply with the limits for a Class A digital device,
pursuant to Part 15 of the FCC rules. While this device is a verified Class A device, it has been shown
to meet the Class B limits. These limits are designed to provide reasonable protection against harmful
interference when the equipment is operated in a commercial environment. This equipment generates,
uses and can radiate radio frequency energy and, if not installed and used in accordance with the
instruction manual, may cause harmful interference to radio communications. Operation of the
equipment in a residential area is likely to cause harmful interference in which case the user will be
required to correct the interference at his own expense.
The user is cautioned that any changes or modifications not expressly approved by the party
responsible for compliance could void the user's authority to operate the equipment.
If necessary, the user should consult the dealer or an experienced radio and television technician for
additional suggestions.
The user may find the following booklet prepared by the Federal Communications Commission
helpful: "How to Identify and Resolve Radio-TV Interference Problems". This booklet is available
from the U.S. Government Printing Office, Washington, DC 20402, Stock No. 004-000-00345-4.
1.4 European Community (CE) Specific Information
The European Community (CE) has established certain specific standards regarding equipment of this
type. Whenever a difference exists between CE and non-CE standards, the information or instructions
concerned are identified by means of shadowed boxes similar to the one below.
CE Standard
Example of box used to distinguish CE and
Non-CE specific information.

1-3
1.5 Shipping Damage Claim Procedure
What to do if your equipment arrives damaged:
Please note that this equipment was carefully inspected and packed by skilled personnel before
leaving the factory. The freight company assumes full responsibility for safe delivery upon acceptance
of the equipment.
1. File Claim for Damages Immediately—Regardless of extent of damage.
2. Visible Loss or Damage—Be sure this is noted on the freight bill or express receipt and is signed
by the person making the delivery.
3. Concealed Loss or Damage—If damage is unnoticed until equipment is unpacked, notify Freight
Company or carrier immediately and file a concealed damage claim. This should be done within
15 days of date of delivery. Be sure to retain container for inspection.
1.6 Service Information
McDonald’s store personnel perform routine maintenance. For non-routine maintenance or repairs, or
for service information, contact your local Frymaster Authorized Service Center (FASC). Service
information may also be obtained by calling the Frymaster Technical Services Department (1-800-
24FRYER). The following information will be needed in order to assist you efficiently:
Model Number _________________________
Serial Number _________________________
Voltage_______________________________
Nature of the Problem ___________________
_____________________________________
_____________________________________
RETAIN AND STORE THIS MANUAL IN A SAFE PLACE FOR FUTURE USE.

2–1
CHAPTER 2: INSTALLATION INSTRUCTIONS
2.1 General
Proper installation is essential for the safe, efficient, trouble-free operation of this appliance.
Any unauthorized alteration of this equipment will void the Frymaster warranty.
DANGER
Copper wire suitable for at least 167° F (75° C) MUST
MUSTMUST
MUST be used for power
connections.
DANGER
The electrical power supply for this appliance MUST
MUSTMUST
MUST be the same as indicated on
the rating and serial number plate located on the inside of the fryer door.
DANGER
This appliance MUST
MUSTMUST
MUST be connected to the voltage and phase as specified on the
rating and serial number plate located on the inside of the fryer door.
DANGER
All wiring connections for this appliance MUST
MUSTMUST
MUST be made in accordance with the
wiring diagrams furnished with the equipment. Wiring diagrams are located on the
inside of the fryer door.
DANGER
Do not store or use gasoline or other flammable vapors and liquids in the vicinity of
this or any other appliance.
In the event of a power failure, the fryer(s) will automatically shut down. If this occurs, turn the
power switch OFF. Do not attempt to start the fryer(s) until power is restored.
This appliance must be kept free and clear of combustible material, except that it may be installed on
combustible floors.
A clearance of 6 inches (15cm) must be provided at both sides and back adjacent to combustible
construction. A minimum of 24 inches (61cm) should be provided at the front of the equipment for
servicing and proper operation.
WARNING
Do not block the area around the base or under the fryers.
The duct system, the hood, and the filter bank must be cleaned on a regular basis and kept free of
grease. See the appropriate Maintenance Requirement Cards.

2–2
2.2 After Fryers Are Under The Fry Station Hood
Adjust casters so that fryers are level and at the proper height in the fry station hood. If necessary,
level the fryer(s) by loosening the locking screw on the caster leg and screwing the caster in or out.
When fryer is level and at proper height, retighten the locking screw on the caster leg.
Secure the fryer in place under the hood with the restraining hardware installed with the hood.
2.3 Power Requirements
DANGER
Copper wire suitable for at least 167°F (75°C) MUST
MUSTMUST
MUST be used for power connections.
MODEL VOLTAGE PHASE
WIRE
SERVICE
MIN.
SIZE
AWG
(mm
2
)
AMPS PER LEG
L1 L2 L3
H14 208 3 3 6 (16) 39 39 39
H14 240 3 3 6 (16) 34 34 34
H14 480 3 3 8 (10) 17 17 17
H14 220/380 3 4 6 (16) 21 21 21
H14 240/415 3 4 6 (16) 20 20 21
H14 230/400 3 4 6 (16) 21 21 21
ALL 208 3 3 6 (16) 39 39 39
14 SERIES 240 3 3 6 (16) 34 34 34
EPRI 220/380 3 4 6 (16) 21 21 21
UNITS 240/415 3 4 6 (16) 20 20 20
DANGER
The electrical power supply for this appliance MUST
MUSTMUST
MUST be the same as indicated on
the rating and serial number plate located on the inside of the fryer door.
DANGER
This appliance MUST
MUSTMUST
MUST be connected to the voltage and phase as specified on the
rating and serial-number plate located on the inside of the fryer door.
DANGER
All wiring connections for this appliance MUST
MUSTMUST
MUST be made in accordance with the
wiring diagrams furnished with the equipment. Wiring diagrams are located on the
inside of the fryer door.

2–3
2.4 Frypot Boil-Out
Before the fryer is first used for cooking product, it should be boiled out to ensure that any residue
from the manufacturing process has been completely eliminated.
Also, after the fryer has been in use for a period of time, a hard film of caramelized vegetable oil will
form on the inside of the frypot. This film should be periodically removed by following the boil-out
procedure.
Refer to Fryers Maintenance Requirement Card (MRC) 14A for the boil-out procedure.

3–1
CHAPTER 3: OPERATING FRYERS
WITH M100B™ COOKING COMPUTERS
3.1 Equipment Setup and Shutdown Procedures
Setup
WARNING
Fill the frypot to the bottom oil level line with vegetable oil before pressing the
ON/OFF switch to the ON position. Failure to do so could damage the frypot.
0. Fill the frypot with vegetable oil to the bottom OIL LEVEL line located on the rear of the frypot.
This will allow for oil expansion as heat is applied. Do not fill cold oil any higher than the bottom
line; overflow may occur as heat expands the oil.
0. Ensure that the power cord(s) is/are plugged into the appropriate receptacle(s). Verify that the
face of the plug is flush with the outlet plate, with no portion of the prongs visible.
0. Ensure that the vegetable oil level is at the top OIL LEVEL line when the vegetable oil is at its
programmed cooking temperature. It may be necessary to add vegetable oil to bring the level up
to the proper mark, after the oil has reached the programmed cooking temperature.
CAUTION
Do not add vegetable oil to the fryer between the time the computer is turned on and
the time it reaches programmed cooking temperature. Doing so is likely to cause
RECOVERY LOCKOUT (REC LOC). See Section 3.4.
Shutdown
0. Press the ON/OFF switch to the OFF position (the display will show OFF).
2. Filter vegetable oil and clean fryers.
3. Place the frypot covers on frypots.
3.2 Introduction To The M-100B™ Cooking Computer
The M-100B cooking computer, illustrated on the following page, automatically maintains fryer
temperature to cook products according to preprogrammed cooking specifications. The computer also
acts as a cooking process timer, displaying the remaining cooking time for each product and alerting
the operator by sound and display message to shake or pull the product at the correct time. It also
signals quality control (hold-time) limits. The computer automatically adjusts cooking times to
compensate for variances in product temperature and basket load so that, for example, a full basket of
cold fries will be cooked to the same quality as half a basket of fries at room temperature.

3–2
A
B
C
D
H
J
L
E
N
O
M
K
I
F
G
ITEM DESCRIPTION
A Temperature Display Switch
B Left LED Display
C Right LED Display
D Cook Switch #1, Left
E Cook Switch #2, Left
F Cook Switch #1, Right
G Cook Switch #2, Right
H Recovery/Use Time Recall Switch, Left
I Recovery/Use Time Recall Switch, Right
J Light - Left Heating Mode Indicator
K Light - Right Heating Mode Indicator
L Switch - Left ON/OFF
M Switch - Right ON/OFF
N Switch - Left Product Selection
O Switch - Right Product Selection
To quickly determine the software version number and the current configuration of an M-100B
computer, with the computer turned OFF (OFF in both displays) press the temperature check
switch. The displays will automatically cycle through the version number, power configuration (gas
or electric), EPRA configuration (On or Off), and frypot configuration (full- or split-).
The M-100B is factory-programmed with McDonalds’s cooking specifications for a group of seven
standard products. The cooking times and temperature settings for these factory-programmed products
can be changed by store personnel if required. Additionally, two test menus are available for store
personnel to program product names, cooking times, temperature settings, and shake or duty times for
products not included on the factory-programmed menu. The test menus can also be set to
automatically adjust the cooking rate to compensate for product variances.
For units equipped with built-in filtration, the computer times the polishing process and alerts the
operator when the polishing time has elapsed. (Polishing refers to circulating the vegetable oil
through the filtration system for a specified time.)

3–3
The fryer has two built-in high-limit protection features. If the temperature in the frypot reaches
approximately 410°F (210°C), the computer opens the heat relay circuit, turning the elements off. If
the temperature in the frypot reaches 450°F (232°C), a mechanical high-limit shuts off electrical
power to the elements. The operator should periodically test each of the high-limit protection features
to verify that they are operating correctly. Refer to Grills/Fryers Maintenance Requirement Card
(MRC) 15 for the procedure.
3.3 M-100B™ Computer Operating Instructions
WARNING
Before pressing the on/off switch to the ON position, ensure that the frypot is
properly filled with vegetable oil. See Section 3.1.
Operating the Computer on Full-Vat Fryers
0. Turn ON the cooking computer by pressing the right ON/OFF switch . A product name (for
example, FR FRIES) will appear in the right LED display.
0. If the frypot temperature is below 180°F (82°C), the computer will automatically enter a warm-up
cycle (often called a melt cycle). The heating elements will cycle on and off repeatedly, allowing
the vegetable oil to heat gradually, without scorching. During the warm-up cycle, the right heating
mode indicator will alternately illuminate and go out as the elements cycle on and off. Within
about 45 minutes, the computer will exit the warm-up cycle and the heat mode indicator will
remain continuously illuminated.
0. The M-100B computer allows the operator to use both sides of the computer if desired. By having
both sides of the computer on, the operator can select two products that have the same cooking
temperature, but different cooking times. Using a pair of twin baskets, both products can be
cooked at the same time.
0. To activate the left side of the computer, press the left ON/OFF switch . A product name will
be displayed in the left LED display.
0. Select the product to be cooked by pressing the right product selection switch (or, if both sides
of the computer are ON, the left product selection switch
) until the desired product is
displayed.
Once the frypot temperature is above 180°F (82°C), but still 15°F (8°C) or more below the setpoint
temperature for the product displayed (for example, french fries), the computer will alternately display
LOW TEMP and FR FRIES, and the right heating mode indicator will remain continuously
illuminated.
The cooking cycle cannot be started until the cooking oil is within ±15°F (8°C) of the programmed
setpoint. When the frypot temperature is within ±15°F (8°C) of the programmed setpoint, the product
name will be displayed continuously, indicating that the fryer is ready to cook the displayed product.

3–4
Operating the Computer on Split-Vat Fryers
1. Turn ON the cooking computer by pressing the ON/OFF switches . Pressing the left switch
turns on the left side of the computer; pressing the right switch turns on the right side. A product
name (for example, FR FRIES) will appear in the LED display corresponding to the switch
pressed.
2. If the frypot temperature is below 180°F (82°C), the computer will automatically enter a warm-up
cycle (often called a melt cycle). The heating elements will cycle on and off repeatedly, allowing
the vegetable oil to heat gradually, without scorching. During the warm-up cycle, the heating
mode indicator will alternately illuminate and go out as the elements cycle on and off. Within
45 minutes, the computer will exit the warm-up cycle and the heat mode indicator will remain
continuously illuminated.
3. Select the product to be cooked by pressing the left or right product selection switches ,
depending upon the vat in which you wish to cook.
4. Once the frypot temperature is above 180°F (82°C), but still 15°F (8°C) or more below the
setpoint temperature for the product displayed (for example, french fries), the computer will
alternately display LOW TEMP and FR FRIES, and the heating mode indicator will remain
continuously illuminated.
5. The cooking cycle cannot be started until the cooking oil is within ±15°F (8°C) of the
programmed setpoint. When the frypot temperature is within ±15°F (8°C) of the programmed
setpoint, the product name will be displayed continuously, indicating that the fryer is ready to
cook the displayed product.
Viewing the Frypot Temperature (Actual or Setpoint)
To display the actual frypot temperature, press the temperature check switch once. To display the
setpoint temperature, press the switch twice.
Cooking Product (Full-Vat or Split-Vat)
1. Fill basket(s) with product, lower the basket into the vegetable oil, then press the cook switch (
1
or
2
) that corresponds to the full- or split-vat to be used. This will activate the cooking cycle of
the product.
Example 1: In a full-vat fryer, press cook switch
1
when the first basket of twin baskets of fries
is dropped. Halfway through the first cooking cycle, drop the second basket and press cook
switch
2
.
Example 2: The M-100B is programmed to cook Crispy Chicken (CSPY) and Chicken
McNuggets (NUG) in the same side of a split-vat arrangement. Cook switch
1
corresponds to
Crispy Chicken, and cook switch
2
corresponds to Chicken McNuggets.
2. The display will show the number of minutes and seconds of cooking time remaining.

3–5
3. At the programmed shake time, an audible alarm will sound and the display will flash SHAKE.
After shaking the basket, press the corresponding cook switch,
1
or
2
, to cancel the alarm.
0. After the completing the cooking time, an audible alarm will sound and the display will flash
pull. Remove the indicated basket and press the corresponding cook switch,
1
or
2
, to cancel
the alarm. If no other products are being cooked in the frypot, the display shows 7:00 QA
indicating that the quality timer is counting down. If the quality time is set for some time other
than 7:00 minutes, the display starts counting down from that time. (QA is not available for
McChicken, Crispy Chicken or Filet-o-Fish).
0. When the quality time expires, an audible alarm will sound, and the display will flash
QA. Cancel
the alarm by pressing the corresponding cook switch,
1
or
2
.
NOTE: When you initiate a new cook cycle, the quality time will automatically reset.
3.4 M-100B™ Computer Problem Condition Indicators
Open Drain Valve Indication
If, when the ON/OFF switch is pressed to the ON position, the display reads IGNITION
FAILURE, verify that the drain valve is fully closed. A drain safety switch built into the drain valve
assembly prevents the elements from being energized if the valve is not completely closed. After
verifying that the valve is fully closed, turn the computer OFF* for at least 5 seconds, then turn it back
on. If the message reappears, there is a problem in the electrical circuitry of the fryer or the computer;
contact your Frymaster Factory Authorized Service Center (FASC).
* On early-version M-100B split-vat units, BOTH computers must be turned off, even though the
problem condition may be associated with only one vat.
Low Temperature Indication
If the frypot temperature drops to more than 45°F (25°C) below the programmed setpoint temperature
during the cooking cycle, the cook switches will lock, the display will flash lOW TEMP and an
audible alarm will sound. If the frypot temperature returns to a range between 45°F (25°C) to 15°F
(8°C) of setpoint, the audible alarm will stop, but the cook switches remain locked and the display
alarm continues flashing. All functions return when the frypot temperature is within 15°F (8°C) of
the programmed setpoint.
Probe Failure Indication
If the temperature probe fails, the display will flash PROBE FAILURE and an audible alarm will
sound. To cancel the alarm, turn the computer OFF. In split-vat fryers, turn off the side in which the
failure occurred. If a probe fails during the high-limit test, PROBE FAILURE is displayed.
NOTE: If the temperature probe fails in the left side of a split-vat, that side cannot be turned back
ON once it has been turned OFF.

3–6
Recovery Out of Range (REC LOC)
Recovery time is an indication of the condition of the fryer. When the fryer is first turned on, the
computer records the amount of time it takes to heat the cooking oil from 250°F (121°C) to 300°F
(149°C). Also, anytime the temperature of the oil drops below 180°F (82°C), such as when cold oil is
added, the computer will check the recovery time. If the fryer takes longer than 1 minute and 40
seconds to recover, the display will show REC LOC and the computer will lock out.
To clear the REC LOC condition, enter the program mode (see How to Enter the Program Mode in
on page 3-10) and push the temperature check switch (see diagram below).
It is easy to view the currently recorded recovery time with the computer ON. Press the recovery
recall switch for the frypot you wish to check. On full-vat units, press the right switch.
If REC LOC occurs three or more times within a week, verify that oil is not being added while the
fryer is heating (that is, while a heat mode indicator is illuminated) and that the fryer’s power cord
is fully plugged in. If oil is not being added while the fryer is heating, and the power cord is fully
plugged in, have the fryer checked by a qualified service agent.

3–7
3.5 M-100B™ Computer Set-Up and Programming Instructions
The M-100B computer has three modes of operation. In addition to the Cooking Mode, which was
discussed in Sections 3.3 and 3.4, there is a Setup Mode and a Programming Mode. (The cooking
mode is the computer’s default mode – when the computer is turned on, it comes up in the cooking
mode.)
In the Setup Mode, the operator can:
• change the computer’s display language
• configure the computer for use on electric or gas fryers
• configure the computer for use on either a full-vat or a split-vat fryer
• specify how the computer displays product names and temperatures
• calibrate computer temperature to actual frypot temperature
• activate or deactivate the frypot BOIL OUT feature
In the Program Mode, the operator can:
• reset the computer to the factory default settings
• change the shake, pull, and QA (hold) times for menu items
• change the cooking temperature setpoints for menu items
• add products and cooking parameters to the two test menus
• suppress a duty function in a menu item
• turn the display of a menu item in the factory-programmed menu on or off
• display usage information that is automatically recorded by the computer
3.5.1 M-100B™ Computer Setup Mode
How to Enter the Setup Mode
1. Turn both sides of the computer OFF by pressing the switches. OFF will appear in both LED
displays.
2. Press the right
1
,
2
and switches simultaneously.

3–8
3. Release all 3 switches at the same time. M100B, then SETUP will appear briefly in the left
display, then BOIL-OUT will appear in the left display and YES or NO will appear in the right
display.
How to Change the Computer’s Display Language
1. Enter the setup mode. See How to Enter the Setup Mode on page 3-7.
2. Press and release the
switch until the word language appears in the left LED display.
3. Press the right
1
or
2
switch until the desired language (English, French, French-Canadian,
Spanish, or Portuguese) is displayed in the right LED display.
4. When the desired language is displayed, press either ON/OFF switch to lock in the selection.
The right display will show loading for about 5 seconds, indicating that the computer’s
display language is being changed, then both displays will change to OFF.
How to Configure the Computer for Use on an Electric Fryer
1. Enter the setup mode. See How to Enter the Setup Mode on page 3-7.
2. Press and release the switch until GAS Yes or GAS no appears in the LED displays.
3. Gas nO indicates the computer is configured for use on an electric fryer; Gas YES indicates
the computer is configured for use on a gas fryer. Press the right
1
or
2
switch to change the
configuration.
4. Press the switch to save the settings.
5. Press either ON/OFF switch to save the setting and exit the setup mode. Both displays will
change to OFF.
How to Configure the Computer for Use on Either a Full-Vat or a Split-Vat Fryer
1. Enter the setup mode. See How to Enter the Setup Mode on page 3-7.
2. Press and release the switch until 1 vat appears in the left display.
3. Press the right
1
or
2
switch to toggle back and forth between full-vat (yes) or split-vat (NO).
4. Press the switch to save the settings.
5. Press either ON/OFF switch to exit the setup mode. Both displays will change to OFF.
How to Change Computer Product/Temperature Displays
1. Enter the setup mode. See How to Enter the Setup Mode on page 3-7.

3–9
2. Press and release the switch until the word DISPLAY appears in the left display.
3. Press the right
1
or
2
switch to toggle back and forth between constant product display
(CONSTANT) or alternating temperature and product display (ALT).
4. Press the switch to save the settings.
5. Press either ON/OFF switch
to exit the setup mode. Both displays will change to OFF.
How to Calibrate Computer Temperature to Actual Frypot Temperature
NOTE: For this procedure, actual frypot temperature refers to the temperature of the oil in the frypot
as measured with a good-grade thermometer or pyrometer. The computer’s temperature can only be
adjusted ±5°F (±3°C). The computer cannot be adjusted to a temperature greater than 375°F (191°C).
1. Enter the setup mode. See How to Enter the Setup Mode on page 3-7.
1. Press and release the switch until CALIB appears in the display.
1. Press the temperature check switch . The frypot temperature sensed by the computer will be
displayed. In split-vat units, the temperatures for each side will be displayed.
1. For the left side of a split-vat: Press the left
1
switch to go UP a degree (maximum of 5 for
Fahrenheit or 3 for Celsius). Press the left
2
switch to go DOWN a degree (maximum of 5 for
Fahrenheit or 3 for Celsius).
For the right side of a split-vat or for a full-vat: Press the right
1
switch to go UP a degree
(maximum of 5 for Fahrenheit or 3 for Celsius). Press the right
2
switch to go DOWN a degree
(maximum of 5 for Fahrenheit or 3 for Celsius).
1. Press the switch to save the settings.
1. Press either ON/OFF switch
to exit the setup mode. Both displays will change to OFF.
How to Activate or Deactivate the Frypot BOIL-OUT Feature
0. Enter the setup mode. See How to Enter the Setup Mode at the beginning of this section.
0. Press and release the switch until BOIL-OUT appears in the display.
0. Press the right
1
or
2
switch to toggle the boil-out mode ON or OFF.
0. Press the
switch to save the settings.
0. Press either ON/OFF switch
to exit the setup mode. Both displays will change to OFF.

3–10
3.5.2 M-100B™ Computer Programming Mode
How to Enter the Program Mode
1. Press the ON/OFF switches until both displays of cooking computer indicate OFF. Press the
left product selection switch and the left
1
and
2
cook switches simultaneously. Release all
three switches at the same time.
2. When the program mode has been entered, the display will flash M-100B computer
briefly, followed by the software version number. After a few seconds, Fr fries yes or
Fr fries no will be displayed, depending upon previous program settings.
How to Reset the Computer to the Factory Defaults
While in the program mode, press all 4 cook switches (left and right
1
and
2
) simultaneously to reset
the computer to the factory defaults. See How to Enter the Program Mode above. Updating
menu will flash in the display, followed by epra cleared and cooks cleared.
After a few seconds, Fr fries yes will be displayed, indicating that the computer has been
reset to the factory defaults.
How to Change the Shake, Pull, Or Quality Times for Menu Items
1. Enter the program mode. (See How to Enter the Program Mode above.)
2. Press and release the switch until the product to be changed appears in the left display.
3. Press and release the switch until the function to be changed (SHAKE, PULL, or QA)
appears in the left display. The current time setting and automatic (AUTO) or manual (MAN)
alarm cancel mode options appear in the right display.
NOTE: Shake Time refers to the programmed time at which the operator will be prompted by an
audible alarm to shake the basket, but not stop the cooking process. Pull Time refers to the
programmed time at which the product is fully cooked and at which the operator will be prompted
by an audible alarm to remove the basket from the cooking oil. QA Time refers to the maximum
time that a product may be held after the cooking cycle has completed.
NOTE: When the programmed time has elapsed, the automatic alarm-cancel mode (AUTO)
audible alarm will sound three times and then stop. When the programmed time has elapsed, the
manual alarm cancel mode (MAN) audible alarm will sound until the operator presses the cook
switch (
1
or
2
) that was pressed to start the cooking cycle.
4. Press the right
2
switch to toggle between automatic alarm cancel mode (AUTO) and manual
alarm cancel mode (MAN).
Page is loading ...
Page is loading ...
Page is loading ...
Page is loading ...
Page is loading ...
Page is loading ...
Page is loading ...
Page is loading ...
Page is loading ...
Page is loading ...
Page is loading ...
Page is loading ...
Page is loading ...
Page is loading ...
Page is loading ...
Page is loading ...
Page is loading ...
Page is loading ...
Page is loading ...
Page is loading ...
Page is loading ...
Page is loading ...
Page is loading ...
Page is loading ...
Page is loading ...
Page is loading ...
Page is loading ...
Page is loading ...
Page is loading ...
Page is loading ...
Page is loading ...
Page is loading ...
Page is loading ...
Page is loading ...
Page is loading ...
Page is loading ...
Page is loading ...
Page is loading ...
Page is loading ...
Page is loading ...
Page is loading ...
Page is loading ...
Page is loading ...
Page is loading ...
Page is loading ...
Page is loading ...
Page is loading ...
Page is loading ...
Page is loading ...
Page is loading ...
Page is loading ...
Page is loading ...
Page is loading ...
Page is loading ...
Page is loading ...
Page is loading ...
Page is loading ...
Page is loading ...
Page is loading ...
Page is loading ...
Page is loading ...
Page is loading ...
Page is loading ...
Page is loading ...
Page is loading ...
Page is loading ...
Page is loading ...
Page is loading ...
Page is loading ...
Page is loading ...
Page is loading ...
Page is loading ...
Page is loading ...
Page is loading ...
Page is loading ...
Page is loading ...
Page is loading ...
Page is loading ...
Page is loading ...
Page is loading ...
Page is loading ...
Page is loading ...
Page is loading ...
Page is loading ...
Page is loading ...
Page is loading ...
Page is loading ...
Page is loading ...
Page is loading ...
Page is loading ...
/