Page is loading ...

0
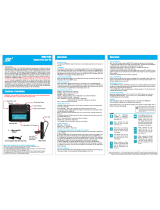
CL8350
GSM Telephone with Voice
Amplification
English

1
CONTENTS 1
INTRODUCTION 5
Unpacking the Telephone 6
DESCRIPTION 7
General Description 7
Menu Navigation 14
SETTING UP 16
Network Services 16
Passwords 16
Install SIM Card and Battery 17
Charging the battery 18
Battery Use 20
Switching On/Off 21
USING THE TELEPHONE 22
Standby Mode 22
Energy Saving Mode 22
Making a Call 22
Making a Call from the Call List 23
Making a Call from the Phone Book 23
Making a Call using Quick Dial 24
Receiving a Call 24
Rejecting a Call 25
CONTENTS

2
Hands Free 26
End Single Call 26
Start a New Call 27
Phoneboook 27
Write an SMS 28
Mute Function 28
DTMF Tones 29
Receiving Volume and Tone 29
Call Timer 29
MESSAGES 30
Send a Text Message 30
Receiving a Text Message (Inbox) 31
Reviewing Stored Text Messages (Inbox) 31
Outbox 32
Templates 32
SMS settings 32
Voicemail Server 33
PHONEBOOK 34
Create a Phonebook Entry 35
Create a Phonebook Entry from Standby 37
View Phonebook Entries 38
Editing and Deleting a Phonebook Entry 39
Copying and Deleting All Phonebook Entries 40
Phonebook Groups 42
CONTENTS

3
Editing Phonebook Groups Name 43
Phonebook Settings 44
Extra Numbers 45
CALL CENTER 46
View Call Logs 46
Call history 46
Delete Call Logs 47
Call Settings 48
Call waiting 49
Call divert 49
Call barring 49
Advance settings 50
Black list/ auto redial 50
Call time display/ Call time reminder 51
SOS SETTINGS 52
SETTINGS 55
Tone control 55
Boost function 55
Direct number 55
User profiles 57
Wall paper 59
Phone settings 59
Network settings 60
CONTENTS

4
Security settings 61
Restore factory setting 63
ORGANISER 64
Calendar 64
Calculator 64
Alarm 66
Bluetooth 66
Tasks 67
Stopwatch 68
OPTIONAL ACCESSORIES 69
TROUBLESHOOTING 70
SAFETY INFORMATION 73
HEARING AID INFORMATION 76
NETWORK SERVICES 77
GUARANTEE 78
RECYCLING DIRECTIVES 80
CONTENTS

5
Congratulations on purchasing your Geemarc CL8350
telephone. This telephone is also hearing aid
compatible. It offers many functions such as an
alarm, a calendar, SMS text messaging, a phone
book, handsfree speakerphone, an automatic keylock
and speed dial buttons. It has an emergency function
in which five numbers can be programmed as
emergency contacts and in case of emergency these
contacts will be called with the flick of just one switch.
The font size on the LCD display is large and the
buttons on the keypad are easy to see and use. This
mobile telephone has a loud ringer and speakerphone
and strong vibrating setting. All these features add
up to make this a highly suitable telephone for the
elderly, hard of hearing or sight people and anyone
who simply wants to keep in touch with a great degree
of ease.
Its is important that you read the instructions below in
order to use your Geemarc telephone to its full
potential. Keep this user guide in a safe place for
future reference.
This guide explains how to use the following
telephone:
GSMCL8350
INTRODUCTION

6
Unpacking the Telephone
When unpacking the telephone, you should find the
following in the box:
• 1 CL8350 mobile telephone handset
• 1 Desktop charging unit
• 1
Mains power adaptor
• 1 x Li-ion rechargeable battery
• 1 User Guide
For product support and help visit our website at
www.geemarc.com
Telephone 01707 384438
Or fax 01707 832529
INTRODUCTION

7
General Description
Handset Description (front)
DESCRIPTION
Volume
UP/U
p
Ke
y
Volume
DOWN/Down
ke
y
Headset
Socket
One Touch
Memor
y
Ke
y
Up/Down Ke
y
Connect Call
Tone Ke
y
Amplif
y
Ke
y
Disconnect
Call/Power
On/Off
Power Socket

8
DESCRIPTION
Emergency
button
Battery
cover
Speaker

9
One touch dialing keys/Soft
keys
A telephone number can be
assigned to each of these
buttons. To dial the number all
you have to do is to press the
button once and the number will
be dialled automatically
M1 and M3 are also softkeys i.e.
they take on different functions
depending on the menu
displayed. The current function
is always displayed by the text
directly above the key
Power key/On-hook key
Long press to power the
telephone on and off
End a call
Cancel current process
Navigation Button
Up Key
Scroll up through lists and menu
options.
Press this key in standby to enter
a menu quickly via the shortcut
settings you have set up.
DESCRIPTION

10
Increase the earpiece /
speakerphone volume during a
call.
Down Key
Scroll down through lists and
menu options.
Press this key in standby to enter
a menu quickly via the shortcut
settings you have set up.
Decrease the earpiece /
speakerphone volume during a
call.
Call Key
Make a call after dialling the
number
Receive a call
Enter Caller list
Hash key
In standby, long press(approx 3s)
to lock or unlock the keypad
When entering text: toggles
between case and numbers.
Mailbox
Hold key 1 to connect to voice
mailbox
DESCRIPTION

11
Asterisk key
Press this key to insert one or more
symbols while composing a
message or editing a phonebook
entry name. Then use
▲, ▼, +
and -
as navigation keys to select
the symbols you want to insert
.
Amplify Key
Press this key on the right side of
the phone during a conversation to
amplify the volume.
Tone Key
Press this key on the right side of
the phone during a conversation to
alter the tone. There is tone
control of up to 10dbm
Volume Up Key/Navigation
Button
+/- keys: - In standby: adjusts
the volume level of the key tone
- Whilst on a call -> adjusts the
earpiece or Hands-free volume.
Thiskeyisalsousedtoscroll
throughlistsofoptions.
DESCRIPTION

12
LCD Screen Description
The LCD screen is split into three distinct areas:
The icon area. This is found at the top of the screen.
This displays the various system icons which help you
to use the telephone.
The main area. This is found across the centre of
the screen. It displays the following:
• number being dialled
• caller ID information
• phonebook
• menu information
• in standby mode current time, date and service
provider name
The soft key area. This is found at the bottom of the
screen.
Signal Strength icon
This is always displayed when your
telephone is switched on. It shows the
current signal strength. More bars
indicate more signal strength.
Alarm icon
Alarm is activated
New Call icon
This indicates that you have missed one
or more calls. More calls have been
added to the call list
DESCRIPTION

13
Key Lock icon
This indicates the keys are locked
Battery Status icon
This is always displayed when your
telephone is switched on. It shows the
level of battery charge. More bars
indicate more battery charge
Message icons
A new SMS (text message) has been
received
A new service message has been
received
Mute icon
Mute is on
Silent icon
The telephone is in silent mode. There
will be no call alert
Ring tone icon
The telephone is in ring tone mode. The
call alert will be a ring tone
Vibrate icon
The telephone is in vibrate mode. The
call alert will be the telephone vibrating
Vibrate followed by ring icon
The telephone is in vibrate followed by
DESCRIPTION

14
ring mode. The call alert will start with
the telephone vibrating followed by the
ringing tone
Vibrate and ring icon
The telephone is in vibrate and ring mode.
The call alert will be the telephone
vibrating together with the ringing tone
Headset icon
The headset is plugged in
Bluetooth icon
Bluetooth is activated
Bluetooth is connected
Menu Navigation
M1 and M3 are softkeys i.e. they take on different
functions depending on the menu displayed on the
LCD. The current function is always displayed by the
text above the key.
The MENU soft key is used to activate the menu.
The
BACK soft key is used to go back a level in the
menu system. Press
to deactivate the menu
and return to standby mode from any menu.
The ▲ and ▼ keys are used to scroll through the
menu.
DESCRIPTION

15
The OK soft key is used to confirm/ select an action or
choice on a screen.
Normally, the submenus and the options have the
shortcut numbers. Input the shortcut number of the
submenu in the list, the relevant option will be displayed.
The + and - keys on the left hand side of the
telephone are also used to scroll through options
within menus.
DESCRIPTION

16
Network Services
To use this mobile telephone you must subscribe to a
service from a wireless service provider. Different
service providers offer different features (at a variety of
charges). This may effect the features made
available to you through the mobile telephone.
Passwords
This mobile telephone allows you to set up passwords
to help protect your telephone from unauthorized use.
The PIN and PIN2 codes are supplied with your SIM
card. The PIN code hellps to protect the SIM card
from unauthorized use. The PIN2 code is required to
access certain services.
The PUK and PUK2 codes may be supplied with the
SIM card. If you enter the PIN code incorrectly three
times in succession, the PUK will be required. If the
codes are not supplied, contact your service provider.
SETTING UP

17
Install SIM Card and Battery
The rechargeable battery pack is supplied with your
mobile phone. Insert the battery and valid SIM card
before using the phone.
Always switch the telephone off and disconnect the
charger before removing/inserting the battery or SIM card.
Take care when handling the SIM card. The SIM card
and its contacts can be easily damaged by scratches or
bending.
To remove the battery compartment cover, press down
and slide the cover off completely.
Remove the battery (if battery already inside)
Slide the SIM card with the gold coloured contacts
face down into the SIM card holder.
SETTING UP

18
Observe the battery contacts (the gold coloured
contacts must face towards the bottom right).and
insert the battery.
Slide the back cover back into place.
Charging the battery
Charging via the Charging Unit
Plug the charger into a wall socket.
Connect the lead from the charger into the the socket
on the back of the charging unit.
Place the mobile telephone onto the charging unit.
The battery indicator on the LCD will fill and empty
whilst charging.
When the battery is fully charged, the indicator will
remain full and stop flickering.
SETTING UP

19
Note: Only use batteries and chargers supplied with
the telephone. The guarantee will be invalid if an
unapproved cable is used. Keep the battery contacts
clean and free of dirt. Try and avoid removing the
battery as this could short circuit the battery.
If the battery is completely discharged, it may take a
few seconds before the charging indicator appears on
the display or before any calls can be made (the
telephone may be used during the charging process)
Before the handset can be used, the battery must
be charged for a minimum of 4 hours.
After inserting the SIM card and charging the battery, the
mobile will search the registered network or any other
SETTING UP
/