Geemarc CL8360 User guide

Category
Telephones
Type
User guide
English
Amplified Mobile Phone with
dual SIM and Camera
1
!!! Please refer to our website:
www.geemarc.com for an up to date user
guide, as there may be important updates and
changes you need to be aware of.!!!
2
CONTENTS .......................................................... 2
INTRODUCTION ................................................... 6
Unpacking the Telephone ...................................... 7
DESCRIPTION ...................................................... 8
General Description .............................................. 8
LCD Screen Description ...................................... 15
Menu Navigation ................................................. 17
Menu Map ........................................................... 17
Network Services & Password ............................ 19
SETTING UP, Install SIM Card and Battery ..... 21
Charging the Battery ........................................... 22
Switching On/Off & Battery Use .......................... 24
USING THE TELEPHONE, Standby Mode,
Making a Call ..................................................... 26
Making a Call from the Call Record & Phone Book 27
Making a Call from the Phone Book .................... 28
Receiving a Call, Rejecting a Call, Switch Off Alerts
............................................................................ 28
Options During a Call .......................................... 29
CONTENTS
3
Receiving Volume ............................................... 30
Call Timer ............................................................ 30
Tone response..................................................... 30
SMS .................................................................... 31
Write & Send a Text Message ............................. 31
Inbox - Receiving a Text Message ...................... 32
Options for a Text Message ................................ 32
Reviewing Stored Text Messages (Inbox) ......... 33
Sent Messages ................................................... 33
Draft box .............................................................. 34
Delete SMS ......................................................... 34
Text Message Settings ........................................ 35
Service Messages ............................................... 38
Service Loading .................................................. 38
VOICEMAIL ........................................................ 39
Voicemail Number Setting ................................... 39
Listen to Voicemail .............................................. 39
PHONEBOOK ..................................................... 40
Create a Phone Book Entry ................................ 40
Create a Phone Book Entry from Standby .......... 42
CONTENTS
4
View Phone Book Entries .................................... 42
Options within Phone Book ................................. 43
Create a Picture Phone Book Entry .................... 44
Dial a Picture Phone Book Entry ......................... 45
Storing a Speed Dial Number .............................. 45
Dialling a Speed Dial Number ............................. 45
CALL RECORD .................................................. 46
Display Missed Calls ........................................... 46
Display Dialled Calls ........................................... 47
Display Received Calls ....................................... 47
Delete Call Logs .................................................. 48
Call Settings ........................................................ 48
HANDSET SETTINGS ........................................ 52
I.C.E .................................................................... 52
Profiles ................................................................ 52
Boost Settings ..................................................... 53
Tone control......................................................... 54
Phone Settings .................................................... 54
Network Settings ................................................. 55
Security Settings ................................................. 56
Restore Default ................................................... 56
CONTENTS
5
SOS..................................................................... 57
SOS Function ...................................................... 57
SOS Number Settings ......................................... 59
SOS Message Record ........................................ 59
ADVANCED SETTINGS ..................................... 60
Tools .................................................................... 60
Multimedia ........................................................... 62
File Manager ....................................................... 63
TROUBLESHOOTING ........................................ 64
SAFETY INFORMATION .................................... 67
HEARING AID INFORMATION .......................... 70
NETWORK SERVICES ...................................... 71
GUARANTEE ..................................................... 72
RECYCLING DIRECTIVES ................................ 74
CONTENTS
6
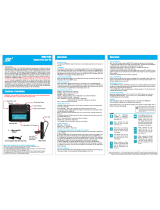
Congratulations on purchasing your Geemarc CL8360
telephone. This telephone offers many functions such as
an alarm, calendar, camera, video, SMS text messaging,
a phone book and picture phone book, human voice
options with talking keypad, and a speakerphone and
speed dial buttons. It has an SOS function in which five
numbers can be programmed as emergency contacts.
In case of emergency these contacts will be called and
SMS messages sent by pressing a single button.
The font size on the colour LCD display is large and the
buttons on the keypad are easy to see and use. This
mobile telephone has a loud ringer and strong vibrating
setting. There is adjustable receiving volume control
reaching up to 35dB with boost key.
The handset
earpiece, speakerphone and ringer can be set to loud
volume levels – please use with care. Increase volume
gradually to a comfortable level. All these features add up
to make this a highly suitable telephone for the elderly, or
for people who are hard of hearing or who are vision
impaired and anyone who simply wants to keep in touch
with a great degree of ease.
It is important that you read the instructions below in
order to make the best use of your Geemarc telephone.
Keep this user guide in a safe place for future reference.
This guide explains how to use the following telephone:
CL8360
INTRODUCTION
7
Unpacking the Telephone
When unpacking the telephone, you should find the
following in the box:
1 CL8360 mobile telephone handset
1 Desktop charging unit
1 Mains power adaptor
1 x Li-Polymer rechargeable battery
1 User Guide
For product support and help visit our website at
www.geemarc.com
Telephone 01707 387602
Or fax 01707 832529
INTRODUCTION
8
General Description
Handset Description (front)
Display
Dial Key
Navigation keys
or camera
function
Keypad
Earpiece
End/Power Key
DESCRIPTION
Left Soft Key
Right Soft Key
Left Arrow
Key
Right Arrow
Key
# and * keys
9
Handset Description (Rear, Sides)
Charging Contacts
Headset Jack
Mini USB Port
Torch
ON/OFF
key
Volume
+/- Button
SOS key
Battery
door
Loudspeaker
DESCRIPTION
Torch LED
Camera lens
10
Charging Contacts
Micro USB port
DESCRIPTION
11
Power key/On-hook key
Long press to power the telephone
on and off
End a call
Cancel current process and return to
standby
Call Key
Make a call after dialling the number
Receive a call
Navigation Button
Up Key
Scroll up through lists and menu
options.
This is a dedicated key in Standby. It
can be set up in Handset Settings or
Camera function in standby mode
Down Key
Scroll down through lists and menu
options.
This is a dedicated key in Standby. It
can be set up in Handset Settin
g
s
DESCRIPTION
12
Left / Right key
These are soft keys: they take on
different functions depending on the
menu displayed. The current
function is always displayed by the
text above the key.
Asterisk key
Press this key to insert one or more
symbols while composing a
message or editing a phonebook
entry name. Then use the navigation
keys to move to the symbols you
want to insert.
Hash Key
Press to switch between different
input modes while composing a text
messa
g
e or editin
g
a contact name.
Torch Key
In standby, press and hold for a few
seconds and the torch will shine
steadily. Press once more to turn it
off.
DESCRIPTION
13
Volume Up and Down Key
Use this key to increase ringer
volume when you access Profiles
menu or when receiving an
incoming call. Increase the earpiece
/ speakerphone volume during a
call. There are 7 volume levels
available.
Volume Down Key
Use key to decrease the ringer
volume when you access Profiles
menu or when receiving an
incoming call. Increase the
earpiece/speakerphone volume
during a call. There are 7 volume
levels available.
DESCRIPTION
14
General Description
Your CL8360 phone can be equipped with the following
items, which are not included:
- One or two SIM cards
- Memory card
You can choose to install a single SIM card, in which
case you will be receiving service from a single cellular
service provider, or two SIM cards – in which case you
will be able to receive service from two different service
providers. This is useful if you want to ensure you have
better network coverage and to avoid having to rely on a
single service provider.
The memory card is needed to provide space for your
photographs and other multimedia content, as well as for
storing your SOS message, phone book and more.
The maximum capacity is 4G.
DESCRIPTION
15
LCD Screen Description
The LCD screen is split into three distinct areas:
The icon area. At the top of the screen. This area
displays the various system icons which help you to
use the telephone.
The main area. Across the centre of the screen. It
displays the following:
Number being dialled
Caller ID information
Phonebook
Menu information
In standby mode current time, date and service
provider name
The soft key area. At the bottom of the screen.
Signal Strength icon
This is always displayed when your telephone
is switched on. It shows the current signal
strength. More bars indicate more signal
strength. There is one of these icons per SIM.
Alarm icon
The alarm has been set to ring at a specified
time.
DESCRIPTION
16
Battery Status icon
This is always displayed when your telephone
is switched on. It shows the level of battery
charge. More bars indicate more battery
charge
Roaming icon
A roaming call is taking place i.e.
international call – outgoing or incoming
SMS icon
A new SMS (text message) has been received
Mute icon
The microphone is temporarily muted during
the conversation
Silent icon
The telephone is in silent mode. There will
be no call alert
Boost icon
Telephone sounds are set to extra-loud.
Headset icon
The headset is plugged in
Missed Call
DESCRIPTION
17
Menu Navigation
The MENU soft key or central square key is used to
activate the menu. The BACK soft key is used to go back
a level in the menu system.
The and keys are used to scroll through the menu.
move backward through the menu
move forward through the menu
Sometimes < and > are used to navigate through sub
menus.
The OK soft key key is used to confirm/ select an action
or choice on a screen.
The central square key is used to go to Menu or to
confirm/ select an action or choice on a screen.
Menu Map
Messages
Write Message
Inbox
Drafts
Outbox
Sent Messages
Message Settings
Phonebook
Picture Phonebook
Normal Phonebook
Call Center
Call Histor
y
DESCRIPTION
18
Call Settin
g
s
Multimedia
Camera
Gallery
Audio Player
Sound Recorder
FM Radio
File Manager
Phone
Memor
y
card
(
if available
)
Services
Internet Service
SIM Toolkit
SIM Toolki
t
SOS
SOS
Record SOS Messa
g
e
Settings
I.C.E
Profiles
Boost Setting
Tone control
Phone Settings
Network Settings
Security Settings
Restore Settin
g
s
Tools
Calendar
Tasks
Alarm
Bluetooth
Calculator
DESCRIPTION
19
Network Services
To use this mobile telephone you must subscribe to a
service from a service provider. Different service
providers offer different features (at a variety of
charges). This may effect the features made available
to you through this mobile telephone.
Using 1 or 2 SIM Cards
Your phone will work just fine with one SIM card
installed from one service provider.
However it is possible to install two SIM cards in your
CL8360 - there are many reasons to do this – here are
some of the main reasons:
1. If you use two SIMS from different providers you
will probably get better network coverage.
2. You can add your professional SIM and keep your
personal SIM.
DESCRIPTION
  • Page 1 1
  • Page 2 2
  • Page 3 3
  • Page 4 4
  • Page 5 5
  • Page 6 6
  • Page 7 7
  • Page 8 8
  • Page 9 9
  • Page 10 10
  • Page 11 11
  • Page 12 12
  • Page 13 13
  • Page 14 14
  • Page 15 15
  • Page 16 16
  • Page 17 17
  • Page 18 18
  • Page 19 19
  • Page 20 20
  • Page 21 21
  • Page 22 22
  • Page 23 23
  • Page 24 24
  • Page 25 25
  • Page 26 26
  • Page 27 27
  • Page 28 28
  • Page 29 29
  • Page 30 30
  • Page 31 31
  • Page 32 32
  • Page 33 33
  • Page 34 34
  • Page 35 35
  • Page 36 36
  • Page 37 37
  • Page 38 38
  • Page 39 39
  • Page 40 40
  • Page 41 41
  • Page 42 42
  • Page 43 43
  • Page 44 44
  • Page 45 45
  • Page 46 46
  • Page 47 47
  • Page 48 48
  • Page 49 49
  • Page 50 50
  • Page 51 51
  • Page 52 52
  • Page 53 53
  • Page 54 54
  • Page 55 55
  • Page 56 56
  • Page 57 57
  • Page 58 58
  • Page 59 59
  • Page 60 60
  • Page 61 61
  • Page 62 62
  • Page 63 63
  • Page 64 64
  • Page 65 65
  • Page 66 66
  • Page 67 67
  • Page 68 68
  • Page 69 69
  • Page 70 70
  • Page 71 71
  • Page 72 72
  • Page 73 73
  • Page 74 74
  • Page 75 75
  • Page 76 76

Geemarc CL8360 User guide

Category
Telephones
Type
User guide

Ask a question and I''ll find the answer in the document

Finding information in a document is now easier with AI