Toshiba 26HLV66 Owner's manual

Category
LCD TVs
Type
Owner's manual
tOSHIBA ....
IMPORTANTNOTE
Beforeconnecling,operating,oradjustingthisproduct,carefully
readtheImporlanlSafety,InslalJalion,Care,andService
informationintheseparateInstallationGuide,
ForanoverviewofstepsforsettJngupyournewTV,see
NoteiTodisplayaHighDefinitionpicture,the_ mustbereceivinga
HighDefinition:signal(suchasanover-the_airHighDefinitionTV
broadcast,aHighDefinitiondigitalcableprog[am,oraHighDefinition
digitalsatellitegrogram).:Fordetails,pleaseCo_tactyourT[/antenna
installer;cableprovider,orsatelliteprovider.
FCCDedarationof Conformitv
ComplianceStatement
(Part15):
The Toshiba 26HLV66, 32HLV66, and 37HLV66 Televisions
comply with Part 15 of the FCC rules.
Operation is subject to the following two conditions: (1) this
device may not cause harmful interference, and (2) this device
must accept any interference received, including interference that
may cause undesired operation.
The party responsible for compliance to these rules is:
Toshiba America Consumer Products, L.L.C.
82 Totowa Rd. Wayne, NJ 07470.
Ph: 1-800-631-3811
Note: This equipment has been tested and found to comply
with the limits for a Class B digital device, pursuant to Part 15
of the FCC rules. These limits are designed to provide
reasonable protection against harmful interference in a
residential installation. This equipment generates, uses, and
can radiate radio frequency energy and, if not installed and
used in accordance with the instructions, may cause harmful
interference to radio communications. However, there is
no guarantee that interference will not occur in a particular
installation. If this equipment does cause harmful interference
to radio or television reception, which can be determined by
removing and applying power to the equipment, the user is
encouraged to try to correct the interference by one or more of
the following measures:
Reorient or relocate the receiving antenna.
Increase the separation between the equipment and the
receiver.
Connect the equipment into an outlet on a circuit different
from that to which the receiver is connected.
Consult the dealer or an experienced radio/TV technician for
help.
Caution: Changes or modifications to this equipment not
expressly approved by Toshiba could void the user's authority
to operate this equipmenL
Important notesaOoutyour £80
TViOVOcomOination
The following symptoms are technical limitations of LCD
Display technology and are not an indication of malfunction;
therefore, Toshiba is not responsible for perceived issues
resulting from these symptoms.
1) An afterimage (ghost) may appear on the screen if a fixed,
non-moving image is displayed for a long period of time. The
afterimage is not permanent and will disappear in a short
period of time.
2) The LCD panel contained in this TV is manufactured using
an extremely high level of precision technology; however,
there may be an occasional pixel (dot of light) that does not
operate properly (does not light, remains constantly lit, etc.).
This is a structural property of LCD technology, is not a sign
of malfunction, and is not covered under your warranty. Such
pixels are not visible when the picture is viewed from a
normal viewing distance.
Note: Interactive video games that involve shooting a "gun"
type of joystick at an on-screen target may not work with this
TV.
i
About tiffs Guide(OVDplayer
This Guide explains the basic instructions for using the internal
DVD player. Some DVDs are produced in a manner that allows
specific or limited operation during playback. As such, the DVD
player may not respond to all operating commands. This is not a
defect in the DVD player.
Refer to the instructions provided with your DVDs.
If the symbol '"1_"appears on-screen during DVD operation, it
means that the operation or feature is not permitted or available for
the DVD player or disc.
For example, sometimes the DVD player is unable to stop
playback of the DVD's copyright message when the _:_ button is
pressed.
i
Trademark Information
WOW, SRS and (e) symbol are trademarks of SRS Labs, Inc.
WOW technology is incorporated under license from SRS Labs, Inc.
Manufactured under license from Dolby Laboratories.
Dolby and the double-D symbol are registered trademarks of Dolby
Laboratories.
HDMI, the HDMI logo and High-Definition Multimedia Interface are
trademarks or registered trademarks of HDMI Licensing LLC.
_ is a trademark of DVD Format/Logo Licensing Corporation.
i
Chapter 1: Introduction............................ 5
Welcome to Toshiba ................................ 5
Features of your new TV ............................ 5
Overview of steps for iustalling, setting up, and using
your new TV .................................. 6
TV front and side panel controls and c(mnections ......... 7
TV back panel connections ........................... 8
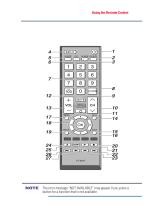
Chapter 2: Usingthe remotecontrol ................... g
Prepm:ing the remote control li)r use.................... 9
Installing the remote control batteries .................. 9
Remote control efli_ctive range ........................ 9
Learning about the remote control .................... 10
Using the remote control to control your other devices .... 11
Remote Control functional key chart .................. 12
Programming the remote control to control your ()tiler
devices ...................................... 13
Remote control codes .............................. 14
Chapter 3: Menu layout and navigation ................. 16
Main menu layout ................................. 16
Setup/lnstallation menu layout ....................... 17
THINC menu layout ............................... 17
Navigating the menu system ......................... 17
Chapter4: Selling up yourIV........................ "18
Selecting the menu language ........................ 18
Configuring the antenna input source fi_)rthe ANT
terminal ..................................... 18
Programming cha*mels into the TV's channel memory .... 19
Programming cham_els automatically .............. 19
Manually adding and deleting channels in the channel
memory .................................. 19
Programming your favorite channels .................. 20
Setting the HDMI'" audio mode ...................... 21
Viewing the digital signal meter ...................... 21
Viewing the system status ........................... 22
Chapter5: Usingthe TV's features .................... 23
Selecting the video input source to view ............... 23
Labeling the vide() input sources ..................... 23
Tuning channels .................................. 24
Tuning cham_els using the Cham_el Browser'" ....... 24
Tuning your favorite channels .................... 26
Tuning to tile next programmed channel ............ 26
Tuning to a specific channel (programmed or
unprogrammed) ............................ 26
Switching between two cha*mels using Channel
Return ................................... 26
Switching between two cha*mels using SurlLock'" .... 26
Selecting the picture size ........................... 27
Scrolling the TheaterWidc ®picture
(TheaterWide 2 and 3 only) ...................... 28
Using the auto aspect ratiu feature .................... 29
Selecting the cinema mode (480i signals only) .......... 29
Adjusting the picture ............................... 30
Selecting the picture mode ....................... 30
Adjusting the picture quality ..................... 30
Using the closed caption mode ....................... 31
Closed Caption Advanced ....................... 31
Digital closed captions .......................... 32
Adjusting the audio ................................ 32
Muting the sound .............................. 32
Using the digital audio selector ................... 32
Selecting stereo/SAP broadcasts .................. 33
Adjusting the audio quality ...................... 33
Using the StableSound ®leature ................... 34
Selecting the optical audio output format ........... 34
Using the Locks menu ............................. 34
Entering the PIN code .......................... 34
If you ca*mot remember your PIN code ............. 35
Changing your PIN code ........................ 35
Blocking TV programs and movies by rating
(V-Chip) ................................. 35
Blocking TV programs and movies
by additional ratings ........................ 36
Blocking channels ............................. 37
Unlocking programs temporarily .................. 37
Using the input lock feature ...................... 38
Using the control panel lock feature ............... 38
Using the PC setting feature ......................... 39
PC Audio........................................ 39
Setting the sleep timer .............................. 40
Displaying TV setting information on-screen using
RECALL .................................... 40
Understanding tile auto power off lcature .............. 41
Understanding the last mode memory feature ........... 41
Chapter6: Usingthe lV's advancedfeatures ............. 42
Using the advm_cedpicture settings features ............ 42
Using dynamic contrast ......................... 42
Using CableClear_ digital noise reduction ........... 42
Using MPEG noise reduction ..................... 42
Selecting the color temperature ................... 43
Using the Game Mode ligature .................... 43
Using the advanced audio settings features ............. 44
Using the SRS WOW )_'surround sound leature ...... 44
Chapter7: Usingthe THINU_home networkfeature ........ 45
A. Connecting the TV to _our home network ........... 45
B. Setting up the network address .................... 45
Automatically setting up the network address ........ 45
Manually setting up the network address ............ 46
Resetting the network address .................... 47
C. Setting up file sharing on your PC .................. 47
Compatible operating systems .................... 47
Setting up file sharing on a PC with Microsoft ®
Windows ®XP Service Pack 1
or Service Pack 2........................... 47
Setting up lile sharing on a PC with Microsoft ®
Windows ®2000 ............................ 48
D. Setting up file sharing on the TV................... 49
About the Sol/ware Upgrade feature ............... 50
E. Viewing/playing shared files on the TV.............. 50
Media specifications ............................ 5(1
Using tile Picture Viewer ........................ 51
Using the Audio Player ......................... 53
Chapter 8: DVDPlayhack ........................... 54
Playing a disc .................................... 54
Basic playback ............................... 54
Using the DVD aspect ratio feature ................... 55
Playing in fast reverse or fast forward ................. 56
To pause playback (still playback) ................... 56
Playing frame by frame ............................ 56
Playing in slow motion ............................ 56
Locating a chapter or track ......................... 56
Changing angles .................................. 56
Title selection .................................... 57
Changing soundtrack language ...................... 57
Subtitles ........................................ 57
Disc status ...................................... 58
(continued)
3
MP3/JPEG CD operation ........................... 58
MP3/JPEG CD inl'ormation ..................... 58
MP3 CD playback ............................. 58
JPEG CD playback ............................ 59
Chapter 9:lr0uhlesh00ting ......................... 60
General troubleshooting ............................ 60
Home network troubleshooting ...................... 62
DVD Troubleshooting ............................. 63
LED indications .................................. 64
Chapter10:Appendix............................. 65
Specilications .................................... 65
Limited United States Warranty
l'or LCD TV/DVD Combinations 26" and Larger ..... 66
Limited Canada Warranty
for LCD TV/DVD Combination .................. 67
Index ........................................ 69
Welcometo Toshiba
Thank you for purchasing this Toshiba LCD TV/DVD
combination, one of the most innovative LCD TVs on the
market. This digital television is capable of receiving analog
basic, digital basic, and digital premium cable television
proglamming by direct connection to a cable system providing
such programming. A security card provided by your cable
operator is required to view encrypted digital programming.
Certain advanced or interactive digital cable services (such as
video-on-demand, a cable operator's enhanced program guide,
and data-enhanced television services) may require the use of
a set-top box. For more information call your local cable
operator.
We have provided two separate Guides to facilitate the
installation and operation of your TV.
Please use the Guides in the order shown below to get the
most enjoyment from your new TV.
1) The hTsmllation Guide explains how to connect your TV to
your antenna and equipment.
2) The Operating Guide (this Guide) provides step-by-step
instructions for using your TV's many features.
FeaturesofyournewTV
The following are just a few of the many exciting features of
your new Toshiba widescreen, integrated HD, LCD TV:
Integrated digital tuning (8VSB ATSC and QAM)
eliminates the need for a separate digital converter set-top
box (in most cases).
HDMI _'' digital, high-definition multimedia interface
(g_ Installation Guide).
Two sets of ColorStream ® HD high-resolution component
video inputs (Ir_'_"lnsmllution Guide).
SRS WOW '_' audio technologies (ir_'_page 44).
Digital Audio Out optical audio connection with Dolby ¢_
Digital optical output format (ire'vpage 34; also see
blstallation Guide).
CableClear®digital picture noise reduction
(ir_-ypage 42).
PC IN (Analog RGB) computer terminal (ir_ lnsu_llation
Guide).
DVD video (and Video CD, Audio CD) player (g_ page
54).
Ethernet (R J-45) (THINC'") port for connecting the TV
to a home netwoN to enable tile sharing (JPEG, MP3)
(ir_ Chapter 7 and blstallation Guide).
(continued)
5
Overviewofstepsforinstalling,
settingup,andusingyournewTV
Follow these steps to set up your TV and begin using its many
exciting features.
2
3
4
5
6
7
8
9
Carefully read the important safety, installation, care, and
service information in tile separate Installation Guide.
Keep this manual for future reference.
Observe the following when choosing a location for the
TV:
Read the separate Installation GuMe.
Read "Important notes about your LCD TV/DVD
combination" (ir_:¢page 2).
Place the TV on the floor or a sturdy, level, stable
surface that can support the weight of the unit. Secure
the TV to a wall, pillar, or other immovable structure as
described in the Irlsmllation Guide.
Place the TV in a location where light does not reflect
on the screen.
Place the TV far enough from walls and other objects to
allow proper ventilation. Inadequate ventilation may
cause overheating, which will damage the TV. THIS
TYPE OF DAMAGE IS NOT COVERED UNDER
THE TOSHIBA WARRANTY.
Do not plug in any power cords until AFTER you have
connected all cables and devices to your TV.
BEFORE connecting cables or devices to the TV, learn
the functions of the TV's connections and controls
(_ pages 7-8).
Connect your other electronic device(s) to the TV
(Ir_ Installation GuMe).
Install the batteries in the remote control (Ir_ page 9).
See "Learning about the remote control" (zr_ page 10) for
an overview of the buttons on the remote control.
Program the remote control to operate your other
device(s) (_-_2r'pages 11-15).
AFTER connecting all cables and devices, plug in the
power cords for your TV and other devices. The yellow
LED will blink until the TV goes into standby mode.
When the TV is in standby mode, press POWER on the
TV control panel or remote control to turn on the TV.
If the TV stops responding to the controls on the remote
control or TV control panel and you cannot turn the TV
off or on, press and hold the POWER button for 5
seconds to reset the TV.
10 See "Menu layout and navigaion" for a quick ovel_'iew of
navigating the TV's menu system (Ir4€ page 16).
1 1 Program channels into the TV's channel memory
(Irq¢ page 19).
12 For details on using the TV's features, see Chapters 5
and 6.
13
For details on connecting the TV to a home network to
enable file sharing, see Chapter 7.
14 For details on using the DVD's features, see Chapter 8.
15 For help, refer to the Troubleshooting Guide, Chapter 9.
16 For technical specifications and warranty information, see
Chapter 10.
1 '7 Enjoy your new TV/DVD!
TVfrontandsidepanelcontrolsandconnections
10-
11-
12-
13-
Left side panel
TV front
_III_IIIH_IIIIH_HIIIII_IIIIIHHIIII;;_IIII;;IIIIIIIIIIIHIIHIIIIHIIHIIHIIHIIHIIHIIHIIHIIHIIHIIHIIHIIHIIHIIHIIHIIHIIHIIHIIHIIHIIHIIHI_H_H_H_H_H_H_H_
:iiiiii!_iiiii!iii!!ii!!ii!!ii!!ii!!ii!!ii!!ii!!ii!!ii!!ii!!ii!!ii!!ii!!ii!!ii!!ii!!ii!!ii!!ii!!ii!!ii!!ii!!ii!!ii!!ii!!ii!!ii!!ii!!ii!!ii!!ii!!ii!!ii!!ii!!ii!!ii!!ii!!ii!!ii!!ii!!ii!!ii!!ii!!ii!!ii!!
_ii!iii!i!iii!iii!iii!iii!iii!iii!iii!iii!iii!iii!iii!iii!iii!iii!iii!iii!iii!iii!iii!iii!iii!iii!iii!iii!iii!iii!iii!iii!iii!iii!iii!iii!iii!iii!iii!iii!iii!iii!iii!iii!iii!iii!iii!iii!iii!iii!iii!i
_;_WWWWWWWWWWWWWWWWWWWWWWWWWWWWWWWWWWWWWWWWWWWWWWWWWWWWWWWWWWWWWWWWWWWWWWW_
Rightside panel
1%7._
z AUDIO
S
--15
TVtop
7 6* 5 4 3 1 2
Remote sensor -- Point the remote control toward this
remote sensor (_r__ "Remote control effective range" on
page 9).
Blue and Yellow LEDs
Blue = Power indicator
Yellow = Disc indicator
See "LED indications" on page 64 for additional
information.
3 POWER -- Press to turn the TV on and oft:
If the TV stops responding to the controls on the remote
control or TV control panel and you cannot turn offthe
TV, press and hold the POWER button on the TV control
panel for 5 or more seconds to reset the TV.
CHANNEL AV -- When no menu is on-screen, these
buttons change the channel (programmed channels only;
=r_, page 19). When a menu is on-screen, these buttons
function as up/down menu navigation buttons.
VOLUME -- When no menu is on-screen, these
buttons adjust the volume level. When a menu is on-
screen, these buttons function as left/right menu
navigation buttons.
*MENU (ENTER) -- Press to access the menu system
(_r_'_pages 16-17). When a menu is on-screen, the MENU
button on the TV's control panel functions as the ENTER
button.
7 INPUT-- Repeatedly press to change the source you are
viewing (ANT 1, Built-In DVD, VIDEO 1, VIDEO 2,
ColorStream HD-l, ColorStream HD-2, HDMI,
PC).
8 EXIT-- Press to instantly close an on-screen menu.
9 ARROWS AV• •-- When a menu is on-screen, these
buttons function as up/down/left/right menu navigation
buttons.
10 PLAY -- Press to play a DVD video disc, or other
playable disc.
11 STOP -- Press to stop a DVD video disc, or other
playable disc.
12 SKIP -- Press to skip DVD chapter, or CD track.
13 OPEN/CLOSE -- Press to eject a disc.
14 DVD disc slot -- Insert a playable disc to play.
15 VIDEO-2 IN -- The side panel A/V connections are
referred to as "VIDEO 2" and include standard A/V
connections.
TVbackpanelconnections
For an explanation of cable types and connections, see the Installation Guide.
TVback
2 3
4
Power cord
per
5 6 7 8 9
4
5
6
7
VIDEO-1 IN -- Standard (composite) video and standard
audio inputs plus optional S-video inputs for connecting
devices with composite video or S-video output.
Note: Standard (composite) video and S-video cables
carry only video information; separate audio cables are
required for a complete connection.
ColorStream ® HD-1 and ColorStream ® HD-2 --
Two sets of ColorStream q_high-definition component
video inputs (with standard stereo audio inputs) for
connecting devices with component video output, such as
a Toshiba DVD player with ColorStream _.
Note: Component video cables carry only video
information; separate audio cables are required for a
complete connection.
PC/HDMI (AUDIO) IN -- PC audio input terminals are
shared with HDMI analog audio input terminals, and their
use can be configured in the Setup menu (Ire'r"page 39).
A/V OUT-- Standard composite video and analog audio
outputs for connecting a VCR for editing and dubbing.
PC IN -- For use when connecting a personal computer.
ANT -- Antenna input that supports analog (NTSC) and
digital (ATSC) off-air antenna signals and analog and
digital Cable TV (QAM) signals.
HDMI TM IN -- High-Definition Multimedia Interface
input receives digital audio and uncompressed digital
video from an HDMI device or uncompressed digital
video from a DVI device. Also see item 3.
8
9
Digital Audio OUT -- Optical audio output in Dolby
Digital or PCM (pulse-code modulation) format for
connecting an external Dolby Digital decoder, amplifier,
A/V receiver, or home theater system with optical audio
input.
RJ-45 (Ethernet) (THINC TM system*) -- Allows you
to connect the TV to your home network. See boxed note
below.
*THINC TM system
(Toshiba Home Interactive Network Connection)
The RJ-45 (Ethernet) port allows your Toshiba TV to
connect to your home network. This revolutionary home
entertainment networking system lets you access MP3
audio tiles and JPEG picture files that are stored on a
networked PC (as shared files) and play/display them on
your TV.
You also can play your shared MP3 audio files through a
connected audio system.
See Installation Guide and Chapter 7 for details.
HDMI, the HDMI logo and High-Definition Multimedia Interface are
trademarks or registered trademarks of HDMI Licensing LLC.
Manufactured under license from Doiby Laboratories.
Dolby and the double-D symbol are registered trademarks of Dolby
Laboratories.
Preparingtheremotecontrol
foruse
Your TV remote control can operate your TV and many other
devices such as cable converter boxes, satellite receivers,
VCRs, DVD players, and HTIBs (home theater in a box), even
if they are different blands.
If you have a Toshiba device:
Your TV remote control is preprogrammed to operate most
Toshiba devices (ir_'_page 13).
If you have a non-Toshiba device or a Toshiba device
that the remote control is not preprogrammed to
operate:
You can program the TV remote control so it will operate the
other device (tr_vpages 11-15).
Installingtheremotecontrol
batteries
1 Remove tile battery cover flom tile back of the remote
control.
cove :)
2
Install two "AAA" size batteries, making sure to match
the + and- signs on the batteries to the signs on the battery
compartment.
3 Reinsert the battery cover in the remote control until the
tab snaps.
Caution: Never throw batteries into a fire.
Note:
Be sure to use AAA size batteries.
° Dispose of batteries in a designated disposal area.
° Batteries should always be disposed of with the
environment in mind. Always dispose of batteries in
accordance with applicable laws and regulations.
° If the remote control does not operate correctly, or if the
operating range becomes reduced, replace batteries with
new ones.
° When necessary to replace batteries in the remote control,
always replace both batteries with new ones. Never mix
battery types or use new and used batteries in combination.
Always remove batteries from the remote control ff they are
dead or if the remote control is not to be used for an
extended period of time. This will prevent battery acid from
leaking into the battery compartment.
Remotecontroleffectiverange
For optimum perforlnance, aim the remote control directly at
the TV and make sure there is no obstruction between the
remote control and the TV.
d_W
Point remote control
toward remote sensor
on front of TV.
16.4 ft (5m)
Learningaboutthe remotecontrol
The buttons used for operating the TV only are described here.
For a complete list of tile remote control's functions, see the
remote control functional key chart (ir_'_page 12).
14
17
15
p g
TV/VCR SL W
HOME REC O
s_
18
ANGLE StlBTffLE AUDIO EJECT
MODE SELECT
a
20
TOSHIBA
GT-90259
Note: The error message "NOT AVAtLABLE" may appear if
you press a key for a function that is not available.
1
2
3
4
5
6
7
8
9
10
POWER turns tile TV on and oft: When tile TV is on, tile
blue LED indicator on the TV fiont will be illuminated.
FREEZE fieezes tile picture. Press again to restore tile
moving picture.
SLEEP accesses tile sleep timer (_v page 40).
PIC SIZE cycles through tile five pictures sizes: Natural.
TheaterWide 1/2/3, and Full (iv,v-page 27).
Channel Numbers (0-9, -/100) directly tune
channels. The (_ button is used to tune digital channels
(ir_" page 26) or to display the favorite channel list
(ir_'_page 20).
INPUT selects the video input source (_;_"page 23).
CH AV cycles through programmed channels when no
menu is on-screen (ir_-page 19), and functions as page up/
down when a menu is on-screen.
VOL + - adjusts tile volume level.
THINC accesses tile THINC menu (ir_ page 17).
RECALL displays TV setting information on-screen
(Ir_r"page 40).
11 CH RTN returns to the last viewed channel (ir_r page 26),
or stops the Picture Viewer slide show (Ir__ page 52). Also
can be used to go between the song select and file select
view in the Audio Player (ir_ page 53).
12 MUTE reduces or turns offthe sound (ir_ page 32).
13 _ / _,i While watching TV, these buttons open the
Channel Browse/" Mbanner and tune to the previous/next
channel in the channel history (ir_ page 25). (Also see
"Arrow buttons.")
14
Arrow buttons (AV• •) When a menu is on-screen,
these buttons select or adjust programming menus. (Also
see
15 FAV AY tunes to the next higheNlower fiworite channel
(ir_ page 21 ).
16 ENTER actiw_tes highlighted items in the main menu
system.
17 MENU accesses the main TV menu system (Ir_vpages 16
and 17).
18 EXIT closes on-screen menus.
19 HOME (_) accesses the Home function of the Channel
Browser 'Mfeature (_'r page 26).
20 MODE SELECT switch switches between TV/DVD,
CABLE/SAT, VCR, and AUX modes (r_ page 11 ). Set to
"TV/DVD" to control the TV.
You can also control the built-in DVD when the MODE
SELECT switch on the remote control is in TV/DVD
mode. For DVD operation the following buttons are used:
TOP MENU. DVD RTN, SET UP, DVD CLEAR,
PAUSE, PLAY, STOP, SKIP, REW, FF, SEARCH,
REC, SLOW, ANGLE, SUB TITLE, AUDIO, and
EJECT (_ Chapter 8).
10
Usingthe remotecontrolto control
yourotherdevices
If you have a non-Toshiba device or a Toshiba device that the
remote control is not preprogrammed to operate, you must first
program the remote control to recognize the device (if you
have not aheady done so) (Ir+'r"pages 13-15).
To use your TV remote control to operate a:
Cable converter box or satellite receiver, set the MODE
SELECT switch to CABLE/SAT.
VCR, set the MODE SELECT switch to VCR
DVD player or HTIB, set the MODE SELECT switch to
AUX.
Note: Even after the TV remote control is programmed, it may
not operate certain features on your other device, tf this
happens and you wish to use those features, you will need to
use the device's original remote control.
Point the remote control
directly at the device.
IN(i::)G:)(£)
2 _(i) (i)
1
2
3
4
5
6
7
8
9
10
11
12
13
14
15
16
17
18
19
20
21
22
POWER Turns the selected device on and off.
Channel Numbers (0-9) Press to directly access
channels (as opposed to (_ _).
+10 Press to directly access DVD chapters higher than 10.
TOP MENU Accesses a DVD's top menu.
CH •• For channels programmed into the channel
memory (|r_ page 26):
selects the next higher channel.
selects the next lower channel.
GUIDE Displays the channel guide in the CABLE/SAT
mode.
SET UP Accesses a DVD's setup menu in the AUX
mode.
INFO Displays TV status information on-screen.
•'_ I_Press to navigate DVD menus (may not work on
some DVD players).
ENTER Required by some satellite receivers and DVD
players to actiw_te certain functions.
DVD CLEAR Press to reset the title and chapter number.
PLAY Begins playback of a tape or DVD.
PAUSE Press during play or record mode to pause the
picture; press again to restart.
STOP Stops the tape or DVD.
SKIP _ Skips forward to locate later DVD chapters.
FF Fast-forwards the tape or DVD. (Press during play
mode to view the picture moving rapidly forward.)
SKIP _ Skips back to beginning of current DVD
chapter, or locates previous chapters.
REW Rewinds/reverses the tape or DVD. (Press during
play mode to view the picture moving rapidly backward.)
TV/VCR To view one program while recording another.
press to select TV mode.
REC Starts tape recording.
SLOW I1_Slow-forwards the DVD.
SLOW _11Slow-reverses the DVD.
MODE SELECT switch Set to "TV/DVD" to control
the TV; "CABLE/SAT" to control a cable converter box
or satellite receiver; "VCR" to control a VCR; "AUX" to
control a DVD player or HTIB.
11
RemoteControlfunctionalkeychart
Note:
* "---" = key does not send a signal in that remote control mode.
° _TV = key will affect the TV, even when the remote control is not in the "TV/DVD" device mode.
Power
Sleep timer
Picture size
Freeze picture
Digit 1-9
Digit 0
(Digital separator)
TV/Video select
THINC Menu
DVD TOP Menu
Sound mute
DVD setup
Vohnne up/down
Channel
up/down
RECALL
Previous channel
DVD previous menu
Enter
Menu select/
FAV up/down
Menu select/
Channel Browser _'
Menu select/
Channel Brov/ser _'
Menu
Exit
DVD clear
Pause
Play
Stop
Skip REV
Skip FWD
Rewind
Fast FWD
Channel Browser _' Home/
DVD search
SLOW REW
SLOW FWD
Angle
Sub title
Audio
Eject
Power
TV
TV
TV
Digit 1-9
Digit 0
TV
TV
TV
TV
Channel
up/down
TV
Power
TV
TV
TV
Digit 1-9
Digit 0
(sub CH)
TV
TV
TV
SAT Guide
TV
Channel
up/down
TV
In%
Select Enter
Menu
up/down
Menu left
Menu right
Menu
Exit
Power
TV
TV
TV
Digit 1-9
Digit 0
100
TV
TV
TV
TV
Channel
up/down
TV
Pause
Play
Stop
Rewind
Fast FWD
Power
TV
TV
TV
Digit 1-9
Digit 0
(Digital separator)
TV
Top Menu
TV
DVD Setup
TV
TV
Display
Enter
Menu up/down
Menu left
Menn right
DVD Menu
DVD Clear
Pause
Play
Stop
Skip REV
Skip FWD
Rewind
Fast FWD
...... TV/VCR DVD search
Record (2 click) ---
--- Angle
--- Sub title
--- Audio
--- Eject
12
Programmingtheremotecontrol
to controlyourotherdevices
Your Toshiba TV remote control is preprogrammed to operate
most Toshiba devices. To program your TV remote control to
operate a non-Toshiba device (or a Toshiba device that it is not
preprogrammed to operate), follow the steps below. For details
on using the remote control to operate the device, see page 11.
2
3
4
In the remote control code table (ir_ page 14), find the
code for your device. If more than one code is listed, try
each one separately until you find one that works.
Set the MODE SELECT switch to the type of device
you are programming the remote control to operate --
CABLE/SAT (for a cable converter box or satellite
receiver), VCR (for a VCR or TV/VCR combo), or AUX
(for a DVD player or HTIB [home theater in a boxl).
RECALL SS
While holding down © , press the Channel Number
buttons to enter the 3-digit code for your device.
To test the code, turn on the device, point the remote
control at it. and press POWER@.See notes below.
If the correct code was entered, the device will turn off.
If the device does not respond, repeat steps 1-4 using
another code.
If the device does not respond to another code, you will
need to use the remote control that came with the
device.
5 Remember to set the MODE SELECT switch back to
"TV" to control the TV.
6 For future reference, write down the code(s) you used:
Note:
tn addition to POWER, confirm thatallnecessarykeys on the
TV remote control operate your device, tf some keys are not
operational, repeat the device code setup using another
code (if other codes are listed for your device). If, after trying
all listed codes, the necessary keys do not operate your
device, use the device's original remote control
° Every time you change the batteries, you will need to
reprogram the remote control.
° Some newer VCRs respond to either of two codes. These
VCRs have a switch labeled "VCR1/VCR2." tf your VCR has
this kind of switch and does not respond to the codes for
your VCR brand, set the switch to the other position ("VCR 1"
or "VCR2") and reprogram the remote control.
13
Remotecontrolcodes
In some cases you may not be able to
operate your device with the TV
relnote control. Your other device may
use a code that is not recognized by the
TV remote control. If this happens, use
the device's remote control.
Cable converter box
ABC 1161,062, 063,082,
084, 087, 091,092,
096,098
Archer 065,092, 097, (}99
Cableview 064, 094
Century 092
Citizen 090, {)92,097
Contec 083,085, (}86, 088,
093,098
Diamund 093
Eagle 09 l
GE 061,062
Gemini 069, 07(I, (194
Hamlin 093
Hitachi 062, 095, 096
Jasco (197
Ma_!navox 072. 096
Memorex (191. 092. 104
MotorohgGl/Jerrold 062. 069. 071. 082.
086, (189, 091, (196
Multi Canal 090
Nuvavision 101
Pauasunic 081. 083. (}85
Philcu 087
Philips {t66.067. 068.070.
072.073. 074. (175.
091. (192
Pioneer 076.077
Pruscan 061. 062
Radio Shack (192.097. 099
RCA 064. 081
Realistic 065
Recoton 102
Samsung (177.090
Scientific Atlanta 063. 078. 079. 080.
088.098. I{tl. 105
Sears (195
Signature 062
Signature 2000 (196
Sprucer (181. 085
Starcom 069. 082, 087. 096.
103. 104
Stargate 069.09(I
Sylvania 095. 100
TeleView 090
Texscan 100
Tocum 071. 084. (}85
13.S. Electronics (187.096. 098
1Jnited Cable 082
13niversal (165. 092. 097. 099.
102. 103
Wards (196
Satellite receiver
Alphastar 038,059
Chaparral 034
DISH Netwurk 057
()rake 020. 040. 044. 046.
{)50. 053
Echostar 018. (141.051
Express Vu 057
Fujitsu 027
GE I}{18.009, 013
General Instruments 010. 011. 012. (122.
023.03 I. 049
Hitachi 033
Hughes 033
Hughes Network
Systems 019
lntersat {)48
Jaueil 027
JVC {117,057
Kenwuod 029
Magnavox 060
Optimus 058
Panhat 036, (152
Primestar 015, 042
Proscan 008, 009, 013
Radio Shack 022, 023, 03(1
RCA {}{t8,009, 013, (116
Realistic 03(I
Samsung 1159
Suny 014. 055
Star Choice 057
Star Trak 025. (126. 037. 054
STS 024
Toshiba 01}{1,001. 002. 003.
I}{t4,005, I}{t6,007,
020, 031, {)56
Uniden 021,028, 030, 032,
035, 039, {}43,045,
{}47,058
Zenith 027
TV/VCRCombo
Action 078
GE 059, 062
Goldstar 065
Panasonic 065
Precision 078
Quasar 065
Realistic 079
Suny 074
Toshiba 057
Totevision 009.010. {165
Zenith 065
DVD/VCRCombo
Go Vide() DVD=087,
VCR=08 ]
JVC DVD=088,
VCR=082
RCA DVD=089,
VCR=083
Samsung DVD=090.
VCR=084
Sanyo DVD=091.
VCR=085
Zenith DVD=092.
VCR=086
DVDplayer
Aiwa {}{t6.015
Apex 016. 017
BOSE 097
Broksonic 018
Clariuu 019
Classic 020
Daewuo 021
Denou 022, 023,024, 025
Emerson 026, 027
Fisher 028
Funai 027
GE 001. 029. 030
Go Video (187
GPX 031
Hitachi {}{15.032. 033. 034.
035
JVC 003, 007,036, 042,
088
Kenwuod 037
Konka 0(18, 009
Magnavox 004. 038
Memorex 039
Miutek (140
NAD 026
Nakamichi 041
Norcent 043
Onkyu 044
Oritron 058
Panasonic 010. {t45. {146.047.
(}48. 049. 050
Philips 004, 051
Pioneer 052, 053,054, 055
Pruscan O01,056
Qwestar 057. 058
RCA 001. 002. (159. 089
Sampu 060
Samsung 061. 062. 086. 090
Sausui 073
Sanyo 063, 09 l
Sharp 064. 067
Sherwood 074
Suny 011. 012. 065. 066.
068. 069. 070
Sylvania 027
Teac 071
Technics (172
Techwood 075
Toshiba 000. 013. (176. 077.
078
Yamaha 079, 080, 081
Zenith 014, {t82. 092
Portable DVDplayer
Aiwa 093
Audiovux 094, 095
P:masonic 024, 096,099
RCA 098
VCR
Admiral
Aiko
Aiwa
Akai
Audiovox
Bell & Howell
Broksonic
Calix
Carver
CCE
Citizen
Coh)rtyme
049
019
018
{}{t3.{t04.037. 038.
039. 058. 069
010
007. 068
008. 017
OlO
026
o19
{}{19,OlO, Ol1, o12,
013. 014. 015. {tl9.
057. 073
005
14
Craig
Curtis Mathes
Daewoo
Daytron
Denon
Dimensia
Electrohome
Emerson
Fisher
Fuji
Funai
Garrard
GE
Go Video
GoMstar
Gradieme
Harman Kardon
Hitachi
JBL
JC Penney
Jensen
JVC
Kenwood
Kodak
LG
Lloyds
Logik
LXI
Magnasonic
Ma,qnavox
Maralltz
Memorex
MGA
MGN
Minolta
Mitsubishi
Montgomery Ward
Motorola
MTC
Multitech
NEC
Nikko
Noblex
Optimus
Optonica
009,010, 016, (161,
065,079
001, 005, 009, 012,
014, 040, 048,053,
056,057
011,013,015,017,
018,019, 057, (178
O78
063
001,048
010, 020, 065
003,008, 010, 011,
017, 018, 020, 028,
039,054, 057,062,
065,068, 072
007, 016, 021,022,
023,057, 064, 068,
070, 071,079
004, {}41
018,073
018
001,002, 009, 040,
042,048, 056
(156, 059, 061, 081
(105,010, 014,054,
056,065, 067
018,065
005
024, 025, 035,037,
042,063, 070, 080
(176
005,006, 007, 008,
009,010, {)23,024,
025,026, 035,056,
{}61,063, 065
024, 025, 037
005,006, 007, {t14,
037,043, 062, 063,
O68,082
005,006, 007, 012,
014, 037, 043,053,
068, 071
010
o 1o
053,073, 079
061
OlO
o61, {)65,078
026, 027, 034, 044,
057, 061, 072
005, {}06,007, 012,
014,026, 053,067
007,009, 010, 016,
018,034, 049,063,
065,066, {)68,075,
079
020, 028, 039
{156
024, 025, 035,063
020, 024, 025,028,
039, {}43,065
049
{)49
{t09,046, 06 I
009,012, 018
005,006, 007,012,
014, 037, 043,053,
054,067, 070
OlO
009
010, 049, 065
031
Orion
Panasonic
Pentax
Pentex Research
Philco
Philips
Pioneer
Porthmd
Proscall
Proton
Quasar
Radio Shack
Radio Shack/Realistic
Radix
RCA
Realistic
Ricoh
RtlllCO
Samsung
Sansui
Sanyo
Scott
Sears
Sharp
Shintom
Signature
Signature 2000
Singer
Sony
STS
Sylvania
Symphonic
Tandy
Tashiko
Tatung
Teac
Technics
Teknika
Toshiba
Totevision
Unitec
Unitech
Vector Research
054, 057, 062, 065,
068, 072
036,045, {t46,057,
061,072, 079
012,024, 025, 035,
{}42,053, {163
014
026,027, {)63
026, {131,{t44, 057
006, 024, 043,055
012,013,015
001, 002, {)48
061
{)45
010, 031, 065
007,009, 010, 016,
018, 020, 021, 022,
031,045)
010
001,002, 003, 009,
024, 025,029, 035,
{}40,042, {}45,048,
055, 056, 063, 07 l,
083
007,009, {t10, Ol 1,
016, 018, 020, 021,
022, 031, {}49,051,
056, 060, 065, 075,
079
{}47
034
0{)9, Ol 1, 038,056,
073, 084
006,037, 043,061
007, 009, 016,054,
064, 068, 071,075,
{}79,085
008, 011, 017,028,
030, 057, {t65, 072
007,010, 016,021,
022, 023,024, 025,
035, 053,057, 063,
064, 065,068, 071,
075, 079
013, 020, 031,049,
051,060, 066
004, 025,032, 061
{}49
{)75
{}47,061
0{}4,032, 033, 041,
052, 058, 070, 074,
{}76,077, 080
O35
018, 026, 027, 028,
{}44,072
018, 051,053, 073,
{}79
{_}7
010
037
Ol8, 029, 037
036
010, 018, {165
0{}0,011,021,023,
024, 028, {)30, 039,
057, 074, 078, 079
009, 010, 065
073
{_}9
005,006, OI I, 012,
053
Vide() Concepts
WaRls
White Westinghouse
XR- 1000
Yamaha
Zenith
HTIB
Lasoi]ic
PallaSolliC
Venturer
{}05,006, Ol 1,012,
039, 053
009, 010, Ol 1,016,
018, 020, 024, 025,
(}31, 035, 049, 051,
056, 057, 060, {)65,
066, 079
073
018
{}05,0{t6, {}07,014,
037, 053
{}04,032, 034, 041,
047, 069, 086
083
084
085
15
Main menu layout
The tables below and on the next page provide a quick overview of your TV's menu system.
To open the main menus (illustrated below), press M_NUon tile remote control or TV control panel.
Picture Viewer -----,[Launches the JPEG Picture Viewerl
Applications
Audio Player -----,[Launches the MP3 Audio Playerl
S JM
Channel Browser _ [Launches the Channel Brow.'er
---, [Launches tile ATSC Digital CC Selectorl
Digital CC/Audio Selector (This option is not available if you are not on a digital channel.)
Video Picture Settings ---, [Opens Picture Settings menul
Advanced Picture Settings _ [Opens Advanced Picture Settings menul
Theater Settings ---, [Opens Tlleater Settings menul
Audio Audio Settings ---, [Opens Audio Settings menul
_ Advanced Audio Settings ----, [Opens Advanced Audio Settings menu]
Audio Setup ---, [Opens Audio Setup menul
Preferences Favorite Channels _ [Opens Favorite Channels menul
Closed Caption Mode _ Off/CC 1/CC2/CC31CC41TI/T2/T3/T4
Closed Caption Advanced ---, [Opens Closed Caption Advanced menul
Input Labeling ---, [Opens Input Labeling menul
Menu Language ----,English / Frangais / Espafiol
Channel Browser Setup _ [Opens Channel Browser Setup menul
Locks Enable Rating Blocking ---, Off/On
Edit Rating Limits ---, [Opens Edit Rating Limits menul
Channels Block ---, [Opens Channels Block menul
Input Lock ----,Off/Video/Video+
Front Panel Lock --* Off/On
New PIN Code _ [Opens New PIN Code entry screenl
Installation _ [Opens the Installation menu (ir_> page 17)1
Setup
_ Sleep Timer -----,[Opens Sleep Timer menulPC Settings -----,[Opens PC Settings menul
PC Audio ---*No/Yes
HDMI Audio ---*Auto/Digital/Analog
Slide Show Interval _ 2 Sec/5 Sec/10 Sec/15 Sec/20 Sec
16
Setup/Installationmenulayout
Tile Installation menu contains tile Terrestrial, Network, and System Status menus,
To open tile Installation menu (illustrated below), " ss MENUpie.. O on the remote control or TV control panel, open the Setup menu.
select Installation, and press @.
Press MENUQ),
open the
Setup menu,
and then
open the
Installation
sub-menu.
Terrestrial
Network
System Status
Input Configuration
Channel Program
Channel Add/Delete
Signal Meter
Basic Network Setup
Home File Server Setup
Software Upgrade
---* [Opens Input Configuration menul
---* [Scans for new channels on ANT II
---* [Opens Channel Add/Delete menul
---* [Opens Signal Meter menul
---* [Opens Basic Network Setup menul
---* [Opens Home File Server Setup menul
System Information _ [Opens the System Information windowl
THINCmenulayout
The THINC menu will not be part of the main menu, but will
TNINC
be viewable by pressing O on the remote control. It will
contain a list of special features offered by the TV; Picture
Viewer, Audio Player, and Channel Browser.
Navigatingthe menusystem
You can use the buttons on the remote control or TV control
panel to access and navigate your TV's on-screen menu
system.
SS MENU
Pre.;s © to open the menu system.
When a menu is open, use the up/down/left/right arrow
buttons (AV._ I1_)on the remote control or TV control panel
to move in the corresponding direction in the menu.
Press @ to save your menu settings or select a highlighted
item. (A highlighted menu item appears in a different color
in the menu.)
All menus close automatically if you do not make a selection
within 60 seconds, except the signal meter menu, which
closes automatically after about 5 minutes.
To close a menu " E×T
mstantly, press O
Note: The menu background may sometimes appear black,
depending on the signal the TV is receiving. This is not a sign
of malfunction.
17
Selectingthemenulanguage
You can choose from three different languages (English,
French and Spanish) for the on-screen display of menus and
messages,
To select the menu language:
SS MENU
Press © and open the Preferences menu.
2 Highlight Menu Language and press I1_.
3 Press orV to select your prefened menu language and
press ,@.
EXIT
Press © to close the Preferences menu.
Configuringtheantennainput
sourcefortheANTterminal
To configure the ANT input source:
SS MENU
Pre,;s © and open tile Setup menu.
2 Highlight Installation and press @.
' F........ i, " ;_(
3
(A new set of Installation menu icons will appear on-
screen, as shown below.) Open the Terrestrial menu,
highlight Input Configuration, and press @.
4
Channel Program
Channel Add/Delete 111
Signal Meter
*_ , ENTER CRRrN: Elff
Press or to select the input source (Cable or
Antenna for the ANT input on the TV.
5 To save your new settings, highlight Done and press @.
To revert to your original settings, highlight Cancel and
press @.
18
Programmingchannelsintothe
TV'schannelmemory
When you press _ or _," on the remote control or TV control
panel, your TV will stop only on the channels you proglammed
into the TV's channel memory.
Follow the steps below to program channels into the TV's
channel memory.
Programmingchannels automatically
Your TV can autolnatically detect all active channels in your
area and store them in its memory. After the channels are
programmed automatically, you can manually add or elase
individual channels in the channel memory.
Note:
Youmust configure theantenna input source before
programming channels (_>"page 18).
° tf theAntenna 1input signal type is set to Cable, the
automatic channel programming process erases channels
that werepreviously programmed into the TV'smemory.
° tf theAntenna 1input signal type is set toAntenna, the
automatic channel programming process adds newly found
channels to the existing set ofprogrammed channels (and
does NOT erasechannels that were previously
programmed into the TV'smemory.) Toremove an Antenna
source channel from thememory,you must manually delete
iL
° Totunethe TVtoa channelnot programmed in the channel
memory, you must use the Channel Number buttons on the
remote control.
° Programming channels when the antenna input is
configured for Cable willtake substantiallylonger thanwhen
theantenna input isconfigured forAntenna. Thisis normal;
however,once channelprogramming isfinished,you should
not have to repeat theprogramming process again unless
your Cable TVservice lineup changes significantly.
To program channels automatically:
1
2
3
Make sure you have configured the antenna input source
(_ page 18).
NN MENU
Press O and open tile Setup menu.
Highlight Installation and press @.
...........L::i
4 (A new set of Installation menu icons will appear on-
screen, as shown below.) Open the Terrestrial menu,
highlight Channel Program, and press @.
Channel Add/Delete
5 Highlight ANT 1 and then press ,4_ to start automatic
channel programming.
6
The TV will automatically cycle through all the antenna
channels, and store all active channels in the channel
memory, While the TV is cycling through the channels,
the message "Scanning channels, please wait" appears (as
shown above).
To cancel channel programming, either press EXIT(bO1"
highlight Abort in the on-screen display and press @.
When channel programming is finished, press _ or _," to
view the programmed channels.
Manually adding and deleting channels
in the channel memory
After automatically programming channels into the channel
memory, you can manually add or delete individual channels.
To add or delete channels in the channel memory:
SS MENU
Pre.<_'o and open the Setup menu.
2 Highlight Installation and press @.
3 (A new set of Installation menu icons will appear on-
screen, as shown below) Open the Terrestrial menu,
highlight Channel Add/Delete, and then press ,d_.
i ii @ iiii
HH i_
iiiinpui_oniig_aii;n iiiii
iii: i:i!:i
19
To add a channel to the channel memory:
Highlight tile unchecked box next to tile channel number you
want to add, and then press @ to check the box.
To manually add digital subchannels on a physical
channel:
Use the Channel Numbers and the Dash ((_)) on the remote
control to enter the channel number dor example, 56-1 ).
Ifthe channel is found, the number will be added to the list and
the box will be checked.
If the channel is not found, a message will appeal.
To remove a channel from the channel memory:
Highlight tile checked box next to tile channel number you
want to remove, and then press @ to uncheck tile box.
To save your new settings:
Highlight Done and press @.
To revert to your original settings:
Highlight Cancel and press @ before saving.
Programmingyourfavorite
channels
You can program up to nine antenna cllannels as tiworite
channels. You can then scan through your fiworite channels
only, skipping other channels you do not normally watch.
To add and delete channels in the Favorite
Channels list:
SS MENU
Pre,<_' © and open tile Preferences menu.
2 Highlight Favorite Channels and press @ (see
illustration, below left).
3 Use &V to select ANT 1 and press ,@ (see illustration,
below right).
4 Highlight Edit and press @.
5a To add a channel:
Use &V to highlight an unchecked box next to a channel
you want to set as a fiworite, and then press @ to check
the box.
Note: You must first use Channel Program or Channel
Add/Delete to add channels to the channel memory
before setting up favorite channels.
5b To delete a channel:
Highlight a checked box and press ,_ to uncheck it.
6
iiiiiiiiiB9
iiiiiii
Note: If you try to add more than nine favorite channels
per input, an error message will appear. You will need to
delete (uncheck) a channel before you can add another.
When you are finished adding or deleting channels,
highlight Done and press @.
2O
  • Page 1 1
  • Page 2 2
  • Page 3 3
  • Page 4 4
  • Page 5 5
  • Page 6 6
  • Page 7 7
  • Page 8 8
  • Page 9 9
  • Page 10 10
  • Page 11 11
  • Page 12 12
  • Page 13 13
  • Page 14 14
  • Page 15 15
  • Page 16 16
  • Page 17 17
  • Page 18 18
  • Page 19 19
  • Page 20 20
  • Page 21 21
  • Page 22 22
  • Page 23 23
  • Page 24 24
  • Page 25 25
  • Page 26 26
  • Page 27 27
  • Page 28 28
  • Page 29 29
  • Page 30 30
  • Page 31 31
  • Page 32 32
  • Page 33 33
  • Page 34 34
  • Page 35 35
  • Page 36 36
  • Page 37 37
  • Page 38 38
  • Page 39 39
  • Page 40 40
  • Page 41 41
  • Page 42 42
  • Page 43 43
  • Page 44 44
  • Page 45 45
  • Page 46 46
  • Page 47 47
  • Page 48 48
  • Page 49 49
  • Page 50 50
  • Page 51 51
  • Page 52 52
  • Page 53 53
  • Page 54 54
  • Page 55 55
  • Page 56 56
  • Page 57 57
  • Page 58 58
  • Page 59 59
  • Page 60 60
  • Page 61 61
  • Page 62 62
  • Page 63 63
  • Page 64 64
  • Page 65 65
  • Page 66 66
  • Page 67 67
  • Page 68 68
  • Page 69 69
  • Page 70 70

Toshiba 26HLV66 Owner's manual

Category
LCD TVs
Type
Owner's manual

Ask a question and I''ll find the answer in the document

Finding information in a document is now easier with AI