Page is loading ...

TelosAlliance.com
2020 TLS Corp. Telos Alliance®. All Rights Reserved. PN: 1490-00149-002 --- QSG xNode
Quick Start Installation Guide
Telos Alliance xNode
The Most Advanced AoIP Interfaces
on the Planet.
THANK YOU FOR PURCHASING THE
TELOS ALLIANCE XNODE
We have made the family of xNode audio and login interfaces easy to set up and
configure. This quick-start installation guide will take you through the basic steps
to configure your new xNode and have you up and running in no time. Before we
get started, let’s make sure you have what you need.
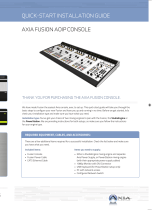
Required Equipment, Cables, and Accessories
There are a few additional items required for a successful installation. Check the
list below and make sure you have what you need.
Included items:
• Power Cables
• Rack-mounting* brackets for single- or dual-unit mounting
Items you need to supply:
• PC with network access connected to a monitor and keyboard
• Congured network switch (if conguration will be implemented
over a network)
*Please refer to the full manual located online for detailed instructions to rack-mount your equipment.

TelosAlliance.com
2020 TLS Corp. Telos Alliance®. All Rights Reserved. PN: 1490-00149-002 --- QSG xNode
Quick Start Installation Guide
ON-BOARD SETUP
Initial Set up
1. Connect the Axia xNode (A) to AC Mains
using the supplied power cable.
2. Wait for the boot process to complete.
The OLED display will show a home screen
identifying the xNode model and version (B).
3. On the front of the xNode, press the top
button (C) twice to display the ID screen
on the display.
4. Once on the ID screen (D), press and hold
the bottom button (E) for 10 seconds to
enter into edit mode.
5. Once on the edit screen (F), the top
button (C) is used to increment value and
the bottom button (E) is used to move the
cursor to the next position.
6. To assign an ID, press the bottom button
(E) twice to move the cursor to the Node
ID position then press the top button (C)
once to assign an ID value to the xNode.
You may assign any number between 1
and 319; each xNode‘s number must be
unique.
A
B
C
D
E
F
E

TelosAlliance.com
2020 TLS Corp. Telos Alliance®. All Rights Reserved. PN: 1490-00149-002 --- QSG xNode
Quick Start Installation Guide
7. After the ID number is chosen, press
the bottom button (E) once more to
save the ID. The xNode‘s IP address
and channel numbers are automatically
assigned based on the ID number, and
are displayed on the OLED (G).
(For details about how auto-assigned IP
addresses and channel numbers are derived,
please see Chapter 2 of the xNode User
Manual.)
Continue to Source and Destination Conguration
The initial set-up of your xNode is complete and ready to be linked to your
network and congured to load sources and destinations. Continue to the “Audio
Source and Destination Conguration” instructions.
E
G

TelosAlliance.com
2020 TLS Corp. Telos Alliance®. All Rights Reserved. PN: 1490-00149-002 --- QSG xNode
Quick Start Installation Guide
SOURCE AND DESTINATION
CONFIGURATION
Axia-Approved Ethernet Switch
Network Enabled PC
AC Mains
CONNECT AND CONFIGURE
1. Connect your desired inputs and outputs
to the appropriate ports on the back of
the xNode console (H). Note: ports will
vary depending on your xNode model.
2. Connect Ethernet cable to the PoE port
(I) on the rear panel of the xNode, connect
other end to either a configured Ethernet
switch (J) or directly to a PC (K).
3. Set a static IP address to the connected
PC (an address of 10.216.0.100 would be suitable).
4. Open a web browser and type the automatically assigned IP address of the
xNode (10.216.0.101) into the URL field (L).
5. When prompted for authentication (M) enter user name „user“,
password is left blank.
L
M

TelosAlliance.com
2020 TLS Corp. Telos Alliance®. All Rights Reserved. PN: 1490-00149-002 --- QSG xNode
Quick Start Installation Guide
6. The xNode control center (N) will
launch. Click the Simple Setup button
(O). (Note: the options available will
vary by the xNode.)
7. The Simple Setup page will launch (P).
In the Sources section (Q), enter useful
labeling in the “Source Name” fields to
describe the devices connected to the
xNode.
8. Click the “Apply” button (R).
9. In the Destinations section (S), enter
useful labeling in the “Name” fields
to describe what is connected to the
xNode outputs.
10. To define the audio present at the
output, click the browse button (T)
next to the Channel field associated
with the destination. A popup window
(U) will appear listing the sources and
their channels that are available on the
network.
11. Select the desired source.
N
O
P
Q
S
R
U
T

TelosAlliance.com
2020 TLS Corp. Telos Alliance®. All Rights Reserved. PN: 1490-00149-002 --- QSG xNode
Quick Start Installation Guide
12. Click the “Apply” button (R).
13. Note: Descriptive naming of xNodes
oers more intuitive selection of
destinations. If you find the sources
presented in the pop up window are
not descriptively named, in the left
column under “Advanced Options”,
select “System” (V). Here, you can
change the host name of your xNode
to an accurately descriptive name.
Your Setup is Complete!
That’s it! You are now ready to experience
Axia xNodes, high performance audio
routing solutions for today’s broadcast
studio. Enjoy!
NOTICE:
Axia is pleased to announce a new
audio mixing feature present in xNode software
v2.0 and higher. This xNode Virtual Mixer
feature is available on Analog, AES, Microphone
and Mixed-Signal xNodes, and is a full matrix
allowing custom signal routing and mixing
between any I/O ports, along with networked
sources and destinations. Please refer to the
complete v2.0 user manual, available at
https://www.telosalliance.com/Axia/xNodes, for
instructions on using this feature.
Installation Help
For more details on other configuration options, or for additional information
about a particular xNode, please access the full manual online at
http://www.telosalliance.com/Axia/xNodes.
If you have more questions, call the Telos Alliance 24/7 Support Team at
+1 (216) 622-0247, or email us at support@telosalliance.com, we’d be happy
to help you out.
R
V

TelosAlliance.com
2020 TLS Corp. Telos Alliance®. All Rights Reserved. PN: 1490-00149-002 --- QSG xNode
Quick Start Installation Guide
THIS PAGE INTENTIONALLY BLANK

TelosAlliance.com
2020 TLS Corp. Telos Alliance®. All Rights Reserved. PN: 1490-00149-002 --- QSG xNode
Quick Start Installation Guide
1241 Superior Ave. • Cleveland, Ohio, 44114, USA • +1.216.241.7225 • TelosAlliance.com
© 2020 TLS Corp. The Telos Alliance®. All Rights Reserved. S20/1/16016 1490-00149-002 --- QUICK START GUIDE: xNode
Subscribe to our Telos Alliance Newsletter
Weekly updates on all things broadcast via email
TelosAlliance.com/newsletter
Social Media
Facebook: /TelosAlliance
Twitter: @TelosAlliance
LinkedIn: /TelosAlliance
YouTube: TelosAllianceTV
Product Catalog
TelosAlliance.com/now
24/7 Tech Support
Radio: +1 (216) 622-0247
TV: +1 (717) 735-3611
Radio: support@telosalliance.com
TV: support@linearacoustic.com
QUICK LINKS
/