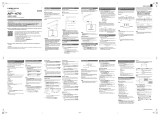
Page is loading ...

IF YOU HAVE ANY QUESTIONS OR PROBLEMS,
DO NOT CALL OR RETURN PRODUCT TO THE STORE
Visit www.suzukipianos.com
CALL THIS TOLL FREE HELP LINE
STOP!
DO NOT ASSEMBLE YOUR PIANO
BEFORE READING THIS GUIDE!
1
•
8OO
•
854
•
1594
Easy
Assembly
Guide
The Name You Know
Micro Digital Grand Piano
MDG-100

1. Unpacking YoUr new grand piano
The diagram below shows how your piano is packaged:
Legs
Pedal assembly
Bench
Box for legs, pedal assembly,
pedal support rods and bench
Piano
Master Box
AC Power cord, polish cream and
cloth

2. Unpacking piano Legs and pedaL assembLY
A. Piano Leg and Lyre Carton:
Remove the Leg and Pedal Assembly Box (the top box) from
the Master Piano Carton.
B. Carefully Handle the Piano Parts
• Carefully slit the tape and open the box as – shown.
• Lift out all the parts inside this box and gently remove the protective
plastic covering. Set aside on a soft surface.
• You are handling the high gloss lacquer finish during this procedure.
Be careful not to scratch or hit these parts against each other or let
them come in contact with any other items.
C. Parts and Pieces:
After you have completed unwrapping everything, here is what you should have:
3 Piano Legs 1 Accessory Cord
1 Pedal Assembly 1 Bag of Hardware:
Piano Bench (includes 4 legs with fastening hardware) 8 - Tapped Screw 4 x 10 (Brass)
2 Brass Support Rods 8 - Bolt M8X45
1 Wrench and Screwdriver 8 - Washers
1 Power Cord

3. remove The piano From The piano box
4. remove The pLasTic cover
B. Stand your piano upright on a soft, scratch free surface such as a blanket or plush carpet
Carefully stand the piano upright as shown in the diagram
IMPORTANT!
One person must hold the piano as indicated, while the
other person attaches the legs and pedal assembly.
IMPORTANT!
One person must hold the piano while the other person removes the
plastic cover.
Please note that the plastic cover does not need to be completely
removed. At this time we just need to remove it from the bottom of
the piano so that we can attach the legs and pedal assembly.
A. Remove the Piano from the Master Carton:
Remove the Leg and Pedal Assembly Box from the Master Piano Carton and Place in an upright position.
Use two people to lift your new Piano out of the carton
and place on a soft surface such as carpet or a blanket.
Please be careful as you lift as the piano is heavy.
A. Plastic Cover:
• Tear the plastic covering away from the piano bottom as
shown.
• It is not recommended you use a knife or sharp object to
remove the plastic. You are very close to the high gloss finish
at this stage of unpacking.

A. Assembly Positions:
You will see the following areas
on the bottom of your piano:
1. Right Piano Leg Position
2. Pedal Assembly Position
3. Left Piano Leg Position
4. Back Piano Leg Position
5. iPod Docking Station
6. Pedal Cable Jack Connection
7. Connections Jack Box
8. Speakers
9. A/C Power Chord Input
10. Serial Number Tag
5. aTTaching The Legs To The piano
IMPORTANT!
One person must hold the
piano as indicated, while the
other person attaches the legs
and pedal assembly.
B. Install the Top Leg: Install the Leg at
the top of the piano:
• Take one of the piano legs and line it up to the leg
holes.
• Use the long bolts and washers in bag
• Loosely thread both bolts and washers in the
threaded lugs. Then tighten completely.
• Again, be careful not to push the piano over when
attaching the legs and pedal assembly.
• Handle the high gloss lacquer finish carefully.
• Do not install the piano leg at the bottom of the
piano at this point.

5. aTTaching The Legs To The piano (conTinUed)
C. Tighten the Bolts:
Tighten both bolts using the provided tool.
D. Install the Back Leg:
Install the back piano leg in
position. Use the same procedure
as the first leg installation.
• So far you have attached 2 of the
3 legs. This is correct. The third leg
will be attached later.
6. pedaL assembLY aTTachmenT
A. Pre-Pedal Assembly:
• Tighten the knob on the bottom
of the pedal assembly clockwise
as shown, until it is as close to the
pedal board as--possible.
• After your piano has been placed
in its final position, these 2 knobs
will be adjusted down to stabilize
the pedals.
IMPORTANT!
• Remember! It is important
that one person hold the
piano while the other
person performs the
installation functions. Be
careful not to push or
pull the piano over while
installing these parts.

B. Pedal Assembly Preparation:
• Locate the 2 support rods
• The ends of these rods have 2 different angles. One angle
is very gentle, the other is more sharp.
• Using the gentle angle, attach the 2 supporting rods using
the brass screws with screwdriver to the back of the pedal
assembly as shown. Tighten but do not over tighten, just
tighten securely.
C. Pedal Assembly Attachment:
The pedal assembly attaches to the threaded lugs as shown
above. Thread the bolts with washers into the lugs and
tighten.
When you have finished tightening the pedal assembly,
there may be a space between the 3 pedal rods and the top
of their 3 square position holes. This is normal. They do not
fit tightly against the piano bottom.
D. Attach the pedal support rods to the piano bottom with
the remaining 4 brass screws. Find the pre-drilled holes on
bottom of the piano as shown in the diagram above.
E. Attach the pedal cable to the pedal cable socket on the
bottom of the piano. See diagram above for location of
pedal cable socket. When plugging in this cable please do
not force it as it will insert correctly when the holes are lined
up properly.
7. pedaL assembLY aTTachmenT (conTinUed)
8. insTaLLing The LeFT Leg
A. Use a pillow or make a thick pad by fold-
ing a blanket or quilt in quarters. Place it so the
pedal assembly will land on it. Using 2 or 3 per-
sons, lift the piano and pivot onto the pad.
B. With one person holding the piano in
position,go under the piano and install the final
leg as shown, Finally, using two people, lift the
piano and remove the thick pad.
Pedal Cable Socket
Tapped Screws

9. posiTioning YoUr new grand piano
WARNING:
When positioning the piano in your home
carry it to the final position.
WARNING: DO NOT PUSH PIANO!
This may cause the legs to break!
A. Adjust the Pedal Feet:
With your piano placed in its final position, reach
under the pedal box and adjust the pedal foot
down to firmly contact the floor by turning the
knob counter clockwise as shown.
B. Install the Power Cord:
Install the power cord into its receptacle on the bottom left
of the piano.
• Connect the male end to an appropriate wall receptacle.
• Please refer to the piano owner’s manual for piano
operation.
Please Note: for cosmetic reasons you may wish to attach the pedal cable to
the bottom back of the pedal assembly and the top of the piano, using the
included black plastic clips.
C. Hiding the Pedal Cable Using Supplied Black Plastic Clips
/