Page is loading ...

1645 Lemonwood Dr.
Santa Paula, CA 93060 USA
Toll Free: (800) 253-2363
Telephone: (805) 933-9970
rangerproducts.com
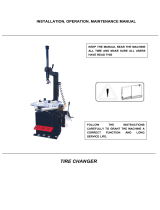
Swing-Arm Tire Changer
Installation and Operation Manual
Manual P/N 5900171 — Manual Revision C — December 2019
Model:
• R745
Designed and engineered in Southern California, USA. Made in China.
⚠ DANGER
Read the
entire
contents of this manual
before
using this
product. Failure to follow the instructions and safety precautions in
this manual can result in serious injury or death. Make sure all other
operators also read this manual. Keep the manual near the product
for future reference. By proceeding with installation and operation,
you agree that you fully understand the contents of this manual.

Manual. R745 Swing-Arm Tire Changer, Installation and Operation Manual, Manual P/N 5900171, Manual
Revision C, released December 2019.
Copyright. Copyright © 2019 by BendPak Inc. All rights reserved. You may make copies of this document if you
agree that: you will give full attribution to BendPak Inc., you will not make changes to the content, you do not gain
any rights to this content, and you will not use the copies for commercial purposes.
Trademarks. BendPak, the BendPak logo, Ranger, and the Ranger logo are registered trademarks of BendPak
Inc. All other company, product, and service names are used for identification only. All trademarks and registered
trademarks mentioned in this manual are the property of their respective owners.
Limitations. Every effort has been made to have complete and accurate instructions in this manual. However,
product updates, revisions, and/or changes may have occurred since this manual was published. BendPak
Ranger reserves the right to change any information in this manual without incurring any obligation for equipment
previously or subsequently sold. BendPak Ranger is not responsible for typographical errors in this manual. You
can always find the latest version of the manual for your product on the Ranger website.
Warranty. The BendPak Ranger warranty is more than a commitment to you: it is also a commitment to the
value of your new product. For full warranty details, contact your nearest BendPak Ranger dealer or visit
bendpak.com/support/warranty. Go to bendpak.com/support/register-your-product/ and fill out
the online form to register your product (be sure to click Submit).
Safety. Your new product was designed and manufactured with safety in mind. Your safety also depends on
proper training and thoughtful operation. Do not set up, operate, maintain, or repair the unit without reading and
understanding this manual and the labels on it;
do not use this product unless you can do so safely!
Owner Responsibility. In order to maintain your product properly and to ensure operator safety, it is the
responsibility of the product owner
to read and follow these instructions
:
• Follow all installation, operation, and maintenance instructions.
• Make sure product installation and operation conforms to all applicable local, state, and federal codes, rules,
and regulations, such as state and federal OSHA regulations and electrical codes.
• Read and follow all safety instructions. Keep them readily available for operators.
• Make sure all operators are properly trained, know how to safely operate the unit, and are properly supervised.
• Do not operate the product until you are certain all parts are in place and operating correctly.
• Carefully inspect the product on a regular basis and perform all maintenance as required.
• Service and maintain the unit only with approved replacement parts.
• Keep the manual with the product and make sure all labels are clean and visible.
• Only use this product if it can be used safely!
Unit Information. Enter the Model Number, Serial
Number, and the Date of Manufacture from the label
on your unit. This information is required for part or
warranty issues.
Model:
Serial:
Date of Manufacture:

R745 Swing-Arm Tire Changer 3 P/N 5900171 — Rev. C — Dec. 2019
Table of Contents
Introduction 3 Installation 11
Shipping Information 4 Operation 22
Safety Considerations 4 Maintenance 48
Components 6 Troubleshooting 51
FAQs 8 Labels 52
Specifications 9 Parts 55
Installation Checklist 10 Maintenance Log 67
Introduction
This manual describes the following Tire Changer:
• R745. Swing Arm, 110 or 220 VAC power, for demounting, mounting, and inflating automobile
and light truck single-piece Tires.
More information about BendPak Ranger products is available at rangerproducts.com.
This manual is mandatory reading for all users
of the R745, including anyone who sets up,
operates, maintains, or repairs it.
You can always find the latest version of the manual for your product on the BendPak
Ranger website.
⚠ DANGER Be very careful when setting up, operating, maintaining, or repairing this equipment;
failure to do so could result in property damage, product damage, injury, or (in very
rare cases) death. Make sure only authorized personnel operate this equipment. All
repairs must be performed by an authorized technician. Do not make modifications
to the unit; this voids the warranty and increases the chances of injury or property
damage. Make sure to read and follow the instructions on the labels on the unit.
Keep this manual on or near the equipment so that anyone who uses or services it can read it.
Technical support and service for your Tire Changer is available from your distributor or by calling
BendPak Ranger at (805) 933-9970. You may also call regarding parts replacement (please
have the serial number and model number of your unit available).

R745 Swing-Arm Tire Changer 4 P/N 5900171 — Rev. C — Dec. 2019
Shipping Information
Your equipment was carefully checked before shipping. Nevertheless, you should thoroughly inspect
the shipment
before
you sign to acknowledge that you received it.
When you sign the bill of lading, it tells the carrier that the items on the invoice were received in good
condition.
Do not sign the bill of lading until
after
you have inspected the shipment.
If any of the
items listed on the bill of lading are missing or damaged, do not accept the shipment until the carrier
makes a notation on the bill of lading that lists the missing or damaged goods.
If you discover missing or damaged goods
after
you receive the shipment and have signed the bill of
lading, notify the carrier at once and request the carrier to make an inspection. If the carrier will not
make an inspection, prepare a signed statement to the effect that you have notified the carrier (on a
specific date) and that the carrier has failed to comply with your request.
It is difficult to collect for loss or damage after you have given the carrier a signed bill of lading. If this
happens to you, file a claim with the carrier promptly. Support your claim with copies of the bill of
lading, freight bill, invoice, and photographs, if available. Our willingness to assist in helping you
process your claim does not make us responsible for collection of claims or replacement of lost or
damaged materials.
Safety Considerations
Read this manual carefully before using your new product.
Do not set up or operate
the product until you are familiar with all operating instructions and warnings. Do not allow anyone else
to operate the product until they are also familiar with all operating instructions and warnings.
⚠ WARNING There are many moving parts on a Tire Changer; keep clear of these moving parts
and the Tire being changed. In particular, when inflating a Tire, never lean over the
Tire; if it were to explode (which does happen), the force could injure or kill the
Operator or bystanders. During inflation, the Operator should be as far away from
the Tire as possible and all bystanders must be at least 30 feet away.
Safety Information
Please note the following:
• The product is a Tire Changer.
Use it only for its intended purpose.
• The product
must
only be operated by authorized, trained, properly supervised personnel. Keep
children and untrained personnel at least 30 feet away from the product when it is in use.
• Always follow all applicable local, state, and federal codes, rules, and regulations, including (but not
limited to) OSHA standard 1910.177 (Servicing multi-piece and single piece rim wheels).
• You
must
wear OSHA-approved (publication 3151) Personal Protective Equipment at all times
when installing, using, maintaining, or repairing the Tire Changer. Leather gloves, steel-toed work
boots, eye protection, back belts, and hearing protection
are mandatory
.
• Do not use the product while tired or under the influence of drugs, alcohol, or medication.
• Do not use the product in the presence of cigarette smoke, dust, or flammable liquids or gases.
Use the product indoors in a well-ventilated area.
• Do not make any modifications to the product; this voids the warranty and increases the chances
of injury or property damage.
Do not modify any safety-related features in any way
.

R745 Swing-Arm Tire Changer 5 P/N 5900171 — Rev. C — Dec. 2019
• Make sure all Operators read and understand this Installation and Operation Manual. Keep the
Manual near the Tire Changer at all times.
• Make a visual inspection of the Tire Changer every day. Do not use the product if you find any
missing or damaged parts. Instead, take the Tire Changer out of service, then contact an
authorized repair facility, your distributor, or BendPak Ranger at (805) 933-9970.
• BendPak Ranger recommends making a
thorough
inspection of the product once a month.
Replace any damaged or severely worn parts, decals, or warning labels.
Symbols
Following are the symbols that may be used in this Manual:
⚠ DANGER Calls attention to a hazard that will result in death or injury.
⚠ WARNING Calls attention to a hazard or unsafe practice that could result in death or injury.
⚠ CAUTION Calls attention to a hazard or unsafe practice that could result in personal injury,
product damage, or property damage.
NOTICE Calls attention to a situation that, if not avoided, could result in product or property
damage.
Tip Calls attention to information that can help you use your product better.
Liability Information
BendPak Ranger assumes no liability for damages resulting from:
• Use of the equipment for purposes other than those described in this Manual.
• Modifications to the equipment without prior, written permission from BendPak Ranger.
• Damage to the equipment from external influences.
• Incorrect operation of the equipment.

R745 Swing-Arm Tire Changer 6 P/N 5900171 — Rev. C — Dec. 2019
Components
The following graphic identifies the main components of the Tire Changer.
Not all components visible.

R745 Swing-Arm Tire Changer 7 P/N 5900171 — Rev. C — Dec. 2019
Tire Changer components include:
• Turntable. Holds the Wheel and has the Wheel Clamps on it.
• Wheel Clamps
. Hold the Wheel in place.
• Tower. Holds the Swing Arm. Comes uninstalled.
• Swing Arm. Holds the main tool, the Mount/Demount Head. Moves to the right up to 90° when
not needed or in the way.
• Mount/Demount Head. Mounts and demounts Tires. Located on the bottom of the Shaft. The
Tire Changer comes with an alloy steel Head. A plastic, non-marring Head is available.
• Shaft. Moves up and down; controls the position of the Mount/Demount Head.
• Shaft Cap. Moves the Shaft down to get the Mount/Demount Head to the desired height.
• Shaft Lock Handle. Locks the Swing Arm in the desired position.
• Swing Control. Stops the Swing Arm from moving past a specific point you choose.
• Bead Breaker. Breaks the Beads of Tires so you can demount them. Located on the right side
of the Tire Changer. Includes a Handle a Blade, and a movable mechanism.
• Bead Lifting Tool. Basically a Tire Iron that you use to pull the Bead edge of a Tire over the
Mount/Demount Head so the Tire can be demounted from the Wheel. Can also be used to hold
down a Tire Sidewall during Tire mounting.
• Inflation Gun with Pressure Gauge. Adds air to a Tire. The Pressure Gauge shows the
amount of air pressure currently in a Tire or the amount of air pressure in a Tire as the Tire is
inflated. Includes an Air Chuck with self-gripping clip and an air-dump button.
• Lube Bucket. Holds Tire lubricant. Use a lubricant approved by the Tire manufacturer for the Tire
being changed.
• Lube Brush. Applies the Tire lubricant.
• Bead Breaker Foot Pedal. Moves the Bead Breaker Blade in.
• Clamps In Foot Pedal. Moves all four Clamps in (if they are out).
• Clamps Out Foot Pedal. Moves all four Clamps out (if they are in).
• Turntable Foot Pedal. Rotates the Turntable. Press down to rotate the Turntable clockwise,
press up to rotate the Turntable counter-clockwise.
• Regulator/Filter. Controls the pressure of the incoming air supply and removes water from the
incoming air.
• Lubricator. Adds lubrication to the incoming air for tools on the Tire Changer that need it.
• Voltage Switch. Switches the Tire Changer’s motor between 110 VAC and 220 VAC operation.
Use with
caution
(refer to Connecting to Power for detailed information). The Tire Changer
comes from the factory set to 110 VAC and the Power Cord has a 110 VAC Plug.
• Replacement Parts. Extra Air Line parts, yellow plastic pieces for the Mount/Demount Head,
and replacement parts for leaking Foot Pedals, in case they are needed in the future.

R745 Swing-Arm Tire Changer 8 P/N 5900171 — Rev. C — Dec. 2019
Frequently Asked Questions
Question: What does a Tire Changer do?
Answer: A Tire Changer takes Tires off of Wheels (called demounting), puts Tires onto Wheels
(called mounting), and inflates Tires.
Q: What is the difference between a Tire, Wheel, and Rim?
A: A Wheel is the round
metal
piece that attaches to the Vehicle’s axle. A Tire is the round
rubber
piece that surrounds the Wheel. The outer edge of the Wheel, where the Tire attaches to the
Wheel, is called the Rim. Some people use Wheel and Rim interchangeably.
Q: What are the steps in the process of demounting a Tire and then mounting a new Tire?
A: The steps are: Deflate the Tire, break the Bead on both sides of the Tire, secure the Wheel on the
Turntable, demount the Tire, mount the new Tire, inflate the new Tire, then remove the Wheel
from the Turntable.
Q: What does “break the Bead” mean?
A: A Tire is held on the Rim of a Wheel by the Tire Bead sitting between the Rim Lip and the Bead
Retainer of the Rim (this location is called the Bead Seat). The air pressure in the Tire holds it in
place once the Bead is seated (during mounting). When you “break the Bead”, you move the Tire
Bead out of Bead Seat, which is required to demount the Tire.
Q: Can I break the Bead without fully deflating the Tire?
A: No, do not do this. Always
fully deflate
a Tire before attempting to break its Bead. The air
pressure energy in a Tire, even if not fully inflated, can be considerable. If you were to attempt to
break the Bead of a Tire not fully deflated, that air pressure energy would be released all at once,
possibly injuring or, in rare cases, killing the Operator or bystanders.
Q: What thing should I always do when working with the Tire Changer?
A: You must identify and correctly match the Tire and Wheel/Rim diameters of the Tires you are
mounting; they must match exactly. If they do not match exactly, this is called a tire mismatch.
The result of a mismatch is that the Tire could literally explode off the Wheel when you inflate it or
while the Vehicle is being driven. In both cases, people could be injured or killed. Note that the
phrase “tire mismatch” is also used to mean Tires on a single vehicle with different tread patterns
or from different manufacturers. This is not what we are talking about here. BendPak Ranger
recommends getting and reading OSHA standard 29 CFR 1910.177 (Servicing Multi-Piece and
Single Piece Rim Wheels) for additional information.
Q: Where should I put my Tire Changer?
A: What you want is a flat Concrete floor with room around it that is also near where you work on
Tires. Ideally, you want it a little off the beaten path, as you must – for safety – keep everyone
away from the Tire Changer while it is in use. No one other than the Operator should be within 30
feet of the Tire Changer while it is in use.
Q: Why is there a 110 VAC plug on the Power Cord; I want to use a 220 VAC power source?
A: The Tire Changer comes configured from the factory for 110 VAC. However, it is switchable to
220 VAC. Refer to Connecting to Power for complete instructions for switching. Short
version: there’s a switch on the side that needs to be changed and you need to have an
Electrician put a 220 VAC Plug on the end of the Power Cord. Pay careful attention to the
instructions for switching; if done wrong, you can damage the Tire Changer.

R745 Swing-Arm Tire Changer 9 P/N 5900171 — Rev. C — Dec. 2019
Specifications
Model R745
Motor*
110
or
220 VAC, 50/60 HZ, 1 Ph.
Power Cord Length 120 in (10 feet) / 3,048 mm
Drive System Type Electric / Air
Air Requirement 140 – 165 PSI (9.6 – 11.4 BAR)
Wheel Clamping 4 Clamps – Internal / External clamping
Table Turning Dual Pneumatic Cylinders
Bead Breaking Pneumatic Blade
Tower Design Rigid Fixed / Swing Arm
Internal Rim Clamping 12 – 21 in / 305 – 533 mm
External Rim Clamping 10 – 18 in / 254 – 457 mm
Turntable Tire Width
Capacity
5 – 12 in / 127 – 305 mm
Bead Breaker Tire Width
Capacity
3 – 11 in / 76 – 279 mm
Maximum Tire Diameter 39 in / 991 mm
Sound <70 dB
Dimensions
33 in wide by 39 in deep by 70 in high
838 mm wide by 991 mm deep by 1,778 mm high
* Comes from factory configured for 110 VAC operation; can be switched to 220 VAC. Refer to
Connecting to Power for instructions; Electrician required to switch to 220 VAC.
Specifications subject to change without notice.

R745 Swing-Arm Tire Changer 10 P/N 5900171 — Rev. C — Dec. 2019
Installation Checklist
Following are the steps needed to install the Tire Changer. Perform them in the order shown.
☐ 1. Review the installation Safety Rules.
☐ 2. Make sure you have the necessary Tools.
☐ 3. Find an appropriate Location.
☐ 4. Make sure there is adequate Clearance around and above.
☐ 5. Unpack the Unit.
☐ 6. Install the Tower.
☐ 7. Move the unit to Permanent Location.
☐ 8. Anchor the Unit.
☐ 9. Connect to Air.
☐ 10. Connect to Power (switching to 220 VAC operation
requires
an Electrician)
☐ 11. Prepare the Lube Bucket.
☐ 12. Review the Final Checklist.

R745 Swing-Arm Tire Changer 11 P/N 5900171 — Rev. C — Dec. 2019
Installation
This section describes how to install your Tire Changer. Perform the tasks in the order presented.
Installation Safety Rules
Pay attention at all times during installation.
Use appropriate tools and equipment. Stay
clear of moving parts. Keep hands and fingers away from pinch points.
Safety is your top priority
.
Use caution when unpacking the Tire Changer from its shipping container and setting it up. The Tire
Changer is heavy and the weight is not evenly distributed; dropping or knocking over the unit may
cause equipment damage and personal injury.
⚠ WARNING You
must
wear OSHA-approved (publication 3151) Personal Protective Equipment
at all times when installing, using, maintaining, or repairing the Tire Changer: leather
gloves, steel-toed work boots, eye protection, back belts, and hearing protection.
Only experienced, trained technicians may install the Tire Changer. In particular, all electrical work
must
be done by a licensed, certified Electrician.
⚠ CAUTION Certain parts of installing the Tire Changer are difficult for one person. We strongly
recommend having two or more persons work together to install the unit.
Tools
You may need some or all of the following tools:
• Forklift, pallet jack, or shop crane
• Utility knife
• Hammer, mallet, crow bar, or pry bar
• Tin or sheet metal snips
• Hex key and wrench set, metric and SAE
• Screwdriver set, slot and Phillips
Finding a Location
Keep the following in mind when deciding on a location:
• Power source. The Tire Changer needs to be near an appropriate power source.
• Floor. The Tire Changer is best used on a flat, Concrete floor.
• Clearance. The Tire Changer needs space around it. Refer to Clearance for more information.
• Access. You need some space to move Tires to and from the Tire Changer.
• Danger. When the Tire Changer is in use, especially during Inflation, you need to keep everyone
away from it. Only the Operator should be within 30 feet of the Tire Changer when it is in use.
Do not set up the Tire Changer in a well-travelled area
.
• No water. The Tire Changer has electronic components. If the Tire Changer gets wet while
turned on, those electronic components will most likely short circuit and have to be replaced.
⚠ WARNING Do not use the Tire Changer if it is in water. You will short circuit the electronic
components in the Tire Changer and you could electrocute yourself or bystanders.

R745 Swing-Arm Tire Changer 12 P/N 5900171 — Rev. C — Dec. 2019
Clearance
A certain amount of space around the Tire Changer is required.
⚠ WARNING The Clearance values shown below allow enough space to operate the Tire
Changer.
However, for safety purposes, only the Operator should be
within 30 feet of the Tire Changer while it is in use.
Top view. Not necessarily to scale. Not all components shown.

R745 Swing-Arm Tire Changer 13 P/N 5900171 — Rev. C — Dec. 2019
Unpacking
BendPak Ranger recommends unpacking the Tire Changer as close as possible to its permanent
location. The less you have to move things around, the smoother your unpacking and installing will be.
Note: Many of the Tire Changer components have been greased for shipping. BendPak Ranger
recommends having some rags nearby when unpacking, as you will almost certainly get
grease on your gloves. You will probably want to clean the grease off of the Turntable, the
Mount/Demount Head, and the Shaft Lock Handle, as keeping them greased would hinder
normal operation of the unit. You can keep the Shaft and the Swing Control knob greased.
Use caution when taking the Tire Changer out of its shipping container
. You do not
want to damage the unit, misplace any of the components that come with it, or hurt anyone.
To unpack the Tire Changer:
1. Make sure you are wearing OSHA-approved (publication 3151) Personal Protective Equipment:
leather gloves, steel-toed work boots, back belts, hearing protection, and ANSI-approved eye
protection (safety glasses, face shield, or goggles).
2. At the bottom of the Cover, push the metal tabs all the way down, on all four sides.
You may have to apply some force to get all of the metal tabs free; they sometimes stick.
3. Lift the Cover off.
⚠ CAUTION Ranger recommends having at least two people lift the Cover off; it is heavy and
awkward. If it is dropped or falls, it could cause injury or equipment damage.
4. Remove the plastic wrap around the Tire Changer and other components.
5. Remove the Accessory Box.

R745 Swing-Arm Tire Changer 14 P/N 5900171 — Rev. C — Dec. 2019
Installing the Tower
The Tower/Swing Arm comes uninstalled from the factory. You need to remove it from where it is
secured on the Shipping Pallet and install it on top of the Tire Changer Cabinet.
To install the Tower:
1. Make sure you are wearing OSHA-approved (publication 3151) Personal Protective Equipment:
leather gloves, steel-toed work boots, back belts, hearing protection, and ANSI-approved eye
protection (safety glasses, face shield, or goggles).
2.
Carefully
remove the components that secured the Tower during transport.
The Tower comes secured to the shipping pallet in several locations. The Shaft, near the
Mount/Demount Head, is tied to a Bolt on the Tire Changer Cabinet.
Keep the Bolt and Washer that is holding the Shaft; you will need it to complete the installation.
3. Stand up the Tower, then move the Base over the Tire Changer Cabinet, lining up the four holes in
the Base over the four large holes in the top of the Cabinet.
⚠ WARNING Use care when moving the Tower; it is heavy and not evenly balanced. If it is
dropped, you could injure bystanders and damage the unit.
Make sure to orient the Tower so that the Mount/Demount Head is over the Turntable.
There are two smaller holes in the top of the Cabinet; they are not used to install the Tower.
4. Locate the Bolt and Washer that was helping to hold the Shaft during transport.
5. Locate three more Bolt/Washer pairs in a bag in the Accessory Box.
6. Use the four Bolt/Washer pairs to
securely
bolt the Tower into position on top of the Cabinet.

R745 Swing-Arm Tire Changer 15 P/N 5900171 — Rev. C — Dec. 2019
Moving the Tire Changer to its Permanent Location
Once you have installed the Tire Changer’s Tower, you can move it to its permanent location.
⚠ WARNING Make sure to use an appropriate lifting device, such as a Forklift or Pallet Jack, to
move the Tire Changer while it is on its Pallet. Make sure only personnel who are
experienced with material handling procedures are allowed to move the Tire
Changer. The Tire Changer is heavy and the weight is not evenly distributed;
dropping or knocking over the unit may cause equipment damage or personal
injury. BendPak Ranger recommends having at least two people work together to
move the Tire Changer.
To move the Tire Changer:
1. Make sure you are wearing OSHA-approved (publication 3151) Personal Protective Equipment:
leather gloves, steel-toed work boots, back belts, hearing protection, and ANSI-approved eye
protection (safety glasses, face shield, or goggles).
2. Remove the shipping bolts that hold the Tire Changer to the Pallet.
3. Move the Tire Changer off the Pallet.
The Tire Changer can be moved off the Pallet using a Forklift under either side.
Use care when
moving the Tire Changer off the Pallet
.
If you prefer lifting the Tire Changer to move it, install the Main Tower/Swing Arm (described in
Installing the Tower), then use an appropriate lifting device (such as a Shop Crane) with a
strap secured around the top of the Main Tower to move it into place.
4. Move the Tire Changer to its permanent location.

R745 Swing-Arm Tire Changer 16 P/N 5900171 — Rev. C — Dec. 2019
Anchoring the Tire Changer
The Tire Changer has holes for anchoring it in place; anchoring is optional.
Note: You are not required to anchor your Tire Changer. BendPak Ranger recommends doing
so, as the Tire Changer uses force at various times during the changing of a Tire.
Anchoring it ensures it will not move during operation.
The Tire Changer has four .5 in / 12.7 mm holes for anchoring, one at each corner of the base.
On the front of the Tire Changer, the Anchor Bolt holes are partially under the Turntable Foot Pedals.
Not necessarily to scale. Not all components shown.
The Anchor Bolts (sometimes called Wedge Anchors) mentioned in the following procedure are
not
supplied with the Tire Changer. You could, for example, use 3/8 in wide by 3 in deep Anchor Bolts to
secure the Tire Changer, drilling the hole approximately 2.5 in / 63.5 mm into the Concrete.
To anchor the Tire Changer:
1. Make sure you are wearing OSHA-approved (publication 3151) Personal Protective Equipment:
leather gloves, steel-toed work boots, back belts, hearing protection, and ANSI-approved eye
protection (safety glasses, face shield, or goggles).
2. Make sure the Tire Changer is in the desired location.
3. Using the holes as guides, drill the holes for the Anchor Bolts.
Go in straight; do not let the drill wobble. Use a carbide-tied drill bit (conforming to ANSI B212.15).
Use a drill bit that is the same diameter as the Anchor Bolt. So if you are using an 3/8 in diameter
Anchor Bolt, for example, use a 3/8 in diameter drill bit.

R745 Swing-Arm Tire Changer 17 P/N 5900171 — Rev. C — Dec. 2019
4. Vacuum each hole clean.
BendPak recommends using a wire brush and a vacuum to get the hole very clean.
Do
not
ream the hole. Do
not
make the hole any wider than the drill bit made it.
5. Make sure the Washer and Nut are in place, then insert the Anchor Bolt into the hole.
The Expansion Sleeve of the Anchor Bolt may prevent the Anchor Bolt from passing through the
hole in the base of the Tire Changer; this is normal. Use a hammer or mallet to get the Expansion
Sleeve through the base and down into the hole.
Even using a hammer or mallet, the Anchor Bolt should only go into the hole part of the way; this is
normal. If the Anchor Bolt goes all the way in with little or no resistance, the hole is too wide.
Once past the hole in the base, the Anchor Bolt eventually stops going down into the hole as the
Expansion Sleeve contacts the sides of the hole; this is normal.
6. Hammer or mallet the Anchor Bolt the rest of the way down into the hole.
Stop when the Washer is snug against the base of the Tire Changer.
7. Use a torque wrench to tighten each Nut
clockwise
to the torque recommended by the
manufacturer of the Anchor Bolt.
If no torque is specified, BendPak Ranger recommends ~55 lbf-ft / 74 N-m for a 3/8 in diameter
Anchor Bolt.
Important: Do
not
use an impact wrench to torque the Anchor Bolts.
Wrenching the Nut forces the Wedge up, forcing out the Expansion Sleeve and pressing it tightly
against the Concrete.

R745 Swing-Arm Tire Changer 18 P/N 5900171 — Rev. C — Dec. 2019
Connecting to Air
The Tire Changer requires a 15 to 25 CFM Air Source with an operating air pressure of 140 to 165 PSI
(9.6 to 11.4 bar). Connect the Air Source to the Air In connector on the Lubricator/Regulator/Filter,
located on the back of the Tire Changer.
Important: The Tire Changer uses pneumatic and electrical energy; if your organization has
Lockout/Tagout policies, implement them once the unit is connected to the Air
Source.
The air lines going out of the Regulator/Filter and Oiler/Lubricator come connected and ready for use;
no installation or adjustment is required.
The incoming Air Source connects to the Tire Changer via the Air In connector on the Regulator/Filter.
You need to provide a fitting for the Air In connector; it is not supplied.
Side view. Drawing not necessarily to scale. Not all components shown.
The following drawing shows a quick-connect air fitting (shown on the right, below) that connects to
the Air In connector (shown on the left, below). The fitting is
not
supplied with the Tire Changer.
The Regulator / Filter removes contaminants from the incoming air. It also includes a gauge that
shows the operating air pressure of the incoming air. If you see water in the Water Sight Gauge, you
can drain it using the Water Drain Plug. Refer to Maintenance for more information.
The Oiler / Lubricator puts pneumatic oil, for lubrication, into the incoming air. This lubricated air is
routed to pneumatic components of the Tire Changer.

R745 Swing-Arm Tire Changer 19 P/N 5900171 — Rev. C — Dec. 2019
Connecting to Power
The Tire Changer comes configured for a 110 VAC power source. It can be changed to work with a
220 VAC power source, if desired.
Important: The Tire Changer uses pneumatic and electrical energy; if your organization has
Lockout/Tagout policies, implement them once the unit is connected to power.
When you receive it from the factory, the Tire Changer is configured for a 110 VAC power source. You
can confirm this in two ways:
• Plug. The Power Cord has a 110 VAC plug on it.
• Voltage Switch setting. The Voltage Switch (on the right side of the unit, behind the Lube
Bucket, near the ID Label) is set to the 110V setting.
If you want to connect the Tire Changer to a 110 VAC power source, simply plug it in to a 110 VAC
power outlet without changing the setting of the Voltage Switch. No Electrician is needed to use the
Tire Changer with a 110 VAC power source as it comes from the factory.
To connect the Tire Changer to a 220 VAC power source, you need to do two things:
• Change the Voltage Selector Switch to 220 V.
• Change the Plug on the end of the Power Cord to a 220 VAC NEMA 30 Amp Plug.
⚠ DANGER
All
electrical work (including changing a Plug from 110 VAC to 220 VAC)
must
be
done by a licensed, certified Electrician. If you do not use a licensed, certified
Electrician, you void your warranty and put everyone who uses the Tire Changer in
danger of injury or, in rare cases, death.
To switch the Tire Changer to use a 220 VAC power source:
1. Make sure the Tire Changer is
not
plugged in to power or air.
If it is, disconnect it.
Do not begin to switch the Tire Changer to 220 VAC until you
are sure that power and air have been disconnected from the unit
.
2. Cut off the 110 VAC plug on the end of the Power Cord and have an licensed, certified Electrician
attach a 220 VAC NEMA 30 amp plug.
Do not change the 110 VAC plug to a 220 VAC plug unless you are a licensed, certified Electrician.
3. Change the setting of the Voltage Selector Switch to 220V.

R745 Swing-Arm Tire Changer 20 P/N 5900171 — Rev. C — Dec. 2019
This can be done using either your finger or a slot screwdriver.
4. Double check the Voltage Selector Switch to make sure it is set to the 220V setting.
⚠ CAUTION The setting of the Voltage Selector Switch
must
match the power source. If you
plug the unit in to 110 VAC power when the Switch is set to 220V or you plug the
unit in to 220 VAC power when the Switch is set to 110V, you void your warranty
and you could severely damage the Tire Changer.
5. Plug in the Tire Changer to a 220 VAC outlet.
6. Attach the air source to the Tire Changer.
7. Test the unit to make sure air and power are working normally.
Additional electrical information:
•
You must ground the unit
.
• Damage caused by improper electrical installation (not grounding the unit) voids the warranty.
⚠ WARNING Disconnect power
before
performing
any
troubleshooting or maintenance. Make
sure the unit cannot be reenergized until you are done. This equipment has internal
arcing or sparking parts that should not be exposed to flammable vapors. The unit
must
not
be located in a recessed area or below floor level.
Preparing the Lube Bucket
The Tire Changer comes with a Lube Bucket (to hold Lube) and a Lube Brush (to apply Lube).
BendPak Ranger does not include Lube with the Tire Changer, as there are many options available.
⚠ CAUTION Only use Tire Lube that is approved by the Tire manufacturer for the Tire you are
changing. Using non-approved Lube could corrode the Wheel or cause Tire/Wheel
slippage and vibration issues.
Be sure to use enough lubricant without using too much. The point of lubricant is to
temporarily
reduce the friction between the Tire Bead area and the Rim. What you are looking for is a lubricant that
is slippery when wet but not slippery once dried. If you notice excessive amounts of lubricant on the
Tire or Rim, remove the excess.
There is a location on the Tire Changer for the Lube Bucket: next to the Bead Breaker.
/