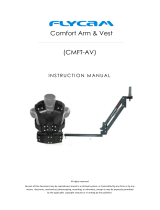
FLYCAM VSTA-II-AV User manual

Type
User manual

This manual is also suitable for

FLYCAM VSTA-II-AV is a stabilizing arm and vest system designed to provide smooth and steady shots while operating a camera. It features a double-section vista arm with adjustable tension, allowing for easy operation and customization to the weight of your camera. The durable fabric vest ensures ergonomic comfort during extended use, and the selectable position front arm mount reduces operator stress. Whether you're a beginner or an experienced videographer, the FLYCAM VSTA-II-AV offers precise control and stability for capturing stunning footage.

FLYCAM VSTA-II-AV is a stabilizing arm and vest system designed to provide smooth and steady shots while operating a camera. It features a double-section vista arm with adjustable tension, allowing for easy operation and customization to the weight of your camera. The durable fabric vest ensures ergonomic comfort during extended use, and the selectable position front arm mount reduces operator stress. Whether you're a beginner or an experienced videographer, the FLYCAM VSTA-II-AV offers precise control and stability for capturing stunning footage.

Instruction Manual
Vista-II Stabilizing Arm
& Vest (VSTA-II-AV)
2
Subject Page
Foreword 3
Introducon 4
Safety Hints 5-6
Assembling 6-8
Warranty 10
At Flycam, our goal is to ensure 100% Customer Sasfacon in all that we do.
We back our sales with a 1 year warranty from the date of purchase and work hard
to resolve any problems in the unlikely event one should arise.
With our commitment to connuous improvement and your Feedback, building on
our reputaon of providing aordable, quality products is
PRIORITY #1.
Table of Contents
3
Dear Client,
On behalf of all the people that work so hard to provide you with the most
up-to-date, exible and cost-ecient producon gear, we would like to welcome
you into the Flycam family.
By purchasing your Flycam Vista-II Stabilizing Arm & Vest, you have just joined a
host of designers, engineers, machinists, assembly, customer service and oce sta
that take great pride in all that they do. Our mantra of connuous
improvement has been the guiding principle of how we conduct our business since
day one.
Once you have the opportunity to experience your new Flycam Vista-II Stabilizing
Arm & Vest, we hope you will agree that we cra quality products at a compeve
price. Products designed to meet and exceed the standards of todays real
producon world.
Standards set by our valued clients and standards we strive to maintain.
With Best Wishes,
Flycam Team
Welcome To Flycam!
4
Introducon
Flycam unveils its new powerful combinaon of Vista-II Stabilizing Arm & Vest
support to achieve superne smooth moves in acon. The dynamic Double secon
- vista arm design allows even beginners to learn its operaon with ease. The arm
has a manually adjustable tension steel spring which maintains the posion of the
stabilizaon system depending on the combined weight of camera and handheld
stabilizer. The Vest is craed from durable fabric with an ergonomic comfort design
and a selectable posion front arm mount ensures to ease operator stress over
lengthy shoot days.
Whats In The Box
Please inspect the contents of your shipped package to ensure you have received
everything that is listed below.
Vista-II Vest
Vista-II Arm
5
Safety Hints
ATTENTION: PLEASE READ THIS BEFORE USING TO PREVENT SERIOUS DAMAGE TO
THE GEAR!
IT IS RECOMMENDED TO APTLY CONNECT ARM & VEST
Always aach iso-elasc arms appropriately with the vest for smooth performance.
BE HIGHLY VIGILANT OF FINGERS
Do not place your ngers inside the arm as they can get caught and injure you.
ALWAYS HOLD UNLOADED ARM
Keep hold of unloaded arm, else it may hit you or someone near you.
NEVER ALLOW LOADED ARM TO SWING AWAY
Don’t let a fully loaded arm to swing out and away from you. Doing so will put a lot
of stress on Arm-Vest connecon components and can cause damage to you and
camera gear.
2 x Heavy Tension Springs
Storage Bag
6
Assembling
NOTE: You can aach the Arm / Vest connector onto the right or le side as per your
requirement. and also can adjust the posion as per your need.
Put-on the Vest and insert lower strap through
the turnbuckle.
Adjust the ghtness of Vest around your waist
and hips using the Velcro strap, drawing it
around evenly on both sides of Vest pad. Lock
them with buckles.
NEVER LEAVE THE BUCKLES LOOSE
Always fasten the buckles properly both on chest and waist for safe & comfortable
ng of the vest.
FOLLOWING THESE GUIDELINES WILL PROVIDE BETTER SHOTS AND TROUBLE-FREE
OPERATION.
SHOULD YOU NEED ADDITIONAL INFORMATION, TECHNICAL ASSISTANCE IS
AVAILABLE ‘ONLINE’ BY CONTACTING YOUR SALES REPRESENTATIVE.
ADJUSTMENT OF VEST
In the same way, adjust and lock upper straps
with buckles on chest plate.
7
The length of chest plate can be adjusted
according to your height by using the
Adjustment Knob.
Finally, the Vest should properly t your body, as
shown.
Straps are made of nylon with strong Velcro, and
can be easily replaced or adjusted to suit
Individual needs.
Our Flycam Galaxy Vest can be used with all
professional Arms like Steadicam, Tin, Glide
cam and Sachtler.
Aaching the Arm
Loosen the knobs of Socket Block on the Vest.
Knobs
Insert the male connecng socket of Arm into
the Socket Block of Vest and ghten the
knobs
NOTE: It can be operated eciently either right or le handed.
8
NOTE: For aaching the stabilizer to Arm, keep
the handle of stabilizer straight in accordance to
the pin of Arm .
Once vercal and horizontal balance is achieved, mount the Stabilizer (Not Included) on
gimbal connector of Arm.
Insert pin of Vista-II Arm into the handle of
your Stabilizer.
Adjustment of Arm
The arm tension is adjusted for the heaviest camcorder it can hold, so it does not boom-out
when you put the camcorder and sled on it for the rst me.
Now adjust Arm for the weight of your camcorder:
1. With the Vest On, aach Arm & undock the rig.
2. Move Arm to the middle of its booming (up and down) range and let go (If it stays
where it is, you are probably close to the right adjustment).
3. Keep making small adjustments unl the camcorder does not rise or fall when you let
go of it in the middle of its booming range.
Posion the Arm
1. Move camcorder to your le so the arm crosses your body
2. Adjust the arc of your arm so rig feels comfortable to you
3. Keep the camcorder close to your body
9
Bearing Maintenance: If aer some period of me the bearings stop running smoothly as
when new, you can oil it with light lubricang oil. We recommend using only a few drops,
anything more than a lile will end up dripping from the bearing and onto the rest of your Arm.
Be sure to keep the oil away from your Camera, and clean up any over-spill when done.
Cleaning: Do not use solvents or harsh cleaners of any kind on Vista-II Arm & Vest. If the unit
becomes dirty, use only a cloth or sponge with water and a very mild detergent to gently rub the
unit clean. Rinse well.
Storage: If you are going to store Flycam Vista-II Arm & Vest for a long period of me, then we
recommend storing it up-right in a dry or low-to-normal humidity area.
If you are unable to nd an environment like this, then we suggest you store the unit in an
airght plasc container or bag. Keeping the unit upright helps to lessen stress on the system.
Maintenance
YOUR VISTA-II STABILIZING ARM & VEST
ALL DRESSED UP AND READY TO GO!
(SHOWN WITH OTPIONAL ACCESSORIES)
10
WARRANTY
We oer a one year warranty for our products from the date of purchase.
We will repair or replace your product, free of charge, in the event of a defect in materials or
crasmanship obtained during normal use or handling based on the user manual. Please note
that we will not cover any shipping costs for returning the product to us. If any VAT or import
dues are applied to the return, we will also charge these costs to the customer.
The warranty does not include, by the way of example, damage caused by products that we do
not supply or from mishandling in transit, accident, misuse, neglect, lack of care of the product ,
or service by anyone other than our company.
We are not liable for incidental or consequenal damages resulng from the use of the unit or
occurring due to any breach of this warranty.
Replacement parts of the product will be provided at nominal cost (covering the cost price of the
replacement parts only) to the customers aer the Warranty Period has expired. We will cover
the complete cost of sending replacement parts within the warranty period. Aer that, Nominal
cost of the product & Actual shipping cost will be charged.
Do not send the unit to us without rst geng a response and geng the approval to send back
the item.
In case of any kind of dissasfacon, we urge you to Contact us immediately and we shall do our
Best to help you out. For any other assistance you can reach us via email.
For any other assistance you can reach us via email.
  • Page 1 1
  • Page 2 2
  • Page 3 3
  • Page 4 4
  • Page 5 5
  • Page 6 6
  • Page 7 7
  • Page 8 8
  • Page 9 9
  • Page 10 10

FLYCAM VSTA-II-AV User manual

Type
User manual
This manual is also suitable for

FLYCAM VSTA-II-AV is a stabilizing arm and vest system designed to provide smooth and steady shots while operating a camera. It features a double-section vista arm with adjustable tension, allowing for easy operation and customization to the weight of your camera. The durable fabric vest ensures ergonomic comfort during extended use, and the selectable position front arm mount reduces operator stress. Whether you're a beginner or an experienced videographer, the FLYCAM VSTA-II-AV offers precise control and stability for capturing stunning footage.

Ask a question and I''ll find the answer in the document

Finding information in a document is now easier with AI