Page is loading ...

Disclaimer
If you install the product in a way that diers from this manual, this will void all
guarantees. Before installation check that the product meets all your requirements
and is not damaged. By proceeding with installation, you accept the condition of the
product.
If the sink / wash bowl without overflow is combined with a closable crepine, it is
recommended to provide a drain in the floor.
Disclaimer
Indien u het product plaatst op een manier die afwijkt van deze handleiding, vervalt
alle garantie. Controleer voor plaatsing of het product aan al uw eisen voldoet en niet
beschadigd is. Indien u overgaat tot plaatsing, aanvaardt u de staat waarin het product
zich bevindt.
Indien de wastafel/waskom zonder overloop gecombineerd wordt met een afsluitbare
crepine is het aanbevolen om een afvoer in de vloer te voorzien.
Clause de non-responsabilité
Si vous installez le produit d’une manière diérente de celle présentée dans ce manuel,
toutes les garanties seront invalidées. Contrôlez avant le placement si le produit répond
à toutes vos exigences et n’est pas endommagé. En procédant au placement, vous
acceptez l’état dans lequel se trouve le produit.
Si l’évier / lavabo sans trop-plein est combiné avec une crépine refermable, il est
recommandé de prévoir un drain dans le sol.
Haftungsausschluss
Wenn Sie das Produkt nicht genau nach den Angaben in dieser Montageanleitung ein-
bauen, verfällt die Garantie. Überprüfen Sie vor dem Einbau des Produkts, ob sämtliche
Voraussetzungen erfüllt sind und das Produkt nicht beschädigt ist. Sobald Sie mit der
Montage beginnen, sehen Sie, in welchem Zustand sich das Produkt befindet.
Wenn die Spüle / Waschschüssel ohne Überlauf mit einer verschließbaren Crepine
kombiniert wird, wird empfohlen, einen Abfluss im Boden vorzusehen.
Installationguide
Installatiegids
Guide d’installation
Montageanleitung
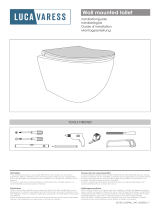
Wall mounted toilet
43992_INSTALL_INT_ver2022.1.1
TOOLS NEEDED

1 2
3 4
INSTALLATION of the TOILET - INSTALLATIE van het TOILET
INSTALLATION des TOILETTES - INSTALLATION der WC
!
3 / 6 L
Accessories Not included
max 1/4

X
X
10 11
5
8
6
9
7
3x

L1
L2
L1
+6mm
L2
+6mm
L1
L2
12
20
15
22
17
19
1413
21
16
23
18

3x
!
24
26
28
30
25
27
29
31

C
D
E
F
A
B
A
B
C
D
E
F
900357
C
D
E
F
A
B
A
B
C
D
E
F
C
D
E
F
A
B
A
B
C
D
E
F
C
D
E
F
A
B
A
B
C
D
E
F
C
D
E
F
A
B
A
B
C
D
E
F
C
D
E
F
A
B
A
B
C
D
E
F
C
D
E
F
A
B
A
B
C
D
E
F
1
2 3 4
5 6
PARTSLIST
INSTALLATION of the TOILET SEAT - INSTALLATIE van de TOILETZITTING
INSTALLATION de L’ABATTANT des TOILETTES - INSTALLATION von WC-SITZ
3 / 6 L
/


