Page is loading ...

INSTALLATION GUIDE
INSTALLATIEGIDS
GUIDE D’INSTALLATION
MONTAGEANLEITUNG
Disclaimer
If you install the product in a way that di ers from this manual, this will void all
guarantees. Before installation check that the product meets all your requirements
and is not damaged. By proceeding with installation, you accept the condition of the
product.
If the sink / wash bowl without overfl ow is combined with a closable crepine, it is
recommended to provide a drain in the fl oor.
Disclaimer
Indien u het product plaatst op een manier die afwijkt van deze handleiding, vervalt
alle garantie. Controleer voor plaatsing of het product aan al uw eisen voldoet en niet
beschadigd is. Indien u overgaat tot plaatsing, aanvaardt u de staat waarin het product
zich bevindt.
Indien de wastafel/waskom zonder overloop gecombineerd wordt met een afsluitbare
crepine is het aanbevolen om een afvoer in de vloer te voorzien.
Clause de non-responsabilité
Si vous installez le produit d’une manière di érente de celle présentée dans ce manuel,
toutes les garanties seront invalidées. Contrôlez avant le placement si le produit répond
à toutes vos exigences et n’est pas endommagé. En procédant au placement, vous
acceptez l’état dans lequel se trouve le produit.
Si l’évier / lavabo sans trop-plein est combiné avec une crépine refermable, il est
recommandé de prévoir un drain dans le sol.
Haftungsausschluss
Wenn Sie das Produkt nicht genau nach den Angaben in dieser Montageanleitung ein-
bauen, verfällt die Garantie. Überprüfen Sie vor dem Einbau des Produkts, ob sämtliche
Voraussetzungen erfüllt sind und das Produkt nicht beschädigt ist. Sobald Sie mit der
Montage beginnen, sehen Sie, in welchem Zustand sich das Produkt befi ndet.
Wenn die Spüle / Waschschüssel ohne Überlauf mit einer verschließbaren Crepine
kombiniert wird, wird empfohlen, einen Abfl uss im Boden vorzusehen.
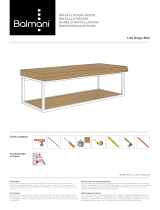
TABLO ARCATO
73034_INSTALL_INT_ver2020.1.1
mild soap
Max
40°C
transparant
acid-free
Top • Tablet • Tablette • Tablette
No pre-drilled holes in the top
Geen voorgeboorde gaten in het tablet
Pas de trous pré-percés dans la tablette
Keine vorgebohrten Löcher in der Tablette
NATURAL
STONE
L-profi le
fragile
Before installation & Granite 2x/year - Marble 4x/year
Voor installatie & Graniet 2x/jaar - Marmer 4x/jaar
Avant l’installation & Granit 2x/an - Marbre 4x/an
Vor der Installation & Granit 2x/Jahr - Marmor 4x/Jahr
Structure and texture will vary for each top (these variations, characteristic of natural stone, are not accepted for claims).
Structuur en textuur varieert voor elke wastafel (deze variaties, eigen aan natuursteen, worden niet geaccepteerd voor schadeclaims).
La structure et la texture varient pour chaque tablette (ces variations, caractéristique de la pierre naturelle, ne sont pas acceptées pour les réclamations).
Struktur und Textur variieren für jedes Tablette (Diese Abweichungen, charakteristisch für Naturstein, werden für Ansprüche nicht akzeptiert).
!
Tools needed
Important
Maintenance
Accessories
(not included)
Obliged
Verplicht
Requis
Erforderlich
!
Must be installed with the recommended drain plug.
Moet geïnstalleerd worden met de aanbevolen afvoerplug.
Doit être installé avec la crépine recommandée.
Muss mit der empfohlenen Ablaufventil installiert werden.

1
BEFORE INSTALLATION - VOOR INSTALLATIE - AVANT L’INSTALLATION - VOR DER INSTALLATION
3
2
2 h
4
Granite
Graniet
Granit
Granit
Marble
Marmer
Marbre
Marmor
-> 2x
min.
-> 3x
min.
6
See detail
further in
this manual.
Zie de details verder
in deze handleiding.
Voir les détails plus loin
dans ce manuel.
Weitere Informationen
finden Sie in diesem Handbuch.
5
24 h
7
*
EXTRA WALL FIXATION - EXTRA MUURFIXATIE - EXTRA SUPPORT MUR - EXTRA WANDHALTER
98
*
* See separate manual - Zie afzonderlijke handleiding
Voir manuel séparé - Siehe separates Handbuch
10
Some natural stone tablets have an extra reinforcement net at the bottom. This net may
under no circumstances be removed. This will void the warranty.
Sommige natuursteen tabletten hebben een extra verstevigingsnet onderaan. Dit net mag
onder geen beding verwijderd worden. Dit leidt tot het vervallen van de garantie.
Certaines tablettes de pierre naturelle ont un fi let de renfort supplémentaire en bas. Ce fi let
ne peut en aucun cas être retiré. Cela annulera la garantie.
Einige Natursteintafeln haben unten ein zusätzliches Verstärkungsnetz. Dieses Netz darf
unter keinen Umständen entfernt werden. Dadurch erlischt die Garantie.
!
(not included)
3 4 3 4

CUTTING AND DRILLING - ZAGEN EN BOREN - COUPER ET PERCER - SÂGEN UND BOHREN
EN Drill the faucet holes with appropriate tools. Under no circumstance use the hammer function of the drill.
For details, see the manual of the tool.
NL Boor de kraangaten met aangepast gereedschap. Gebruik onder geen beding de klopboorstand van de
boormachine. Raadpleeg de handleiding van het gereedschap voor details.
FR Percez les trous de robinet avec des outils sur mesure. N’utilisez en aucun cas la fonction à impulsions de
la perceuse. Pour plus de détails, reportez-vous au manuel de l’outil.
DE Bohren Sie die Löcher für die Armatur mit einem geeigneten Bohraufsatz. Verwenden Sie jedoch auf
keinen Fall die Schlagbohrfunktion! Einzelheiten zur Verwendung fi nden Sie in der Anleitung der Bohrmaschine.
11
Y
X = 1/4 Y X
Opposite drain hole
Tegenover afvoer
Drain opposé
Gegenüber Drain
Ø 35 mm
m
+ H2O
12

INSTALLATION - INSTALLATIE - INSTALLATION - INSTALLATION
It is important to use an acid-free silicone to avoid stains.
Het is belangrijk om een zuurvrije silicone te gebruiken om vlekken te vermijden.
Il est important d’utiliser un silicone sans acide pour éviter les taches.
Es ist wichtig, ein säurefreies Silikon zu verwenden, um Flecken zu vermeiden.
ASSEMBLY BOWL, FAUCET AND DRAIN - MONTAGE KOM, KRAAN EN SIFON
ASSEMBLAGE VASQUE, ROBINET ET SIPHON - MONTAGE SCHALEN, HAHN UND SIPHON
Please refer to the manuals of the faucet and drain for
further steps in the installation.
Raadpleeg de handleidingen van de kraan en sifon voor
verdere stappen in de installatie.
Veuillez vous référer aux manuels du robinet et syphon
pour les autres étapes de l’installation.
Beachten Sie den Handbüchern zu Wasserhahn und Si-
phon für weitere Schritte in der Installation.
!
+/- 3 mm
+/- 3 mm
13 14
Check for leaks
Lektest
Teste de fuite
Dichtheitsprüfung
15 16
17 18
/

