Page is loading ...

Installationguide
Installatiegids
Guide d’installation
Montageanleitung
Disclaimer
If you install the product in a way that differs from this manual, this will void all guarantees. Before installation check that the product meets all your requirements
and is not damaged. By proceeding with installation, you accept the condition of the product.
Disclaimer
Indien u het product plaatst op een manier die afwijkt van deze handleiding, vervalt alle garantie. Controleer voor plaatsing of het product aan al uw eisen voldoet
en niet beschadigd is. Indien u overgaat tot plaatsing, aanvaardt u de staat waarin het product zich bevindt.
Clause de non-responsabilité :
Si vous installez le produit d’une manière différente de celle présentée dans ce manuel, toutes les garanties seront invalidées. Contrôlez avant le placement si le
produit répond à toutes vos exigences et n’est pas endommagé. En procédant au placement, vous acceptez l’état dans lequel se trouve le produit.
Haftungsausschluss
Wenn Sie das Produkt nicht genau nach den Angaben in dieser Montageanleitung einbauen, verfällt die Garantie. Überprüfen Sie vor dem Einbau des Produkts, ob
sämtliche Voraussetzungen erfüllt sind und das Produkt nicht beschädigt ist. Sobald Sie mit der Montage beginnen, sehen Sie, in welchem Zustand sich das Produkt
befi ndet.
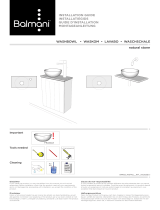
Natural stone upmounted
basin - round
61139_INSTALL_INT_ver2018.1.1
Clean
Tools
Dit is een niet gebonden tekst
zonder zinnige inhoud.
Deze dient om zeer kleine
etiketten te voorzien van letters
en tekens, de beste defenitie is
in dit geval klinkklare onzin in de
meest basic vorm.Dit is een niet
gebonden tekst

PRODUCT FEATURES - PRODUCT EIGENSCHAPPEN - CARACTÉRISTIQUES DU PRODUIT - MERKMALE DES PRODUKTS
EN
NL
FR
DU
It is best before installation to clean the marble / granite top with warm water (60°C) and a neutral degreasing cleaner. Let dry for at least 24 h.
Surface must be uniform after drying, otherwise do not proceed to the next step.
Then treat it with a “stop stain” which makes it easier to remove stains and splashes. Read carefully the instructions.
Het is het beste vóór de installatie om het marmer / graniet met warm water (60°C) en een neutrale ontvetter schoon te maken. Laat ge-
durende ten minste 24h drogen. Het oppervlak moet egaal zijn na droging, zoniet ga niet verder met de volgende stap.
Daarna dient u het te behandelen met een vlekstop waardoor vlekken en spatten makkelijker te verwijderen worden. Lees zorgvuldig de
gebruiksinstructies.
Il est préférable avant l’installation pour nettoyer le marbre / granit avec de l’ eau chaude (60°C) et un nettoyant de dégraissage neutre. Lais-
ser sec au moins 24 h. La surface doit être uniforme après séchage, sinon ne pas poursuivre à l’étape suivante.
Puis traiter avec un “stop tache” qui rend plus facile enlever les taches et éclaboussures. Lisez attentivement les instructions.
Es empfi ehlt sich vor der Installation die Marmor / Granit-Spitze mit warmem Wasser (60°C) und einer neutralen Entfettung Reinigungsmittel
reinigen. Lassen für bei mindestens 24 Stunden trocknen. Oberfl äche nach dem Trocknen einheitlich sein müssen, sonst fahren Sie nicht mit
dem nächsten Schritt.
Dann behandeln Sie es mit einer “stop Fleck”, wodurch es leichter zu entfernen von Flecken und Spritzern. Lesen Sie sorgfältig die Anwei-
sungen.
INSTALLATION - INSTALLATIE - INSTALLATION - INSTALLATION
1
3Install the drain/ waste plug and the faucet, according the instruc-
tions of the manufacturer.
Monteer de afvoerplug en de kraan volgens de instructies van de
fabrikant.
Installez la garniture de vidage et le robinet suivant les instructions
du fabricant.
Installieren Sie das Abfl ussventil und das Armatür, gemäß die
Anweisungen des Herstellers.
EN
NL
FR
DU
4
2
/


