ENG - ii
SAFETY INFORMATION
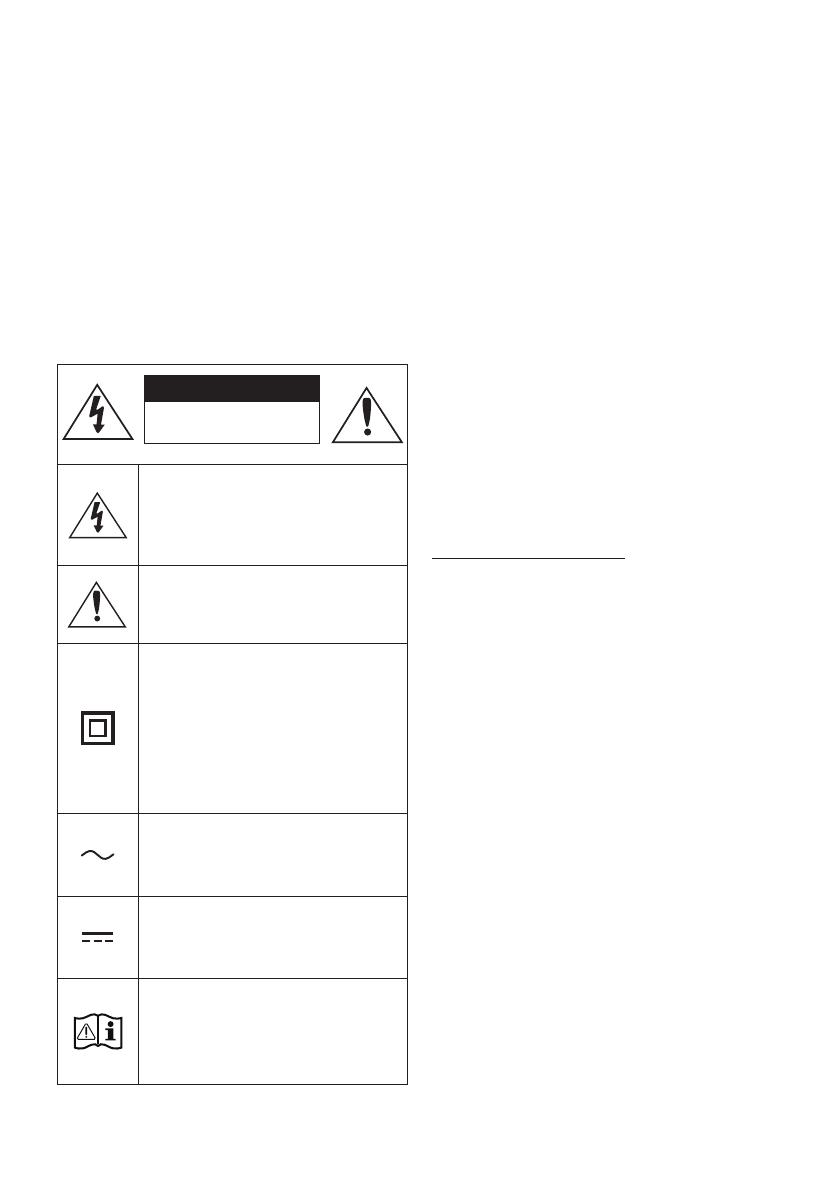
SAFETY WARNINGS
TO REDUCE THE RISK OF ELECTRIC SHOCK, DO
NOT REMOVE THE COVER (OR BACK).
NO USER-SERVICEABLE PARTS ARE INSIDE.
REFER SERVICING TO QUALIFIED SERVICE
PERSONNEL.
Refer to the table below for an explanation of
symbols which may be on your Samsung product.
CAUTION
RISK OF ELECTRIC SHOCK.
DO NOT OPEN.
This symbol indicates that high voltage
is present inside. It is dangerous to
make any kind of contact with any
internal part of this product.
This symbol indicates that this product
has included important literature
concerning operation and maintenance.
Class II product : This symbol indicates
that it does not require a safety
connection to electrical earth (ground).
If this symbol is not present on a
product with a power cord, the product
MUST have a reliable connection to
protective earth (ground).
AC voltage : This symbol indicates that
the rated voltage marked with the
symbol is AC voltage.
DC voltage : This symbol indicates that
the rated voltage marked with the
symbol is DC voltage.
Caution, Consult instructions for use :
This symbol instructs the user to
consult the user manual for further
safety related information.
WARNING
• To reduce the risk of re or electric shock, do
not expose this appliance to rain or moisture.
• To prevent injury, this apparatus must be
securely attached to the oor/wall in
accordance with the installation instructions.
CAUTION
• Do not expose this apparatus to dripping or
splashing. Do not put objects lled with
liquids, such as vases, on the apparatus.
• To turn this apparatus off completely, you
must pull the power plug out of the wall
socket. Consequently, the power plug must
be easily and readily accessible at all times.
CAUTION (for Canada)
This device contains licence-exempt
transmitter(s)/receiver(s) that comply with
Innovation, Science and Economic Development
Canada’s licence-exempt RSS(s). Operation is
subject to the following two conditions:
(1) This device may not cause interference.
(2) This device must accept any interference,
including interference that may cause undesired
operation of the device.
This device and its antenna(s) must not be co-
located or operation in conjunction with any other
antenna or transmitter.
This device may automatically discontinue
transmission if there is no information to
transmit, or an operational failure. Note that this
is not intended to prohibit the transmission of
control or signaling information or the use of
repetitive codes where required by the
technology.
This Class B digital apparatus complies with
Canadian ICES-003.


