Page is loading ...

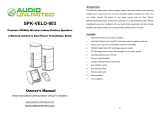
SPK-VELO-P
900MHz Indoor/Outdoor
Wireless Speakers
User Manual
www.audio-unlimited.com
www.cablesunlimited.com
P. 1
INTRODUCTION
This 900 MHz digital hybrid wireless speaker system uses the latest wireless technology
to enable you to enjoy music and TV sound anywhere inside or outside your home. You
simply connect the system to any audio source such as Radio, TV, VCR, Hi-Fi and
CD/MP3/VCD/DVD/Blu-ray player. Without any complicated wiring and installation this
system enables you to enjoy incredible, bona fide sound in minutes.
FEATURES
1. Weatherproof indoor and outdoor speakers.
2. Automatic Phase Lock Loop (PLL) scanning system on speaker receivers
3. Phase Lock Loop (PLL) transmission system on transmitter
4. 900 MHz Digital Hybrid RF technology speaker system.
5. RF technology lets you roam freely throughout your house or outdoors
6. Operating distance up to 150 feet.
7. No line of sight limitation.
8. Virtually interference free audio quality.
9. Auto ON/OFF control.
10. Auto tuning function.
11. Wireless remote control unit: Independently controls each speaker
Volume up/down
Power on/off
12. Wall-mountable using included mounting gaps on rear of product.
13. 2-way speakers.

P. 2
COMPONENT IDENTIFICATION
TRANSMITTER
SPEAKER RECEIVERS
REMOTE CONTROL
VOLUME UP
Signal On Indicator (blue) Power On Indicator (red)
Antenna
AUTO TUNE
POWER ON/ OFF
VOLUME UP
VOLUME DOWN
AUTO TUNE
VOLUME DOWN
POWER ON/ OFF
VOLUME UP
P. 3
IMPORTANT SAFETY INFORMATION
1. Read and understand all instructions.
2. Follow all warnings and instructions.
3. Do not use liquid or aerosol cleaners. Use a damp cloth for
cleaning. If necessary, use a mild soap.
INSTALLATION INSTRUCTIONS
TRANSMITTER
1. Insert the antenna tube into the antenna wire.
2. Connect the supplied AC/DC power adapter to an electrical wall outlet.
3. Plug the AC/DC power adapter in the DC jack located on the rear of the transmitter.
4. When the AC adapter is plugged in, the red POWER LED illuminates. If the red
POWER LED does not illuminate, make sure the adapter is plugged in.
5. The rear of the transmitter has one audio cord that can be connected to audio output
jack of TV, Monitor, VCR, Radio recorder, CD/MP3/VCD/DVD/Blu-ray players or to
headphone/earphone jack with the connector provided.
” Note: You may need the included iPhone Adapter to connect your iPhone to the
transmitter for audio streaming. Simply plug the cable from the transmitter into one
end of this iPhone Adapter, then plug the other end of the adapter into your iPhone. ”
When the transmitter receives an audio signal, the blue SIGNAL LED and the red
POWER LED will illuminate together. If the blue SIGNAL LED does not illuminate, ensure
the audio source is turned on.

P. 4
SPEAKER RECEIVERS
1. Insert 6 ‘C’ cell alkaline batteries into the battery compartment with correct polarity at
the bottom of each speaker (batteries not included in the package) or connect the 9V
power adapter to the DC input jack on the bottom of each speaker, then plug it to the
wall AC outlet.
2. Press On/Off button and turn the speakers ON. The POWER LED will light up in Blue.
Switch off the speakers by pressing the ON/OFF button on the speakers or on the
remote control unit, and the LED will be off.
3. To suit the needs of different users, these speakers are designed for optional wall
mounting. There are two holes at the back of each speaker for you to easily hang
them on the wall.
P. 5
REMOTE CONTROL UNIT
1. Remove the battery cover at the rear of the remote control unit and insert 2 “AAA”
size batteries (not included) into the battery compartment with the correct polarity.
2. Place back the cover and close the battery compartment.
OPERATION
1. Turn on the audio source (TV or audio component) to which the transmitter is
connected with. The blue signal LED on the transmitter will light up.
2. Select the channel (1 or 2) of the transmitter for best performance in your location.
3. Turn on the ON/OFF button on the speakers (the ON/OFF button on the remote
control unit cannot be used as a primary device to switch on the speakers). Press the
“AUTO TUNE” button to get the best tuning reception in the speakers. When the
button is pressed, frequency tuning starts automatically and it stops when a signal is
detected. Tuning process can also be activated by pressing the “AUTO TUNE”
button on the remote control unit.
4. Volume can be adjusted up by pressing the “+” button or down by pressing the
button “-“ to the desired listening level, or you can press the “+” button, or “-“ button
on the remote control unit to adjust the volume level.

P. 6
NOTE :
a) Keep the speakers up to 7 meters apart from the transmitter, and then press
“AUTO TUNE” button for the best reception.
b) Should you experience any frequency interference, move your channel switch
from one channel to the other channel (there are two channels for selection) on
the transmitter, and then press the “AUTO-TUNE” button again.
5. When the batteries are installed your speakers are portable and can be carried freely
from room to room (and outdoors) up to their maximum range. Should you
encounter any sound disruption (signal cuts off or carries distortion), press the
speaker’s “AUTO TUNE” button to maximize the best reception.
If you hear interference from other components, switch on the channel control of
transmitter, and then move the speakers to another location. You can re-adjust the
tuning control by changing it to either channel 1 or 2 on the transmitter and by then
pressing the "AUTO TUNE" button, for best reception.
P. 7
When transmitting / receiving over long distances, the signal from the system will
become weaker. This system will transmit through walls, floors and other obstacles.
However, range will be maximized by the “line of sight” placement with no obstacles
between the transmitter and the speakers. Keep this in mind when placing your
equipment throughout your house.
6. Switching Off
a) To protect the transmitter and save power, the transmitter will turn off
automatically if it detects that the unit is not being operated or, there is weak
reception from the signal audio source, for 4 minutes.
In other words, if the signal comes back, the transmitter will work again
automatically.
b) Press the ON/OFF button to turn off the speakers and the LED light will then
turn off, or simply press the ON/OFF button on the remote control unit. If you
use the remote control unit to turn off the speakers, the speakers will be at
stand-by mode for 5 minutes and the LED will change from blue to yellow. You
can switch on the speakers again by using the remote control unit during the
stand-by time. If there is no signal from the remote control unit in 4 minutes,
the speakers will automatically power off.
ATTENTION:
The transmitter for this speaker set is designed to work with a wide variety of devices.
Our tests have shown the default volume levels of iPods, MP3 players and other devices
connected to the transmitter through the headphone jack does not have the signal
strength required by the transmitter. Raising the volume of your device will increase the
signal strength to the transmitter. The blue signal LED will light when the required signal
strength from your device if reached. We recommend that you keep the volume set on
your iPod or MP3 player at a minimum of ¾ of full volume.

P. 8
WARNING:
The Power adapters are for indoor use only. If it is wet outside or raining, you can
continue to operate your speakers via their internal batteries. Please move the adapters
out of the rain by removing them and placing them in a safe dry place..
When powering by AC household current this device must be used with the AC/DC
adapters supplied within the package. Do not try to power using other AC or DC
adapters.
This device must be used with the AC/DC adapters supplied in the package.
TROUBLE SHOOTING
NO SOUND
- Ensure the AC/DC adapter is fully inserted into the AC outlet and the power
connection input on the transmitter.
- Ensure the speakers are switch ON.
- Speaker’s battery capacity is too low, replace with new batteries or connect
the AC/DC adapters to the speakers.
- Ensure the TV or audio component is ON.
- The connected audio / video equipment is not playing. Start playing the
equipment.
- The volume of speakers is too low, adjust the volume to an appropriate level.
DISTORTED
- Press the “AUTO-TUNE” button on the speakers until matching the frequency
of the transmitter.
- Change the position of the channel selector on the transmitter. You must then
press the “AUTO TUNE” button on the speakers.
- Battery capacity is too low. Replace with the new battery.
- Ensure the volume level of speakers is adjusted properly.
- The speakers are too far away from the transmitter, move it closer.
- The input level of the audio signal is too low. Turn up the volume of the audio
source equipment.
P. 9
TECHNICAL SPECIFICATIONS
Transmission Mode : UHF
Carrier Frequency : 900 MHz Digital Hybrid
Operation Voltage : Transmitter, DC 12V 150mA
Speakers, 6x ‘C’ size Alkaline batteries or DC 9V 1A adapter
Remote Control Unit, 2 X ‘AAA’ size batteries
Frequency Response : 40Hz – 12KHz
Distortion : 1%
S/N Ratio : 65dB (typical)
Operation Distance : Up to 150 feet
Speakers : 2-way
Output Power : 2 x 5 Watts
NOTE: This equipment has been tested and found to comply with the limits of a Class B
digital device, pursuant to Part 15 of the FCC Rules. These limits are designed to provide
reasonable protection against harmful interference in a residential installation. This
equipment generates, uses and can radiate radio frequency energy and, if not installed
and used in accordance with the instructions, may cause harmful interference to radio
communications. However, there is no guarantee that interference will not occur in a
particular installation. If this equipment does cause harmful interference to radio or
television reception, which can be determined by turning the equipment off and on, the
user is encouraged to try to correct the interference by one or more of the following
measures:
-- Reorient or relocate the receiving antenna.
-- Increase the separation between the equipment and receiver.
-- Connect the equipment into an outlet on a circuit different from that to which the
receiver is connected.
-- Consult the dealer or an experienced radio/TV technician for help.
Changes or modifications not expressly approved by the party responsible for
compliance could void the user’s authority to operate the equipment.

P. 10
“This product may contain chemicals listed in Proposition 65
(http://www.oehha.ca.gov/prop65/prop65_list/Newlist.html) that may be known to cause
cancer, birth defects or other reproductive harm.”

SPK-VELO-P
Haut-Parleurs Hybrides 900MHz
Sans Fil pour Intérieur ou
Extérieur avec Télécommande
Manuel de l’Utilisateur
www.audio-unlimited.com
www.cablesunlimited.com
P. 1
INTRODUCTION
Ce système de haut-parleur 900 MHz numérique hybride sans fil utilise la technologie
sans fil la plus récente afin de vous offrir le plaisir d’écouter de la musique et la télévision
à partir de tout endroit à l’intérieur ou l’extérieur de votre résidence. Vous n’avez qu’à
brancher le système à toute source audio telle la radio, télévision, magnétoscope, Hi-fi et
lecteur CD/MP3/VCD/DVD/Blu-ray. Sans nécessiter ni câblage ni installation compliquée,
ce système vous donne la capacité d'apprécier des sons palpitants et naturels en
quelques minutes.
CARACTÈRISTIQUES
1. Haut-parleurs extérieur et intérieur à l’épreuve des intempéries.
2. Système de balayage boucle à verrouillage de phase (PLL) automatique sur les
récepteurs du haut-parleur
3. Système de transmission à boucle à verrouillage de phase (PLL) sur l’émetteur
4. Système de haut-parleurs 900 MHz à technologie RF numérique hybride
5. La technologie RF vous offre la possibilité de vous déplacer en toute liberté à
l’intérieur de votre résidence ou à l’extérieur
6. Distance d’opération jusqu’à 150 pieds.
7. Aucune restriction de distance à vue
8. Audio stéréo de qualité supérieure virtuellement libre d’interférences
9. Contrôle automatique ON/OFF.
10. Fonction automatique de syntonisation.
11. Unité sans fil de contrôle à distance : Contrôle individuellement chaque
haut-parleur
Augmentation/diminution du volume
Alimentation on/off
12. Montage mural en utilisant les trous de montage.
13. Haut-parleurs bidirectionnels.

P. 2
IDENTIFICATION DES COMPOSANTES
ÉMETTEUR
RÉCEPTEURS DES HAUT-PARLEURS
TÉLÉCOMMANDE
Voyant de signal On (bleu) Voyant d’alimentation On (rouge)
Antenne
SYNTONISATION AUTO
ALIMENTATION ON/OFF
AUGMENTATION DU VOLUME
DIMINUTION DU VOLUME
SYNTONISATION AUTO
DIMINUTION DU VOLUME
ALIMENTATION ON/OFF
AUGMENTATION DU VOLUME
P. 3
L'INFORMATION IMPORTANTE CONCERNANT LA SECURITE
1. Lire et comprendre toutes les instructions.
2. Suivre tous les avertissements et instructions.
3. Ne pas employer les décapants de liquide ou d'aérosol.
Employer un tissu humide pour le nettoyage. Au besoin,
utiliser un savon doux.
INSTRUCTIONS D’INSTALLATION
ÉMETTEUR
1. Insérez le tube d’antenne à l'intérieur du fil d'antenne.
2. Raccordez l'adaptateur d'alimentation AC/DC fourni à une prise électrique murale.
3. Branchez l’adaptateur d’alimentation AC/DC dans le connecteur DC situé à l’arrière
de l’émetteur.
4. Lorsque l’adaptateur AC est branché, le voyant D’ALIMENTATION rouge s’allume. Si
le voyant D’ALIMENTATION rouge ne s’allume pas, assurez-vous que l’adaptateur
est branché.
5. L’arrière de l’émetteur comporte un cordon audio qui peut se connecter à une prise
de sortie audio de la télévision, moniteur, magnétoscope, enregistreuse radio,
lecteurs CD/MP3/VCD/DVD ou à une prise de casque d’écoute/écouteurs en
utilisant le connecteur. « Note : Vous pouvez avoir besoin de l'Adaptateur d'iPhone
inclus pour connecter votre iPhone à l'émetteur pour l'audio coule. Simplement
boucher le câble de l'émetteur dans une fin de cet Adaptateur d'iPhone, alors
boucher l'autre fin de l'adaptateur dans votre iPhone. »
Lorsque l’émetteur reçoit un signal audio, le voyant DE SIGNAL bleu ainsi que le voyant
D'ALIMENTATION rouge s’allument au même moment. Si le voyant DE SIGNAL bleu ne
s'allume pas, assurez-vous que la source audio est allumée.

P. 4
RÉCEPTEURS DES HAUT-PARLEURS
1. Insérez 6 piles alcalines « C » dans le compartiment de piles au bas de chaque
haut-parleur en vous assurant que la polarité est correcte (les piles ne sont pas
incluses pour cet ensemble) ou branchez l'adaptateur d’alimentation 9V à la prise
d’entrée DC au bas de chaque haut-parleur, ensuite branchez-le à la prise murale
AC.
2. Appuyez sur le bouton On/Off et allumez les haut-parleurs. Le DEL
D’ALIMENTATION s’allumera en bleu. Fermez les haut-parleurs en appuyant sur le
bouton ON/OFF des haut-parleurs ou à partir de l’unité de contrôle à distance et le
DEL s’éteindra.
3. Afin de satisfaire aux besoins d'utilisateurs différents, ces haut-parleurs sont conçus
pour un montage mural optionnel. À l’arrière ce chaque haut-parleur il y a deux trous
afin que vous puissiez facilement les monter sur le mur.
MUR
P. 5
TÉLÉCOMMANDE
1. Retirez le couvercle de la pile situé à l’arrière de l’unité de contrôle à distance et
insérez 2 piles « AAA » (non incluses) dans le compartiment de piles en vous
assurant que la polarité est correcte.
2. Remettez le couvercle en place et fermez le compartiment de pile.
OPÉRATION
1. Allumez la source audio (télévision ou composante audio) à laquelle l’émetteur est
branché. Le voyant bleu de signal sur l’émetteur s’allumera.
2. Sélectionnez le canal 1 ou 2 de l’émetteur afin d’obtenir le meilleur rendement pour
votre emplacement.
3. Placez le bouton ON/OFF à la position ON sur les haut-parleurs (le bouton ON/OFF
de l’unité de contrôle à distance ne peut s’utiliser comme dispositif premier afin
allumer les haut-parleurs). Appuyez sur le bouton « AUTO TUNE » afin d'obtenir la
meilleure réception de syntonisation pour les haut-parleurs. Lorsque vous appuyez
sur ce bouton la syntonisation de la fréquence démarre automatiquement et s’arrête
lorsqu'un signal est capté. La procédure de syntonisation peut aussi s’activer en
appuyant sur le bouton « AUTO TUNE » de l’unité de contrôle à distance.
4. Vous pouvez régler le volume en appuyant sur le bouton d’augmentation « + » ou le
bouton de diminution « - » afin d’obtenir le niveau d’écoute désiré ou vous pouvez
appuyer sur le bouton « + » ou « - » à partir de l’unité de contrôle à distance pour
régler le niveau du volume.

P. 6
NOTE :
a) Maintenez les haut-parleurs à une distance de 7 mètres de l’émetteur et ensuite
appuyez sur le bouton « AUTO TUNE » pour obtenir la meilleure réception.
b) Si vous subissez de l’interférence de fréquence, déplacez l’interrupteur de canal
d’un canal à l’autre (il y a deux canaux que vous pouvez sélectionner) sur
l’émetteur et ensuite appuyez à nouveau sur le bouton « AUTO-TUNE ».
5. Lorsque vos piles sont installées, vos haut-parleurs deviennent portables et peuvent
être transportés librement d’une pièce à l’autre jusqu’à leur portée maximum. Si
vous subissez des distorsions de son (le signal qui coupe ou émet de la distorsion),
appuyez sur le bouton « AUTO TUNE » du haut-parleur afin de maximiser la qualité
de réception.
Si vous entendez de l’interférence en provenance d’autres composantes, allumez le
contrôle de canal de l’émetteur et ensuite déplacez les haut-parleurs vers un autre
endroit. Vous pouvez régler à nouveau le contrôle de syntonisation en le changeant
au canal 1 ou 2 à partir de l’émetteur et ensuite en appuyant sur le bouton « AUTO
TUNE » afin d’obtenir une meilleure réception.
7 mètres
7 mètres
P. 7
Lors de transmissions/réceptions qui couvrent de longues distances le signal du
système s’affaiblira. Ce système peut transmettre à travers de murs et autres
obstacles. Cependant, la portée sera maximisée selon un placement par « distance
à vue » avec aucun obstacle entre l’émetteur et les haut-parleurs. Tenez compte de
cela lorsque vous placerez votre équipement à l'intérieur de votre résidence.
6. Fermeture
a) Afin de protéger l’émetteur et économiser l'alimentation, l’émetteur se fermera
automatiquement après quatre minutes s’il détecte que l’unité n’est pas en
opération ou si la réception est faible à partir du signal de la source audio.
En bref, si le signal revient l’émetteur se rallumera automatiquement.
b) Appuyez sur le bouton ON/OFF afin de fermer les haut-parleurs et le voyant
DEL se fermera, ou appuyez simplement sur le bouton ON/OFF de l’unité de
contrôle à distance pour fermer les haut-parleurs. Les haut-parleurs
resteront en mode attente pour cinq minutes et le voyant changera de
bleu à jaune. Vous pouvez rallumer les haut-parleurs pendant la période
d'attente en utilisant l’unité de contrôle à distance. Si aucun signal n’est émis à
partir de l’unité de contrôle à distance pendant cinq minutes, l'alimentation des
haut-parleurs se fermera automatiquement.
ATTENTION :
L'émetteur pour cette série de haut-parleur est conçu pour travailler avec une grande
variété d'appareils. Nos tests ont montré MP3 aux niveaux de volume implicites d'iPods,
joueurs électroniques et les autres appareils ont connecté à l'émetteur par le cric de
casque n'a pas la force de signal exigée par l'émetteur. Elever le volume de votre
appareil augmentera la force de signal à l'émetteur. Le signal bleu MENE allumera quand
la force de signal exigée de votre appareil si atteint. Nous recommandons que vous
gardiez la série de volume sur votre joueur électronique d'iPod ou MP3 à au moins ¾ de
volume plein.

P. 8
MISE EN GARDE :
Les adaptateurs d’alimentation sont conçus pour utilisation intérieure seulement.
S’il pleut ou l’environnement de l'extérieur est mouillé vous pouvez continuer l’opération
de vous haut-parleurs en utilisant leurs piles intérieures. Veuillez retirer vos adaptateurs
afin de les protéger contre la pluie et placez-les dans un lieu sec à l’ abri.
Lors de la mise sous tension avec un courant résidentiel AC ce dispositif doit
s’utiliser avec les adaptateurs AC/DC fournis dans l’ensemble. Ne tentez pas de les
l'alimenter en utilisant d'autres adaptateurs AC ou DC.
DÉPANNAGE
AUCUN SON
- Assurez-vous que l’adaptateur d’alimentation AC/DC est complètement à
l’intérieur de la prise AC et la connexion d’alimentation d’entrée sur l’émetteur.
- Assurez-vous que les haut-parleurs sont allumés (ON).
- La capacité des piles du haut-parleur est trop basse, remplacez-les avec des
nouvelles piles ou branchez les adaptateurs AC/DC aux haut-parleurs.
- Assurez-vous que la télévision ou composante audio est allumée.
- L’équipement audio/vidéo ne joue pas. Démarrez l’équipement.
- Le volume des haut-parleurs est trop bas, réglez le volume à un niveau
approprié.
DISTORSION
- Appuyez sur le bouton « AUTO-TUNE » sur les haut-parleurs jusqu’au
moment où vous atteignez une fréquence qui correspond à celle de
l’émetteur.
- Changez la position du sélecteur de canal sur l’émetteur. Vous devez ensuite
appuyer sur le bouton « AUTO TUNE » sur les haut-parleurs.
- La capacité de la pile est trop basse. Remplacez-la avec une nouvelle pile.
- Assurez-vous que le niveau du volume des haut-parleurs est réglé
correctement.
P. 9
- Les haut-parleurs sont trop éloignés de l’émetteur, rapprochez-le.
- Le niveau d’entrée du signal audio est trop bas. Augmentez le volume de
l’équipement de la source audio.
SPÉCIFICATIONS TECHNIQUES
Mode de transmission : UHF
Fréquence porteuse : 900 MHz hybride numérique
Tension d’opération : Émetteurr, DC 12V 150mA
Haut-parleurs, 6 piles alcalines C ou l’adaptateur DC 9V 1A
Unité Télécommande, 2 piles « AAA »
Réponse en fréquence : 40Hz – 12KHz
Distorsion : 1 %
Rapport signal sur bruit : 65dB (typique)
Portée d’opération : Jusqu’à 150 pieds
Haut-parleurs : bidirectionnel
Puissance de sortie : 2 x 5 Watts
NOTE : Cet équipement a été testé et trouvé conforme aux limites de dispositif
numérique de Classe B, conformément à la Section 15 des règlements de la FCC. Ces
limites sont conçues afin de fournir une protection raisonnable contre de l’interférence
néfaste dans un établissement résidentiel. Cet équipement génère, utilise et peut
émetteur de l’énergie de fréquence radio et si non installé et utilisé en conformité avec
les instructions peut engendrer une interférence néfaste pour les communications radio.
Cependant, il n’existe aucune garantie que l’interférence ne se produira pas dans un
établissement précis. Si équipement est bien la cause d’interférence néfaste à la
réception radio ou de télévision, ce qui peut se vérifier en fermant et rallumant
l’équipement, nous encourageons l’utilisateur à tenter de remédier à cette interférence
en suivant l’une ou plusieurs des procédures qui suivent :
-- Réorientez ou relocaliser l’antenne de réception.

P. 10
-- Augmentez la distance qui sépare l’équipement du récepteur.
-- Branchez l’équipement dans une prise dont le circuit est différent de celui auquel le
récepteur est branché.
-- Consultez le concessionnaire ou un technicien d’expérience en entretien de
télévision/radio afin d’obtenir de l’aide.
Toute modification ou tout changement qui ne sont pas expressément approuvés par
l’organisme responsable de la conformité pourraient entrainer l’annulation de
l’autorisation de l'utilisateur d'opérer l'équipement.
Ce produit peut contenir des produits chimiques énumérés dans la Proposition 65
(http://www.oehha.ca.gov/prop65/prop65_list/Newlist.htm ) cela pourrait être su pour
causer cancer, les défauts de naissance ou l'autre mal reproducteur.
/