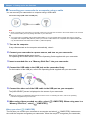
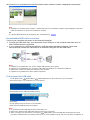
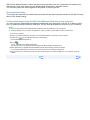
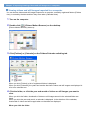
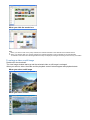
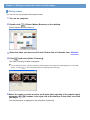
Sony DCR-DVD108: Capture life's precious moments effortlessly with stunning image quality, flexible recording options, and seamless connectivity. Record directly to DVD or Memory Stick Duo media, ensuring you never miss a special occasion. Enjoy the convenience of editing and organizing your videos and still images on your computer using the supplied Picture Motion Browser software. Connect to a TV or projector via A/V output for a captivating viewing experience.
Sony DCR-DVD108: Capture life's precious moments effortlessly with stunning image quality, flexible recording options, and seamless connectivity. Record directly to DVD or Memory Stick Duo media, ensuring you never miss a special occasion. Enjoy the convenience of editing and organizing your videos and still images on your computer using the supplied Picture Motion Browser software. Connect to a TV or projector via A/V output for a captivating viewing experience.


-
 1
1
-
 2
2
-
 3
3
-
 4
4
-
 5
5
-
 6
6
-
 7
7
-
 8
8
-
 9
9
-
 10
10
-
 11
11
-
 12
12
-
 13
13
-
 14
14
-
 15
15
-
 16
16
-
 17
17
-
 18
18
-
 19
19
-
 20
20
-
 21
21
-
 22
22
-
 23
23
-
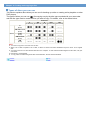 24
24
-
 25
25
-
 26
26
-
 27
27
-
 28
28
-
 29
29
-
 30
30
-
 31
31
-
 32
32
-
 33
33


Sony DCR-DVD108 User guide
- Type
- User guide
- This manual is also suitable for
Sony DCR-DVD108: Capture life's precious moments effortlessly with stunning image quality, flexible recording options, and seamless connectivity. Record directly to DVD or Memory Stick Duo media, ensuring you never miss a special occasion. Enjoy the convenience of editing and organizing your videos and still images on your computer using the supplied Picture Motion Browser software. Connect to a TV or projector via A/V output for a captivating viewing experience.
Ask a question and I''ll find the answer in the document
Finding information in a document is now easier with AI