Page is loading ...

Page 1 of 4
(Rev 07/03/23)
CTRL044-LightGrid-Mesh-Cellular-Node-Installation-Guide
LED.com
© 2022 Current Lighting Solutions, LLC. All rights
reserved. Information and specifications subject to
change without notice. All values are design or typical
values when measured under laboratory conditions.
© 2022 Current Lighting Solutions, LLC. Tous droits
réservés. Toutes les valeurs données sont théoriques
ou typiques lorsque mesurées sous conditions de
laboratoire.
Outdoor Wireless Control System
Système de contrôle extérieur sans fil
LightGrid Node | NŒUD LightGrid
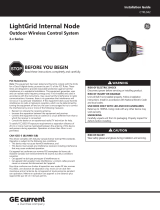
BEFORE YOU BEGIN
AVANT DE COMMENCER
Read these instructions completely and carefully.
Lisez ces instructions entièrement et avec aention
Installation Guide | Manuel d’installation
CTRL044
RISK OF ELECTRICAL SHOCK
Disconnect power before servicing or installing product.
RISK OF INJURY OR DAMAGE
Unit will fall if not installed properly. Follow installation instructions.
Install in accordance with National Electric Code and local codes.
DANGER D’ÉLECTROCUTION
Déconnecter l’alimentation avant un entretien ou l’installation de l’appareil.
RISQUE DE BLESSURE OU DE DÉGÂTS
S’il n’est pas installé correctement, l’appareil pourrait tomber.
Respectez les instructions d’installation. Installez en accord avec le
code Électrique national et les codes locaux.
WARNING/AVERTISSEMENT
RISK OF INJURY
Wear safety glasses and gloves during installation and servicing.
RISQUE DE BLESSURE
Durant l’installation et l’entretien, portez des lunees de sécurité et
des gants.
CAUTION/ATTENTION
FCC Statements:
Note: This equipment has been tested and found to comply
with the limits for a Class B digital device, pursuant to part 15 of
the FCC Rules. These limits are designed to provide reasonable
protection against harmful interference in a residential installation.
This equipment generates, uses and can radiate radio frequency
energy and, if not installed and used in accordance with the
instructions, may cause harmful interference to radio communications.
However, there is no guarantee that interference
will not occur in
a particular installation. If this equipment does cause harmful
interference to radio or television reception, which can be
determined by turning the equipment o and on, the user is
encouraged to try to correct the interference by one or more
of the following measures:
• Reorient or relocate the receiving antenna.
• Increase the separation between the equipment and receiver.
• Connect the equipment into an outlet on a circuit dierent
from that to which the receiver is connected.
•
Consult the dealer or an experienced radio/TV technician for help.
To satisfy FCC/ISED RF exposure requirements a separation
distance of 20 cm or more must be maintained between the
antenna of this device and persons during operation. Operation
at closer than 20 cm is not permied.
Déclaration FCC:
Remarque : Cet équipement a été testé et prouvé être en
conformité avec les limites de la classe B des appareils digitaux,
en respect de la partie 15 des règlements FCC. Ces limites sont
établies pour assurer une protection raisonnable contre les
interférences nuisibles dans une installation résidentielle. Cet
équipement produit, utilise et peut émere une énergie de radio
fréquence et, s’il n’est pas installé et utilisé en accord avec les
instructions, peut provoquer des interférences néfastes aux
communications radio. Toutefois, il n’est pas garanti qu’une
interférence ne va pas se produire dans une installation particulière.
Si cet équipement provoque une interférence néfaste avec la
réception radio ou télévision, ce qui peut être démontré un meant
l’équipement en marche/arrêt, nous conseillons à l’utilisateur
d’essayer de corriger cee interférence par une ou plusieurs des
méthodes suivantes :
• Réorienter ou repositionner l’antenne de réception.
• Augmenter la distance entre l’équipement et le récepteur.
• Raccorder l’équipement à une prise ou un circuit diérent que
celui auquel le récepteur est connecté.
•
Consultez le distributeur ou un technicien radio/TV expérimenté
pour obtenir une aide.
Pour satisfaire aux conditions d’exposition FCC/ISED RF une
distance d’écart de 20 cm ou plus doit être maintenue entre
l’antenne de cet appareil et le personnel durant l’opération. Une
opération à une distance de moins de 20 cm n’est pas permise.

Page 2 of 4
(Rev 07/03/23)
CTRL044-LightGrid-Mesh-Cellular-Node-Installation-Guide
LED.com
© 2022 Current Lighting Solutions, LLC. All rights
reserved. Information and specifications subject to
change without notice. All values are design or typical
values when measured under laboratory conditions.
© 2022 Current Lighting Solutions, LLC. Tous droits
réservés. Toutes les valeurs données sont théoriques
ou typiques lorsque mesurées sous conditions de
laboratoire.
Installation Guide | Manuel d’installationLightGrid Node 2.x Series
Nœud LightGrid Série 2.x
• Carefully unpack unit. Inspect for defects before installing.
•
Check electrical parameters. Ensure that the fixture operating
waage is below 1000W, and the voltage at the pole is within
the allowed range of the Controller (range is listed on the
sticker on the boom of the controller). Using controller outside
these parameters will void its warranty.
• Verify that power to the luminaire is ON 24/7 constant
power. The LightGrid mesh will not operate properly when
operating on switched power from a master timer or photocell.
• Confirm that the controller is the correct network ID for the
system it is intended to join. This will be on the sticker on the
boom of the node, labeled as Net A, Net B, Net C … this must
match the other controllers in the area or the node will not
join the network.
• Install the gateways first. The startup and formation of the
network is faster and smoother process when the Gateways
are installed before starting to install Controllers.
• Plan an installation route. Generally it is best to install
controllers nearest to the gateways first, and then proceed
outwards.
1Before Installation Avant installation
• Déballez l’appareil avec précautions. Inspectez à fond avant
installation.
• Vérifiez les paramètres électriques. Assurez-vous que la
puissance de fonctionnement de l’appareil est en-dessous de
1000 W et que la tension au poteau se trouve dans les limites
permises du Contrôleur (la gamme est reprise sur l’étiquee
au bas du contrôleur). L’utilisation du contrôleur hors de ces
paramètres va annuler la garantie.
• Vérifiez que l’alimentation en puissance est constante 24/7.
La maille LightGrid ne va pas fonctionner correctement
lorsqu’elle fonctionne alimentée au départ d’une minuterie ou
d’une cellule photoélectrique.
• Confirmez que le contrôleur a l’identification correcte du
réseau
pour le système qu’il va rejoindre. Ceci sera sur l’étiquee au
bas du nœud, marqué comme Net A, Net B, Net C, …et ceci
doit correspondre aux autres contrôleurs de la zone ou bien le
nœud ne saura pas se connecter au réseau.
•
Installez d’abord les Gateways. Le démarrage et la formation
du réseau est un processus plus rapide et plus commode
lorsque les Gateways sont installés avant les contrôleurs.
• Prévoyez un chemin d’installation. En général il vaut mieux
installer d’abord les contrôleurs plus proches des Gateways et
ensuite procéder en s’éloignant.
CAN ICES-5 (B)/NMB-3(B):
This device complies with Industry Canada license-exempt RSS
standards.
Operation is subject to the following two conditions:
• This device may not cause harmful interference, and
• This device must accept any interference received, including
interference that may cause undesired operation.
Cet appareil est conforme aux normes RSS exemptees de licence
de Industrie Canada. Son fonctionnement est soumis aux deux
conditions suivantes:
• Cet appareil ne doit pas provoquer d’interférences et
• Cet appareil doit accepter toute interférence, y compris celles
pouvant causer un mauvais fonctionnement de l’appareil.
Pour être conforme aux limites d’exposition aux ondes RF des
normes FCC/ISED, une distance de séparation d’au moins 20 cm
doit être maintenue entre l’antenne de cet appareil et toute
personne pendant son opération. Mere en opération cet appareil
a une distance plus rapprochée que 20 cm n’est pas permis.

Page 3 of 4
(Rev 07/03/23)
CTRL044-LightGrid-Mesh-Cellular-Node-Installation-Guide
LED.com
© 2022 Current Lighting Solutions, LLC. All rights
reserved. Information and specifications subject to
change without notice. All values are design or typical
values when measured under laboratory conditions.
© 2022 Current Lighting Solutions, LLC. Tous droits
réservés. Toutes les valeurs données sont théoriques
ou typiques lorsque mesurées sous conditions de
laboratoire.
Installation Guide | Manuel d’installationLightGrid Node 2.x Series
Nœud LightGrid Série 2.x
Fi
g
ure
1F
i
g
ure 2
North
2How to Install the LightGrid 2.x Controller Comment installer les contrôleurs LightGris 2.x
(The GESEM65-3 module is pictured below, however the
instructions are applicable across the entire Select TXTM
Gen3 family of modules.)
A. Check nearby poles. At the pole to be installed, confirm there
is either a Gateway or another active LightGrid Controller within
1000Ft. This is important, to make sure the node has a connection
path for communications and is within its RF range limits.
B. Ensure Cellular Service is Accessible: Prior to installing
cellular nodes verify with LightGrid support team that cellular
service is available at the location, providing latitude and longitude
coordinates.
C. Plug in the node: Orient controller so large blade aligns with
large slot in receptacle. Plug in, then twist clockwise until it is fully
locked in place (Figure 1).
D. Confirm the fixture dims during the first 60 seconds. When
the controller is first plugged in, it will turn the luminaire ON and
will then dim the luminaire. Before leaving the pole, you must
visually confirm that you see the brightness of the luminaire drop,
in order to confirm that dimming is working properly. Note: applies
only to dimmable fixtures with an ANSI 5 Pin or 7 Pin socket.
Fixtures with a standard 3 Pin socket will not be dimmable.
E. Orient the Controller towards North: Li up on the controller,
which will also li the receptacle with it. While liing, rotate the
controller and socket until the word North on the top of the
controller is directed toward true North. Then lower the assembly
back into place (Figure 2).
F. Make sure red and yellow indicator LEDs are blinking. This
confirms the controller is looking for a network to join.
(Le module GESEM65-3 est représenté ci-dessous, toutefois
les instructions sont d’application pour toute la famille des
modules Select TX™ Gen3)
A. Vérifiez les poteaux aux environs. Au poteau où il doit être
installé, confirmez qu’il y a soit un Gateway ou un autre contrôleur
actif LightGrid dans les 1000 (300 m). Il est important de
s’assurer que le nœud a une piste de connexion pour les
communications et se trouve dans ses limites de la gamme RF.
B. Assurez-vous que le service cellulaire est accessible :
Avant d’installer les nœuds cellulaires vérifiez avec l’équipe de
support de LightGrid que le service cellulaire est disponible en
cet emplacement, en fournissant les coordonnées de latitude et
longitude.
C. Branchez le nœud : Orientez le contrôleur de manière que la
lame large soit alignée avec la rainure large dans le réceptacle.
Branchez et ensuite tournez dans le sens horlogique jusqu’à ce
qu’il soit bien verrouillé en position (Figure A)
D. Confirmez que l’appareil est en gradation durant les
premières
60 secondes. Lorsque le contrôleur est connecté
pour la première fois, il va allumer ON le luminaire et le mere en
gradation. Avant de quier le poteau, vous devez confirmer vi-
suellement que vous voyez la brillance du luminaire diminuer pour
confirmer que le système de gradation fonctionne correctement.
Remarque : Ceci n’est d’application que pour les appareils avec
gradation avec une broche ANSI 5 Pin ou 7 Pin. Les appareils
avec une prise standard 3 Pin ne sont pas avec gradation.
E. Orientez le contrôleur vers le Nord : Soulevez le contrôleur,
ce qui va également soulever le réceptacle avec lui. Lorsqu’il est
soulevé, faite pivoter le contrôleur et la prise jusqu’à ce que le mot
« Nord » à la partie supérieure du contrôleur est dirigé vers le
Nord réel. Abaissez alors l’ensemble de retour en place (Figure B).
F. Assurez-vous que les indicateurs DEL rouge et jaune
clignotent. Ceci confirme que le contrôleur recherche un réseau
à joindre.

Page 4 of 4
(Rev 07/03/23)
CTRL044-LightGrid-Mesh-Cellular-Node-Installation-Guide
LED.com
© 2022 Current Lighting Solutions, LLC. All rights
reserved. Information and specifications subject to
change without notice. All values are design or typical
values when measured under laboratory conditions.
© 2022 Current Lighting Solutions, LLC. Tous droits
réservés. Toutes les valeurs données sont théoriques
ou typiques lorsque mesurées sous conditions de
laboratoire.
Installation Guide | Manuel d’installationLightGrid Node 2.x Series
Nœud LightGrid Série 2.x
3Troubleshooting Recherche des pannes
Symptom Solution
The luminaire is not
turning ON.
Check that the pole has power. The relay
inside the Controller is Normally Closed,
so the luminaire will always turn ON
when the controller is first plugged in.
I did not see the
dimming sequence
in the first 60
seconds.
Unplug the controller, and try plugging
it in again. If you still do not see the
sequence, check that the dimming
wires of the fixture (Grey & Violet) are
properly connected to the dimming
wires of the ANSI socket. If you confirm
the wiring is connected and the
controller still does not dim the
luminaire, try another new controller.
Symptôme Solution
Le luminaire n’est
pas alimenté (ON)
Vérifiez que le poteau est sous
tension. Le relai dans le contrôleur est
normalement Fermé, de sorte que le
luminaire va chaque fois se mere en
marche ON lorsque le contrôleur est mis
sous tension.
Je n’ai pas vu la
séquence de
gradation dans
les premières 60
secondes.
Déconnectez le contrôleur et essayez
de le brancher de nouveau. Si vous ne
voyez toujours pas le cycle, vérifiez que
les fils de gradation de l’appareil (Gris
et violet) sont connectés correctement
aux fils de gradation de la prise ANSI.
Si vous pouvez confirmer que le câblage
est correct et que le contrôleur continue
à ne pas faire de gradation au luminaire,
essayez un nouveau contrôleur.
These instructions do not purport to cover all details or variations in equipment nor to provide for every possible contingency to be met in connection with installation,
operation or maintenance. Should further information be desired or should particular problems arise which are not covered suciently for the purchaser’s purposes,
the maer should be referred to Current.
Ces instructions ne prétendent pas couvrir tous les détails ou variantes de l’équipement ni couvrir toutes les conditions possibles à satisfaire en rapport avec l’installation,
l’opération ou l’entretien. Si des informations supplémentaires sont souhaitées sur des aspects qui ne sont pas susamment couverts pour satisfaire les besoins du client,
ou si des problèmes particuliers se présentent, veuillez addresser ces questions à Current.
Questions:
Web: LED.com
Phone: 1-877-843-5590
Email: lightgrid.support@currentlighting.com
Current Lighting Solutions, LLC
25825 Science Park, Suite 400
Beachwood, OH 44122
/