Page is loading ...

MUTI-PLATFORM
WIRELESS CONTROLLEP
(wireless receiver)
Instruction Manual
1. The handle is mainly X-360 host, but also supports Windows computer and
P3 host.
2. The handle supports dual motor vibration function.
3. Wireless 2.4G connection, strong anti-interference ability, stable connection
signal, and free control.
4. There is no need to load any drivers, the handle is connected to the 360 host/
P3 host / PC computer be usable.
5. The PC can be switched to X-input or D-input at will without loading any drivers.
6. When the handle is charged, the game can also be played normally.
7. The handle (receiver) can be upgraded with updated software by connecting to
a computer.
Left Joystick
Body sensors
Tracking
Y:
X:
B:
A:
Install/Right
Joystick
Back
Confirm
Right Joystick
Start
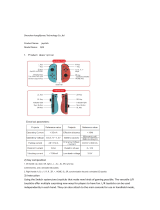
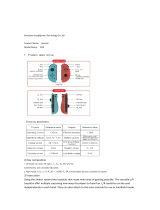
Product Features
Warm Tips: The wireless receiver only can compatible with this
controller,it can`t work with the original X-360 cantroller.
D-pand
RB Key
Battery box Charging
Port Pairing Key
LT Key
LB Key
RT Key
Back
Function key
Handle battery display
1. When the handle is connected to the X-360 dedicated charging cable for
charging, the red LED on the charging cable lights up, indicating that the handle is
charging. When the light on the X-360 dedicated charging cable turns green, it
indicates that the hand is now fully charged and the handle The battery pack is fully
charged.
2. The handle can work normally and vibrate when the battery power is greater than
2.2V, but the handle will be disconnected when the power is too low when the battery
power is lower than 2.1V. At this time, replace the battery (dry battery) or charge the
battery (battery pack).
Note: When the handle uses 1.5V dry batteries, do not charge the handle to avoid
danger! ! !
1. Introduction to buttons
Handle end:
1. X-360 key*1: Turn on the handle or execute commands from the host, and switch
between X-Input and D-input.
2. Direction keys*1 group: up, down, left, right.
3. Function control keys *10: A, B, Y, X, LB, RB, LT, RT, BACK, START
4. Left and right joysticks*2: 3D joysticks, including joystick buttons.
5. Reset button *1: Press this button to turn off the power of the handle, and disconnect
the handle from the receiver (reset).
Second, even machine guidance
1. Connect to the 360 host via 2.4G wireless
When the 360 host is turned on, connect the receiver's USB connector to the 360
host. At this time, the receiver's LED light starts to flash to enter the pairing mode,
and then press the X-360 button on the handle to wake up the handle, and the handle
LED1~LED4 flashes for pairing, pairing After success, the receiver LED is always on,
and the handle channel light is always on to operate.
2. Connect to P3 host via 2.4G wireless
When the host is turned on, connect the USB connector of the receiver to the P3
host. At this time, the receiver's LED light starts to flash to enter the pairing mode,
and then press the X-360 button on the handle to wake up the handle, and the handle
LED1~LED4 flashes for pairing, the pairing is successful After the receiver LED is
always on, and the handle channel light is always on, the operation can be performed.
Specifications
Connection Way: 2.4GWireless (Include receiver)
working voltage : 3.0V
Range: 8~10m
Size: 152*105*58mm
Weight: 249g
Color: Black / White
Applications: X-360 Console,PC,P3
Working current : 25mA(motor doesn`t vibrate)
180mA(motor vibrate)
3. Connect to PC computer wirelessly via 2.4G
When the PC computer is turned on, connect the USB connector of the receiver to
the PC computer. At this time, the receiver LED light starts to flash to enter the
pairing mode, and then press the X-360 button on the handle to wake up the handle,
and the handle LED1~LED4 flashes for pairing, the pairing is successful After the
receiver LED is always on, the handle LED2 is always on to operate, and the PC
computer is connected to the X-input mode by default; long press the handle X-360
button for 5 seconds, it will switch to D-input mode, at this time the LED1 on the
handle, LED2 is always on, and the handle is in PC digital mode at this time.
Short press the X-360 key to switch the cross key mode, when LED1 is on, it is the
PC simulation mode.Remark 1: In PC mode, there is no vibration function.
Plug the wireless receiver into
the USB port of the X-360 host. Install the 2AA or rechargeable batteries
in the battery box(Battery is not included.)
Connect TV Havge fun playing games
Note: In P3 host/PC computer mode, there is no vibration function.

This device complies with part 15 of the FCC Rules. Operation is subject to the following two
conditions: (1) this device may not cause harmful interference, and (2) this device must accept
any interference received, including interference that may cause undesired operation.
Any changes or modifications not expressly approved by the party responsible for compliance
could void the user's authority to operate the equipment.
NOTE: This equipment has been tested and found to comply with the limits for a Class B
digital device, pursuant to Part 15 of the FCC Rules. These limits are designed to provide
reasonable protection against harmful interference in a residential installation. This equipment
generates, uses and can radiate radio frequency energy and, if not installed and used in
accordance with the instructions, may cause harmful interference to radio communications.
However, there is no guarantee that interference will not occur in a particular installation.
If this equipment does cause harmful interference to radio or television reception,
which can be determined by turning the equipment off and on, the user is encouraged to try to
correct the interference by one or more of the following measures:
-- Reorient or relocate the receiving antenna.
-- Increase the separation between the equipment and receiver.
-- Connect the equipment into an outlet on a circuit different
from that to which the receiver is connected.
-- Consult the dealer or an experienced radio/TV technician for help.
The device has been evaluated to meet general RF exposure requirement. The device can be u
sed in portable exposure condition without restriction
/


