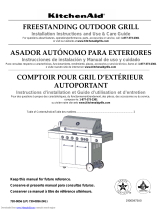
KitchenAid 720-0893 Installation guide

Type
Installation guide

The KitchenAid 720-0893 gas grill offers a range of features for a versatile and enjoyable grilling experience. With its powerful burners, you can achieve precise temperature control for perfectly cooked food. The durable stainless steel construction ensures longevity, while the electronic ignition system provides a quick and easy start-up. The grill's spacious cooking surface accommodates a variety of foods, making it ideal for both small and large gatherings. Cleanup is a breeze thanks to the removable drip pan and dishwasher-safe components.

The KitchenAid 720-0893 gas grill offers a range of features for a versatile and enjoyable grilling experience. With its powerful burners, you can achieve precise temperature control for perfectly cooked food. The durable stainless steel construction ensures longevity, while the electronic ignition system provides a quick and easy start-up. The grill's spacious cooking surface accommodates a variety of foods, making it ideal for both small and large gatherings. Cleanup is a breeze thanks to the removable drip pan and dishwasher-safe components.

Observe all governing codes and ordinances.
IMPORTANT: This installation must conform with all local codes
and ordinances. In the absence of local codes, installation must
conform with either the National Fuel Gas Code, ANSI
Z223.1/NFPA54, Natural Gas and Propane Installation Code,
CSA B149.1, Propane Storage And Handling Code, B149.2, or
Gas Supply Requirements
Burner Requirements for High Altitude
Input ratings shown on the model/serial rating plate are for
elevations up to 2,000 ft (609.6 m).
For elevations above 2,000 ft (609.6 m), ratings are reduced at a
rate of 4% for each 1,000 ft (304.8 m) above sea level. Orifice
conversion is required. See “Assistance” section to order.
Gas Supply Line Pressure Testing
Testing above 1/2 psi (3.5 kPa) or 14" (35.5 cm) WCP (gauge):
The grill and its individual shutoff valve must be disconnected
from the gas supply piping system during any pressure testing of
that system at test pressures greater than 1/2 psi (3.5 kPa).
Testing below 1/2 psi (3.5 kPa) or 14" (35.5 cm) WCP (gauge)
or lower:
The grill must be isolated from the gas supply piping system by
closing its individual manual shutoff valve during any pressure
testing of the gas supply piping system at test pressures equal to
or less than 1/2 psi (3.5 kPa).
Gas Connection Requirements
20 lb LP Gas Fuel Tank
This grill is equipped for use with a 20 lb LP gas fuel tank (fuel
tank not supplied). A gas pressure regulator/hose assembly is
supplied.
Any brand of 20 lb LP gas fuel tank is acceptable for use with
IMPORTANT: Grill must be connected to a regulated gas supply.
Refer to the model/serial rating plate for information on the type
of gas that can be used. If this information does not agree with
the type of gas available, check with your local gas supplier.
Gas Conversion:
No attempt shall be made to convert the grill from the gas
specified on the model/serial rating plate for use with a different
gas type without consulting the serving gas supplier. The
conversion kit supplied with grill must be used. See “Gas
Conversionssection for instructions.
Gas Pressure Regulator
The gas pressure regulator supplied with this grill must be used.
The inlet (supply) pressure to the regulator should be as follows
for proper operation:
LP Gas:
Operating pressure: 11" (27.9 cm) WCP
Inlet (supply) pressure: 11" to 14" (27.9 cm to 35.5 cm) WCP
Natural Gas:
Operating pressure: 4" (10.2 cm) WCP
Inlet (supply) pressure: 7" to 14" (17.8 cm to 35.5 cm) WCP
maximum.
Contact local gas supplier if you are not sure about the inlet
(supply) pressure.
CSA B149.1, Propane Storage And Handling Code, B149.2, or
the Standard for Recreational Vehicles, ANSI A119.2/NFPA
1192 and CSA Z240 RV Series Recreational Vehicle Code as
applicable.
the grill, provided that it is compatible with the grill’s retention
means (tank tray included).
It is also design-certified by CSA International for local LP gas
supply or for Natural gas with appropriate conversion.
The 20 lb LP gas fuel tank must be mounted and secured.
Door Style Tank Tray
1. Open cabinet door.
2. Slide the tank tray locking bracket counterclockwise 90 º
and pull out the tray
A. Gas pressure regulator/hose assembly
A. Tank
tray locking bracket
A
24
A
Natural Gas Conversion
Conversion must be made by a qualified gas technician. The
qualified Natural gas technician shall provide the Natural gas
supply to the selected grill location in accordance with the
National Fuel Gas Code ANSI Z223.1/NFPA 54 - latest edition,
and local codes. For conversion to Natural gas, the Natural Gas
Conversion Kit supplied with the grill (on some models) or the
Natural Gas Conversion Kit Part Number 710-0003 must be
used. See “Assistance” section for information on ordering.
IMPORTANT: The gas installation must conform with local
codes, or in the absence of local codes, with the National Fuel
Gas Code, ANSI Z223.1/NFPA 54 - latest edition.
Follow instructions for converting to Natural gas in the “Gas
Conversionssection of this manual or the instructions supplied
with Natural Gas Conversion Kit Part Number 710-0003.
The gas supply line shall be equipped with an approved shutoff
valve. This valve should be located in the same area as the grill
and should be in a location that allows ease of opening and
closing. Do not block access to the shutoff valve. The valve is
for turning on or shutting off gas to the grill.
A
B
C
A. Locking screw
B. Bottom collar
C. Mounting hole
5. Slide the drawer with the 20lb LP gas fuel tank back into the
cabinet. Turn the tank tray locking bracket clockwise 90º to
tighten.
A
A. Tank tray locking bracket
3. Place the 20 lb LP gas fuel tank bottom collar into the
mounting hole in the tank tray.
4. Tighten the locking screw against the bottom collar of
the 20 lb LP gas fuel tank to secure.
A. Gas supply line
B. Shutoff valve “open” position
C. To grill
A. Tank tray locking bracket
25
LP Gas:
IMPORTANT: A 20 lb LP gas fuel tank must be purchased
separately.
IMPORTANT: The gas pressure regulator/hose assembly
supplied with the grill must be used. Replacement gas pressure
regulator/hose assembly specific to your model is available from
your outdoor grill dealer.
A. Gas pressure regulator/hose assembly
B. 20 lb LP gas fuel tank
A
B
Make sure that the cylinder valve connection device
properly mates with the connection device attached to
the inlet of the pressure regulator.
6. Open the tank valve fully by turning the valve
counterclockwise. Wait a few minutes for gas to move
through the gas line.
7. Before lighting the grill, test all connections by brushing
on an approved noncorrosive leak-detection solution.
Bubbles will show a leak.
8. If a leak is found, turn the tank valve off and do not use
the grill. Contact a qualified gas technician to make repairs.
9. Go to “Check and Adjust the Burners” section.
To
Disconnect
the
20
lb
LP
Fuel
Tank
:
Make Gas Connection
NOTE: If grill is to be converted to Natural gas, follow
instructions in the “Gas Conversions” section.
20 lb LP Gas Fuel Tank
your outdoor grill dealer.
To Connect the 20 lb LP Gas Fuel Tank:
1. Check that the 20 lb LP gas fuel tank is in the “Off”
position. If not, turn the valve clockwise until it stops.
2. Check that the 20 lb LP gas fuel tank valve has the proper
type-1 external male thread connections per ANSI Z21.81.
3. Check that the burner control knobs are in the “Off”
position.
4. Remove any debris and inspect the valve connections,
port, and gas pressure regulator/hose assembly for
damage.
NOTE: Always keep the LP cylinder at 90
e
(upright)
orientation to provide vapor withdrawal.
5. Using your hand, turn the gas pressure regulator/hose
assembly clockwise to connect to the 20 lb LP gas fuel
tank as shown.
Hand tighten only. Use of a wrench could damage the
quick coupling nut.
26
To
Disconnect
the
20
lb
LP
Fuel
Tank
:
1. Check that the burner control knobs are in the “Off” position
and the grill is cool.
2. Check that the 20 lb LP gas fuel tank is in the “Off” position.
If not, turn the valve clockwise until it stops.
3. Using your hand, turn the gas pressure regulator/hose
assembly counterclockwise to disconnect to the 20 lb LP gas
fuel tank as shown.
Hand loosen only. Use of a wrench could damage the quick
coupling nut.
A. Gas pressure regulator/hose assembly
B. 20 lb LP gas fuel tank
A
B
4. Place dust cap on cylinder valve outlet whenever the
cylinder is not in use. Only install the type of dust cap on
the valve outlet that is provided with the cylinder valve.
Other types of caps or plugs may result in leakage of
propane.
GAS CONVERSIONS
Tools and Parts for Gas Conversion
Gather the required tools and parts before starting installation.
Read and follow the instructions provided with any tools listed
here.
Parts supplied
n Natural gas orifices
Parts needed
n Natural gas conversion kit Part Number 710-0003. See
“Assistance” section to order. The conversion kit includes:
n Natural gas regulator 4" W.C. (marked “Natural Gas
n Regulator”)
n 10 ft (3.0 m) Natural gas hose with quick connector
n 5.9" (150 mm) Natural gas regulator hose
n 6 mm nut driver
n 6 mm wrench
n Hex key
1. Turn off the main gas supply valve.
2. Disconnect 20 lb LP gas fuel tank (if present).
3. Turn off all burner control valves.
4. Remove the 20 lb LP gas fuel tank (if present) from the
grill cart.
5. Use an adjustable wrench to remove the LP regulator
from the manifold.
Conversion from LP Gas to Natural Gas
Installation of the regulator
Tools needed
6mm
IMPORTANT: Gas conversions must be done by a qualified
installer. Before proceeding with conversion, shut off the gas
supply to the grill.
6. Use an adjustable wrench to install the Natural gas
regulator hose to the manifold and secure. Attach the
Natural gas regulator to the side panel inside the grill
cart with the two screws that are preassembled on the
regulator.
27
  • Page 1 1
  • Page 2 2
  • Page 3 3
  • Page 4 4

KitchenAid 720-0893 Installation guide

Type
Installation guide

The KitchenAid 720-0893 gas grill offers a range of features for a versatile and enjoyable grilling experience. With its powerful burners, you can achieve precise temperature control for perfectly cooked food. The durable stainless steel construction ensures longevity, while the electronic ignition system provides a quick and easy start-up. The grill's spacious cooking surface accommodates a variety of foods, making it ideal for both small and large gatherings. Cleanup is a breeze thanks to the removable drip pan and dishwasher-safe components.

Ask a question and I''ll find the answer in the document

Finding information in a document is now easier with AI