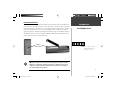
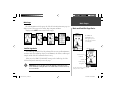
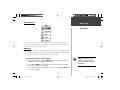
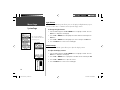
Garmin Geko 101 is a compact and easy-to-use GPS navigator designed to provide reliable guidance and navigation in various outdoor activities. With its user-friendly interface and intuitive controls, the Geko 101 offers a range of features to enhance your outdoor adventures.
Garmin Geko 101 is a compact and easy-to-use GPS navigator designed to provide reliable guidance and navigation in various outdoor activities. With its user-friendly interface and intuitive controls, the Geko 101 offers a range of features to enhance your outdoor adventures.


-
 1
1
-
 2
2
-
 3
3
-
 4
4
-
 5
5
-
 6
6
-
 7
7
-
 8
8
-
 9
9
-
 10
10
-
 11
11
-
 12
12
-
 13
13
-
 14
14
-
 15
15
-
 16
16
-
 17
17
-
 18
18
-
 19
19
-
 20
20
-
 21
21
-
 22
22
-
 23
23
-
 24
24
-
 25
25
-
 26
26
-
 27
27
-
 28
28
-
 29
29
-
 30
30
-
 31
31
-
 32
32


Garmin Geko 101 is a compact and easy-to-use GPS navigator designed to provide reliable guidance and navigation in various outdoor activities. With its user-friendly interface and intuitive controls, the Geko 101 offers a range of features to enhance your outdoor adventures.
Ask a question and I''ll find the answer in the document
Finding information in a document is now easier with AI
Related papers
-
Garmin Geko 201 User manual
-
Garmin Geko 301 User manual
-
Garmin DC 50 Dog Tracking Collar Important Safety and Product Information
-
Garmin GPSMAP 76S User manual
-
Garmin 376C User manual
-
-
-
-
-