Page is loading ...

User’s Manual
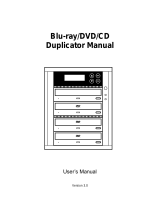
Tower DVD Duplicator
DVW-D13
DVW-D13H
DVW-D17
DVW-D17H
®
TEACdvwd17h.book Page 1 Sunday, May 1, 2005 6:28 PM

TEACdvwd17h.book Page 2 Sunday, May 1, 2005 6:28 PM

TEAC Tower DVD Duplicator User’s Manual i
Safety Precautions
TEAC DVD Duplicator systems are high-precision electronic devices. Do not use them in
any manner other than as specified in this manual. Please read this manual in its entirety
before you begin the installation procedure. Use of controls, adjustments, or performance
of procedures other than those specified herein may result in hazardous radiation exposure.
To prevent fire or shock, do not expose the unit to moisture or rain.
To prevent electrical shock, do not attempt to disassemble the DVD Duplicator system.
Refer servicing to authorized personnel.
TEAC DVD Duplicator drives utilize a laser beam that can be harmful to your eyes. Do not
disassemble the cabinet or unit. Do not attempt to look through the front panel or into the
unit while the power is turned on.
A user who changes or modifies the unit or operating procedures specified herein without
expressed written approval by the manufacturer will void user authority to operate the
equipment.
Specifications and features subject to change without notice or obligation.
TEACdvwd17h.book Page i Sunday, May 1, 2005 6:28 PM

ii TEAC Tower DVD Duplicator User’s Manual
Copyright and Trademark Information
© Copyright 2005 TEAC America, Inc. All rights reserved.
TEAC America, Inc. reserves the right to modify product offerings or specifications
without advanced notice. No part of this publication may be reproduced in any format
without the expressed written permission of TEAC America, Inc.
TEAC is a trademark of TEAC Corporation. All other trademarks and registered
trademarks are the property of their respective owners.
Piracy Statement
Copying audio, video, or software without the permission of the copyright holder is illegal.
TEAC accepts no responsibility for copyright infringement or misuse of this equipment. It
is the sole responsibility of the user to ensure that the legal copyrights of the copyright
owners are respected.
About This Manual
This
TEAC Tower DVD Duplicator User’s Manual
explains how to operate the TEAC
Tower DVD Duplicator. It is divided into the following chapters:
Chapter 1: Introduction
This chapter describes the shipping package contents and introduces the TEAC Tower
DVD Duplicator.
Chapter 2: Using the DVD Duplicator
This chapter explains how to set up the DVD Duplicator. It also details its basic copy
operation.
Chapter 3: DVD Duplicator Functions
This chapter explains all available functions of the DVD Duplicator.
Appendix A: List of Functions
Appendix A includes a complete list of all DVD Duplicator functions.
Appendix B: LCD Messages
Appendix B lists all messages that may appear on the LCD display.
Appendix C: About DVD-R and DVD-RW Discs
Appendix C contains information about handling, loading, and ejecting discs.
Appendix D: Specifications
Appendix D includes technical specifications for the TEAC Tower DVD Duplicator units.
Appendix E: Technical Support and Warranty
This appendix explains how to contact technical support at TEAC America, Inc. and
provides Limited Warranty information.
TEACdvwd17h.book Page ii Sunday, May 1, 2005 6:28 PM

Table of Contents
TEAC Tower DVD Duplicator User’s Manual iii
Table of Contents
Safety Precautions . . . . . . . . . . . . . . . . . . . . . . . . . . . . . . . . . . . . . . . . . . . . . . . . . . . . . . . i
Copyright and Trademark Information . . . . . . . . . . . . . . . . . . . . . . . . . . . . . . . . . . . . . . . ii
Piracy Statement . . . . . . . . . . . . . . . . . . . . . . . . . . . . . . . . . . . . . . . . . . . . . . . . . . . . . . . .ii
About This Manual . . . . . . . . . . . . . . . . . . . . . . . . . . . . . . . . . . . . . . . . . . . . . . . . . . . . . . ii
List of Figures . . . . . . . . . . . . . . . . . . . . . . . . . . . . . . . . . . . . . . . . . . . . . . . . . . . . . . . . . . v
Chapter 1. Introduction . . . . . . . . . . . . . . . . . . . . . . . . . . . . . . . . . . . . . . . . . . 1
DVD Duplicator Package Contents . . . . . . . . . . . . . . . . . . . . . . . . . . . . . . . . . . . . . . . . . . 2
Front Panel . . . . . . . . . . . . . . . . . . . . . . . . . . . . . . . . . . . . . . . . . . . . . . . . . . . . . . . . . . . . . 3
Rear Panel . . . . . . . . . . . . . . . . . . . . . . . . . . . . . . . . . . . . . . . . . . . . . . . . . . . . . . . . . . . . . 5
Chapter 2. Using the DVD Duplicator . . . . . . . . . . . . . . . . . . . . . . . . . . . . . . . 7
Setup . . . . . . . . . . . . . . . . . . . . . . . . . . . . . . . . . . . . . . . . . . . . . . . . . . . . . . . . . . . . . . . . . 7
Basic Operation . . . . . . . . . . . . . . . . . . . . . . . . . . . . . . . . . . . . . . . . . . . . . . . . . . . . . . . . . 8
Copying from the Optical (DVD) Source Drive . . . . . . . . . . . . . . . . . . . . . . . . . . . . . . . 8
Loading Data to and Copying from the Hard Disk Source Drive . . . . . . . . . . . . . . . . . 9
Chapter 3. Tower DVD Duplicator Functions . . . . . . . . . . . . . . . . . . . . . . . 13
1 Copy . . . . . . . . . . . . . . . . . . . . . . . . . . . . . . . . . . . . . . . . . . . . . . . . . . . . . . . . . . . . . . . 13
2 Test . . . . . . . . . . . . . . . . . . . . . . . . . . . . . . . . . . . . . . . . . . . . . . . . . . . . . . . . . . . . . . . . 13
3 Test & Copy . . . . . . . . . . . . . . . . . . . . . . . . . . . . . . . . . . . . . . . . . . . . . . . . . . . . . . . . . 14
4 Verify . . . . . . . . . . . . . . . . . . . . . . . . . . . . . . . . . . . . . . . . . . . . . . . . . . . . . . . . . . . . . . 14
5 Compare . . . . . . . . . . . . . . . . . . . . . . . . . . . . . . . . . . . . . . . . . . . . . . . . . . . . . . . . . . . . 14
6 Prescan . . . . . . . . . . . . . . . . . . . . . . . . . . . . . . . . . . . . . . . . . . . . . . . . . . . . . . . . . . . . . 14
7 Disc Info . . . . . . . . . . . . . . . . . . . . . . . . . . . . . . . . . . . . . . . . . . . . . . . . . . . . . . . . . . . . 14
8 Select Source . . . . . . . . . . . . . . . . . . . . . . . . . . . . . . . . . . . . . . . . . . . . . . . . . . . . . . . . . 14
9 Image . . . . . . . . . . . . . . . . . . . . . . . . . . . . . . . . . . . . . . . . . . . . . . . . . . . . . . . . . . . . . . . 15
9.1 Load . . . . . . . . . . . . . . . . . . . . . . . . . . . . . . . . . . . . . . . . . . . . . . . . . . . . . . . . . . . . 15
9.2 Delete Image . . . . . . . . . . . . . . . . . . . . . . . . . . . . . . . . . . . . . . . . . . . . . . . . . . . . . . 15
9.3 Image Info . . . . . . . . . . . . . . . . . . . . . . . . . . . . . . . . . . . . . . . . . . . . . . . . . . . . . . . . 15
9.4 Compare Image . . . . . . . . . . . . . . . . . . . . . . . . . . . . . . . . . . . . . . . . . . . . . . . . . . . . 15
9.5 Select Image . . . . . . . . . . . . . . . . . . . . . . . . . . . . . . . . . . . . . . . . . . . . . . . . . . . . . . 15
9.6 Image Src Drive . . . . . . . . . . . . . . . . . . . . . . . . . . . . . . . . . . . . . . . . . . . . . . . . . . . 15
9.7 Image Format Info . . . . . . . . . . . . . . . . . . . . . . . . . . . . . . . . . . . . . . . . . . . . . . . . . 16
10. Edit Track (for CD only) . . . . . . . . . . . . . . . . . . . . . . . . . . . . . . . . . . . . . . . . . . . . . . 16
10.1 CD to CD Edit . . . . . . . . . . . . . . . . . . . . . . . . . . . . . . . . . . . . . . . . . . . . . . . . . . . 16
10.2 CD to HDD . . . . . . . . . . . . . . . . . . . . . . . . . . . . . . . . . . . . . . . . . . . . . . . . . . . . . . 16
10.3 Play Audio Track . . . . . . . . . . . . . . . . . . . . . . . . . . . . . . . . . . . . . . . . . . . . . . . . . 16
10.4 Close Session . . . . . . . . . . . . . . . . . . . . . . . . . . . . . . . . . . . . . . . . . . . . . . . . . . . . 17
11 Setup . . . . . . . . . . . . . . . . . . . . . . . . . . . . . . . . . . . . . . . . . . . . . . . . . . . . . . . . . . . . . . 17
11.1 Language . . . . . . . . . . . . . . . . . . . . . . . . . . . . . . . . . . . . . . . . . . . . . . . . . . . . . . . . 17
11.2 CD Burn Speed . . . . . . . . . . . . . . . . . . . . . . . . . . . . . . . . . . . . . . . . . . . . . . . . . . . 17
11.3 DVD Burn Speed . . . . . . . . . . . . . . . . . . . . . . . . . . . . . . . . . . . . . . . . . . . . . . . . . 17
11.4 Read Speed . . . . . . . . . . . . . . . . . . . . . . . . . . . . . . . . . . . . . . . . . . . . . . . . . . . . . . 17
11.5 Auto Start Drive . . . . . . . . . . . . . . . . . . . . . . . . . . . . . . . . . . . . . . . . . . . . . . . . . . 17
11.6 Startup Menu . . . . . . . . . . . . . . . . . . . . . . . . . . . . . . . . . . . . . . . . . . . . . . . . . . . . 18
11.7 Auto Verify . . . . . . . . . . . . . . . . . . . . . . . . . . . . . . . . . . . . . . . . . . . . . . . . . . . . . . 18
TEACdvwd17h.book Page iii Sunday, May 1, 2005 6:28 PM

Table of Contents
iv TEAC Tower DVD Duplicator User’s Manual
11.8 Auto Compare . . . . . . . . . . . . . . . . . . . . . . . . . . . . . . . . . . . . . . . . . . . . . . . . . . . . 18
11.9 Auto Prescan . . . . . . . . . . . . . . . . . . . . . . . . . . . . . . . . . . . . . . . . . . . . . . . . . . . . . 18
11.10 Eject Disc . . . . . . . . . . . . . . . . . . . . . . . . . . . . . . . . . . . . . . . . . . . . . . . . . . . . . . 18
11.11 Burn on the Fly . . . . . . . . . . . . . . . . . . . . . . . . . . . . . . . . . . . . . . . . . . . . . . . . . . 18
11.12 Burn Mode . . . . . . . . . . . . . . . . . . . . . . . . . . . . . . . . . . . . . . . . . . . . . . . . . . . . . 19
11.13 Display Time . . . . . . . . . . . . . . . . . . . . . . . . . . . . . . . . . . . . . . . . . . . . . . . . . . . 19
11.14 Button Sound . . . . . . . . . . . . . . . . . . . . . . . . . . . . . . . . . . . . . . . . . . . . . . . . . . . 19
11.15 Device Info . . . . . . . . . . . . . . . . . . . . . . . . . . . . . . . . . . . . . . . . . . . . . . . . . . . . . 19
11.16 System Info . . . . . . . . . . . . . . . . . . . . . . . . . . . . . . . . . . . . . . . . . . . . . . . . . . . . . 19
11.17 Quick Erase . . . . . . . . . . . . . . . . . . . . . . . . . . . . . . . . . . . . . . . . . . . . . . . . . . . . . 19
11.18 Full Erase . . . . . . . . . . . . . . . . . . . . . . . . . . . . . . . . . . . . . . . . . . . . . . . . . . . . . . 19
11.19 Auto Close Tray . . . . . . . . . . . . . . . . . . . . . . . . . . . . . . . . . . . . . . . . . . . . . . . . . 19
11.20 Quick Compare . . . . . . . . . . . . . . . . . . . . . . . . . . . . . . . . . . . . . . . . . . . . . . . . . . 20
11.21 Audio Burn Speed . . . . . . . . . . . . . . . . . . . . . . . . . . . . . . . . . . . . . . . . . . . . . . . . 20
12 Advanced Setup (Adv Setup) . . . . . . . . . . . . . . . . . . . . . . . . . . . . . . . . . . . . . . . . . . . 20
12.1 UnderRun Protect . . . . . . . . . . . . . . . . . . . . . . . . . . . . . . . . . . . . . . . . . . . . . . . . . 20
12.2 Overburn . . . . . . . . . . . . . . . . . . . . . . . . . . . . . . . . . . . . . . . . . . . . . . . . . . . . . . . . 20
12.3 Read Error Skip . . . . . . . . . . . . . . . . . . . . . . . . . . . . . . . . . . . . . . . . . . . . . . . . . . 20
12.4 Format HDD . . . . . . . . . . . . . . . . . . . . . . . . . . . . . . . . . . . . . . . . . . . . . . . . . . . . . 21
12.5 Verify HDD . . . . . . . . . . . . . . . . . . . . . . . . . . . . . . . . . . . . . . . . . . . . . . . . . . . . . 21
12.6 Burn-in . . . . . . . . . . . . . . . . . . . . . . . . . . . . . . . . . . . . . . . . . . . . . . . . . . . . . . . . . 21
12.7 Update Firmware . . . . . . . . . . . . . . . . . . . . . . . . . . . . . . . . . . . . . . . . . . . . . . . . . 21
12.8 Compare Firmware . . . . . . . . . . . . . . . . . . . . . . . . . . . . . . . . . . . . . . . . . . . . . . . . 21
12.9 H/W Diagnostic . . . . . . . . . . . . . . . . . . . . . . . . . . . . . . . . . . . . . . . . . . . . . . . . . . 21
12.10 Load Default . . . . . . . . . . . . . . . . . . . . . . . . . . . . . . . . . . . . . . . . . . . . . . . . . . . . 22
12.11 CD+G . . . . . . . . . . . . . . . . . . . . . . . . . . . . . . . . . . . . . . . . . . . . . . . . . . . . . . . . . 22
12.12 ISRC & MCN . . . . . . . . . . . . . . . . . . . . . . . . . . . . . . . . . . . . . . . . . . . . . . . . . . . 22
12.13 Switch USB Mode . . . . . . . . . . . . . . . . . . . . . . . . . . . . . . . . . . . . . . . . . . . . . . . 22
12.14 CD-Text . . . . . . . . . . . . . . . . . . . . . . . . . . . . . . . . . . . . . . . . . . . . . . . . . . . . . . . 22
12.15 MultiSession DVD . . . . . . . . . . . . . . . . . . . . . . . . . . . . . . . . . . . . . . . . . . . . . . . 22
Appendix A. List of Functions . . . . . . . . . . . . . . . . . . . . . . . . . . . . . . . . . . . . 23
Appendix B. LCD Messages . . . . . . . . . . . . . . . . . . . . . . . . . . . . . . . . . . . . . . 25
Normal Conditions (for all DVD Duplicator models) . . . . . . . . . . . . . . . . . . . . . . . . . . . 25
Normal Conditions (for models that feature a hard disk drive) . . . . . . . . . . . . . . . . . . . . 26
Audio Editing . . . . . . . . . . . . . . . . . . . . . . . . . . . . . . . . . . . . . . . . . . . . . . . . . . . . . . . . . . 26
Appendix C. About DVD-R and DVD-RW Discs . . . . . . . . . . . . . . . . . . . . . 27
Handling Discs . . . . . . . . . . . . . . . . . . . . . . . . . . . . . . . . . . . . . . . . . . . . . . . . . . . . . . . . . 27
Loading and Ejecting Discs . . . . . . . . . . . . . . . . . . . . . . . . . . . . . . . . . . . . . . . . . . . . . . . 28
Appendix D. Specifications . . . . . . . . . . . . . . . . . . . . . . . . . . . . . . . . . . . . . . . 29
Appendix E. Technical Support and Warranty . . . . . . . . . . . . . . . . . . . . . . 30
Limited Warranty . . . . . . . . . . . . . . . . . . . . . . . . . . . . . . . . . . . . . . . . . . . . . . . . . . . . . . . 30
TEACdvwd17h.book Page iv Sunday, May 1, 2005 6:28 PM

TEAC Tower DVD Duplicator User’s Manual v
List of Figures
Figure 1. DVD Duplicator Unit Package Contents . . . . . . . . . . . . . . . . . . . . . . . . . . . . . . 2
Figure 2. Front Panel of the DVD Duplicator Unit . . . . . . . . . . . . . . . . . . . . . . . . . . . . . . 3
Figure 3. LCD Control Panel . . . . . . . . . . . . . . . . . . . . . . . . . . . . . . . . . . . . . . . . . . . . . . . 4
Figure 4. Rear Panel of the DVD Duplicator Unit . . . . . . . . . . . . . . . . . . . . . . . . . . . . . . . 5
Figure 5. Copy Function on LCD Panel . . . . . . . . . . . . . . . . . . . . . . . . . . . . . . . . . . . . . . 7
Figure 6. How to Handle Compact Discs (DVD-R and DVD-RW) . . . . . . . . . . . . . . . . 27
Figure 7. Ejecting the Disc Tray . . . . . . . . . . . . . . . . . . . . . . . . . . . . . . . . . . . . . . . . . . . 28
TEACdvwd17h.book Page v Sunday, May 1, 2005 6:28 PM

vi
TEAC Tower DVD Duplicator User’s Manual
TEACdvwd17h.book Page vi Sunday, May 1, 2005 6:28 PM

TEAC Tower DVD Duplicator User’s Manual 1
Chapter 1. Introduction
Thank you for purchasing a TEAC Tower DVD Duplicator.
The TEAC Tower DVD Duplicator is a stand-alone disc-to-disc DVD Duplicator
system that does not require connection to a computer. It can duplicate a single
master DVD to DVD media at up to 16X speeds, resulting in an exact replica of a
4.7GB disc. It can also duplicate discs to CD-R media at up to 48X speeds.
The TEAC Tower DVD Duplicator is designed to perform DVD copying quickly
and accurately. The DVD Duplicator automatically identifies source DVD
formats and replicates the content as required.
The TEAC Tower DVD Duplicator performs continuous copying with no waiting.
It is an ideal DVD Duplicator for the advanced user who requires speed and
accuracy.
You can set up your TEAC Tower DVD Duplicator very quickly and easily. There
is no need to install any software. There is no need to attach any cables to your
computer. The TEAC Tower DVD Duplicator functions entirely as a stand-alone
unit.
Note:
❑
TEAC Tower DVD Duplicators are available in 1x3 (one source drive and
three target drives) and 1x7 (one source drive and seven target drives) mod-
els, with or without internal hard disk drives. Please refer to “Specifica-
tions” on page 29 for detailed information on the model you purchased.
❑
This User's Manual is intended for both 1x3 and 1x7 Tower DVD Duplica-
tor systems. Operational instructions for all models are essentially the
same. The primary difference between models is the number of target drives
and the inclusion of an optional hard disk drive. Other minor differences
between the models are described herein as necessary.
Caution:
Your TEAC Tower DVD Duplicator can operate on either 115VAC or
220VAC voltage. Before you turn on the power to the unit, be certain to select
the correct voltage for your region by setting the AC Voltage Selector on the rear
panel. Failure to do so can result in damage to the unit. For more information,
refer page 5.
TEACdvwd17h.book Page 1 Sunday, May 1, 2005 6:28 PM

DVD Duplicator Package Contents
2 TEAC Tower DVD Duplicator User’s Manual
DVD Duplicator Package Contents
Your TEAC DVD Duplicator package includes the following items (see
Figure 1).
❑
TEAC (1x3 or 1x7) Tower DVD Duplicator unit
❑
AC power cable
❑
TEAC Tower DVD Duplicator User’s Manual
(this booklet)
Figure 1. DVD Duplicator Unit Package Contents
Note:
If any of the items above is missing from your package upon purchase,
please contact your vendor immediately.
1x3 DVD Duplicator AC power cable
User’s Manual
1x7 DVD Duplicator
OR
TEACdvwd17h.book Page 2 Sunday, May 1, 2005 6:28 PM

Front Panel
TEAC Tower DVD Duplicator User’s Manual 3
Front Panel
Figure 2 illustrates the front panel of the Tower DVD Duplicator unit.
Figure 2. Front Panel of the DVD Duplicator Unit
source drive:
Insert the disc to be copied into the source drive. Use the disc
tray to load a DVD into the drive. You can open the tray by pressing the eject
button (if the tray fails to open, you can use the emergency eject mechanism).
You can close the tray by pressing the eject button.
Notes:
❑
TEAC strongly recommends that you do not push the tray in to close it.
Please press the eject button to eject or retract the tray.
❑
The Tower DVD Duplicator may include an internal hard disk drive as
an alternate source drive. Please refer to “Specifications” on page 29
for detailed information on the model that you purchased.
LED status indicators
power switch
target drive
source drive
LCD control panel
target drive
TEACdvwd17h.book Page 3 Sunday, May 1, 2005 6:28 PM

Front Panel
4 TEAC Tower DVD Duplicator User’s Manual
LCD control panel:
Use the control panel buttons to navigate through the
various functions viewed on the LCD display.
Figure 3. LCD Control Panel
The DVD Duplicator control panel features an LCD display and four buttons.
These buttons are described in the following table:
target drives:
Insert a blank disc into each target drive to make a copy of the
source disc. You can open the tray by pressing the eject button (if the tray fails
to open, you can use the emergency eject mechanism). You can close the tray
by pressing the eject button.
power switch:
Use the power switch to turn the power to the DVD Duplicator
unit on and off.
LED power indicator:
The LED power indicator will be continuously lit
when the DVD Duplicator power is on
.
Press the Up arrow button to scroll up functions or menus.
Press the Down arrow button to scroll down functions or menus.
Press the ENT (Enter) button to execute a selected function.
Press the ESC (Escape) button to cancel a selected function or to return to
the main menu.
Note:
TEAC strongly recommends that you do not push the tray in to close
it. Please press the eject button to eject or retract the tray.
TEACdvwd17h.book Page 4 Sunday, May 1, 2005 6:28 PM

Rear Panel
TEAC Tower DVD Duplicator User’s Manual 5
Rear Panel
Figure 4 illustrates the rear panel of the DVD Duplicator unit.
Figure 4. Rear Panel of the DVD Duplicator Unit
cooling fan:
Ball-bearing fans cool the DVD Duplicator.
AC voltage selector:
Use this switch to select either 115VAC or 220VAC.
AC IN power connector:
Connect the included AC power cable to this input
connector. Plug the other end of the power cable into a three-prong receptacle
AC power outlet.
Caution:
Before you turn on the power to the DVD Duplicator, make sure
the correct voltage is selected. Otherwise, you risk damage to the unit. The
default setting is 115VAC.
Caution:
Do not attempt to bypass the grounding plug. Otherwise, you risk
electrical shock or damage to the unit.
Note:
To ensure proper operation, use only the original AC power cable with
your TEAC Tower DVD Duplicator unit.
AC IN power connector
cooling fans
AC voltage
selector
TEACdvwd17h.book Page 5 Sunday, May 1, 2005 6:28 PM

Rear Panel
6 TEAC Tower DVD Duplicator User’s Manual
TEACdvwd17h.book Page 6 Sunday, May 1, 2005 6:28 PM

Setup
TEAC Tower DVD Duplicator User’s Manual 7
Chapter 2. Using the DVD Duplicator
This chapter explains how to set up the DVD Duplicator, as well as basic
operation and menu functions.
Setup
1. Carefully remove the DVD Duplicator unit, AC power cord and user’s
manual from the shipping box.
2. Connect one end of the included power cable to the back of the DVD
Duplicator. Connect the other end of the power cable to a three-prong
receptacle AC outlet.
3. Turn on the power to the DVD Duplicator by pressing the power button
on the lower right-hand side of the unit.
During initialization, the DVD Duplicator performs a self-test in which the
unit’s internal buffer is tested, source and target drives are detected, and the
LCD display is tested. Once the initialization is complete, the DVD
Duplicator is ready for use.
The LCD initially displays the Copy function by default.
Figure 5. Copy Function on LCD Panel
Note:
The following instructions are applicable to 1x3 and 1x7 Tower DVD
Duplicators. The primary difference between models is the number of target
drives and the inclusion of an optional hard disk drive. Please refer to
“Specifications” on page 29 for detailed information on your model.
Note:
Please keep the original box and packaging materials for use in the
event of future storage or transportation of the unit.
Caution:
Do not attempt to bypass the grounding plug. Otherwise, you risk
damage to the unit and electrical shock.
TEACdvwd17h.book Page 7 Sunday, May 1, 2005 6:28 PM

Basic Operation
8 TEAC Tower DVD Duplicator User’s Manual
Basic Operation
This section explains the basic operation of the DVD Duplicator.
Copying from the Optical (DVD) Source Drive
1. Place a source disc in the disc tray of the source drive.
2. Switch to function
[1 Copy]
by pressing the button (if necessary).
3. Place a blank DVD-R disc into as many of the target drives as you
desire, then press the
(ENT)
button to start copying.
You do not need to insert a DVD disc into every available target drive. You
can make fewer copies if you prefer. The internal controller will
automatically detect inserted discs and issue the record command to only
those target drives that contain a blank disc.
When the copy operation is complete, the DVD disc in each of the target
drives will be ejected automatically.
Note:
The following instructions apply to all DVD Duplicator models.
Note:
❑
With the default setting, after a source disc has been successfully copied, the
DVD Duplicator automatically ejects the target DVD discs.
❑
With the default setting, if the copy operation fails, the failed target DVD disc
remains in the target drive. To remove the failed DVD disc, press the eject
button on the target drive and retrieve the disc. Press the eject button again
to retract the disc tray. You can change the default settings by using the
[Advanced Setup] menu. (For more information, see “12 Advanced Setup
(Adv Setup)” on page 20.)
TEACdvwd17h.book Page 8 Sunday, May 1, 2005 6:28 PM

Loading Data to and Copying from the Hard Disk Source Drive
TEAC Tower DVD Duplicator User’s Manual 9
Loading Data to and Copying from the Hard Disk Source Drive
During initialization (see Step 3 on page 7), the DVD Duplicator performs a self-
test to detect source drives. The DVD-ROM drive and hard disk drive will be
detected as available source drives. The DVD-ROM drive is the default source
drive.
The internal hard disk drive was formatted and partitioned at the factory. Each
partition occupies 5GB of hard disk space. The number of partitions depends on
the capacity of the hard disk drive. Partitions are arranged alphabetically and
initially contain no data. A set of data loaded into a partition on the hard disk drive
is called an “image file.”
To use the hard disk drive as the source drive, you must first load an image file
from a DVD onto a partition on the hard disk drive, select the partition that
contains the data you want to copy, specify the hard disk drive as the source drive,
then execute the copy function.
1. Insert a source DVD into the DVD-ROM drive.
This disc (DVD-ROM or DVD) contains the data that you wish to copy to the
partition on the internal hard disk drive.
2. Press the / buttons to select function menu
[9 Image]
, then press
the
(ENT)
button.
The
Image
menu includes the
Load, Delete Image, Image Info, Compare
Image, Select Image
,
Image Src Drive
and
ImageFormat Info
functions.
3. Press the / buttons to select function
[9-5 Select Image]
, then
press the
(ENT)
button to access the Select a Partition submenu.
The Select a Partition submenu enables you to select a partition (A, B, C, etc.)
into which to load an image file on the hard disk drive. (When the unit is
shipped from the factory, the partitions on the hard disk drive contain no
data.)
The LCD will display a message similar to the following for each
corresponding partition:
Select a Partition
No image in A
Note:
The following instructions apply only to Tower DVD Duplicator models
that feature a factory-installed hard disk drive (DVW-D13H and DVW-D17H).
TEACdvwd17h.book Page 9 Sunday, May 1, 2005 6:28 PM

Loading Data to and Copying from the Hard Disk Source Drive
10 TEAC Tower DVD Duplicator User’s Manual
4. Press the / buttons to select the desired partition letter.
The LCD will display partition A as the first option, but you can select any
partition letter at any time.
5. Press the
(ENT)
button to confirm the desired partition.
The LCD will display a message similar to the following:
Set Partition To A
(If you selected partition B, the LCD will display the message:
Set Partition To B,
and so on.)
6. Press the
(ESC)
button to return to function menu
[9 Image]
.
7. Press the / buttons to select function
[9-1 Load]
, then press the
(ENT)
button to transfer data from the DVD to the specified parti-
tion on the hard disk drive.
The data (image file) on the DVD in the source drive will be copied onto the
partition you selected in Step 5.
8. Once the data is loaded successfully, remove the source disc from the
DVD-ROM drive.
9. Repeat Steps 1 through 8 to load additional image files from other DVDs
to other partitions, if desired.
At this point, the selected partition is the same as the one you selected in Step
5 above. If you want to copy from this partition, skip to Step 12.
If you want to copy an image file from another partition into which you have
already loaded data, continue with Step 10.
10. Press the / buttons to select function
[9-5 Select Image]
, then
press the (ENT) button to access the Select a Partition submenu.
The Select a Partition submenu also enables you to select a partition (A, B, C,
etc.) from which you want to copy an image file.
Note: To help you quickly locate your data in the future, TEAC recommends
that you keep track of the data that you load into each partition.
TEACdvwd17h.book Page 10 Sunday, May 1, 2005 6:28 PM

Loading Data to and Copying from the Hard Disk Source Drive
TEAC Tower DVD Duplicator User’s Manual 11
11. Press the / buttons to select the partition you wish to copy from,
then press the (ENT) button.
The data will be copied from the selected partition when you specify the hard
disk drive as the source and execute the copy function as described in Steps
13 through 16.
12. Press the (ESC) button twice to exit to the DVD Duplicator’s main
menu.
13. Press the / buttons to select function menu [8 Select Source],
then press the (ENT) button to access a list of available source drive
options.
14. Press the / buttons to select the hard disk drive, then press the
(ENT) button.
The hard disk drive is now designated as the source drive.
15. Press the button to switch to function [1 Copy].
The LCD will display a message similar to the following:
1 Copy. P : A
This message indicates that the data will be copied from the hard disk drive’s
partition “A” (which was selected in Step 11).
(If you selected partition B, the LCD will display the message:
“1 Copy. P : B,” and so on.)
16. Place a blank DVD-R disc into each of the target drives, then press the
(ENT) button to start copying.
TEACdvwd17h.book Page 11 Sunday, May 1, 2005 6:28 PM

Loading Data to and Copying from the Hard Disk Source Drive
12 TEAC Tower DVD Duplicator User’s Manual
Note:
❑ With the default setting, after source data has been successfully copied to the
target DVD discs, the DVD Duplicator automatically ejects the discs.
❑ With the default setting, if the copy operation fails, the failed target DVD disc
remains in the target drive. To remove the failed DVD disc, press the eject
button on the target drive and retrieve the disc. Then press the eject button
again to retract the disc tray. You can change the default settings by using
the [Advanced Setup] menu. (See “12 Advanced Setup (Adv Setup)” on
page 20.)
TEACdvwd17h.book Page 12 Sunday, May 1, 2005 6:28 PM
/