Peavey JSX Mini Colossal User manual
- Category
- Musical Instrument Amplifier
- Type
- User manual
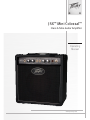
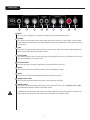
Peavey JSX Mini Colossal is a Class A tube guitar amplifier. It is the perfect choice for guitarists who demand the warm, natural sound of tube amplification in a compact and portable package. The JSX Mini Colossal features two channels, each with its own独立的gain and volume controls. The Clean channel provides a pristine,Fender-style sound, while the Lead channel offers a wide range of overdriven tones, from classic rock to high-gain metal. The JSX Mini Colossal also includes a built-in reverb, which adds depth and ambiance to your sound.
Peavey JSX Mini Colossal is a Class A tube guitar amplifier. It is the perfect choice for guitarists who demand the warm, natural sound of tube amplification in a compact and portable package. The JSX Mini Colossal features two channels, each with its own独立的gain and volume controls. The Clean channel provides a pristine,Fender-style sound, while the Lead channel offers a wide range of overdriven tones, from classic rock to high-gain metal. The JSX Mini Colossal also includes a built-in reverb, which adds depth and ambiance to your sound.


-
 1
1
-
 2
2
-
 3
3
-
 4
4
-
 5
5
-
 6
6
-
 7
7
-
 8
8
-
 9
9
-
 10
10
-
 11
11
-
 12
12


Peavey JSX Mini Colossal User manual
- Category
- Musical Instrument Amplifier
- Type
- User manual
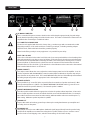
Peavey JSX Mini Colossal is a Class A tube guitar amplifier. It is the perfect choice for guitarists who demand the warm, natural sound of tube amplification in a compact and portable package. The JSX Mini Colossal features two channels, each with its own独立的gain and volume controls. The Clean channel provides a pristine,Fender-style sound, while the Lead channel offers a wide range of overdriven tones, from classic rock to high-gain metal. The JSX Mini Colossal also includes a built-in reverb, which adds depth and ambiance to your sound.
Ask a question and I''ll find the answer in the document
Finding information in a document is now easier with AI
in other languages
Related papers
-
Peavey JSXTM Mini ColossalTM Class A Tube Guitar Amplifier User manual
-
-
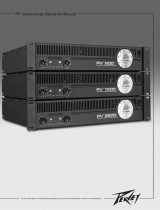 Peavy PV Series Power Amplifer Owner's manual
-
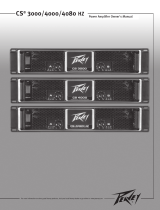
Peavey CS 4000 Owner's manual
-
 Peavy 4000 User manual
-
Crest Audio CC 4000 User manual
-
-
-
-


Other documents
-
 Architectural Acoustics IP-Six User manual
-
-
Crest Audio CC 4000 User manual
-
-
-
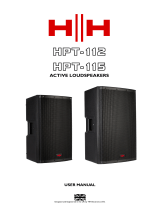 HH Electronics HPT-112 User manual
-
HH Electronics HPT-110 User manual
-
 Architectural Acoustics IP-Six User manual
-
Laney AH150 User manual
-


