Riva RC3502SV-7311 Quick Installation Guide
- Type
- Quick Installation Guide
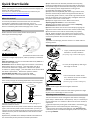
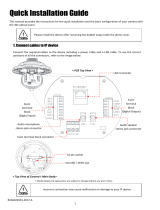
Riva RC3502SV-7311 is a high-quality IP camera with a range of features that make it ideal for home or business security. With its 358-degree panning and tilting capabilities, you can monitor a wide area with ease. The camera also features zoom and focus adjustment, so you can get a clear view of even distant objects. And with its built-in micro SD card slot, you can record footage locally for later review. Whether you're looking to protect your home or business, the Riva RC3502SV-7311 is a great choice.
Riva RC3502SV-7311 is a high-quality IP camera with a range of features that make it ideal for home or business security. With its 358-degree panning and tilting capabilities, you can monitor a wide area with ease. The camera also features zoom and focus adjustment, so you can get a clear view of even distant objects. And with its built-in micro SD card slot, you can record footage locally for later review. Whether you're looking to protect your home or business, the Riva RC3502SV-7311 is a great choice.


-
 1
1
-
 2
2


Riva RC3502SV-7311 Quick Installation Guide
- Type
- Quick Installation Guide
Riva RC3502SV-7311 is a high-quality IP camera with a range of features that make it ideal for home or business security. With its 358-degree panning and tilting capabilities, you can monitor a wide area with ease. The camera also features zoom and focus adjustment, so you can get a clear view of even distant objects. And with its built-in micro SD card slot, you can record footage locally for later review. Whether you're looking to protect your home or business, the Riva RC3502SV-7311 is a great choice.
Ask a question and I''ll find the answer in the document
Finding information in a document is now easier with AI
Related papers
-
 Riva RC3512HD-6311IR Quick Installation Guide
-
 Riva RC3512HD-6311 Quick Installation Guide
-
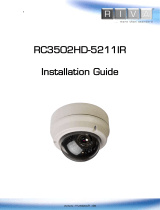 Riva RC3502HD-5211IR Installation guide
-
 Riva RC3402HD-6311 Installation guide
-
 Riva RC362HD-6211IR Installation guide
-
 Riva RC3502HD-5211IR Installation guide
-
 Riva RC3302HD-5344 Installation guide
-
 Riva RC4602SV01-2017-A Quick Installation Guide
-
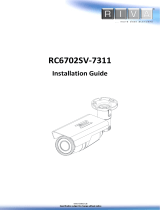 Riva RC6702SV-7311 Installation guide
-
 Riva RC5502HD-6415-05 Installation guide


