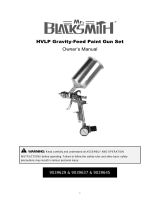
H4840GHVSG

Husky H4840GHVSG, HDK00600SG User guide

  • Hello! I am an AI chatbot trained to assist you with the Husky H4840GHVSG User guide. I’ve already reviewed the document and can help you find the information you need or explain it in simple terms. Just ask your questions, and providing more details will help me assist you more effectively!
USE AND CARE GUIDE
GRAVITY FEED HVLP SPRAY GUN
Questions, problems, missing parts?
Before returning to the store, call
Husky Customer Service
8 a.m. - 6 p.m., EST, Monday-Friday
1-888-43-HUSKY
HUSKYTOOLS.COM
Item #762 051
Model #H4840GHVSG
THANK YOU
products designed to enhance your home. Visit us online to see our full line of products available for your home improvement needs. Thank you
for choosing Husky!
(KIT)
2
Table of Contents
Table of Contents ...................................2
Safety Information ..................................2
Work Area Safety ..................................2
Personal Safety ...................................2
Air Compressor and Air Tool Safety ....................3
Warranty ..........................................3
Husky Air Tools Limited Two Year Warranty ..............3
Additional Limitations ..............................3
Pre-Installation .....................................4
Specications ....................................4
Package Contents .................................4
Installation ........................................5
Operation. . . . . . . . . . . . . . . . . . . . . . . . . . . . . . . . . . . . . . . . . . 6
Maintenance .......................................8
Troubleshooting ....................................9
Service Parts ......................................10
Safety Information
WORK AREA SAFETY
1. Keep your work area clean and well lit. Ensure oors are not
slippery from wax or dust.
2. Do not operate power tools in explosive atmospheres, such as
in the presence of ammable liquids, gases, or dust. Power
tools create sparks which may ignite the dust or fumes. Keep
bystanders, children, and visitors away while operating tools.
Distractions can cause you to lose control.
3. Always disconnect the air supply and power supply before
making adjustments, servicing a tool, changing an accessory or
when a tool is not in use.
4. For further information on the safe use of air tools, we advise
you to obtain a copy of CAGI B186.1-2009 from
Husky Air Tools
851 Jupiter Park Lane
Jupiter, Florida 33458
(877) 260-1630.
PERSONAL SAFETY
1. Use safety equipment. Always wear eye protection with side
shields when operating power tools. Dust mask, nonskid
safety shoes, hard hat, or hearing protection must be used for
appropriate conditions.
2. Stay alert when operating a power tool. Do not use the tool while
tired or under the inuence of drugs, alcohol, or medication.
3. Do not wear loose clothing or jewelry. Contain long hair. Keep
your hair, clothing, and gloves away from moving parts. Loose
clothes, jewelry, or long hair can be caught in moving parts.
4. Keep proper footing and balance at all times. Proper footing
and balance enables better control of the tool in unexpected
situations.
5. Do not use on a ladder or unstable support.
WARNING: Risk of injury to persons. Read and
understand operation instructions. Always become familiar
with all the instructions and warnings before operating any
pneumatic tool.
WARNING: Some dust created by power sanding, sawing,
grinding, drilling and other construction activities contains
chemicals known to cause cancer, birth defects or other
reproductive harm. Some examples of these chemicals are:
Lead from lead based paint, crystalline silica from bricks
and cement and other masonry products, arsenic and
chromium from chemically-treated lumber.
Your risk from those exposures varies, depending on how
often you do this type of work. To reduce your exposure to
these chemicals: work in a well-ventilated area, and work
with approved safety equipment, such as dust masks that
are specically designed to lter out microscopic particles.
CAUTION: This product contains chemicals known to
the State of California to cause cancer and birth defects or
other reproductive harm. Wash hands after handling.
3 HUSKYTOOLS.COM
Please contact 1-888-43-HUSKY for further assistance.
Safety Information (continued)
AIR COMPRESSOR AND AIR TOOL SAFETY
1. Risk of Bursting. Do not adjust the regulator to result in output
pressure greater than the marked maximum pressure of this air
tool.
2. Ensure the hose is free of obstructions or snags. Entangled or
snarled hoses can cause loss of balance or footing and may
become damaged.
3. Never leave a tool unattended with the air hose attached.
4. Do not operate this tool if it does not contain a legible warning
label.
5. Do not continue to use a tool or hose that leaks air or does not
function properly.
6. Never direct a jet of compressed air toward people or animals.
7. Protect your lungs. Wear a face or dust mask if the operation is
dusty.
WARNING: Do not use at a pressure greater than the
rated maximum pressure of this air tool.
WARNING: Do not attempt to modify this tool or create
accessories not recommended for use with this tool. Any
such alteration or modication is misuse and could result in
a hazardous condition leading to possible serious personal
injury.
WARNING: Operating any power tool can result in foreign
objects being thrown into your eyes, which can result in
severe eye damage. Before beginning operation, always
wear safety goggles, safety glasses with side shields, or
a full face shield when needed. Always use eye protection
marked to comply with ANSI Z87.1.
WARNING: Avoid Prolonged Exposure to Vibration
Pneumatic tools can vibrate during use. Prolonged exposure
to vibration or very repetitive hand and arm movements,
can cause injury. Stop using any tool if discomfort, tingling
feeling or pain occurs. You should consult your physician
before resuming use of the tool.
Warranty
HUSKY AIR TOOLS LIMITED TWO YEAR WARRANTY
If within two years from the date of purchase, this Husky air tool product fails due to a defect in materials or workmanship, please
immediately contact the Customer Service Team at 1-888-43-HUSKY 8 a.m. - 6 p.m., EST, Monday-Friday, except normal holidays. Do not
return the air tool to the store. Please be prepared to send the product, postage prepaid, to the address provided by the Customer Service
Team. The package must also include a copy of the dated rst owner purchase receipt with the air tool model included and circled. The
serial number and month/year of manufacture of the air tool must also be included to determine warranty. A defective product will be
promptly replaced with a new one of equal or greater value. This warranty excludes incidental/consequential damages and failures due to
misuse, abuse or normal wear and tear. This warranty gives you specic rights, and you may also have other rights, which vary, from state
to state.
Please contact the Customer Service Team at 1-888-43-HUSKY or visit www.HUSKYTOOLS.com.
ADDITIONAL LIMITATIONS
To the extent permitted by applicable law, all implied warranties, including warranties of merchantability or tness for a particular
purpose, are disclaimed. Any implied warranties, including warranties of merchantability or tness for a particular purpose, that cannot
be disclaimed under state law are limited to two years from the date of purchase. Husky is not responsible for direct, indirect, incidental,
special or consequential damages. If this air compressor is used for commercial purposes, the warranty will apply for ninety (90) days
from the date of purchase. Some states do not allow limitations on how long an implied warranty lasts and/or do not allow the exclusion
or limitation of incidental or consequential damages, so the above limitations may not apply to you. This warranty gives you specic legal
rights, and you may also have other rights, which vary from state to state.
WARNING: Hearing Protection is Recommended
Hearing protection should be used when the noise level
exposure equals or exceeds an 8 hour time-weighted
average sound level of 85dBA.
4
Pre-Installation
SPECIFICATIONS
Cup
Size
(CC)
Spray Pattern
(in)
Tip Size
(mm)
Weight
(lbs)
Length
(in)
Maximum
Operating Pressure
(PSI)
Air Cons.
(SCFM)
600
1.2 - 9.2
1.4
1.35 6.25
40
4
PACKAGE CONTENTS
E
B
C
D
A
Part Description Quantity
A Spray Gun 1
B Cleaning Brush 1
C Wrench 1
D Socket Spanner 1
E Paint Cup 1
5 HUSKYTOOLS.COM
Please contact 1-888-43-HUSKY for further assistance.
Installation
1
Cleaning the air hose
A 1/4” air hose is required, with a maximum length of 25 ft.
Clean the air hose of accumulated dust and moisture
before connecting it to the air supply.
NOTE: If a longer air hose is required, connect a 3/8" air
hose to the 1/4" air hose to ensure the spray gun has the
necessary air supply.
2
Connecting to the air supply
Always use clean dry air. Excessive moisture and dirt will
greatly reduce the life of any air motor. We recommend the
installation of an in-line lter-regulator as close to the tool
as possible.
Ensure all hoses and ttings are the correct size and
secured tightly.
WARNING: Lubricators should not be used with spray
guns. The use of an inline lubricator will damage the paint
nish.
Recommended Air Line Set-Up
Part Description
A Spray Gun
B Regulator
C Quick Plug
D Quick Coupler
E Air Hose
F In-line Filter
G Air Compressor
6
Operation
1
Operating the spray gun
A low pressure at the spray cap minimizes over-spray,
eliminating paint waste.
This air operated spray gun is designed to perform a variety of
of compressor air. This gravity feed spray gun features the
HVLP (high volume low pressure), which enhances the transfer
to conventional spraying.
Do not exceed the maximum air pressure of 40 psi.
The trigger lever of this gun has a two-step design. Press
. Press the trigger
lever to the second step to connect the paint material.
2
Adjust the air pressure with the trigger pulled and the air
control knob fully open. If reduced air pressure is desired
for some area of the spray job, use the air compressor
regulator or air control to reduce pressure as necessary.
clockwise.
knob counterclockwise.
Set the pattern size to the desired shape. For a full pattern,
turn the pattern control knob counterclockwise. For a
round pattern, turn the pattern control knob clockwise.
.
The direction of the fan (horizontal or vertical) can be
adjusted by loosening the air cap ring and turning the air
cap 90 degrees.
counterclockwise. Observe the spray pattern on the
atomization is achieved.
Pattern Control
Knob
(1)
Fluid Control
Knob
(2)
Air Control
Knob
(3)
1
2
3
Air Cap
(1)
Air Cap Ring
(2)
Horizontal Fan
(3)
Vertical Fan
(4)
4
1
2
3
7 HUSKYTOOLS.COM
Please contact 1-888-43-HUSKY for further assistance.
Operation
3
Preparing and loading the paint
Thoroughly mix and thin the paint in accordance with the paint
manufacturer’s instructions. Most materials will spray readily
if thinned properly.
Strain the material through cheese cloth or a paint strainer.
Fill the paint canister to the maximum of the 3/4 full capacity
carefully.
Set up a piece of cardboard or other scrap material to use as a
target. Adjust the spray gun for the best spray pattern and the
best atomization option.
Test the consistency of the material by making a few strokes
on a cardboard target. If the material still appears too thick,
add a small amount of thinner. THIN WITH CARE!! Do not
exceed paint manufacturer’s thinning recommendations.
4
Painting with the sprayer
Begin spraying. Always keep the spray gun at a right angle to
the work surface.
Keep the nozzle about 6 to 9 inches from the work surface
throughout the stroke and always keep the gun in motion
while spraying. Stopping gun movement in mid-stroke
will cause a build up of paint and result in runs. Do not
fan the gun from side to side while painting. This will
cause a build-up of paint in the center of the stroke and an
.
Trigger the gun properly. Start the gun moving at the
beginning of the stroke BEFORE SQUEEZING THE TRIGGER.
Release the trigger BEFORE STOPPING GUN MOVEMENT at
the end of the stroke. This procedure will feather (blend)
each stroke with the next without showing overlap or
unevenness.
The amount of paint being applied can be varied by
the speed of the stroke, distance from the surface and
.
Use a piece of cardboard as a shield to catch overspray
at the edges of the work to protect other surfaces. Use
masking tape to cover other areas if needed.
(continued)
8
Maintenance
Ensure the air line is shut-off and drained of air before removing this tool for service. This will prevent the tool from operating if the throttle
is accidentally engaged.
DAILY CLEAN UP
NOTE: Clean the spray gun immediately after use.
Remove and empty the canister. Rinse with a solvent recommended
for the paint or other material used. Rell the canister with clean solvent and
attach to the gun. Spray the solvent through the gun while shaking the gun vigorously.
Wipe the gun exterior with a solvent soaked rag. Repeat until the gun is clean.
Remove the air cap and soak in solvent until clean. Use a small brush for stubborn
stains if necessary. Toothpicks or small brushes may be used to clean air passages.
NEVER USE METAL OBJECTS TO CLEAN PRECISELY DRILLED PASSAGES.
DAMAGED PASSAGES WILL CAUSE IMPROPER SPRAYING.
Clean the gaskets with a solvent soaked rag. To prevent equipment damage, DO NOT
IMMERSE THE GASKET OR SPRAY GUN BODY IN SOLVENTS.
After using water to clean out water based paints or materials, spray mineral spirits
through the gun to prevent corrosion.
Use a non-silicone oil on all moving parts when reassembling. Use Vaseline®
or light grease on all threaded connections prior to storage.
9 HUSKYTOOLS.COM
Please contact 1-888-43-HUSKY for further assistance.
Troubleshooting
Problem Possible Cause Solution
Heavy spray pattern to the left
or right of the paint surface.
Holes in the left or right side of the air cap
are plugged.
Dirt on the left or right side of the uid tip.
Use only non-metalic paint.
Clean the air cap.
Clean the uid tip.
Heavy spray pattern to the top
or bottom of the paint surface.
Dried material at the top or bottom of the
uid tip.
The air cap is loose or the seat is dirty.
The air cap is plugged.
Use only non-metalic paint.
Clean the uid tip.
Clean and tighten the air cap.
Spray gun emits split spray
pattern.
The fan pattern is open too far.
The uid control is turned too far.
The atomization air adjustment is too high.
Partially close the pattern adjustment.
Increase uid using the uid control
knob.
Reduce the atomization air pressure.
The spray gun emits split spray
pattern.
The fan adjustment is partially closed.
The paint material is too thick.
Atomization pressure is too low.
Open the fan pattern adjustment.
Thin paint material to proper viscosity.
Increase the atomization pressure.
The spray gun emits sputtering
spray pattern.
The material level is too low. Rell the paint cup.
The container is tipped too far. Hold the spray gun upright.
Loose uid inlet connection. Tighten the uid cap.
Loose or damaged uid tip / seat. Adjust or replace the uid tip or seat.
Dry or loose uid needle packing nut. Lubricate and tighten the uid needle
and packing nut.
The air vent is clogged. Clear the vent hole.
Air is leaking from the air cap
without pulling the trigger.
The air valve stem is sticking. Lubricate the valve stem.
There is contaminate on the valve or seat. Clean air valve or seat.
The air valve or seat is worn or damaged. Replace air valve or stem.
The air valve spring is broken. Replace air valve spring.
Valve stem is bent. Replace valve stem.
Fluid leaking from uid tip of
spray gun.
The packing nut is too tight. Adjust the packing nut.
The uid tip is worn or damaged. Replace the tip and / or needle.
There is foreign matter on the tip. Clean the uid tip.
The uid needle spring is broken. Replace uid needle spring.
The spray gun emits excessive
overspray.
The atomization pressure is set too high. Reduce the atomization pressure.
The spray gun is held too far away from the
work surface.
Adjust to the proper distance.
Improper stroking (arcing, gun motion too
fast).
Move the spray gun at a moderate
pace, parallel to the surface.
The spray gun will not spray. There is no air pressure at the gun. Check the air lines.
The uid control is not open enough. Open uid control.
The material is too heavy. Thin the material or change over to a
pressure feed system.
10
Service Parts
11 HUSKYTOOLS.COM
Please contact 1-888-43-HUSKY for further assistance.
Service Parts (continued)
Reference
Number
Part Number Description Reference
Number
Part Number Description
1 9B9802-14 Air Cap 1.4 mm
23 9H9811 Fluid Adj. Nut
24 9H9812 Fluid Adj. Knob
2
9H9801
Air Cap Ring
25 9W7117H Air Inlet
3
9W9801-2
Gasket
26 9W71061 Retainer Ring
4
9B9803B1-14
Nozzle 1.4 mm
27 9W71283 Inlet Set Spring
28 9W71282 Washer
5
9H98064
Pattern Control Needle 29 9W71062 O-Ring
6
9H98063
Pattern Control Nut 30 9W71286H Inlet Set Nut
7
9H98062
O-Ring 31 9W71282H Inlet Set Needle
8
9H98065
Pattern Control Knob 32 9W71287 Inlet Set Knob
9
9H9805
Gun Body 33 9H9819 Trigger Lever
10
9W7131
Air Valve Copper Nut 34 9H9818 Trigger Pin
11
9W7132
Air Valve Packing Ring 35 9H9819-1 Washer
12
9W7133
Air Valve Bushing 36 9W98061 Retainer Ring (2)
13
9W7134
O-Ring 37 9W9821 Paint Inlet Bushing
14
9W7114
Air Valve Needle 37a 9W98302-1 Filter
15
9W7115
Air Valve Spring 38 9H98301-1 Ornamental Ring
16
9H98042
Fluid Needle Packing 39 9H98301 Gravity Paint Cup
17
9W98043
Spring 40 9H98305 Cup Lid
18
9H98041
Fluid Needle Seat 41 9B98031 Nozzle Bushing
19
9H9809B
Fluid Adj. Needle 1.4 mm 42 9W98032 Brass Washer
43 9W9801-1 Gasket
20
9H98081
Fluid Adj. Gasket
44 9W98262 Socket Spanner
21
9H9808
Fluid Valve Bushing
45 9B9826 Wrench
22
9H9810
Fluid Adj. Spring
46 9W9827 Cleaning Brush
Questions, problems, missing parts? Before returning to the store,
call Husky Customer Service
8 a.m.-6 p.m., EST, Monday-Friday
1-888-43-HUSKY
HUSKYTOOLS.COM
Retain this manual for future use.
/