888-97-282-G-00 rev. C • 12/12
11/13
12
1x
1
1
2
1
2
3
1
2
3
4
4
5
6
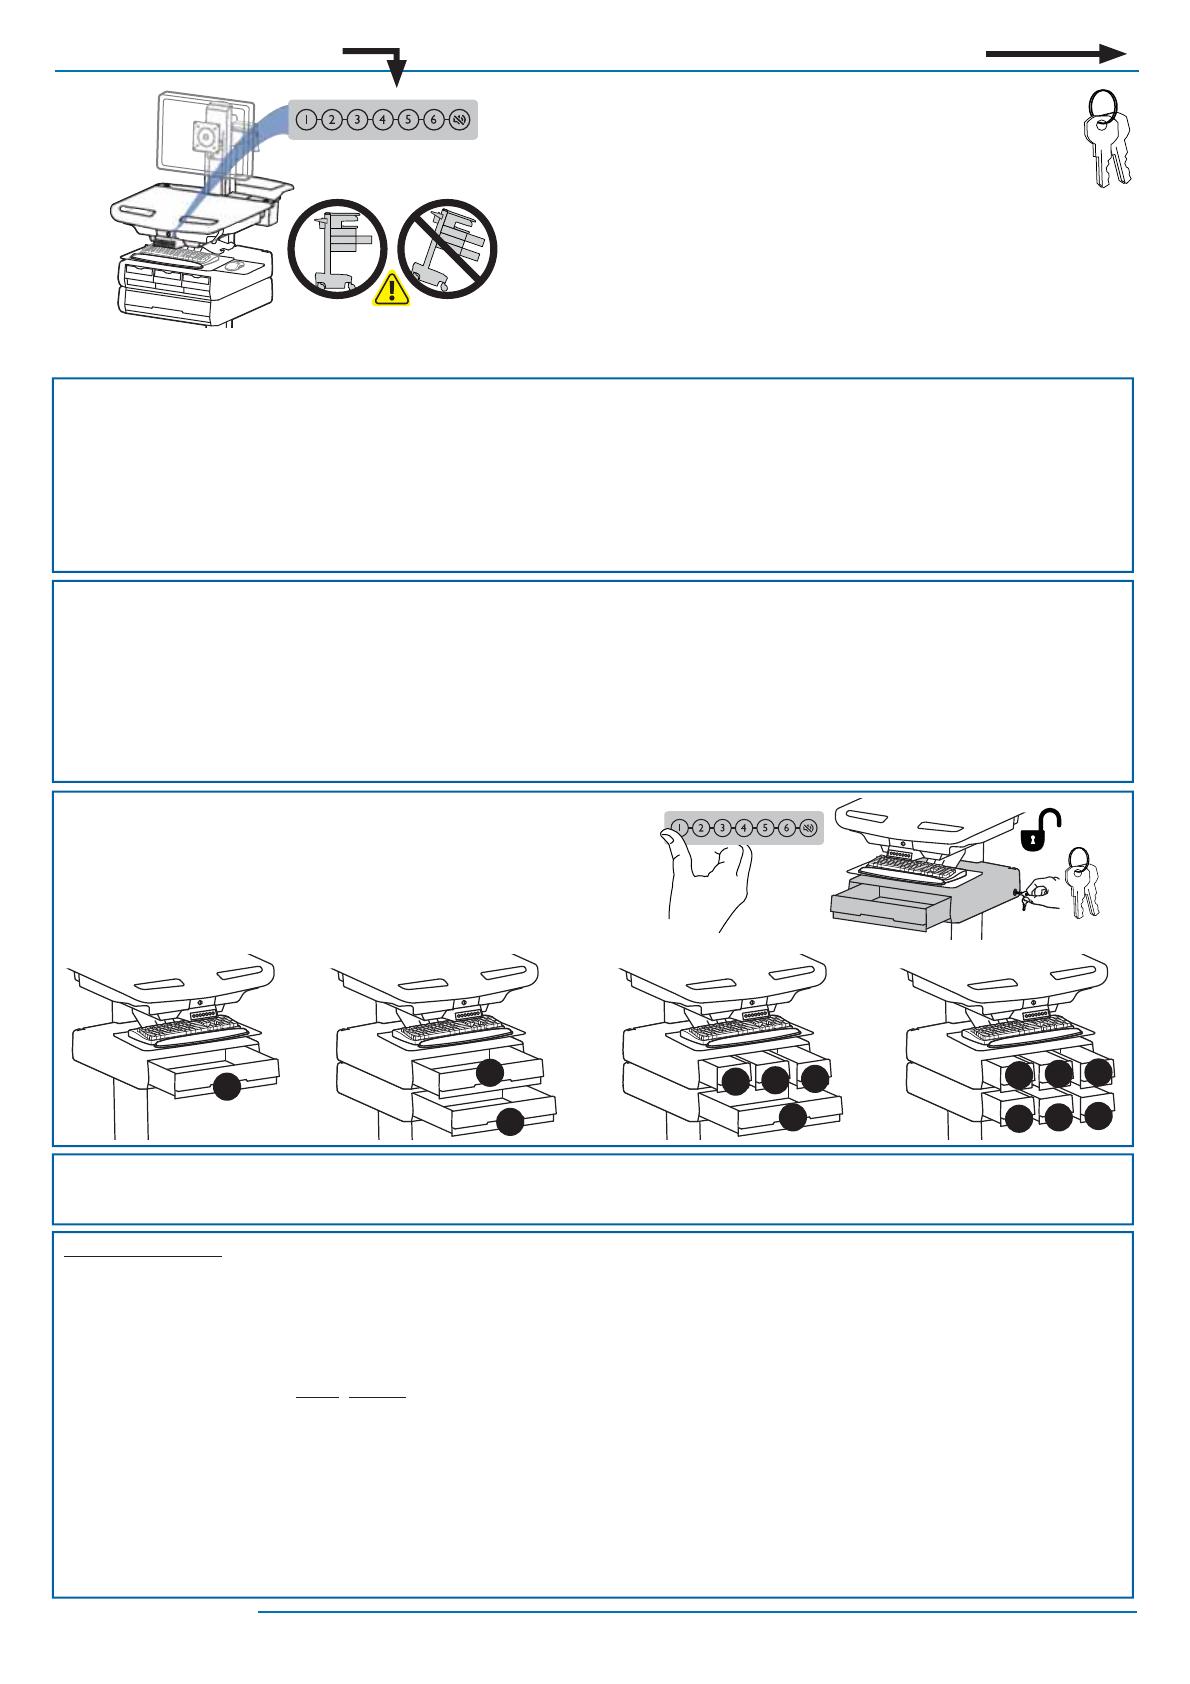
Powered Carts Non-Powered Carts
NOTE: User should change Master Personal Identi cation Number
(PIN) upon receipt of cart.
Lock Drawer:
• Wait 4 seconds for lock to engage automatically.
NOTE: Drawer must be fully closed to lock.
Unlock Drawer (3 methods):
• Enter Master PIN, then press desired drawer number*.
• Enter User PIN, then press desired drawer number*.
• Key - turn clockwise 1/4 turn
*Drawer Numbers:
Lost Master PIN
Contact Ergotron Customer Care for instructions.
Ensure that the main power system batteries are installed and functioning. The
power does not need to be turned on at the power system user interface.
Set-up Master PIN for the First Time (Default Master PIN: 12345)
Contact Ergotron Customer Care for instructions if Master PIN is lost.
1. Enter Master PIN (All numbers associated with available drawers will light).
2. Simultaneously press 3 and 5 (Numbers 3 and 5 will light green).
3. Simultaneously press 3 and 5 again (Numbers 3 and 5 will ash green).
4. Simultaneously press 3 and 5 a third time (All numbers will light green). You have 5 seconds to enter the new Master PIN.
5. Input new 5 digit Master PIN (All numbers will ash green).
6. Wait 5 seconds for system to exit program mode (All numbers will ash green several times).
Programming User PINS
1. Enter Master PIN (All numbers associated with available drawers will light).
2. Simultaneously press 4 and 6 (Numbers 4 and 6 will light green).
3. Simultaneously press 4 and 6 again (Numbers 4 and 6 will ash green).
4. Simultaneously press 4 and 6 a third time (All numbers will light green). You have 10 seconds to enter a new User PIN.
5. Input new 5 digit User PIN (All numbers will ash green). You can continue to enter 5 digit User PINs until nished.
After sitting idle for 10 seconds, system will exit program mode (All numbers will ash green several times).
NOTE: System will hold up to 100 User PINs. Once 100 User PINs storage is exceeded, the oldest User PIN will be overwritten by the next User PIN programmed.
Lights: Meaning
1,2,3,4,5 or 6 and Red mute button
Flashing and alarm sounding: Drawer is open longer than 20 seconds. Mute button can be pressed to mute alarm.
System will not function until drawer is shut and locked.
The number corresponding to the open drawer will Flash Red on the keypad.
All available drawer numbers
Flashing Green: Waiting for drawer selection (see Unlock Drawer)
All available drawer numbers
Flashing Red: Firmware upgrade is happening
All ash once: New code accepted.
All ash three times: Exiting program mode.
Drawer Troubleshooting
• Key pad numbers are dark:
- Touch anywhere on number pad to activate back-light, (drawer remains locked until you enter valid PIN).
- Check to make sure DC cable is connected.
• Drawer won’t open when User PIN is entered:
- Test system by entering Master PIN. If drawer doesn’t unlock, contact Ergotron customer care for "Lost Master PIN" instructions.
CAUTION: Close worksurface before opening drawers. Open only one drawer at a time. Do Not push
cart when drawers or worksurface are open. Failure to follow these instructions may cause the cart to be
unstable.


