Note: Please see the full product manual for web viewer setup, functions and
camera settings options.
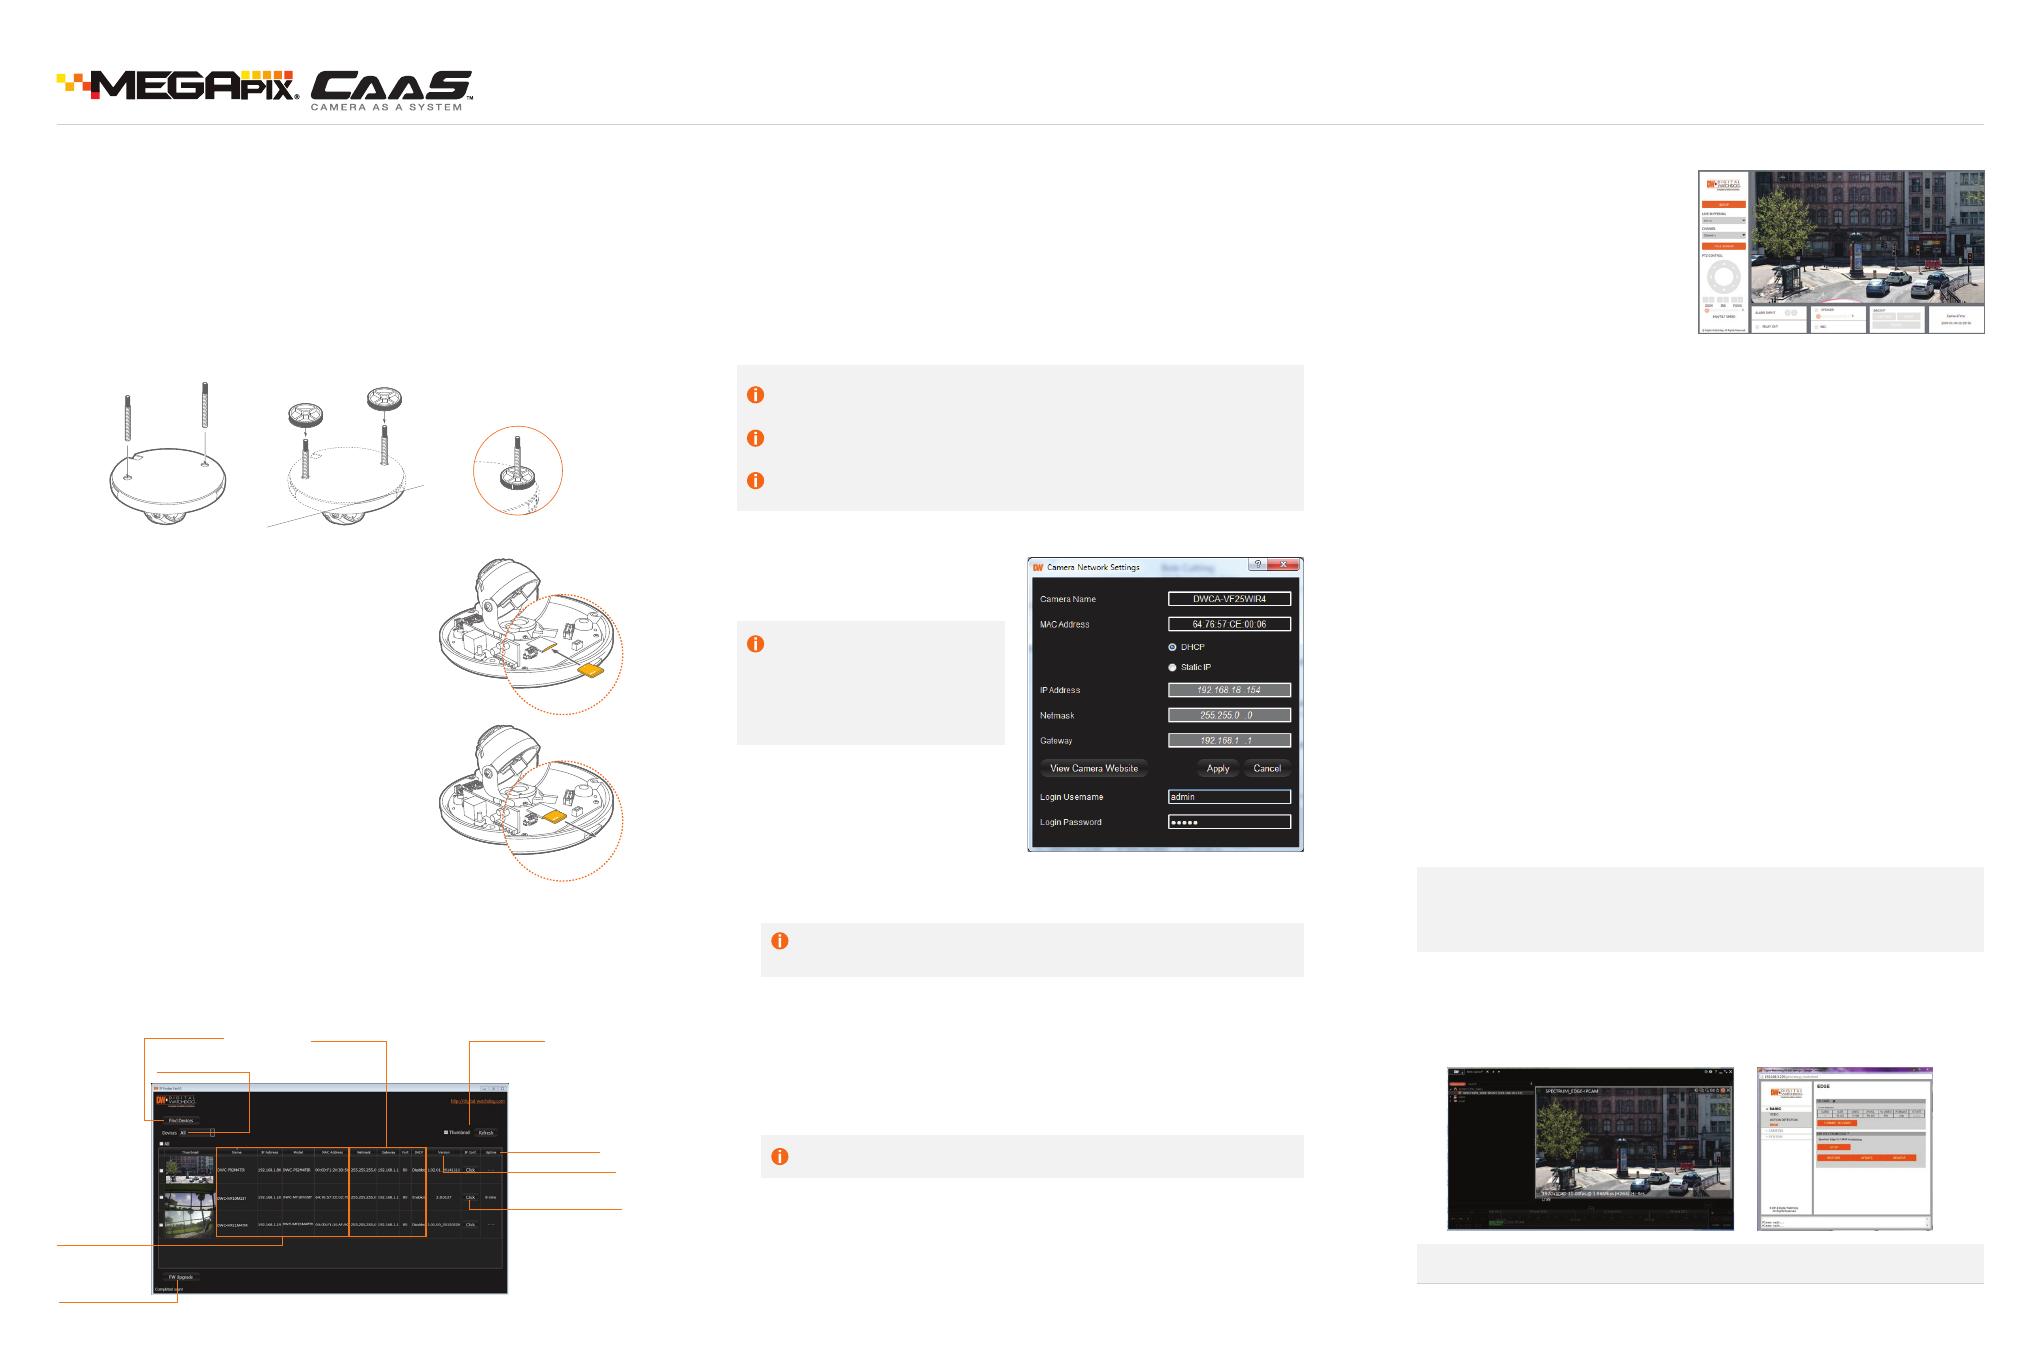
SearchforCameras
Camera’s
NetworkSe2ngs
ViewCamera’s
ThumbnailView
Camera’sFirmware
CameraUp>me
OpenCamera’sIP
Configura>onScreen
FilterSearchResults
CameraName,
Model,IPAddress,
andMACAddress
FirmwareUpgrade
Step 5 – DW IP FINDER
™
Step 7 – DW SPECTRUM EDGE
™
SETUP
Use the DW IP Finder
™
included in the camera’s accessory CD to scan the network
and detect all MEGApix
®
cameras, set the camera’s network settings, perform
rmware upgrade or access the camera’s web client.
Step 6 – WEB VIEWER
Once the camera’s network settings
have been setup properly, you can
access the camera’s web viewer
using the DW IP Finder
™
. To open the
camera’s web viewer:
1. Find the camera using the DW IP Finder
™
.
2. Double-click on the camera’s view in the results table.
3. Press the ‘View Camera Website’. The camera’s web viewer will open up in your
default web browser.
4. Enter the camera’s username and password (default are admin / admin).
5. If you are accessing the camera for the rst time, install the VLC les in order to
view video from the camera.
Step 3 – INSTALLING THE CAMERA (CONT.)
Installation using Mount Bolt and Screws:
1. Using the template sheet, make and drill the cabling holes on the wall/ceiling.
2. Secure the two long mounting screws to the camera’s base.
3. Pass the wires through and make all necessary connections.
4. Mount the camera by using the 2 mounting nuts. Rotate the locking discs over
the screws until the camera is held tightly from the mounting surface.
Quick Start Guide
4. The camera’s default network
information is:
Network Setup
1. Run the CD included with the camera and click on the DW IP Finder
™
le.
2. The software will scan your network for all supported cameras and display the
results in the table.
3. Select a camera from the list by double-clicking on the camera’s image or
clicking on the ‘Click’ button under the IP Conf. column. The camera’s network
information will appear. If necessary, you can adjust the camera’s network type.
Select DHCP if the internet service is dynamic IP. This will allow the camera to
receive its IP address from the DHCP server.
Select STATIC to manually enter the camera’s IP address, subnet mask,
Gateway and DNS information.
Contact your network administrator for more information.
Default TCP/IP information
• IP: 169.254.X.X
• Subnet Mask: 255.255.255.0
• Gateway: 192.168.1.1
• DNS: 16 8.126.63.1
5. To view the camera’s web viewer, click on ‘View Camera Website’.
6. To save the changes made to the camera’s settings, input the ID and PW of the
camera for authentication and click ‘Save’.
7. If the camera needs to be rebooted after the settings were changed, press the
‘Reboot’ button. The camera will cycle power and will appear back in the search
results once the reboot is complete.
8. To update the camera’s rmware from the DW IP Finder
™
, click on the rmware
tab, upload the rmware le and select the cameras to update. You can update
multiple cameras at the same time.
‘Port Forwarding’ has to be set in your network’s router for external access
to the camera.
Default ID / PW : admin / admin
Rev Date: 7/15 © 2015 Digital Watchdog. All rights reserved.
Step 4 – MANAGING THE SD CARD
This camera comes with an SD card pre-installed.
If you wish to upgrade the memory size or reset the
SD card:
1. To install the camera’s SD Card, locate the SD
card slot in the back of the camera module.
2. Insert a class 10 SD card into the SD card slot
by pressing the SD card slot. Please check your
camera model as your camera may come with
a 64GB SD Card pre-installed.
3. To remove the SD Card, press the card inward
to release from the card slot.
This camera comes with the DW Spectrum Edge
™
pre-installed. Follow the
instructions below if a new SD card is installed on the camera.
1. To add the Edge capability to the camera, install the DW Spectrum CaaS
™
software. This software will allow you to record locally to the camera, use the
failover redundancy feature and control your camera as any other server using
the DW Spectrum
™
IP VMS software.
2. To download the DW Spectrum CaaS
™
software and for more information,
please go to Digital Watchdog’s website at www.digital-watchdog.com.
3. Once the DW Spectrum CaaS
™
software is installed on the camera, you can
stop or restart the now installed DW Spectrum CaaS
™
server, update the
software or remove it from the camera.
4. To access the camera via the DW Spectrum
™
client:
a. Install the client software included in the accessory CD.
b. Run the DW Spectrum
™
software.
c. Enter the camera’s IP address in the login screen.
Note: Before Settings up the DW Spectrum Edge
™
, please make sure the
camera’s time zone is set properly. Go to the camera’s web viewer and
select: Setup > System > Date & Time. Select the proper time zone from
the drop-down menu and press save to save all changes.


