Page is loading ...

LIDL US LLC.
ARLINGTON
VA 22202
Made in /Hecho en: China
Last Information Update · Estado de las informaciones:
02 / 2020 · Ident.-No.: SWWS240C1-012020-2
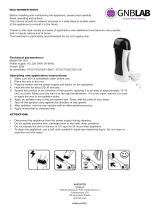
WAXING KIT
KIT DE DEPILACIÓN CON CERA SWWS 240 C1
IAN 344173_1910 IAN 344173_1910
US - EN Operating instructions Page 1
US - ES Instrucciones de uso Página 27
Before reading, unfold the page containing the illustrations and familiarize
yourself with all functions of the device.
Antes de empezar a leer abra la página que contiene las imágenes y, en
seguida, familiarícese con todas las funciones del dispositivo.
WAXING KIT
Operating instructions
KIT DE DEPILACIÓN CON CERA
Instrucciones de uso
9
CV_344173_SWWS240C1_LB9.indd 1-3CV_344173_SWWS240C1_LB9.indd 1-3 14.02.20 12:3914.02.20 12:39

B
A
CV_344173_SWWS240C1_LB9.indd 4-6CV_344173_SWWS240C1_LB9.indd 4-6 14.02.20 12:3914.02.20 12:39

LIDL US LLC.
ARLINGTON
VA 22202
Made in /Hecho en: China
Last Information Update · Estado de las informaciones:
02 / 2020 · Ident.-No.: SWWS240C1-012020-2
WAXING KIT
KIT DE DEPILACIÓN CON CERA SWWS 240 C1
IAN 344173_1910 IAN 344173_1910
US - EN Operating instructions Page 1
US - ES Instrucciones de uso Página 27
Before reading, unfold the page containing the illustrations and familiarize
yourself with all functions of the device.
Antes de empezar a leer abra la página que contiene las imágenes y, en
seguida, familiarícese con todas las funciones del dispositivo.
WAXING KIT
Operating instructions
KIT DE DEPILACIÓN CON CERA
Instrucciones de uso
9
CV_344173_SWWS240C1_LB9.indd 1-3CV_344173_SWWS240C1_LB9.indd 1-3 14.02.20 12:3914.02.20 12:39

US-EN │ 1 ■
SWWS 240 C1
Contents
Introduction ......................... 2
Intended use ......................... 2
Warning types ....................... 3
Safety instructions .................... 4
Important cord information ............ 8
Check package contents ............... 9
Appliance description ................ 10
Automatic shut-off ................... 10
Before first use ...................... 11
Preparing the appliance .............. 11
Epilation ........................... 13
Legs ......................................
14
Armpits ...................................
15
Bikini zone .................................
16
After epilation ..............................17
Cleaning ........................... 18
Storage ............................ 20
Disposal ........................... 21
Appendix .......................... 22
Technical specifications .......................22
FCC Compliance Statement ...................
22
3 year limited warranty .......................24
Distributor .................................
26
IB_344173_SWWS240C1_LB9.indb 1IB_344173_SWWS240C1_LB9.indb 1 14.02.20 12:3314.02.20 12:33

■ 2 │ US-EN
SWWS 240 C1
Introduction
Congratulations on the purchase of your new appliance.
You have selected a high-quality product.
The operating instructions are part of this product.
They contain important information about safety,
usage, and disposal. Before using the product, please
familiarize yourself with all operating and safety instruc-
tions.
Use the product only as described and for the specified
range of applications. Please also pass these operating
instructions on to any future owner.
Intended use
This appliance has been designed exclusively for epila-
tion of legs, armpits and the bikini zone on the human
body. This appliance is intended solely for use in private
households. Do not use it for commercial purposes.
Any use other than the intended use is considered to be
improper. The manufacturer accepts no responsibility
for damage caused by improper use. The risk is borne
solely by the user.
IB_344173_SWWS240C1_LB9.indb 2IB_344173_SWWS240C1_LB9.indb 2 14.02.20 12:3314.02.20 12:33

US-EN │ 3 ■
SWWS 240 C1
Warning types
The following warning types are used in these operating
instructions:
This is the safety alert symbol. It is used to
alert you to potential injury hazards. Obey
all safety messages that follow this symbol to
avoid possible injury or death.
► WARNING indicates a hazardous situation that, if
not avoided, could result in death or serious injury.
► CAUTION indicates a hazardous situation that, if not
avoided, could result in minor or moderate injury.
► NOTICE indicates information considered important,
but not hazard-related (e.g. messages related to
property damage).
►A TIP provides additional information that will assist
you in using the appliance.
IB_344173_SWWS240C1_LB9.indb 3IB_344173_SWWS240C1_LB9.indb 3 14.02.20 12:3314.02.20 12:33

■ 4 │ US-EN
SWWS 240 C1
Safety instructions
This section contains important safety instructions for using
the appliance. This appliance complies with statutory
safety regulations. Improper use may result in personal
injury and property damage.
IMPORTANT SAFETY
INSTRUCTIONS
When using electrical appliances, especially when
children are present, basic safety precautions should
always be followed, including the following:
READ ALL INSTRUCTIONS BEFORE USE!
KEEP AWAY FROM WATER!
DANGER – To reduce the risk of electrocution:
1. Always unplug the appliance immediately
after use.
2. Do not use the appliance while bathing or
showering.
3. Do not place or store the appliance where
it can fall or be pulled into a tub or sink.
4. Do not immerse the appliance, cord or plug
in water or other liquids.
IB_344173_SWWS240C1_LB9.indb 4IB_344173_SWWS240C1_LB9.indb 4 14.02.20 12:3314.02.20 12:33

US-EN │ 5 ■
SWWS 240 C1
5. Do not reach for an appliance that has
fallen into water. Unplug it immediately.
6. Never touch the appliance, power cord
or power plug with wet hands.
7. Do not use the appliance outdoors; use in
dry indoor rooms only.
8. Do not allow any liquid to run over the
appliance’s plug connections.
WARNING ‒ To reduce the risk of burns,
electrocution, fire, or injury to persons:
1. An appliance should never be left unattended
when plugged in.
2. Close supervision is necessary when this
appliance is used by, on, or near children
or individuals with certain disabilities.
3. This product is not intended for use by
persons (including children) with reduced
physical, sensory or mental capabilities or
lack of experience and knowledge, unless
they are supervised by a person who is
responsible for their safety or receive
instructions from this person on how to use
the product. Children should be supervised
to ensure they do not play with the product.
IB_344173_SWWS240C1_LB9.indb 5IB_344173_SWWS240C1_LB9.indb 5 14.02.20 12:3314.02.20 12:33

■ 6 │ US-EN
SWWS 240 C1
4. Cleaning and user maintenance should not
be performed by children, unless they are
being supervised.
5.
Use this appliance only for its intended
use as described in this manual. Use only
accessories/attachments recommended by
the manufacturer.
6. Never operate this appliance if it has a
damaged cord or plug, if it is not working
properly, or if it has been dropped, dam-
aged, or dropped into water. Return the
appliance to a service center for examina-
tion and repair. Under no circumstances
should you open the appliance yourself.
Repairs that are not carried out by a specialist
workshop could lead to physical injuries
and will also invalidate any warranty claims.
7. Keep the cord away from heated surfaces.
8. Never cover the appliance or place it on
soft surfaces, such as a bed or couch.
9. Never use while sleeping.
10. Never drop or insert any object into any
opening or tube.
IB_344173_SWWS240C1_LB9.indb 6IB_344173_SWWS240C1_LB9.indb 6 14.02.20 12:3314.02.20 12:33

US-EN │ 7 ■
SWWS 240 C1
11. Do not use outdoors or operate where
aerosol (spray) products are being used or
where oxygen is being administered.
12. Do not use an extension cord with this
appliance.
13. Provide a stable location for the appliance.
14. Do not apply hot wax near eyes or other
heat-sensitive areas, to any skin injury,
rashes, or surface growth.
15. Fill the appliance with wax only. Do not add
any aggressive substances or substances
containing solvents!
16. Do not let the cord hang over the edge
of the table or the counter where it could
be pulled on by children or tripped over
unintentionally.
17. Unplug from outlet when not in use, in case of
operating malfunctions, and before cleaning.
18. After use, the surfaces of the heating elements
will still have some residual heat.
19. Allow to cool before handling, cleaning, or
storing the appliance.
20. The physiological effects of this appliance
have not been investigated by Intertek.
IB_344173_SWWS240C1_LB9.indb 7IB_344173_SWWS240C1_LB9.indb 7 14.02.20 12:3314.02.20 12:33

■ 8 │ US-EN
SWWS 240 C1
21. Do not touch hot surfaces. Use handles or
knobs.
22. Test hot wax on a small area of the skin
for proper temperature and possible skin
reactions before using it. If you are suscep-
tible to allergic reactions or if you have
circulatory problems, it is recommended
that you consult a physician before using
this appliance.
23. There is a risk of injury if the appliance
is misused. Use the appliance only as
described in the instructions!
FOR HOUSEHOLD USE ONLY!
SAVE THESE INSTRUCTIONS!
Important cord information
This appliance has a polarized plug. To reduce the
risk of electric shock, this plug only fits into a polarized
outlet in one way. If the plug does not completely fit into
the outlet, reverse the plug. If it still does not fit, contact
a qualified electrician. Do not attempt to modify the
plug in any way.
IB_344173_SWWS240C1_LB9.indb 8IB_344173_SWWS240C1_LB9.indb 8 14.02.20 12:3314.02.20 12:33

US-EN │ 9 ■
SWWS 240 C1
Check package contents
This appliance comes standard with the following
components:
▯ Waxing Kit
▯ 18 wax discs
▯ Spatula
▯ Operating instructions
Risk of suffocation!
► Packaging materials should not be used as a toy.
♦ Remove all parts of the appliance and the operating
instructions from the packaging.
♦ Remove all packing material from the appliance.
► Check the package for completeness and signs of
visible damage. If the delivery is incomplete or
damage has occurred as a result of defective pack-
aging or during transport, contact the customer service
hotline (see "3 year limited warranty" section).
IB_344173_SWWS240C1_LB9.indb 9IB_344173_SWWS240C1_LB9.indb 9 14.02.20 12:3314.02.20 12:33

■ 10 │ US-EN
SWWS 240 C1
Appliance description
(See fold-out page for illustrations)
1 Inner bowl
2 Control indicator light
3 Power plug
4 Socket
5
Groove (for locking the lid)
6 Tray (for the spatula)
7 Lid
8 Spatula
9 Wax disc
Automatic shut-off
After 60 minutes, the appliance will turn off auto matically.
After 55 minutes, the control indicator light 2 will start
flashing to notify you that the appliance is about to turn
off automatically.
The automatic shut-off feature is not intended as a substitute
for removing the plug from the power after use!
It is merely a safety feature! Always remove the plug
from the power socket when the appliance is not in use!
IB_344173_SWWS240C1_LB9.indb 10IB_344173_SWWS240C1_LB9.indb 10 14.02.20 12:3314.02.20 12:33

US-EN │ 11 ■
SWWS 240 C1
Before first use
♦ Wipe the appliance with a damp cloth inside and
outside to remove any residual dust left over from
transport. Dry it well so that there is no moisture
left in the appliance.
♦ Place the appliance on a level and heat-resistant
surface. Also keep in mind that wax splashes may
drip onto the surface. The surface should therefore
be easy to clean.
Preparing the appliance
PROPERTY DAMAGE!
► Never operate this appliance when it is empty
(without wax).
► Fill the appliance with wax only. Do not add any
aggressive substances or substances containing
solvents!
► Never heat the wax in the plastic packaging.
► Never heat the wax in a microwave oven, over an
open flame, or on a stove.
► Never use pointed or sharp objects to remove
solidified wax from the appliance.
IB_344173_SWWS240C1_LB9.indb 11IB_344173_SWWS240C1_LB9.indb 11 14.02.20 12:3314.02.20 12:33

■ 12 │ US-EN
SWWS 240 C1
Once the appliance is set up on a suitable surface:
♦ Remove the wax discs 9 from its packaging.
♦ Add the required number of wax discs 9 to the inner
bowl 1. Use the following standard values as an
orientation guide. The values may vary.
Body region Number of wax
discs 9
Lower leg approx. 2 pcs. per
lower leg
Armpits 1 pc.
Bikini zone 1 pc.
Entire body (lower leg,
armpits, bikini zone) 6 pcs.
♦ Put the lid 7 on the appliance by placing the plastic
tab in the groove 5 and then turning the lid 7
slightly clockwise (see fold-out page):
♦ Insert the plug 3 of the power cord into the socket 4
on the appliance.
♦ Insert the plug into a power socket. The control
indicator light 2 in the base of the appliance turns
on and the appliance heats up.
♦ Stir the wax occasionally while it is melting.
As soon as the wax discs 9 have melted (it takes about
25–30 minutes for 6 discs), you can start epilating.
IB_344173_SWWS240C1_LB9.indb 12IB_344173_SWWS240C1_LB9.indb 12 14.02.20 12:3314.02.20 12:33

US-EN │ 13 ■
SWWS 240 C1
► If you realize that you need more wax than you
have melted, you can add additional wax discs 9
to the inner bowl 1. Wait until the wax has melted
before you start epilating.
► Never melt more than 6 wax discs 9 at a time.
Epilation
The skin regions you want to epilate should be dry,
clean, and free of skincare products, oils, or fats.
► Before first use, perform a skin test to find out whether
your skin reacts to the treatment. Apply a small amount
of melted wax to an inconspicuous area of the skin.
After removing the wax, check to see whether the
skin reacts in any way over the course of the next
24 hours. If you notice any skin reactions, stop using
this appliance. If in any doubt, seek medical advice.
► If you have a tendency toward ingrown hairs, carry
out peelings frequently. They can prevent the hairs
from growing inward.
► Always pull off the wax strips as close as possible
to the skin surface.
► Make sure that you do not get any wax on your
clothes. Wax residue can be very difficult to remove
and may discolor clothing.
IB_344173_SWWS240C1_LB9.indb 13IB_344173_SWWS240C1_LB9.indb 13 14.02.20 12:3314.02.20 12:33

■ 14 │ US-EN
SWWS 240 C1
Legs
Once the wax discs 9 are completely melted:
♦ Open the lid 7 by turning it slightly counterclockwise
and lifting it upward.
♦ Pick up a little wax using the flattened edge of the
spatula 8. You can wipe off excess wax on the rim
of the appliance.
♦ Apply the wax to the skin in the direction of hair
growth (from the knee toward the heel). The wax
strips should have the approximate thickness of an
orange peel and the area of two spatulas 8 laid
side by side. You may have to add wax. Try to make
sure that one end of the applied wax strip (the end
closer to your heel) is a little thicker as you will need
to be able to grip this end for removal.
♦ After application, you can place the spatula 8 into
the tray 6 on the edge of the appliance so that the
spatula 8 projects over the inner bowl 1.
♦ Wait about 30 - 60 seconds until the wax is dry.
♦ Pull the skin tight with one hand. Grip the wax strip
by the thicker end and pull it off with a rapid movement
against the direction of hair growth (from your ankle
toward your knee).
IB_344173_SWWS240C1_LB9.indb 14IB_344173_SWWS240C1_LB9.indb 14 14.02.20 12:3314.02.20 12:33

US-EN │ 15 ■
SWWS 240 C1
Repeat the process for the remaining areas of skin.
♦ When you are finished with the treatment, pull the
plug from the power socket to turn off the appliance.
The control indicator light 2 turns off.
Armpits
Once the wax disc 9 is completely melted:
♦ Open the lid 7 by turning it slightly counterclockwise
and lifting it upward.
► As armpit hairs tend to grow in different directions,
they need to be removed in at least two steps.
♦ Raise your elbow upward and hold it out behind you.
This tightens the skin in the armpit.
♦ Pick up a little wax using the flattened edge of the
spatula 8. You can wipe off excess wax on the rim
of the appliance.
♦ Apply it immediately from the middle of the armpit
upward in the direction of the elbow. The wax strips
should be roughly the thickness of an orange peel.
Try to make sure that one end of the applied wax
strip (the end closer to your elbow) is a little thicker as
you will need to be able to grip this end for removal.
♦ After application, you can place the spatula 8 into
the tray 6 on the edge of the appliance so that the
spatula 8 projects over the inner bowl 1.
IB_344173_SWWS240C1_LB9.indb 15IB_344173_SWWS240C1_LB9.indb 15 14.02.20 12:3314.02.20 12:33

■ 16 │ US-EN
SWWS 240 C1
♦ Wait about 30–60 seconds until the wax is dry.
♦ Grip the wax strip by the thicker end (the end closer
to your elbow) and pull it off downward with a rapid
movement against the direction of hair growth.
♦ To epilate the lower part of the armpit, apply the wax
from the middle of the armpit toward the bottom.
♦ Wait about 30–60 seconds until the wax is dry.
♦ Grip the wax strip at the lower end and pull it off
upward with a rapid movement against the direction
of hair growth.
♦ When you are finished with the treatment, pull the
plug from the power socket to turn off the appliance.
The control indicator light 2 turns off.
Bikini zone
Once the wax disc 9 is completely melted:
♦ Open the lid 7 by turning it slightly counterclockwise
and lifting it upward.
♦ Pick up a little wax using the flattened edge of the
spatula 8. You can wipe off excess wax on the rim
of the appliance.
♦ After application, you can place the spatula 8 into
the tray 6 on the edge of the appliance so that the
spatula 8 projects over the inner bowl 1.
IB_344173_SWWS240C1_LB9.indb 16IB_344173_SWWS240C1_LB9.indb 16 14.02.20 12:3314.02.20 12:33

US-EN │ 17 ■
SWWS 240 C1
► When epilating the bikini zone, treat only small
areas at a time. The skin is very sensitive.
♦ Tighten the skin with one hand and apply the wax in
the direction of hair growth (toward your inner thigh).
♦ Wait about 30–60 seconds until the wax is dry.
♦ Grip the wax strip by the thicker end (the end closer
to your inner thigh) and pull it off downward with a
rapid movement against the direction of hair growth.
♦ Repeat the process for the remaining areas of skin.
♦ When you are finished with the treatment, pull the
plug from the power socket to turn off the appliance.
The control indicator light 2 turns off.
After epilation
■ Clean the spatula 8 (see section "Cleaning").
■ You can remove small quantities of residual wax from
your skin using baby oil. If you do not have any baby
oil, you can also use olive oil or some other edible
oil.
■ You skin may be slightly reddened after epilation.
This is normal. Run cold water over affected areas to
soothe the skin. If your skin does not recover and/
or you experience a burning sensation, contact a
physician.
IB_344173_SWWS240C1_LB9.indb 17IB_344173_SWWS240C1_LB9.indb 17 14.02.20 12:3314.02.20 12:33
/