44 5
Return to the Top page
Before Use
Return to the Top page
How To Read This Manual
2 WARNING
To prevent injury or fire, take
the following precautions:
• Topreventashortcircuit,neverputor
leaveanymetallicobjects(suchascoinsor
metaltools)insidetheunit.
• Donotwatchorfixyoureyesontheunit’s
displaywhenyouaredrivingforany
extendedperiod.
• Ifyouexperienceproblemsduring
installation,consultyourKenwooddealer.
Precautions on using this unit
• Whenyoupurchaseoptionalaccessories,
checkwithyourKenwooddealertomake
surethattheyworkwithyourmodelandin
yourarea.
• Youcanselectlanguagetodisplaymenus,
audiofiletags,etc.SeeLanguage setup
(P.89).
• TheRadioDataSystemorRadioBroadcast
DataSystemfeaturewon’tworkwhere
theserviceisnotsupportedbyany
broadcastingstation.
Protecting the monitor
Toprotectthemonitorfromdamage,donot
operatethemonitorusingaballpointpenor
similartoolwiththesharptip.
Cleaning the unit
Ifthefaceplateofthisunitisstained,wipeit
withadrysoftclothsuchasasiliconcloth.
Ifthefaceplateisstainedbadly,wipethe
stainoffwithaclothmoistenedwithneutral
cleaner,thenwipeitagainwithacleansoft
drycloth.
¤
• Applying spray cleaner directly to the unit
may affect its mechanical parts. Wiping the
faceplate with a hard cloth or using a volatile
liquid such as thinner or alcohol may scratch
the surface or erase screened print.
Lens fogging
Whenyouturnonthecarheaterincold
weather,deworcondensationmayform
onthelensinthediscplayeroftheunit.
Calledlensfogging,thiscondensationon
thelensmaynotallowdiscstoplay.Insuch
asituation,removethediscandwaitforthe
condensationtoevaporate.Iftheunitstill
doesnotoperatenormallyafterawhile,
consultyourKenwooddealer.
Precautions on handling discs
• Donottouchtherecordingsurfaceofthe
disc.
• Donotsticktapeetc.onthedisc,orusea
discwithtapestuckonit.
• Donotusedisctypeaccessories.
• Cleanfromthecenterofthediscandmove
outward.
• Whenremovingdiscsfromthisunit,pull
themouthorizontally.
• Ifthedisccenterholeoroutsiderimhas
burrs,usethedisconlyafterremovingthe
burrswithaballpointpenetc.
• Discsthatarenotroundcannotbeused.
• 8-cm(3inch)discscannotbeused.
• Discswithcoloringontherecording
surfaceordiscsthataredirtycannotbe
used.
• ThisunitcanonlyplaytheCDswith
.
Thisunitmaynotcorrectlyplaydiscswhich
donothavethemark.
• Youcannotplayadiscthathasnotbeen
finalized.(Forthefinalizationprocesssee
yourwritingsoftware,andyourrecorder
instructionmanual.)
Before Use
How to Read this Manual
27
Return to the Top page
CD, Disc, iPod, USB device
Search Operation
You can search the music, video, or picture
file by some operations.
NOTE
• If you use a remote controller, you can jump
directly to the desired track/file with entering the
track/folder/file number, play time, etc. For details,
see “Direct search mode” (p.81).
List search
You can search tracks, folders, and files
according to hierarchy.
For USB devices and iPods, you can list and
search files in the device by using playlist.
1
Press the <MENU> button during
playback.
Simple Control screen appears.
2
Touch [ ].
List Control screen appears.
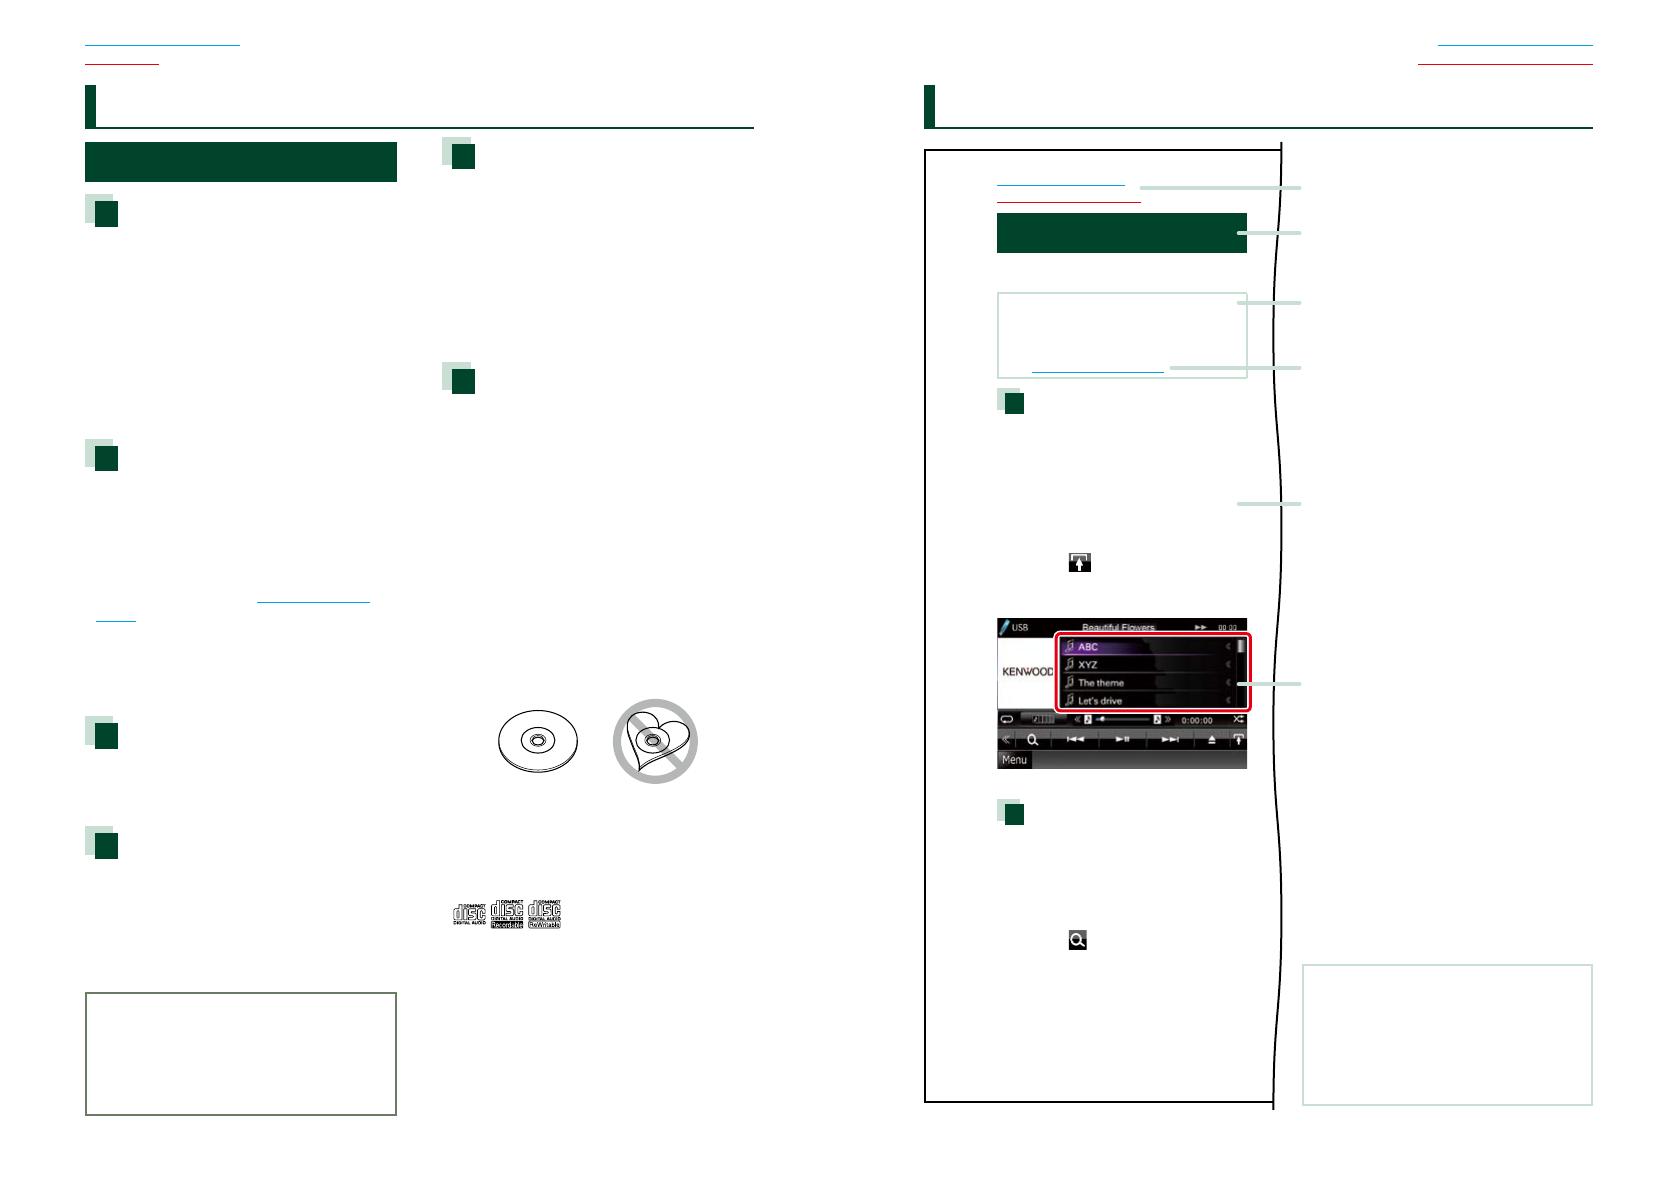
3
Touch desired track/file.
Playback starts.
Other search
When you want to narrow the list down,
there are other search ways.
1
Press the <MENU> button during
playback.
Simple Control screen appears.
2
Touch [ ].
The search type screen appears.
NOTE
• The screens and panels shown in this
manual are examples used to provide clear
explanations of the operations.
For this reason, they may be different from the
actual screens or panels used, or some display
patterns may be different.
Link header
You can refer each section or top page
with one-click.
Reference mark
Displayed in blue notes.
With one-click, you can jump to the
article related to the current section.
Screen shot
Shows some screen shots displayed during
operation for reference.
The area or keys to touch are surrounded
with a red frame.
Operation procedure
Explains necessary procedures to
achieve the operation.
< >: Indicates the name of panel
buttons.
[ ]: Indicates the name of touch
keys.
Operation title
Introduces the function.
NOTE
Introduces some tips, notes, etc.