XTM PLU636381 User manual

Type
User manual

XTM PLU636381 is a versatile and adjustable tub rack system designed to fit various tub sizes and heights, providing a secure and reliable platform for carrying cargo on your vehicle's tub. With its adjustable height ranging from 420mm to 590mm and width from 1370mm to 1680mm, it can accommodate a wide variety of loads and vehicles. The tub rack features robust construction with legs, elbows, cross beams, and top/side bars, ensuring durability and stability.

XTM PLU636381 is a versatile and adjustable tub rack system designed to fit various tub sizes and heights, providing a secure and reliable platform for carrying cargo on your vehicle's tub. With its adjustable height ranging from 420mm to 590mm and width from 1370mm to 1680mm, it can accommodate a wide variety of loads and vehicles. The tub rack features robust construction with legs, elbows, cross beams, and top/side bars, ensuring durability and stability.

XTM TUB RACK
Instruction Manual
PLU636381
Tools required:
- Tape measure
- Marking pen
- Masking tape
- Enamel paint pen
- Cordless drill
- 5mm & 6mm Hex / Allen keys
- 13mm & 17mm spanners
- 3mm & 10mm drill bits
+ Parts List
Thank you for purchasing the XTM Tub Rack. Please read these instructions carefully before
assembling and installing the tub rack to your vehicle. Assembly and installation requires
minimum 2 people.
Note: SRG accepts no responsibility for incorrect fitment / accidental damage to vehicle
during fitment. If unsure, please contact a reputable accessory fitter to install the tub racks for
you.
IMPORTANT
Load and weight capacities of the tub rack is dependent on vehicle load ratings. Please
be aware of vehicle load ratings before use.
Before installing the tub rack please ensure you are aware and understand the following:
Your vehicle's maximum load rating.
Your vehicle's maximum load rating including off-road capacity.
The maximum amount of weight you can safely add to a vehicle’s cargo area differs according
to make and type of vehicle including after market additions such as roof racks / bars.
Note: Roof rack & tub rack off-road limits are different to normal road use load
ratings. If in doubt contact your vehicle manufacturer for the specific loading capacity of your
vehicle.
FRubber Pad
4 pcs GHex Bolt
M10 50mm
M8 25mm M10 30mm
8 pcs
HHex Bolt
76 pcs IHex Bolt
4 pcs
JM8 Nut
M8 Flat
M8 Spring M10 Spring
M10 Flat
M10 Nut
76 pcs K12 pcs
LWasher
152 pcs MWasher
24 pcs
NWasher Washer
76 pcs O12 pcs
ETop/side Bar
6 pcs
ALeg
4 pcs
CCross Beam
1 pcs
DCross Beam
1 pcs
BElbow
4 pcs
+ Optional Heights
1.
2.
Assemble 4 sets of uprights using
4 Legs (A) and 4 Elbows (B).
Do not tighten at this stage
Fixings used:
20 x M8 Hex bolts (H)
20 x M8 Nuts (J)
40 x M8 Flat washers (L)
20 x M8 Spring washers (N)
Note: Allow 2 hole overlap
Measure here
The tub racks can be
assembled to fit various
tub sizes and heights.
+Assembly
Note: Allow 10mm narrower to
begin with as final adjustments
can be made later.
Measure internal width of tub.
When assembling tub rack,
vertical flanges of tub legs
must fit within this
measurement.
Adjustable 1370-1680mm
Adjustable
420-590mm
Minimum 2 hole overlap using
4 x M8 Hex bolts (H
Require 1 bolt on front and 2 bolts
on each side
3.
4.
36 x M8 Nuts (J)
Fixings used:
36 x M8 Hex bolts (H)
72 x M8 Flat washers (L)
36 x M8 Spring washers (N)
20 x M8 Nuts (J)
Fixings used:
20 x M8 Hex bolts (H)
40 x M8 Flat washers (L)
20 x M8 Spring washers (N)
Note: Require 1 bolt on top and 2 bolt on
each side.
1.
2.
+Mounting
Slide until vertical flanges fit within
internal tub lip measurement.
Final adjustments can be done at
mounting stage.
To avoid scratching and
for ease of marking,
determine position of tub
racks on tub and apply
masking tape on top lip
and inside face of lip.
Do this for all 4 corners.
Place assembled tub rack on
top of tub in desired position.
Mark drilling position of 3 holes
on each leg.
Once all holes are marked,
remove tub rack.
Tip: When drilling inner holes, allow
for thickness of rubber pad.
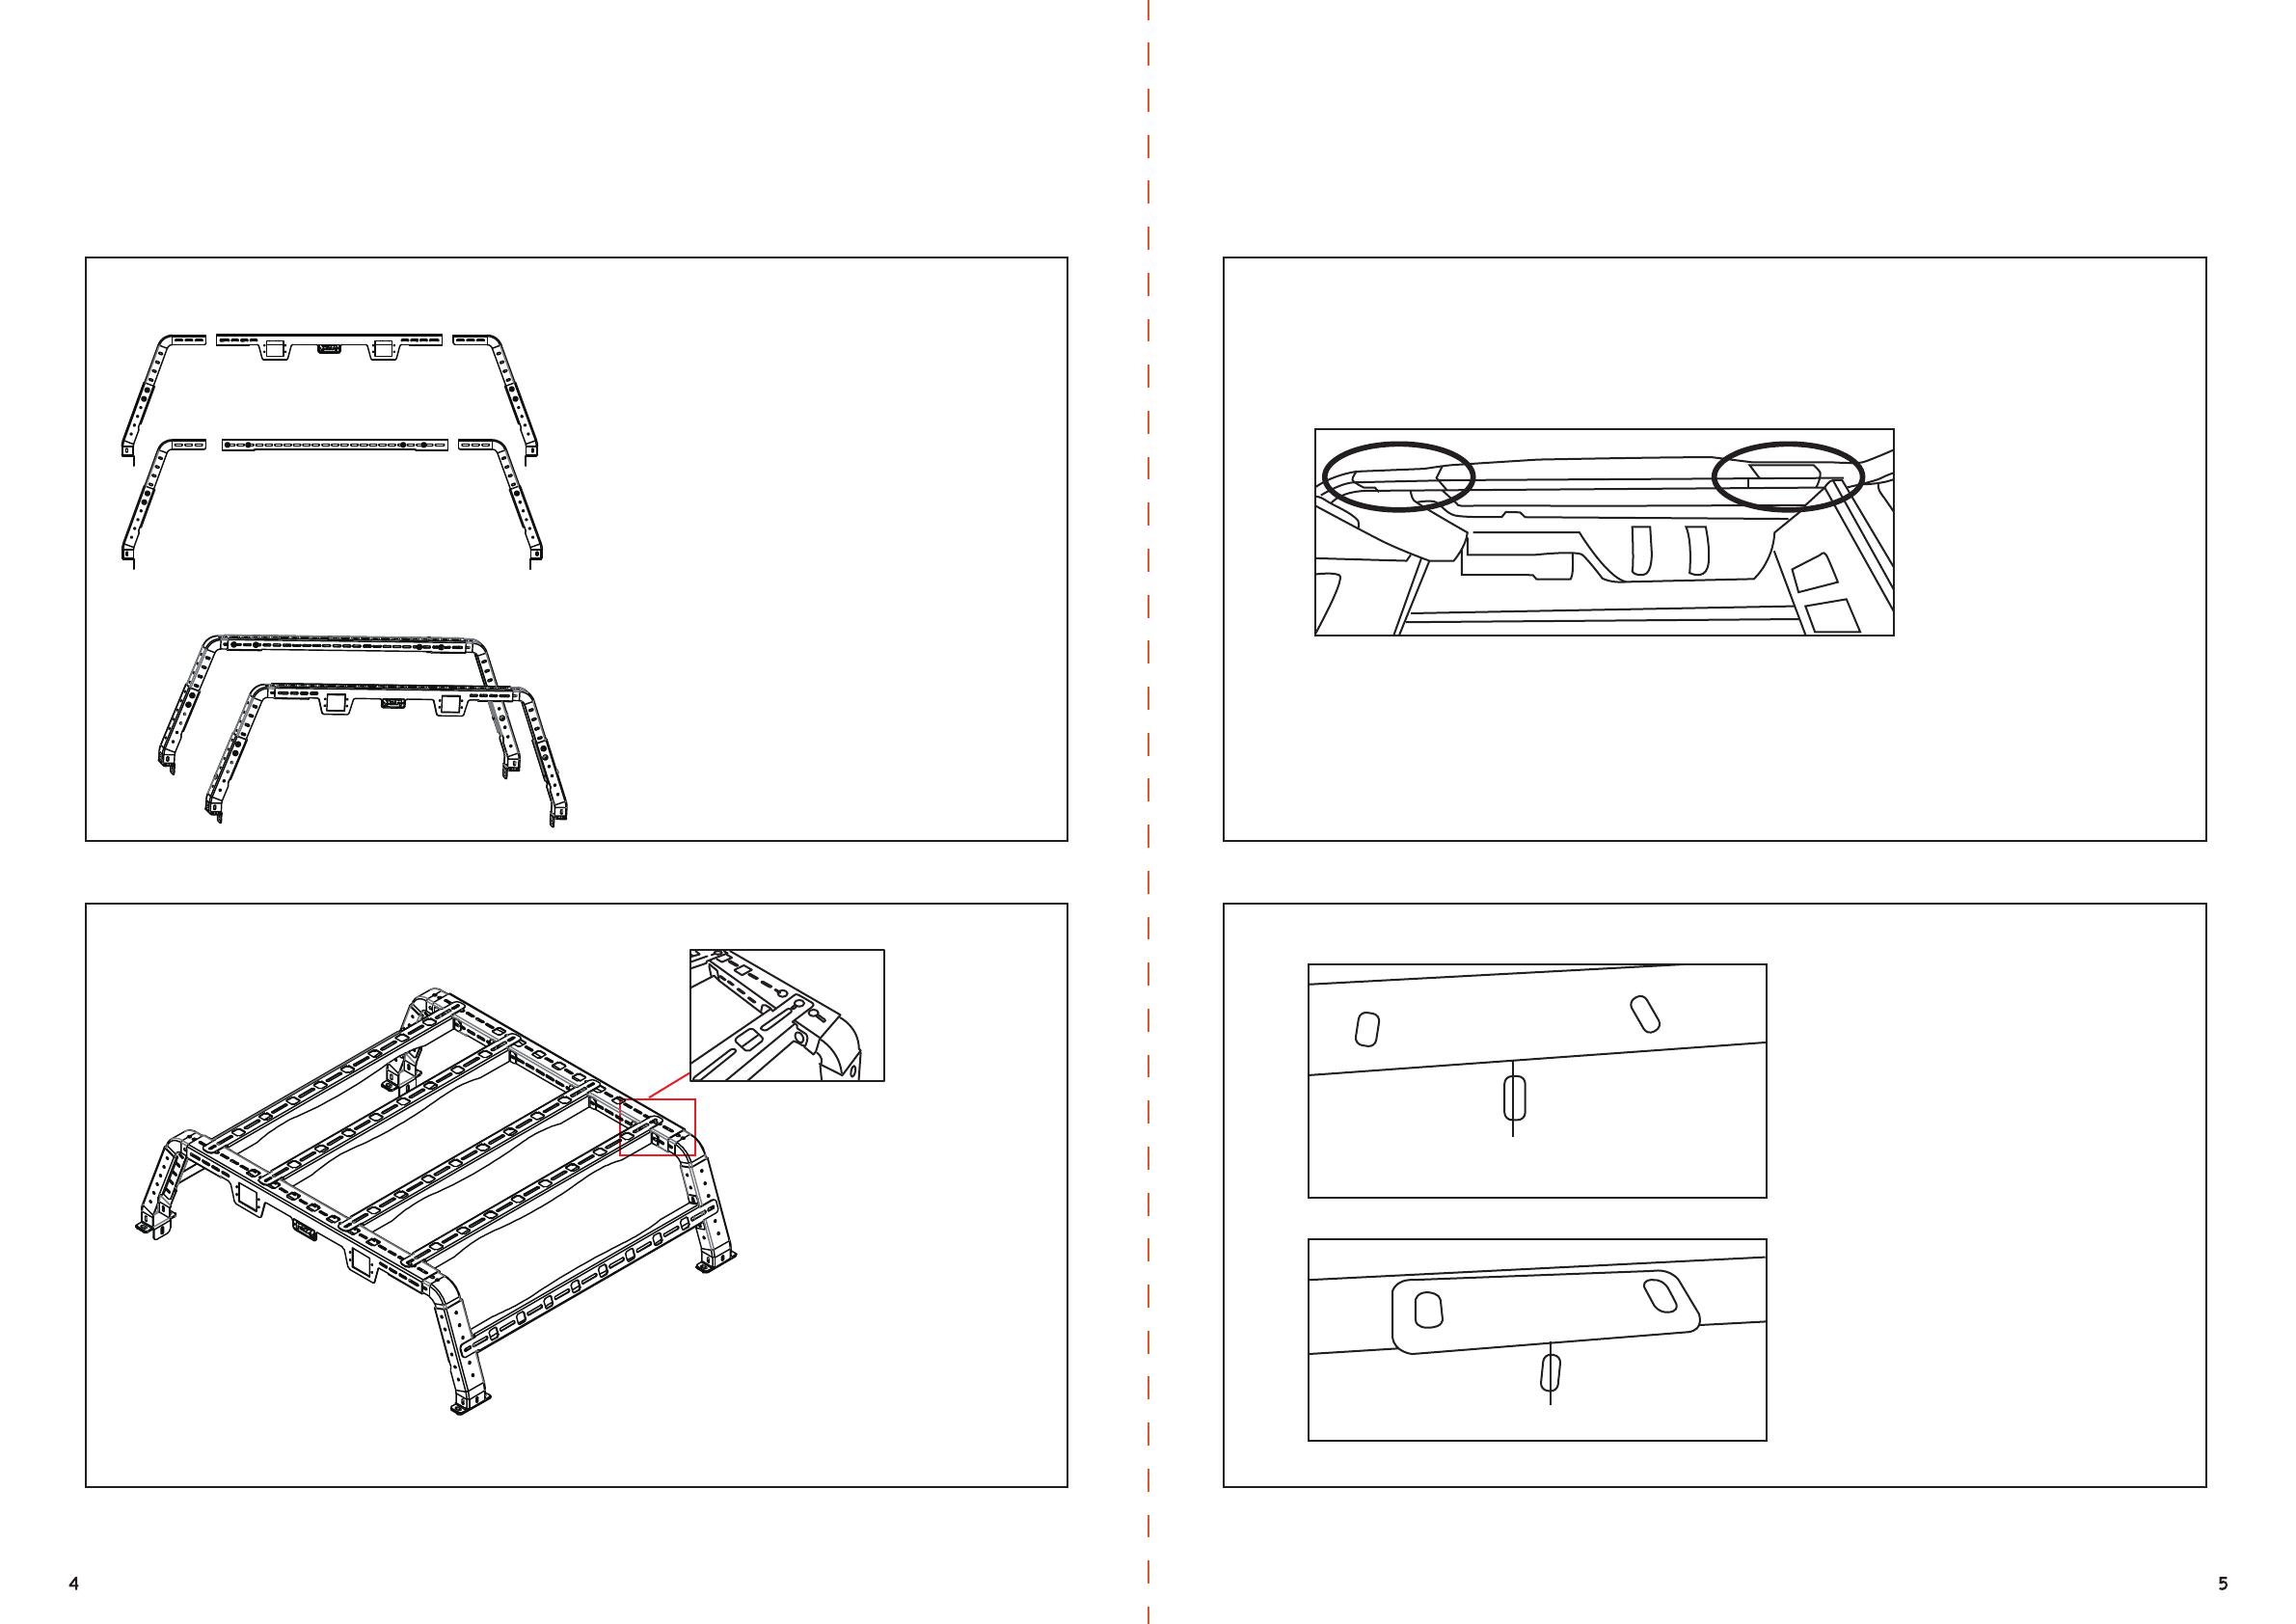
Attach Legs/Elbows to each end of
Cross Beam C/D
Create 2 hoops.
Do not tighten at this stage
Join hoops together by
attaching a minimum of
4 rails (E). Do not tighten
bars at this stage.
4.
3.
5.
Drill holes.
Use 3mm drill bit for pilot hole
followed by 10mm drill bit for
final hole.
Tip: De-bur holes and apply
enamel paint on bare metal to
avoid rust.
Remove backing from protective
rubber pad and stick down over holes
flush with inside lip.
Place tub rack on top of ute tub.
Align holes and fit M10 Hex bolts to
all 4 legs.
Once bolts, washers and nuts have
been seated, tighten all.
Fixings used:
8 x M10 50mm Hex bolts (G)
4 x M10 30mm Hex bolts (I)
12 x M10 Nuts (K)
24 x M10 Flat washers (M)
12 x M10 Spring washers (O)
Tighten and inspect
all bolts/nuts on legs,
elbows rails and cross
beams.
Tub rack is now ready
for use.
M10 50mm(G) M10 50mm(G)
M10 30mm(I)
PLU: 636381 CODE: LM-RB001
  • Page 1 1
  • Page 2 2
  • Page 3 3
  • Page 4 4
  • Page 5 5
  • Page 6 6

XTM PLU636381 User manual

Type
User manual

XTM PLU636381 is a versatile and adjustable tub rack system designed to fit various tub sizes and heights, providing a secure and reliable platform for carrying cargo on your vehicle's tub. With its adjustable height ranging from 420mm to 590mm and width from 1370mm to 1680mm, it can accommodate a wide variety of loads and vehicles. The tub rack features robust construction with legs, elbows, cross beams, and top/side bars, ensuring durability and stability.

Ask a question and I''ll find the answer in the document

Finding information in a document is now easier with AI