FPI FIREPLACE PRODUCTS INTERNATIONAL LTD. 6988 Venture St., Delta, BC Canada, V4G 1H4
919-908d
MODEL: I2500
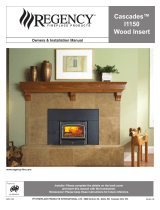
Cascades™
I2500 Wood
Fireplace
Insert
07.17.19
Owners & Installation Manual
Installer: Please complete the details on the back cover
and leave this manual with the homeowner.
Homeowner: Please keep these instructions for future reference.
www.regency-re.com
French Manual: https://bit.ly/2YuraWc
Manuel en Français: https://bit.ly/2YuraWc
0219WN025S
Tested & listed by:

2 | Regency I2500M
|
2
Thank-you for purchasing a
REGENCY FIREPLACE PRODUCT.
The pride of workmanship that goes into each of our products will give you years of trouble-free enjoyment. Should you have any questions about
your product that are not covered in this manual, please contact the REGENCY DEALER in your area.
“This wood heater has a manufacturer set minimum low burn rate that must not be altered. It is against federal regulations to alter this
setting or otherwise operate this wood heater in a manner inconsistent with operating instructions in this manual.” Failure to follow
the manual details can lead to smoke and CO emissions spilling into the home. It is recommended to have monitors in areas that are
expected to generate CO such as heater fueling areas.
“U.S. ENVIRONMENTAL PROTECTION AGENCY Certified to comply with 2020 particulate emission standards using cord wood.”
Tested & listed to ASTM E3053. Model Regency I2500 – 1.0 g /hr.
“This manual describes the installation and operation of the Regency I2500 catalytic equipped wood heater. This heater meets the 2020 U.S. En-
vironmental Protection Agency’s cord wood emission limits for wood heaters. Under specific test conditions this heater has been shown to deliver
heat at rates ranging from 17,178 Btu/hr. to 42,995 Btu/hr.” Efficiency is determined using the B415 method resulting in lower and higher heat values.
This heater generates the best efficiency when operated using well-seasoned wood and installed in the main living areas where the majority of the
chimney is within the building envelope. "This wood heater contains a catalytic combustor, which needs periodic inspection and replacement for
proper operation.
It is against federal regulation to operate this wood heater in a manner inconsistent with operating instructions in this manual, or if the
catalytic element is deactivated or removed."
CAUTION: BURN UNTREATED WOOD ONLY. OTHER MATERIALS SUCH AS WOOD PRESERVATIVES, METAL FOILS, COAL,
PLASTIC,GARBAGE, SULPHUR OR OIL MAY DAMAGE THE CATALYST
CAUTION: CATALYTIC COMBUSTOR IS FRAGILE--HANDLE WITH CARE.
The performance of the catalytic device or its durability has not been evaluated as part to this certification.
"This heater is designed to burn natural wood only. Higher efficiencies and lower emissions generally result when burning air dried seasoned hard-
woods, as compared to softwoods or to green or freshly cut hardwoods."
DO NOT BURN:
• Treated wood
• Lawn clippings or yard waste • Manure or animal remains
• Coal
• Materials containing rubber including tires • Saltwater driftwood or other previously salt
water saturated materials
• Garbage
• Materials containing plastic • Unseasoned wood
• Cardboard
• Waste petroleum products , paints or paint thinners or asphalt
products
• Paper products, cardboard, plywood or par-
ticle board. The prohibition against burning
these materials does not prohibit the use
of fire starters made from paper, cardboard,
saw dust, wax and similar substances for the
purpose of starting a fire in a wood heater.
• Solvents
• Materials containing asbestos
• Colored Paper
• Construction or demolition debris
• Trash
• Railroad ties
Burning these materials may result in release of toxic fumes or render the heater ineffective and cause smoke.
The authority having jurisdiction (such as Municipal Building Department, Fire Department, Fire Prevention Bureau, etc.) should be con-
sulted before installation to determine the need to obtain a permit.
This unit must be connected to either a listed factory built chimney suitable for use with solid fuels and conforming to, ULC629 in Canada or UL-
103HT in the United States of America. or code approved masonry chimney with flue liner.
I2500 is tested and certified to ULC-S628-93 (R1997) and UL1482-2011 (R2015).
SAVE THESE INSTRUCTIONS

Regency I2500M | 3
3
|
table of contents
safety label
Safety Label For I2500 ..................................................4
unit dimensions
Unit Dimensions ...........................................................5
installation
Before Installing Your Insert ...........................................6
Chimney Specifications .................................................6
Wood Insert Specifications ............................................6
Installing Your Insert ......................................................7
Masonry And Factory Built Fireplace Clearances ........8
Installation Into A Masonry Fireplace ............................9
Step-by-Step Installation Into A Factory Built Fireplace 9
Stainless Steel Smoke Deflector Installation ...............10
Faceplate And Trim Installation ....................................11
Flue Collar Removal and Installation & Deflector
Replacement ...............................................................13
Catalyst Combustor Removal & Replacement ............15
Fan Installation ............................................................17
Floor Protection ...........................................................18
Flue Baffle &Secondary Air Tube Installation ..............18
Glass Replacement .....................................................18
Wood Door & Handle Assembly ..................................19
Brick Installation ..........................................................20
Seasoned Wood ..........................................................21
Bypass Operating Handle ............................................21
operating instructions
Operating Instructions .................................................22
Draft Control ................................................................22
First Fire ......................................................................22
Fan Operation ..............................................................23
Ash Disposal ................................................................23
Safety Guidelines and Warnings .................................23
maintenance
Maintenance ................................................................24
Creosote .....................................................................24
Door Gasket ................................................................24
Glass Maintenance ......................................................24
Wood Storage ..............................................................24
Latch Adjustment .........................................................24
Removing Wooden Handle ..........................................24
Catalytic Combustor Part#021-531 .............................25
Troubleshooting Guide .................................................26
Annual Maintenance ....................................................27
parts
Main Assembly & Options - I2500 ...............................28
Faceplates - I2500 .......................................................29
Brick Panels - I2500....................................................30
Combustor Assembly - I2500 .....................................31
warranty
Warranty .....................................................................32
ALL PICTURES / DIAGRAMS SHOWN THROUGHOUT THIS MANUAL ARE FOR ILLUSTRATION PURPOSES ONLY.
ACTUAL PRODUCT MAY VARY DUE TO PRODUCT ENHANCEMENTS.
CAUTION: To avoid burns or wood splinters, when opening/closing the fuel
door or adding wood to the fire, You should always wear appropriate protective
gloves to protect your hands from the heat being emitted from this fireplace.

4 | Regency I2500M
|
4
safety decal
This is a copy of the label that accompanies
your Regency Insert. We have printed a copy
of the contents here for your review.
NOTE: Regency units are constantly being
improved. Check the label on the unit and if
there is a difference, the label on the unit is the
correct one.
Part #: 919-907
Size: 3"Hx20-1/2"W(leat100%)
Colour: Blackongrey,exceptforwhatisindicatedasbeingprintedredongrey.
Sept.17/18: Created decal
Sept.26/18: Modied French text
Oct. 31/18:Updated clearances + added EPA info
Nov. 1/18: Updated the decal as per Dave L
Nov. 13/18: updated the G/hr
Nov. 20/18: Updated wording added yr. to standard
SIGNATURE
Jan Feb Mar Apr May June
July Aug Sept Oct Nov Dec
DATE OF
MANUFACTURE
INSTALLANDUSEONLYINACCORDANCEWITHTHEMANUFACTURER'SINSTALLATIONANDOPERATINGINSTRUCTIONS.INSTALLANDUSEONLYINMASONRYFIREPLACEORFACTORY
BUILTFIREPLACE.CONTACTLOCALBUILDINGORFIREOFFICIALSABOUTRESTRICTIONSANDINSTALLATIONINSPECTIONINYOURAREA.
INSTALLERETUTILISERSELONLESINSTRUCTIONSDUFABRICANT.INSTALLERETUTILISERDANSUNFOYERDEMAÇONNERIEOUPRÉFABRIQUÉ.
APPELERUNINSPECTEURENBÂTIMENTOULEDÉPARTEMENTINCENDIELOCALPOURCONNAÎTRELESRESTRICTIONSETLESCONDITIONSD'INSPECTIONÀL'INSTALLATIONDANSVOTRE
SECTEUR.
LISTEDFACTORYBUILTFIREPLACEINSERT
CERTIFIEDFORUSEINCANADAANDU.S.A.
MODEL/MODÈLE : I2500M
TESTED&LISTEDBY/TESTÉ&APPROUVÉ:
ULC-S628-93(R1997)/UL-1482-2011(R2015)
DONOTREMOVETHISLABEL/NE
PASRETIRERCETTEÉTIQUETTE
473
MINIMUM CLEARANCES TO
COMBUSTIBLEMATERIALS(MEASURED
FROMINSERTBODY)
ADJACENT
SIDEWALLA)12in/305mm
MANTELB)17-1/4in/438mm
(3-1/2"MANTEL)
B)22-1/2in/572mm(12"MANTEL)
TOPFACINGC)16in/406mm
SIDEFACINGD)0.5in/13mm
(TOSIDESURROUND)
OPTIONALCOMPONENT:FAN(142-917),ELECTRICALRATING:VOLTS115,60HZ,0.6AMPS
DANGER:RISKOFELECTRICSHOCK.DISCONNECTPOWERBEFORESERVICINGUNIT.DONOTROUTEPOWERCORD
UNDERORINFRONTOFAPPLIANCE.DONOTCONNECTTHISUNITTOACHIMNEYFLUESERVICINGANOTHERAPPLI-
ANCE.DONOTREMOVEBRICKSORMORTARINMASONRYFIREPLACE.FORUSEWITHSOLIDWOODFUELONLY.DO
NOTUSEGRATEORELEVATEFIRE.BUILDWOODFIREDIRECTLYONHEARTH.RISKOFSMOKEANDFLAMESPILL-
AGE,OPERATEONLYWITHDOORSFULLYOPENORFULLYCLOSED.OPENFEEDDOORTOFEEDFIREONLY.RE-
PLACEGLASSONLYWITHCERAMICGLASS(5MM).INSPECTANDCLEANCHIMNEYFREQUENTLY.UNDERCERTAIN
CONDITIONSOFUSECREOSOTEBUILDUPMAY OCCURRAPIDLY.DONOTOVERFIRE,IFINSERTGLOWSYOUARE
OVER-FIRING.CATALYTICCOMBUSTORPART#021-531
PIÈCEFACULTATIVE:VENTILATEUR(142-917);PUISSANCEÉLECTRIQUE:115VOLTS,60HZ,0,6A
DANGER:RISQUED'ÉLECTROCUTION.DÉBRANCHERL’APPAREILAVANT TOUTERÉPARATION.NEPA SFAIREPASSER
LEFILÉLECTRIQUEDEVANTL’APPAREIL
NIENDESSOUS.NEPAS RELIERCETAPPAREILÀUNECHEMINÉEDESTINÉE
ÀL’ÉVACUATIOND’UNAUTREAPPAREIL.NEPASENLEVERDEBRIQUESNIDEMORTIERD’UNECHEMINÉEDEMA-
ÇONNERIE.N’UTILISERQUEDUCOMBUSTIBLEDEBOISSOLIDE.NEPAS SURÉLEVERLESBÛCHESNILESPLACER
SURDESGRILLES,MAISLESDÉPOSERDIRECTEMENTSURL’ÂTRE.RISQUEDEDÉGAGEMENTDEFUMÉEOUDE
FLAMMES:TOUJOURSGARDERLESPORTESCOMPLÈTEMENTOUVERTESOUFERMÉESLORSQUEL’APPAREIL
FONCTIONNE.DANSUNEMAISONMOBILE,TOUJOURSGARDERLESPORTESBIENFERMÉESLORSQUEL’APPAREIL
FONCTIONNE.OUVRIRLAPORTEUNIQUEMENTPOURALIMENTERLEFEU.SILESPORTESDUPOÊLERESTENT
OUVERTES,TOUJOURSUTILISERLEPARE-ÉTINCELLESFOURNIPARLEFABRICANT.REMPLACERLAVITREUNIQUE-
MENTPAR UNEVITREENVITROCÉRAMIQUE(5MM).INSPECTERETNETTOYERFRÉQUEMMENTLACHEMINÉE.SELON
LETYPED’USAGE,DELACRÉOSOTEPEUTS’ACCUMULERRAPIDEMENT.NEPASSURCHAUFFER;SIL’ENCASTRABLE
SEMETÀROUGIR,ILSURCHAUFFE.CATALYSEURDEPOSTCOMBUSTIONPIÈCEN
O
021-531
CAUTION / ATTENTION
HOTWHILEINOPERATIONDONOTTOUCH.KEEPCHILDREN,
CLOTHINGANDFURNITUREAWAY.CONTACTMAYCAUSE
SKINBURNS.READABOVEINSTRUCTIONS.
SURFACESCHAUDESLORSDEFONCTIONNEMENT.
NEPASTOUCHER.ÉLOIGNERLESENFANTS,LESVÊTEMENTSET
LES MEUBLES. TOUT CONTACT AVEC LA PEAU PEUT
OCCASIONNERDESBRÛLURES. LIRELESCONSIGNES DE
CETAPPAREIL.
FLOOR THERMAL INSULATION/PROTECTION WITH A R VALUE OF 2.8 IS REQUIRED IF THE UNIT IS RAISED 0 - 3" (76MM) (MEASURED FROM THE BOTTOM OF THE APPLIANCE).
THERMAL FLOOR PROTECTION IS NOT REQUIRED WHEN UNIT IS RAISER GREATER THAN 3" (76MM) (MEASURED FROM THE BOTTOM OF THE APPLIANCE).
INSTALLER OBLIGATOIREMENT UNE ISOLATION/PROTECTION THERMIQUE D'UNE VALEUR R DE 2,8 SI L'APPAREIL EST INSTALLÉ À UNE DISTANCE INFÉRIEURE À 3 PO (76 MM) DU SOCLE
(MESURE PRISE À PARTIR DU BAS DE L'APPAREIL).
LA PROTECTION THERMIQUE N'EST PAS REQUISE SI L'APPAREIL SE TROUVE À PLUS DE 3 PO (76 MM) DU SOCLE (MESURE PRISE À PARTIR DU BAS DE L'APPAREIL).
MADE IN CANADA
919-907
(DuplicateSerial#)
473
ManufacturedBy
:
FIREPLACEPRODUCTSINTERNATIONALLTD.
6988VENTUREST.,DELTA,BCV4G1H4
2019
2020
2021
2022
2023
Serial No./ No de série
0219WN025S
Tested and listed to:
U.S. ENVIRONMENTAL PROTECTION AGENCY CERTIFIED TO COMPLY WITH 2020 PARTICULATE EMISSION STANDARDS USING CORD WOOD.” TESTED & LISTED
TO ASTM E3053. MODEL REGENCY I2500 – 1.0 G /HR. THIS WOOD HEATER NEEDS PERIODIC INSPECTION AND REPAIR FOR PROPER OPERATION. CONSULT THE
OWNER'S MANUAL FOR FURTHER INFORMATION. IT IS AGAINST FEDERAL REGULATIONS TO OPERATE THIS WOOD HEATER IN A MANNER INCONSISTENT WITH
THE OPERATING INSTRUCTIONS IN THE OWNER'S MANUAL. COMPONENTSREQUIREDFORINSTALLATION:5.5"(140mm)or6"(152mm)STAINLESSSTEELLINER.
CERTIFIÉ CONFORME AUX NORMES 2020 DU U.S. ENVIRONMENTAL PROTECTION AGENCY EN MATIÈRE D'ÉMISSION DE PARTICULES DE BOIS AVEC DU BOIS
DE CORDE''. TESTÉ & APPROUVÉ ASTM E3053. MODÈLE REGENCY I2500 – 1,0 G /H. CET APPAREIL DE CHAUFFAGE AU BOIS DOIT ÊTRE INSPECTÉ PÉRIODIQUE-
MENT ET RÉPARÉ POUR FONCTIONNER CORRECTEMENT. CONSULTER LE MANUEL D’INSTALLATION POUR PLUS D’INFORMATION. LA RÉGLEMENTATION
FÉDÉRALE INTERDIT DE FAIRE FONCTIONNER UN TEL APPAREIL SI LES CONSIGNES D'UTILISATION CONTENUES DANS LE PRÉSENT MANUEL NE SONT PAS
RESPECTÉES.
PIÈCES REQUISES POUR L'INSTALLATION : DOUBLURE EN ACIER INOXYDABLE DE 5,5 PO (140 mm) OU 6 PO (152 mm)
919-907
SAFETY LABEL FOR I2500

Regency I2500M | 5
5
|
dimensions
35"
890mm
31
1
8
"
792mm
7
5
8
"
192mm
10
7
8
"
276mm
11
1
4
"
284mm
23
1
4
"
591mm
21
3
8
"
542mm
20
3
4
"
526mm
5
5
8
"
141mm
17"
433mm
5
3
8
"
137mm
20
3
4
"
528mm
22"
558mm
*
*
From back of faceplate (not shown) to fuel door opening
7" (178mm)

6 | Regency I2500M
|
6
installation
CHIMNEY
SPECIFICATIONS
Before installing, check and clean your chimney
system thoroughly. If in doubt about its condition,
seek professional advice. Your Regency Insert
is designed for installation into a masonry fire-
place that is constructed in accordance with the
requirements of "The Standard for Chimneys,
Fireplaces, Vents, and Solid Fuel Burning Ap-
pliance", N.F.P.A. 211, the National Building
Code of Canada, or the applicable local code
requirements.
The appliance, when installed, must be electri-
cally grounded in accordance with local codes or,
in the absence of local codes, with the National
Electrical Code, ANSI/NFPA 70, or the Canadian
Electrical code, CSA C22.1.
Regency Inserts are designed to use either a
5.5" (140mm) or 6" (152mm) flue.
A continuous liner is required from the unit to
the cap.
Requirements for Installing
Solid-fuel Inserts in Factory-built
Fireplaces.
1. The insert must be tested and meet the
requirements of UL 1482 (U.S.) and or ULC
S628 (Canada) when tested in a masonry
fireplace built per ULC S628.
2. The factory-built fireplace must be listed per
UL 127 or ULC S610.
3. Clearances obtained from the masonry fire-
place tests are also relevant for installation
in factory-built fireplaces.
4. Installation must include a full height listed
chimney liner type HT requirements (2100
degree F.) per UL 1777 (U.S.) or ULC
S635 (Canada). The liner must be securely
attached to the insert flue collar and the
chimney top, a continuous full liner.
5. Means must be provided to prevent room
air passage to the chimney cavity of the fire-
place. This may be accomplished by sealing
the damper area around the chimney liner,
or sealing the fireplace front.
6. Alteration of the fireplace in any manner is
not permitted with the following exceptions;
a. externaltrimpieceswhichdonotaect
the operation of the replacemaybe
removedprovidingtheycanbestored
onorwithinthereplaceforre-assembly
if the insert is removed.
b. thechimneydampermayberemoved
to install the chimney liner.
Regency Inserts are constructed with the high-
est quality materials and assembled under strict
quality control procedures that insure years of
trouble free and reliable performance.
It is important that you read this manual thor-
oughly and fully understand the safe instal-
lation and operating procedures. The more
you understand the way your Regency Insert
operates, the more enjoyment you will experi-
ence from knowing that your unit is operating
at peak performance.
BEFORE INSTALLING
YOUR INSERT
1. Please read this entire manual before you
install and use your new wood insert. Failure
to follow instructions may result in property
damage, bodily injury or even death. Install
and use only in accordance with manufac-
turer’s installation and operating instructions.
2. Check your local building codes - Building
Inspection Department. You may require
a permit before installing your insert. Be
aware that local codes and regulations may
override some items in the manual.
WARNING: Careless installation is the
major cause of safety hazard. Check all
local building and safety codes before
installation of unit.
3. Notify your home insurance company that
you plan to install a fireplace insert or hearth
heater.
4. Your fireplace insert is heavy and requires
two or more people to move it safely. The
insert can be badly damaged by mishandling.
5. If your existing fireplace damper control will
become inaccessible once you have installed
your Regency Insert, you should either
remove or secure it in the open position.
6. Inspect your fireplace and chimney prior
to installing your insert to determine that it
is free from cracks, loose mortar or other
signs of damage. If repairs are required,
they should be completed before installing
your insert. Do not remove bricks or mortar
from your masonry fireplace.
7. Do not connect the insert to a chimney
system servicing another appliance or
an air distribution duct.
7. Circulating air chambers (i.e. in a steel
fireplace liner or metal heat circulator) shall
not be blocked.
8. Means must be provided for removal of the
insert to clean the chimney flue.
9. Inserts that project in front of the fireplace
must be supplied with appropriate supporting
means.
10. Installer must mechanically attach the sup-
plied label to the inside of the firebox of the
fireplace into which the insert is installed.
In order for a solid-fuel insert to be certified for
use in factory-built fireplaces, the above infor-
mation must be clearly stated in the installation
manual and appropriate markings. Final approval
is contingent on the authority having jurisdiction.
WOOD INSERT
SPECIFICATIONS
Your fireplace opening requires the following
minimum sizes:
Height: 21.5"
Width: 25"
Depth: 17"
Two faceplates are available to seal the fireplace
opening:
Standard Oversize
40" W x 30" H 48" W x 33" H
"WARNING: This fireplace has been converted
for use with a wood insert only and cannot be
used for burning wood or solid fuels unless
all original parts have been replaced, and the
fireplace re-approved by the authority having
jurisdiction."
Important:
The blower to this appliance must be turned
off anytime the fuel door is opened. Prior to
turning the blower back on, ensure there are no
embers near the blower which may have fallen
onto the hearth when the fuel door was opened.
Once the fuel door is closed, the blower may
be turned back on.

Regency I2500M | 7
7
|
installation
View from Rear of Insert
INSTALLING YOUR
INSERT
Your insert is very heavy and will require two or
three people to move it into position. The insert
can be made a little lighter by removing the
cast iron door by opening it and lifting it off its
hinges. Be sure to protect your hearth extension
with a heavy blanket or carpet scrap during the
installation.
Convection Grills
The black convection grills are pre-installed on
this appliance.
If the optional nickel grills are being used, remove
the black grills and position the nickel grill on
the inside body face side and fasten using the
bolts, washers and nuts provided (2 per side)
Note: The grill has a front and rear, the holes
on the front side have rounded edges
and the rear holes have at edges.

8 | Regency I2500M
|
8
installation
Clearance diagram for installations
Side and Top facing is a maximum of 1-1/2" (38mm)
thick.
MASONRY AND FACTORY BUILT FIREPLACE CLEARANCES
The minimum required clearances to combustible materials when installed into a masonry or factory built fireplace are listed below.
F
G
*Floor Protection
Floor thermal insulation/protection with a R value of 2.8 is required if the unit is raised 0 - 3"
(0-76mm) (measured from the bottom of the appliance).
Thermal floor protection is not required when unit is raiser greater than 3" (76mm) (measured
from the bottom of the appliance).
Please check to ensure that your floor protection and hearth will meet the standards for clear-
ance to combustibles. Your hearth extension must be made from a non-combustible material.
Extending 16" for US and 18" for Canada—measured from the fuel loading door.
Side View
12" (305mm) Mantel
3-1/2" (89mm) Mantel
22-1/2"
(572mm)
17-1/4"
(438mm)
2
0
12
6
4
810
2
0
12
6
16
4
14
8
18
10
Top of
Unit
20
22
24
Clearances are critical.
**Mantel can be installed anywhere in shaded area
or higher using the above scale.
Note: Ensure the paint that is used on the
mantel and the facing is "heat resistant"
or the paint may discolour.
Unit
I2500
Adjacent
Side Wall
(to Side)
A
Mantle **
(to Top of
Unit)
B
Top
Facing
(to Top of Unit)
C
Side
Facing
D
Minimum
Hearth
Extension*
E
Minimum
Hearth Side
Extension*
F
To Top of Unit
G
12" (305mm) 17-1/4"(438mm)
for 3-1/2" (89mm)
mantel
16" (406mm) 1/2"(13mm)
to side surround
16" (406mm) USA 8" (203mm)
20" (508mm)
18"(457mm) Canada
22-1/2"(572mm)
for 12" (305mm)
mantel

Regency I2500M | 9
9
|
installation
INSTALLATION INTO A
MASONRY FIREPLACE
The insert must be installed as per the requirements
of your local inspection authority. A full flue liner
is required.
A full flue liner is a stainless steel rigid or flexible
liner pipe which is routed from the insert outlet collar
to the top of the chimney.
Flush Inserts
Full Flue Liner
(No Cleanout Required)
The use of this connection method listed on this
page not only increases the safety of your insert
by directing the hot gases up the flue, but will also
help increase the unit's efficiency and decrease
creosote deposits in the chimney.
When a connected flue or liner is in use, the insert
is able to “breathe” better by allowing a greater
draft to be created. The greater draft can decrease
problems such as, difficult start-ups, smoking out
the door, and dirty glass.
Draft is the force which moves air from the appliance
up through the chimney. The amount of draft in your
chimney depends on the length of the chimney, local
geography, nearby obstructions and other factors.
Too much draft may cause excessive temperatures
in the appliance and may cause damage. An un-
controllable burn or excessive temperature indicates
excessive draft. Inadequate draft may cause back
puffing into the room and plugging of the chimney.
Inadequate draft will cause the appliance to leak
smoke into the room through appliance and chim-
ney connector joints. Ensure the heater is installed
in areas that are not too close to neighbors or in
valleys that would cause unhealthy air quality or
nuisance conditions.
STEP-BY-STEP
INSTALLATION INTO A
FACTORY BUILT
FIREPLACE
1. When installed in a factory built fireplace, a
full stainless steel rigid or flexible flue liner is
mandatory, for both safety and performance
purposes. When a flue or liner is in use, the
insert is able to breathe better by allowing a
greater draft to be created. The greater draft
can decrease problems such as, difficult start-
ups, smoking out the door, and dirty glass.
2. In order to position the flue liner, the existing
rain cap must be removed from your chimney
system. In most cases the flue damper should
also be removed to allow passage of the liner.
3. In most cases opening the existing spark
screens fully should give enough room for the
insert installation. If it does not, remove and
store.
4. If the floor of your fireplace is below the level
of the fireplace opening, adjust the insert's
levelling bolts to accommodate the difference.
When additional shimming is required, use
non-combustible masonry or steel shims.
5. Measure approximately the alignment of the
flue liner with the position of the smoke outlet
hole on the insert to check for possible offset.
If an offset is required, use a proper stainless
steel unit available with the chimney liner.
6. Once the above items have been checked, slide
your insert into position after first positioning
the flue liner and offset if required. (Re-install
rain cap at completion of installation).
NOTE: Refer to "Requirements for Installing
Solid-fuel Inserts in Factory-built Fire-
places" section for the requirements
for installing solid fuel inserts in factory
built fireplaces.
Prior to sliding your insert into its final position and
attaching the connector or liner pipe, the faceplate
side panel plates must be installed as follows:

10 | Regency I2500M
|
10
installation
STAINLESS STEEL SMOKE DEFLECTOR INSTALLATION
The stainless smoke deflector is located in the upper front area of the firebox. The deflector is held in place with 2 bolts
Prior to the first fire, ensure deflector is seated properly and secured with 2 hand tightened bolts.
To replace the deflector, loosen off both bolts and slide deflector upward and out. Install new deflector and hand tighten bolts. Ensure positive location of
the deflector prior to hand tightening.
WARNING: Operation of the unit with out proper installation of smoke deflector will void warranty.
Smoke deector installed with 2 bolts.
Note: This is a view from the back of the unit
through the top.
Smoke deector is installed through the door
opening in location shown in diagram
Smoke deector
Ensure deector is seated so bolts are situated
at the top of the keyhole before tightening.

Regency I2500M | 11
11
|
installation
FACEPLATE AND TRIM INSTALLATION
920-057 02.07.19
Wood Insert
Faceplate & Trim Assembly
WOOD INSERT
I2500M
Your Faceplate kit contains:
1 Set Faceplate panel (top, left & right)
1 Set Tr im (top, left, right)
2 pcs. insulation
4 spring nuts
4 1" screws
8 washers
2 screws - black
2 corner trim clips
Note: The Digital Monitor Operating Door tool Bracket
and tool holder are supplied with the insert.
Prior to sliding your insert into its fi nal position and
attaching the connector or liner pipe, the faceplate must
be installed as follows:
1) Slide the spring nuts (supplied) over the slots in
the insert’s side convection panels (the spring nuts
may need to be squeezed with a pair of pliers fi rst,
to help them stay in position).
2) Screw the side faceplate panels, (item A in the
diagram) one to each side. See diagram 1.
3) Slide the digital monitor operating tool bracket lining
up the slots on the bracket to the 2 loose screws
on item A on left hand side Once slid into position
tighten screws on both left and right side (item A)
See diagram 2.
Tool Holder
Slots in door tool
bracket
Screws securing both
surround and bracket
on left hand side
when facing the
appliance from front
Digital monitor operating
door tool bracket
Tool holder slid into tool bracket
Diagram 2
1
Diagram 1
4) Using the top panel (item B - see diagram 1) as a
gauge, check that the side panels are within ap-
proximately 1/4" of the overall width. If the difference
is greater than this, use the supplied washers to
attain the required width.
5) The unit may now be slid into fi nal position and
attached to the connection system.
6) Once connection is made, the insulation strips
should be installed between the insert faceplates
and the fi replace face.
7) The faceplate top may now be installed (with insula-
tion strip behind) by aligning its brackets with the
top fl ange on the side shields and the angle iron
bar on the insert top.
8) The faceplate trim may be installed to the edge of
the faceplate at this time. To permanently mount the
trim, drill two 5/32" diameter holes through the trim
and side panels and screw the trim to the panels
using the gold plated screws provided.

12 | Regency I2500M
|
12
installation
Note: It may be easier to install the insulation, faceplate
top and faceplate trim with the unit pulled slightly
away from the fi replace face. If this is done, be
very careful not to disturb the connector when
shifting the unit to its fi nal position.
9) Now that your insert is installed, check once more
that all the clearances from the unit to any combus-
tible materials are correct as listed earlier.
920-057 02.07.192

Regency I2500M | 13
13
|
installation
FLUE COLLAR REMOVAL AND INSTALLATION & DEFLECTOR REPLACEMENT
NOTE: The removable flue collar is attached to the unit. If you need to re-
move the collar for ease of installation, please follow the below steps.
Note: unit in images may not be identical to the I2500—but they depict the
process.
SAFETY NOTE: The insert is very heavy and will require two people to move
it into position. The door and bricks can be removed to help. Be sure to protect
your hearth extension with a heavy blanket or cardboard during the installation.
If the combustor must be examined or replaced, follow this procedure:
1. Remove the front 3 secondary air tubes with pliers as shown below.
2. Remove baffles - push the baffles together and away from the side walls.
Note: If baffles are not installed, proceed to step 5.
4. Manoeuver the baffle above the air tube and slide out.
Side View
Front View
Front View
3. Lift the left baffle out from underneath the right baffle - then lift out. Remove
the right baffle.
Note: F2500 shown
List of Tools required:
- Tin snips
- Pull rod (supplied with unit)
- 1/2" socket / ratchet
- 3/8" open face wrench
- 7/16" socket / ratchet
6. Take a 1/2" ratchet and remove the two bolts at back inside of the firebox.
These bolts are used to secure the flue collar. Keep these and washers
for reinstall.
5. Remove locking clip from the front face of the Catalyst assembly by sliding
up and out.
7. Slide out the flue collar.
1/2" bolt
8. Install flex liner into existing chimney as per liner manufacturer’s specifi-
cations. Ensure that the notch on the adapter cut in the previous step is
pointed forward at about the 6 o'clock position. See Diagram 1.
Flex Liner
Diagram 1
Adaptor
Diagram 2
Flue Adaptor
9. Secure the adaptor to the flex liner with three screws. Ensure the adapter
is level and aligned correctly. See Diagrams 2 & 2A.

14 | Regency I2500M
|
14
installation
Diagram 4
11. Install the unit by first setting the rear of the
unit into the fireplace. See Diagram 4. Ensure
that the unit is centered in the existing fireplace
and lined up with the flue adaptor.
12. Slide the unit back until the flue adaptor is slightly
engaged. At this point it is recommended to level
the unit. This will keep the adaptor from binding.
Pull Rod
Diagram 5
13. Insert the provided pull rod through the hole in
the top center of the unit. Secure the threaded
end into the flue adaptor as shown in diagram
5. While sliding the unit into place pull on the
rod to ensure that the flue adaptor is properly
engaged. See Diagram 6. Double check the
adaptor is seated properly and the pull rod in
the firebox, locate the two holes lined up to the
two holes on the adaptor.
14. To complete the install, use the two bolts,
washers and lock washers removed in step 6
and install them, tighten down using the 1/2"
socket to ensure the adapter is positively se-
cured to the unit. Once completed remove pull
rod and place away for future re-install.
Pull Rod in place
Diagram 6
Diagram 7
10. Fully insert the probe into the probe bracket as
shown. See diagram 3.
Diagram 2A
Probe Bracket
Cutout in
adaptor properly
aligned to probe
bracket
Diagram 3
15. When re-installing flue collar after it has been
attached to the flex, be careful to guide the
bypass arm through front above the door. This
can only be guided through firebox opening.
Bypass rod
Opening
for bypass rod
Guide the bypass
rod through opening
inside rebox
Diagram 8
16. Repeat steps 5-1 to complete install.

Regency I2500M | 15
15
|
installation
CATALYST COMBUSTOR REMOVAL AND REPLACEMENT
Catalyst
1. Allow the stove to burn out and cool down.
2. Remove stainless steel smoke deflector - See instructions in this manual.
3. Remove the front 3 secondary air tubes with pliers as shown below.
4. Remove baffles - push the baffles together and away from the side walls.
6. Manoeuver the baffle above the air tube and slide out.
8. Pull the flame shield forward and tilt down, be prepared to support
catalyst assembly.
9. Slide the catalyst retainer to the right to remove.
10. Pull down catalyst assembly to remove.
11. If the bypass rod/clip requires replacement also reach up into the catalyst
cartridge and remove bypass rod clip. Slide out bypass rod from the front
of the insert.
Side View
Front View
Front View
5. Lift the left baffle out from underneath the right baffle - then lift out. Remove
the right baffle.
Note: F2500 shown
List of Tools required:
- 7/16" socket / ratchet
- Hammer
- Vice Grip
7. Remove locking clip from the front face of the Catalyst assembly by
sliding up and out.

16 | Regency I2500M
|
16
installation
12. Take your new or cleaned out round catalyst and
install it into the square support. Then take the
catalyst and square support and insert it into
the cartridge in the unit. Take the flame shield
and slide back end into the opening. After sliding
flame shield into position—secure in place by
sliding the clip down (reverse Step 7). The install
of the catalyst, bypass rod, and flue adaptor is
now complete.
Catalyst in square support
13. Repeat steps 10-1.
NOTE: when cleaning chimney, remove tubes,
baffles, retainer, flame shield and catalyst. After
sweeping, re-install.

Regency I2500M | 17
17
|
installation
Ground
Fan Fan
Ground
Green
Neutral
Live
White
Fan
Switch
Manual/
Auto
Switch
Black Black
High (Black)
Low (Red)
Black
Fan Thermodisc
(normally open)
120V AC
60 Hz
Wire98gr.eps
updated Jan. 27/00
updated: Aug. 09/05
capitalized the word Nut
Lockwasher
Ground wire
from power cord
Ground wire
from fan
#8 Groun Lugd
Star washer
Nut
Nut
Star washer
Grounding
Lug Detail
Thermo Switch Sensor
Blower/Fan Wiring Diagram
4. Push the Regency logo plate into the two holes
in the front bottom left corner of the fan.
Do not turn fan ON until your insert has reached
operating temperature or at least 30 minutes
after starting fire.
1. Align the fan support with the offset clip
on the bottom of the ashlip.
2. Slide the supports into the clips. The tension
holding the clips in place may be adjusted by
increasing or decreasing the offset spacing of
the clips.
3. Ensure that the power cord is not in contact
with any hot stove surfaces.
NOTE: DO NOT ROUTE POWER CORD
UNDER OR IN FRONT OF UNIT.
CAUTION: Label all wires prior
to disconnection when servic-
ing controls. Wiring errors can
cause improper and dangerous
operation.
WARNING:
Electrical Grounding Instructions
This appliance is equipped with a
three pronged (grounding) plug for
your protection against shock hazard
and should be plugged directly into
a properly grounded three-prong
receptacle. Do not cut or remove the
grounding prong from this plug.
Installer: Please record unit serial number here before installing blower.
Serial No.______________________________
Important:
The blower to this appliance must be turned
off anytime the fuel door is opened. Prior to
turning the blower back on, ensure there are no
embers near the blower which may have fallen
onto the hearth when the fuel door was opened.
Once the fuel door is closed, the blower may
be turned back on.
FAN INSTALLATION

18 | Regency I2500M
|
18
installation
3) Tilt the left baffle up on top of the side chan-
nel and it will leave enough room to position
the right baffle in the same manner as Step 1)
above. Then reposition the left baffle flat on the
air tubes.
Side View
Front View
Front View
4) Important: push both baffles so they are
tight against the side walls.
The unit arrives with the 2 baffle plates on the
floor of the firebox.
1) If all 4 air tubes are installed continue on to Step
2), if not, follow the instructions below. Install
the air tube into the holes in the side channels.
The notch goes on the right hand side with the
air holes facing toward the door. Slide the tube
into the left hand side, as far as possible and
then bring it back into the hole on the right hand
side. Use a pair of vise grips or pliers and tap
it into place with a hammer. A tighter fit will
ensure the tube will not move when the unit is
burning. Though there are four air tubes in the
medium units.
2) Slide the left baffle over the air tubes from the
front and then push it to the back.
FLUE BAFFLE &
SECONDARY AIR TUBE
INSTALLATION
The flue baffle system located in the upper area
of the firebox is removable to make cleaning your
chimney system easier. The baffles must be
installed prior to your first fire. Smoke spillage
and draft problems may occur if the baffles are
improperly positioned. Check the position of the
baffles on a regular basis as they can be dislodged
if too much fuel is forced into the firebox.
GLASS REPLACEMENT
Your Regency stove is supplied with 5 mm Neoceram
ceramic glass that will withstand the highest heat that
your unit will produce. In the event that you break
your glass by impact, purchase your replacement
from an authorized Regency dealer only.
Remove the door from the stove and remove the
screws securing the glass retainer. Position the glass
in the door, make sure that the glass gasketing will
properly seal your unit, and replace the retainer,
it should rest on the gasket not the glass. Tighten
securely, but do not wrench down on the glass as
this may cause the glass to break.
Shown with classic door
FLOOR PROTECTION
Please check to ensure that your floor protection
and hearth will meet the standards for clearance to
combustibles. Your hearth extension must be made
from a non-combustible material.

Regency I2500M | 19
19
|
installation
Wood handle
Door handle
Door
Hinge Cap
Cover
tooltip
Door hinges
tooltip
WOOD STOVES & INSERTS
WOOD DOOR & HANDLE ASSEMBLY
919-967 01.25.19
1. In preparation of installing the door handle, the nuts,
cam, washers and spacer must be removed as shown in
Diagram 1.
3. Put the hinge cover caps on top of hinges to complete the
door installation.
Note: The bottom of the door may scrape the ashlip. In this
case place the spacers provided on the door hinges of
the unit before placing the door.
4. Close door and ensure there is a tight seal. If door is too
tight a washer can be removed. Recheck door to ensure
there is still a tight seal. The handle should be approxi-
mately in the 8 o'clock position when door is fully closed.
(Diagram 3)
2. Place the door onto the hinges and then place the door
handle through the opening on the door, as shown in
Diagram 2.
Diagram 1
Diagram 2
Diagram 3
Nuts
Cam
Door
Handle
Washers
Spacer
Re-assemble and secure the door handle components in
reverse order as removed in step 1, refer to Diagram 1.
LATCH ADJUSTMENT
The door latch may require adjustment as the door gasket
material compresses over time. Removal of 1 or 2 wash-
ers will allow the latch to move closer to the door frame,
causing a tighter seal. (Refer to Diagram 1)
WOOD DOOR & HANDLE ASSEMBLY

20 | Regency I2500M
|
20
installation
LyTherm sheet
Order of firebrick install:
a) Rear Firebrick
b) Firebox floor - install brick over LyTherm Sheet
c) Right and left side Firebricks
BRICK INSTALLATION
Firebrick is included to extend the life of your stove and radiate heat more evenly. Check to see that all firebricks are in their correct positions and have not
become misaligned during shipping. Install all firebricks (if bricks were removed at install) per the diagram below and place in their correct positions.
Do not use a grate.
70) Brick Regular Full Size: 1-1/4" x 4-1/2" x 9"
75) Brick Partial: 1-1/4 x 4-1/2" x 2"
76) Brick Partial: 1-1/4" x 2" x 9"
Page is loading ...
Page is loading ...
Page is loading ...
Page is loading ...
Page is loading ...
Page is loading ...
Page is loading ...
Page is loading ...
Page is loading ...
Page is loading ...
Page is loading ...
Page is loading ...
Page is loading ...
Page is loading ...
Page is loading ...
Page is loading ...
Page is loading ...
Page is loading ...
Page is loading ...
Page is loading ...
/
