Page is loading ...

CR50
wireless speaker and
alarm clock with
phone charger
Sleep & Sound

CAUTION
RISK OF ELECTRIC SHOCK
DO NOT OPEN
DANGEROUS VOLTAGE: The lightning flash with arrowhead symbol, within an equilateral triangle is intended
to alert the user to the presence of uninsulated dangerous voltage within the product’s enclosure that may be
of sufficient magnitude to constitute a risk of electric shock to persons.
ATTENTION: The exclamation point within an equilateral triangle is intended to alert the user to the presence
of important operating and maintenance (servicing) instructions in the literature accompanying the appliance.
CAUTION: TO REDUCE THE RISK OF ELECTRIC SHOCK, DO NOT REMOVE COVER (OR BACK).
NO USER-SERVICEABLE PARTS INSIDE. REFER SERVICING TO QUALIFIED SERVICE PERSONNEL.
FCC WARNING: This equipment may generate or use radio frequency energy. Changes or modifications to this equipment may
cause harmful interference unless the modifications are expressly approved in the instruction manual. The user could lose the
authority to operate this equipment if an unauthorized change or modification is made.
ATTENTION: POUR ÉVITER LES CHOC ÉLECTRIQUES, INTRODUIRE LA LAME LA PLUS LARGE DE LA FICHE DANS LA BORNE
CORRESPONDANTE DE LA PRISES ET POUSSER JUSQU’AU FOND.

NOTE: This equipment has been tested and found to comply with the limits for a Class B digital device, pursuant to part 15 of the
FCC Rules. These limits are designed to provide reasonable protection against harmful interference in a residential installation.
This equipment generates, uses and can radiate radio frequency energy and, if not installed and used in accordance with the
instructions, may cause harmful interference to radio communications. However, there is no guarantee that interference will not
occur in a particular installation. If this equipment does cause harmful interference to radio or television reception, which can be
determined by turning the equipment off and on, the user is encouraged to try to correct the interference by one or more of the
following measures:
• Reorient or relocate the receiving antenna.
• Increase the separation between the equipment and receiver.
• Connect the equipment into an outlet on a circuit different from that to which the receiver is connected.
• Consult the dealer or an experienced radio/TV technician for help.
Compliance information: This device complies with Part 15 of the FCC Rules. Operation is subject to the following two conditions:
(1) this device may not cause harmful interference, and (2) this device must accept any interference received, including interference
that may cause undesired operation.
WARNING: TO PREVENT FIRE OR SHOCK HAZARD,D O NOT EXPOSE THIS UNIT TO RAIN OR MOISTURE.
SURGE PROTECTORS: It is recommended to use a surge protector for AC connection. Lightning and power surges ARE NOT
covered under warranty for this product.
This Class B digital apparatus complies with Canadian ICES-003. Cet appareil numérique de la classe B est conforme à la norme
NMB-003 du Canada.

SAFETY PRECAUTIONS
a. Do not expose this unit or the AC/DC adaptor to dripping or splashing water. Keep liquid-filled objects
such as vases, away from this unit and AC/DC adaptor.
b. To ensure that this unit is completely disconnected, unplug it from the wall.
c. Ensure that the AC/DC adaptor is easily accessible.
d. Please note the information printed underneath the unit.
e. Batteries should not be exposed to excessive heat such as direct sunshine, fire, etc.
f. Do not impede the ventilation of this unit by covering the ventilation openings with items such as newspapers,
table-cloths, curtains, etc.
g. Keep open flames, such as lighted candles, away from this unit.
h. Do not place this unit in closed bookcases, racks, or other spaces without proper ventilation.
i. Use only the same or equivalent type batteries as there is a danger of explosion if the incorrect batteries are used
or they are installed incorrectly.
j. Dispose of batteries properly according to environmental regulations.

inside the box
CR50 Charge Up alarm clock radio, AC power adapter and user guide.
adjusting the volume
Press the VOL
+
or VOL – button repeatedly to increase or decrease the volume to a safe listening level.
AC power source
Insert the small end of the AC adaptor into the DC In Jack
(located on the rear of the unit). Connect the other end to a
wall outlet providing 100-240V AC, 50/60 Hz.
The output of the provided AC/DC Adaptor is DC 5V 3A.
note: Disconnect both ends of the power cord when not in use.
Use only the supplied AC adaptor with the following specs:
AC In - 100-240V AC, 50/60Hz / DC Out - 5V 3A
AC outlet
AC/DC adapter plug

location of controls
POWER button
Volume +
SOURCE button
TUNE / SKIP – button
PAIR button
PLAY button
PRESET button
Volume – button
TUNE / SKIP + button
ALARM 1 switch
SLEEP button
TIME SET button
ALARM 2 switch
SNOOZE button

USB Charging port
DC In jack
Backup battery compartment
Line-In jack
USB Charging port
Time display
Line-In / AUX
Bluetooth
Buzzer
NAP
Sleep Timer
FM Radio
Radio PRESET
AM/PM Time
ALARM 2
AM/PM
(ALARM 2)
ALARM 2 Set Time
Dimmer button
Day of the week
ALARM 1 Set Time
AM/PM
(ALARM 1)
ALARM 1
zzz zzz
PM
AM
AM
PM
FM
PM
AM
M T W Th F Sat Sun
PRESET
SLEEP
NAP
LED Display indicators

backup battery installation
Two (2) ‘AAA’ size batteries can also be used to power the unit, as well as backup for the clock, alarm time,
preset memories if the AC/DC adapter is disconnected or there is a power failure.
Open the battery door by pushing in on the tabs, then removing the door.
Insert two (2) ‘AAA’ batteries following the correct polarity indicated in the battery compartment.
Replace the battery door back on the compartment.
notes: The batteries are used to backup the clock and alarm times when the AC adaptor is disconnected or there
is a power failure. Alkaline batteries are recommended for the longest playing time.
The battery indicator will appear and flash in the display when there are no batteries or when the batteries are low
and need to be replaced.
When replacing the battery, do not disconnect the AC power adapter otherwise the current time, alarm and station
presets will be erased.
battery precautions when using batteries in this device:
• Warning - Danger of explosion if batteries are incorrectly replaced. Replace only with the same or equivalent type.
• Use only the size and type of batteries specified.
• Be sure to follow the correct polarity when installing the batteries as indicated. A reversed battery may cause
damage to the device.
• Do not mix different types of batteries together (e.g. Alkaline, Rechargeable and Carbon-zinc) or old batteries with
fresh ones.
• If the device is not to be used for a long period of time, remove the batteries to prevent damage or injury from
possible battery leakage.
• Do not try to recharge a battery not intended to be recharged - it can overheat and rupture. (Follow battery
manufacturer’s directions)

setting the alarm
Slide the ALARM 1 switch to the “SET” position and the display will begin flashing “12”.
Press the TUNE / SKIP
<<
or TUNE / SKIP
>>
button repeatedly to advance the alarm hour. When you
reach the desired alarm hour, press the TIME SET button to confirm.
With “:00” flashing now, press the TUNE / SKIP
<<
or TUNE / SKIP
>>
button repeatedly until you reach
the desired alarm minute.
Press the TIME SET button to confirm the alarm setting.
(continue on next page)
setting the clock and date
Plug in the CR50 Charge Up but leave the power ‘OFF’.
Press and hold the TIME SET button until the display flashes “12” then press the TUNE / SKIP
<<
or
TUNE / SKIP
>>
button repeatedly to advance to the correct current hour.
Press the TIME SET button to confirm and now the digits “00” will begin flashing. Pressing the TUNE /
SKIP
<<
or TUNE / SKIP
>>
button repeatedly to adjust the minutes.
When you reach the correct current minute, press the TIME SET button again to confirm.
Four digits which display the year will begin flashing below the time. Press the TUNE / SKIP
<<
or TUNE / SKIP
>>
button repeatedly to advance to the correct current year.
Press TIME SET button to confirm the current year and the display will begin flashing “1/1”. Press the
TUNE / SKIP
<<
or TUNE / SKIP
>>
button repeatedly to advance the correct current month.
Press TIME SET button to set the current month then press the TUNE / SKIP
<<
or TUNE / SKIP
>>
button repeatedly to advance the correct current day then press TIME SET again to confirm.

silencing the alarm
When the alarm sounds, press the POWER button to silence the alarm.
The ALARM 1 icon will appear on the display, indicating that the alarm is reset and will sound again
in 24 hours.
disabling the alarm
If the alarm is not needed the next day, slide the ALARM 1 switch to the “OFF” position and the
ALARM 1 icon will disappear from the display, indiacting that the alarm is off and will not sound.
To reactivate the alarm next time it is needed, slide the ALARM 1 switch to the “ON” position and
the ALARM 1 icon will appear on the display, then check to make sure the alarm time is correct.
setting the alarm (con’t)
Press the TUNE / SKIP
<<
or TUNE / SKIP
>>
button to select the BUZZER or FM radio as the alarm
source to wake you up.
Slide the ALARM 1 switch to the “ON” position to complete the the process and the indicator will stop
flashing and become solid.
notes: Before setting the alarm, make sure that the clock time is set correctly (see "Setting the clock").
To set the radio alarm, first tune to the desired station and adjust the volume (see "Playing the radio").
To set ALARM 2 simply follow the same directions above but use the ALARM 2 button.

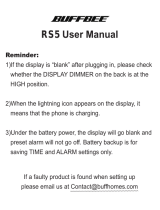
adjusting the dimmer
Repeatedly press the DIMMER button will cycle through the brightness levels of the LCD display and
choose from; high, medium, low and off. The default setting is medium.
snooze
When the alarm sounds, pressing the SNOOZE button will temporarily silence the alarm. The alarm will
sound again after 9 minutes pass.
setting the sleep timer
With the CR50 in the FM/AUX/BT mode, press the SLEEP button. The SLEEP icon and "15" will appear
on the display briefly indicating the unit will turn off after 15 minutes.
To increase the sleep time duration, up to a maximum of 90 minutes, repeatedly press the SLEEP
button to select one of the following sleep time presets.
After 5 seconds, the sleep time will disappear from the display.
To view the remaining sleep time once set, press the SLEEP button once and the remaining time will
appear on the display.
note: To cancel the SLEEP TIMER function, repeatedly press the SLEEP button until “OFF” appears in the display.
15 30 60 90 OFF

setting radio presets
To preset a radio station to memory, first follow the steps above to tune in the desired station.
Press and hold the PLAY / PAUSE button to enter save mode.
Repeatedly press the PRESET button until the desired preset number you wish to assign to that station
appears in the display and the unit tunes to the station.
Press the PLAY / PAUSE button again to save.
Repeat the steps to save up to 20 preset stations if desired.
To automatically save presets, press and hold the PLAY / PAUSE button for a few seconds and
the CR50 will scan and save the strongest station signals in ascending order.
note: Setting a new station preset in the same position as a previously saved station will replace the previously stored
station for that preset number.
playing the radio
With the CR50 plugged in and powered ‘ON’, press the SOURCE button to switch the input source to
RADIO mode and the FM frequency will appear on the display.
Repeatedly press the TUNE / SKIP – or TUNE / SKIP + button to manually adjust the tuning on the
display until the desired station appears.
For auto tuning, press and hold the TUNE / SKIP – or TUNE / SKIP + button until the display starts to
scan then release the button and the tuner will search and stop on the next strongest station it finds.
Repeat this process until the desired station appears on the display.
notes: Fully extend the FM wire antenna to increase reception sensitivity.
Keep digital music players or mobile phones away from the FM antenna as this may cause interference.
Do not place the FM antenna near the AC power adaptor as this may lead to reception interference.

streaming Bluetooth audio
With the CR50 plugged in and powered ‘ON’, press the SOURCE button to switch the input source to
Bluetooth mode and the BT icon will appear on the display.
Power on your Bluetooth compatible device and search for the CR50 under the Bluetooth settings of
your audio streaming device. After a few seconds it should detect the CR50, at which time you can
select the CR50 and establish a wireless Bluetooth connection.
note: To terminate the Bluetooth session, press and hold the PAIR button to disconnect. Then press the SOURCE
button to select a new input mode.
changing the input source
With the CR50 powered on, repeatedly press the SOURCE button to change the input source to cycle
bewteen Radio, Bluetooth or AUX IN.
dual USB charging ports
The CR50 features dual USB charging ports on the back of the unit which are designed to charge most
USB compatible devices. Simply plug in a USB cable (sold separately) into the CR50 USB port then
connect your device to begin charging.

aux-in connection
To listen to music from an external audio device (e.g. iPad, iPod shuffle, mobile phone, MP3 player,
digital media player, etc.), turn on your CR50 and power on the external audio device.
Insert one end of a 3.5mm audio cable (sold separately) into the Line-Out / Headphone jack of your
external audio device and the other end into the Line-In jack on the CR50.
Press the SOURCE button to switch the input source to AUX.
Select the music you wish to listen to on your external audio device then press play and sound will be
projected through the CR50 speakers.
specifications
general:
Power Source......................................................................................................................................................... DC 5V/3A
AC Power Supply ........................................................................................................................ 100 - 240V - 50/60Hz 0.5A
Battery Backup.........................................................................................................................2 x 1.5V “AAA” size batteries
Speaker ................................................................................................................................................................ 2 x 4 ohms
Output Power ..............................................................................................................................................................2W x 2
radio:
Frequency Range (FM) .................................................................................................................................. 87.5 - 108 MHz
Bluetooth:
Bluetooth specification...........................................................................................................................................v2.1+EDR
Supported Profile ................................................................................................................................................... AD2Pv1.2
Range .............................................................................................................................................. 10m/33 feet line of sight
Specifications are subject to change without notice.

?
FAQs
Q: Why is the USB port not charging my devices?
A: Make sure that the USB plug is firmly connected into both ports of the CR50 and your USB compatible
device and that the CR22 is plugged in to a power source as the USB charging ports will not operate
from the backup batteries.
Q: Why will my Nook / netbook device not charge when I connect it to the USB charger?
A: Even though it may be USB compatible, some devices, including the Nook and some larger tablets or
netbooks require a higher output to charge them than the 5V/1.0A USB port on the CR50. Please check
your device manufacturer’s charging specifications as you may be required to only use the charger
supplier with your device at time of purchase.
Q: How do I turn the alarm off?
A: Pressing the POWER button will silence the alarm and reset it to sound again in 24 hours.
Q: What if I don’t want the alarm to go off on the weekends?
A: You can disable the alarm on days you do not need it by sliding the ALARM 1 switch to the “OFF”
position. The ALARM 1 icon will disappear from the display, indiacting that the alarm is turned off and
will not sound until you reactivate the alarm.
Q: Why do I not hear any music when I play the radio?
A: Make sure that a 3.5mm Line-In cable is not plugged into the Line-In jack of the CR50 as this will switch
the input source to AUX even if there is no external audio device connected.
Q: The display is flashing “12:00”?
A: This appears during the initial setup or could be a result of an extended power output or if the CR50 was
unplugged for an extended period. Simply follow the steps in the ‘setting the clock’ section of this user
guide to reset the current time.
For further assistance, please visit our website at hellocapello.com or contact
customer service at [email protected] or 1-855-896-1795

©2015 Life Lab International Ltd.
/