16
TROUBLE SHOOTING GUIDE
If you experience difculties with the appliance, please check the suggestions below
before contacting customer services on 01473 271272:
To test microwave is working before cooking food – DO NOT operate empty, instead
place one cup of water (approx.150ml) in a glass in the microwave and close the door
securely. Microwave lamp should go off if the door is closed properly. Let the microwave
work on full power for 1 min.
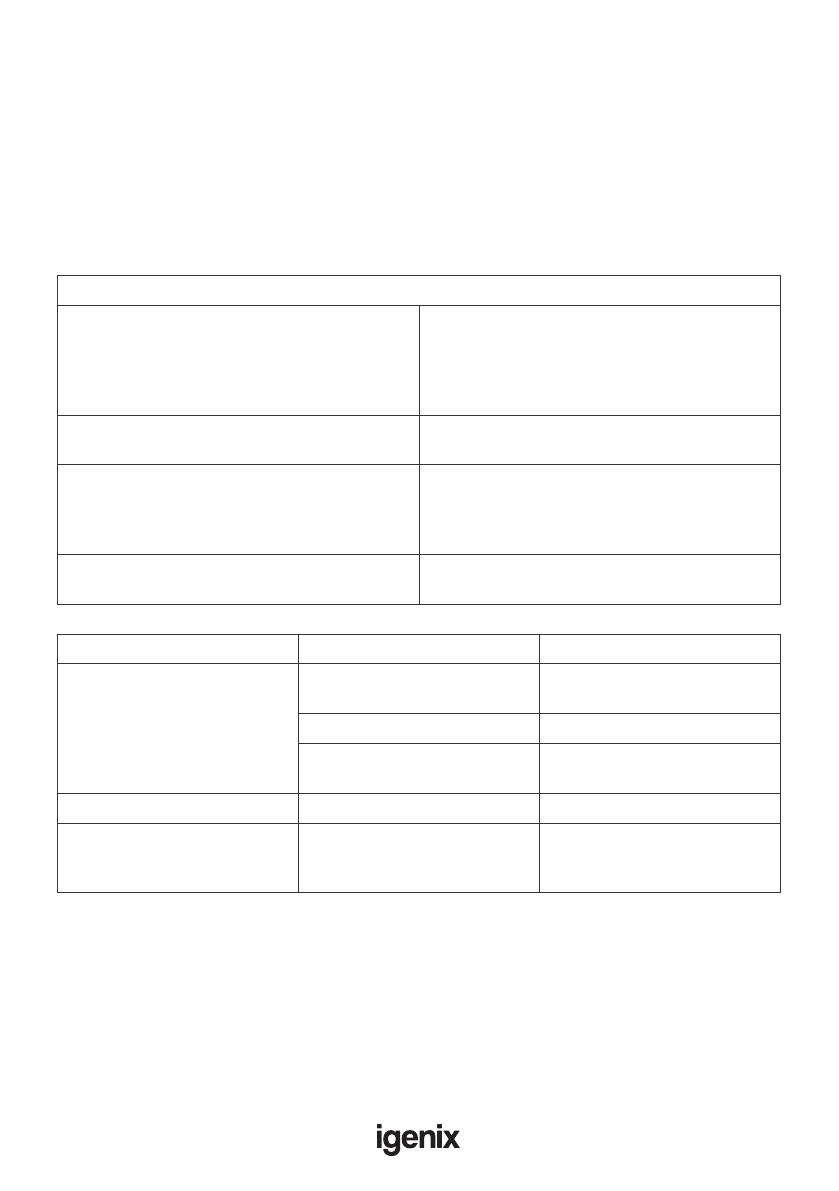
Normal
Microwave oven interfering TV reception Radio and TV reception may be interfered
when microwave oven operating. It
is similar to the interference of small
electrical appliances like mixer, vacuum
cleaner, and electric fan. It is normal
Dim oven light In low power microwave cooking, oven
light may become dim. It is normal
Steam accumulating on door, hot air out
of vents
In cooking, steam may come out of food.
Most will get out from vents. But some
may accumulate on cool place like oven
door. It is normal
Oven started accidentally with no food in It is forbidden to run the unit without any
food inside. It is very dangerous
Problem Possible Cause Possible Solution
Microwave cannot be
started
Power cord is not plugged
in tightly.
Unplug. Then plug in again
after 10 seconds
Fuse blowing Replace fuse
Trouble with outlet Test outlet with other
electrical appliances
Microwave does not heat Door not closed properly Close door fully
Glass turntable makes
noise when microwave
oven operates
Debris stuck between
turntable ring and bottom
of microwave
Refer to “Cleaning and
Maintenance” section to
clean dirty parts


