Page is loading ...

1
Issued: July 2009
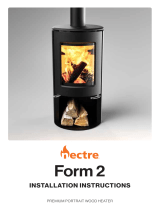
Installation and
Operating Instructions for the
following Woodsman models
These instructions should be read in conjunction with the flue installation
instructions and drawings supplied with each HHF HeatSaver flue system.
Testing and Certification
MODEL
AS/NZS
2918:2001
AS/NZ
2918:2001, APP E
AS/NZS
4012:1999
AS/NZS
4013:1999
ECan Cert
Number
Blaze Complies N/A 66% 0.7g/kg 082947
Boston Complies N/A 67% 0.8g/kg 073734
Matai DVI-165 Complies Complies 67% 0.53g/kg 04002/3
Matai ECR MkII Complies N/A >65% <1.0g/kg 071128
IMF Complies Complies 70% (est) 3.9g/kg -
Manhattan Complies N/A 67% 0.8g/kg 073735
Milford Complies N/A Not tested Not tested -
RMF Complies N/A 83% 3.9g/kg -
RMF - RV Complies Complies 70% (est) 3.9g/kg -
Regent Complies Complies 69% 0.9g/kg 072526
Strongman Complies N/A Not tested Not tested -
Tarras Complies N/A 70% 0.88g/kg 094113
Tarras - WB Complies N/A 65% 0.99g/kg 094114
KEEP THESE INSTRUCTIONS FOR FUTURE REFERENCE

2
Minimum Safe Installation Clearances
BLAZE
ECR MkII
MANHATTAN
& BOSTON
MILFORD
RMF
RMF - RV
STRONGMAN
TARRAS &
TARRAS-WB
A 200 100 150 210 125 N/A 300 160
B 250 450 300 285 500 500 *875 550
C 300 300 300 300 300 300 515 500
D 150 150 150 150 150 150 150 150
E 100 200 140 100 180 N/A 380 300
F 371 251 318 381 276 N/A 441 301
G 560 740 610 628 790 790 **1233 906
H 421 512 459 446 492 N/A 711 626
J 920 880 920 986 880 880 1015 1015
K 1038 807 986 1054 832 N/A 1364 1184
L 1264 1280 1318 1303 1252 N/A 1928 1769
M 1113 1110 1151 1164 1060 N/A 1616 1493
N 669 556 668 673 556 N/A 923 883
O 620 580 620 686 580 580 715 686
Table 1
All dimensions are given in millimetres .
*610mm with firebox side panels fitted.
**968mm with firebox side panels fitted.
FIG 1
FIG 2

3
Minimum Safe Installation Clearances
DVI-165 IMF REGENT RMF-RV
P 930 980 923 913
Q¹ 380 460 333 300
R¹ 0 0 0 12
Q² 352 408 309 -
R² 13 25 13 -
Q³ 325 363 300 -
R³ 25 50 >18 -
Q⁴ 300 300 - -
R⁴ 40 88 - -
S 50 50 50 -
T 840 840 840 880
Table 2
* If Q = Q¹; then R = R¹ etc.

4
Installation Instructions
This appliance should only be installed by a trained and qualified installer.
Warning: the appliance and flue system shall be installed in accordance with AS/NZS 2918
and the appropriate requirements of relevant building code/codes.
Warning: appliances installed in accordance with this standard shall comply with the
requirements of AS/NZS 4013 where required by the regulatory authority, i.e. the appliance
shall be identifiable by a compliance plate with the marking “Tested to AS/NZS 4013”.
Any modification of the appliance that has not been approved in writing by the testing
authority is considered to be in breach of the approval granted for compliance with
AS/NZS 4013.
Caution: mixing of appliance or flue system components from different sources or modifying
the dimensional specification of components may result in hazardous conditions. Where such
action is considered, the manufacturer should be consulted in the first instance.
Caution: cracked and broken components e.g. glass panels or ceramic tiles, may render the
installation unsafe.
Warning: do not connect to an unvented hot water system.
Install in accordance with AS 3500.4.1 or NZS 4603 and the appropriate requirements of the
relevant building code/codes.
• Maintain a clearance of at least 1 metre between front of the appliance and building
structure or any other substantial immovable object.
• If the appliance is installed on a heat sensitive floor, the floor should be protected with
an insulation floor protector, which shall extend entirely beneath the heater. For the
correct floor protector extension, refer to dimension C in FIG 1 & 2.
• Your appliance shall be seismically restrained, including the floor protector, using the
two metal seismic restraint brackets supplied.
Minimum Material Specifications
For Floor Protectors
MODEL SPECIFICATION
BLAZE 8mm of ceramic tiles
ECR MkII 8mm of ceramic tiles
MANHATTEN & BOSTON 8mm of ceramic tiles
MILFORD 12mm HardiFlex
RMF (2006+) 8mm of ceramic tiles
RMF - RV 12mm Hardiflex
STRONGMAN 24mm Eterpan
TARRAS & TARRAS-WB 24mm Eterpan

5
Minimum Flue Height
The top of the flue system should be at
least 600mm above the highest point
of the roof ridgeline, if the point of
intersection of the flue system and the
roofline is less than 3 metres from the
ridgeline horizontally.
If the point of intersection of the flue
system and the roofline is greater than
3 metres horizontally, the top of the
flue system shall be at least 1 metre
above the point of intersection with the
roofline. (refer FIG 3)
These are considered to be minimum dimensions, and depending on local conditions,
taller flue system heights may be required for satisfactory performance.
Flue Installation Detail
Your Woodsman appliance should be installed with a HeatSaver Flue System.
A HeatSaver Flue System is available from all authorised Woodsman dealers throughout
New Zealand.
The HeatSaver Flue System contains a complete installation drawing and correct
clearances from the ceiling level up. Minimum clearances from the appliance to nearby
combustible surfaces are given in FIGS 1 & 2.
Use of a flue system other than a genuine HeatSaver Flue System may affect the safety
of the installation, and may affect your Woodsman 10 year warranty.
Insist on a genuine HeatSaver Flue System.
Installation requirements for Woodsman fireplace inserts and flue system
where timber framing is less than 50mm from the chimney structure.
Installation should be carried out by a qualified installer who will ensure:
• That the minimum clearances determined by tests in accordance with AS/NZS
2918:2001 are complied with to prevent overheating of nearby combustibles.
• That the minimum opening size of 600mm wide x 600mm high x 500mm deep
is available when firebricks are removed, and that extra provision also be made for
plumbing where a hot water booster is fitted (where permitted).
• That any flue requirements specific to the model being installed are met in full -
refer HeatSaver Flue System Instructions.
• Where the fireplace opening is in a heat sensitive wall, a non-metallic heat
resistant material shall extend not less than 50mm beyond each side of the
appliance and 150mm beyond the top of the appliance.
• Clearance of at least 1 metre between the front of the appliance and building
structure, or any other substantial material object.
• That the insulating floor protector of non-combustible material is provided,
extending not less than the dimensions shown in the chart. (Refer Table 2)
• A fireplace appliance shall not be connected to a flue common with an open
fireplace.

6
Operating Instructions
(Burning Wood)
Keep these instructions for future reference
Important: ensure installation instructions have been adhered to before lighting the
appliance.
Important: firewood should be loaded in a front to back direction when operating this
appliance.
Warning: any modification of the appliance that has not been approved in writing by
the testing authority is considered as breaching AS/NZS 4013.
Warning: do not use flammable liquids or aerosols to start or rekindle the fire.
Warning: do not use flammable liquids or aerosols in the vicinity of this appliance when
it is operating.
Warning: do not store fuel within heater installation clearances.
For your comfort, it is advised that you light your first fire with the windows open to
allow the escape of paint fumes. This will normally happen for the first 30 minutes of
the first burn.
Fully open the heat control. Place wood kindling and paper or firelighter in the firebox. Ignite
and leave the door partially open by resting on the catch until the fire is blazing (4-5 minutes),
and burns well with the door closed. Do this only from a cold start. Once the fire is underway,
adjust the heat control to suit. If the firebox or the flue becomes visible red-hot, adjust the
heat control to a lower heat position to avoid being unnecessarily harsh on the unit as well as
wasting excessive heat up the flue.
Warning: always open the heat control before opening the fire door.
For long holding operation in a Clean Air Zone, level the ashes and load with the firewood lying
front to back, rather than left to right. After loading new wood, operate the fire with the heat
control fully open for 20 minutes before closing the heat control to the lower burning position.
By following this simple method of low burn firing, you will achieve very low emission rates and
obtain the high efficiency burn that is associated with the Woodsman product.
The fuel approved for use in Clean Air Zones in this appliance is wood with a moisture content
of less than 25% of dry weight. This usually means green timber left for at least three months
to air dry.
Caution: the use of some types of preservative-treated wood as a fuel can be hazardous.
Caution: this appliance should not be operated with cracked glass.
Caution: this appliance should be maintained and operated at all times in accordance with
these instructions.
Operating Instructions
(Multi-fuels)
Your Woodsman Multi-fuel will operate perfectly well burning coal, wood, briquettes or a mixture
of any of these. Often the hottest temperatures are achieved by burning a mixture of wood with
coal laid over the top.
The appliance has two heat controls. The High - Low control to the left of the ash pan door is for
use when burning coal, briquettes, or a mixture of wood and coal. The High - Low control above
the fire door is for use when burning wood only.

7
Set the fire using kindling wood and paper (or a solid fuel lighter), light and close the door; set
the lower High - Low control on High and the upper High - Low control on Low. Once the fire is
burning brightly, decide if wood or coal is to be used. If coal is to be burned, lay the coal over
the burning fire and adjust to suit. If wood is to be burned, place dry logs on the fire and set
the lower control to Low and the upper control to suit the required burning rate.
Important: Ensure the ash pan door is closed firmly before lighting, and remains so during
use. Do not have both controls fully open at the same time. If burning wood, the lower control
should be fully closed; if burning coal, the upper control should be set to Low.
If the ash pan door knob is removable, it should be removed while the stove is in use. This is a
safety feature designed to avoid the ash pan door being opened by children in particular, and
risking any overheating of nearby combustibles by the increased combustion rate.
Creosote Formation
A small intense fire is preferable to a large smouldering one, to reduce the amount of
creosote. When wood is burned slowly it produces tar and other organic vapours, which
combine with expelled vapour to form creosote. These creosote vapours condense in the
relatively cool flue of a slow burning fire. As a result, creosote residue accumulates on
the flue. When ignited, this creosote makes an extremely hot fire.
The flue should be checked at least every 2 months, during the burning season, to
determine if a creosote build up has occurred. If this is the case, it should be removed
by a chimney sweep to reduce the risk of an unexpected flue fire.
Your appliance has been designed to produce low levels of creosote at high and low
settings.
In the event of a chimney fire, close the firebox door, fully close the heat
control, vacate the premises and call the fire service.
Storage of Fuel
Do not store fuel within installation clearances or within the space required for refuelling
or ash removal.
Disposal of Ashes
Ashes should be placed in a metal container with a tight-fitting lid. The closed container
of ashes should be placed on a non-combustible floor or on the ground well away from
all combustible materials, pending final disposal once cooled.
The door must be closed at all times during the operation, except during
refuelling and occasional poking of the fire when necessary. Ensure door seals
are maintained in good condition.
Your appliance and flue system should not be modified in any way without the
approval of the manufacturer.
Manufactured by W H Harris Ltd
Trading as Harris Home Fires
PO Box 4043
41 Braddon Street
Christchurch
New Zealand

8
10 YEAR WARRANTY
41 BRADDON STREET, PO BOX 4043, CHRISTCHURCH, NEW ZEALAND
Phone 03 366 1796, Fax 03 366 1795
Email: [email protected], Website: www.harrishomefires.co.nz
This WOODSMAN fire is warranted for a period if 12 months to the original purchaser,
from the date of purchase, against defects of manufacture. If a defect occurs, inform
your dealer and the part will be repaired or replaced at our option.
This warranty does not cover damage caused by mishandling, misuse, failure to follow
the manufacturer’s installation and operating instructions, or work done by others such
as installers, or plumbers etc.
Your WOODSMAN firebox is then covered by a further nine year warranty against defect
during normal domestic use.
In the case of a claim after the first 12 months, it shall be the owner’s responsibility and
expense to deliver the WOODSMAN fire to the dealer from whom it was purchased, and
the reinstallation after any repair has been made.
The manufacturer shall not be responsible for site conditions such as insufficient
draught, downdraughts, or routine servicing and adjustments.
Exempted from any warranty are any door glass, firebox baffle, firebox air tube, grate
and firebricks. Your high temperature paint finish is warranted for 12 months from date
of purchase.
Any factory fitted water heating system is warranted against leakage for a period of 6
months from purchase.
Please complete this form following installation, attach your copy of the Sales Invoice
and file securely. This form and Sales Invoice will be required to be sighted in the event
of a warranty claim.
OWNER’S NAME:
ADDRESS:
MODEL:
SERIAL NUMBER:
INSTALLED BY:
Date Purchased: / /
May 2009
/