Page is loading ...

www.rivatech.de
Specification subject to change without notice
RTC6500 Thermal Camera
Series
Installation Guide
Screw &
Plastic Anchor-3pcs
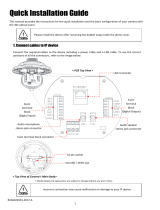
Quick Installation Guide
CABEL CORE

RTC Series RTC6500 Series Installation Guide
04-2017-A www.rivatech.de 2
Precaution
Please read this manual carefully before installing the unit.
Never disassemble the camera. Unauthorized disassembly may cause equipment
failure or damage to the unit.
Please do not install the camera in a place exposed to direct sunlight.
Do not operate the camera in environments beyond the specified temperature.
Refer to Environment Condition on APPENDIX (A): SPECIFICATIONS in this manual.
Before applying power to the camera, check the power source to ensure that it is
within the specifications. Refer to Electrical Characteristics on APPENDIX (A):
SPECIFICATIONS.
CAUTION: RISK OF EXPLOSION IF BATTERY IS REPLACED BY AN INCORRECT TYPE.
DISPOSE OF USED BATTERIES ACCORDING TO THE MANUFACTURER’S INSTRUCTIONS.

RTC Series RTC6500 Series Installation Guide
04-2017-A www.rivatech.de 3
Table of Contents
Precaution ................................................................................................................ 2
1. FEATURES ............................................................................................................. 5
2. PACKAGE CONTENTS............................................................................................. 6
3. PART NAMES ........................................................................................................ 7
4. INSTALLATION ...................................................................................................... 9
4.1. Installing Cable Gland ............................................................................................ 9
4.2. Connecting Cable(s) ............................................................................................. 10
4.3. Installing Base Mount .......................................................................................... 10
4.4. Closing the Back Cover ......................................................................................... 11
4.5. Installing the Sunshield ........................................................................................ 11
4.6. Adjusting Image Focus ......................................................................................... 11
4.7. Installing with Bracket ......................................................................................... 12
5. CONNECTIONS .................................................................................................... 13
6. CONFIGURATION ................................................................................................ 16
6.1. Set up network environment ............................................................................... 16
6.1.1. Generic IP Environment ............................................................................................ 16
6.1.2. Custom IP Environment............................................................................................. 17
6.2. View video on web page ...................................................................................... 18
6.2.1. ActiveX Installation .................................................................................................... 18
6.2.2. View video using IPAdmin Tool ................................................................................. 19
6.3. Reboot .................................................................................................................. 20
6.4. Factory Default ..................................................................................................... 20
6.5. Safe Mode ............................................................................................................ 21
APPENDIX (A): SPECIFICATIONS .............................................................................. 23
Summary ..................................................................................................................... 23
Electrical Characteristics ............................................................................................. 24
Environment Condition ............................................................................................... 24
Mechanical Condition ................................................................................................. 24
APPENDIX (B): DETECTION RANGE .......................................................................... 25
APPENDIX (C): POWER OVER ETHERNET .................................................................. 27
Power Comparison ...................................................................................................... 27

RTC Series RTC6500 Series Installation Guide
04-2017-A www.rivatech.de 4
APPENDIX (D): DIMENSIONS ................................................................................... 28
APPENDIX (E): HEXADECIMAL-DECIMAL CONVERSION TABLE .................................. 29
REVISION HISTORY ................................................................................................. 30

RTC Series RTC6500 Series Installation Guide
04-2017-A www.rivatech.de 5
1. FEATURES
Camera
17 ㎛ uncooled vanadium oxide micro-bolometer
320x240 / 640x480 resolutions
6, 9, 16, 24, 42,60 degrees field of view (RTC6500Q)
12, 18, 25, 37, 50 degrees field of view (RTC6500V)
Weather Proof (IP66)
Video
H.264 and MJPEG(Motion JPEG)
Max 9 fps or 30 fps in all available resolutions depending on the camera model
Text Overlay
Video Motion Detection supported
Audio
Two-way audio streaming
Audio compression: G.711 µLaw
Network
RTSP/ HTTP protocol supported
10/100 Base-T Ethernet
Sensor/Alarm
1 Digital Input / 2 Digital Outputs
Integration
Software Development Kit (SDK)
ONVIF compliant (Profile S & Profile G)
Additional Features
microSDHC card embedded (optional)
RS-485 supported
DC12V, AC24V, or PoE
VCA (Video Content Analysis)
VCA Detect (Included as basic)

RTC Series RTC6500 Series Installation Guide
04-2017-A www.rivatech.de 6
2. PACKAGE CONTENTS
Please unpack the package carefully and handle the equipment with care. The package
contains:
Note
i
The contents above are subject to change without prior notice.
Camera
(
Below is the sunshield attached image)
Sunshield
DC Power Jack Cable
Tamper Resistant Screws x 8
Base Mount
Terminal Blocks
Stem Bumpers x 2 and 1
Spare
Cable Gland & Electrical Nut & O-ring
Silica Gel Packet
Quick Start Guide
Torx Wrench
Screw &
Plastic Anchor-3pcs
Quick Installation Guide
Installation Template
Adaptor & AC Plug
WALL CUSHION
CABEL CORE
Screw &
Plastic Anchor-3pcs
Quick Installation Guide
CABEL CORE
Screw &
Plastic Anchor-3pcs
Quick Installation Guide
CABEL CORE
Screw &
Plastic Anchor-3pcs
Quick Installation Guide
CABEL CORE
Screw &
Plastic Anchor-3pcs
Quick Installation Guide
CABEL CORE
Screw &
Plastic Anchor-3pcs
Quick Installation Guide
CABEL CORE
Screw &
Plastic Anchor-3pcs
Quick Installation Guide
CABEL CORE
Screw &
Plastic Anchor-3pcs
Quick Installation Guide
CABEL CORE

RTC Series RTC6500 Series Installation Guide
04-2017-A www.rivatech.de 7
3. PART NAMES
① Sunshield
It prevents the lens from getting the direct sunlight.
② NTSC / PAL Button
The button switches the video output mode between NTSC and PAL.
Pressing the button will maintain the current video output mode unless pressing once more
to switch to the other mode.
③ Analogue Video Output
Connect a BNC output cable to see video via an analogue monitor.
④ RJ45 Socket
RJ45 LAN connector for 10/100 Base-T Ethernet (PoE supported).
⑤ Reset Button
Pressing this button reboots the camera or initializes the current settings of the camera to
the factory default settings. Refer to 6.3. Reboot and 6.4. Factory Default for the pressing
duration and more information.
⑥ Terminal Connectors for DI/DO
Connecting terminal blocks for digital input (sensor) and digital outputs (alarms)
Refer to 5. CONNECTIONS for more information.
⑦ Terminal Connectors for Audio In/Out
Connecting terminal blocks for audio input (microphone) and audio output (speaker)
Refer to 5.CONNECTIONS for more information.
⑧ Terminal Connector for RS-485
Connecting terminal blocks for RS-485
Refer to 5.CONNECTIONS for more information.
NTSC / PAL Button
Analogue Video Output
Sunshield
RJ45 Socket
Screw &
Plastic Anchor-3pcs
Quick Installation Guide
CABEL CORE
[ Camera Profile Image ]
[ Back Panel of Camera ]
Reset Button
Terminal Connectors
for DI/DO
Terminal Connectors
for Audio In/Out
Terminal Connectors
for RS-485
* The model herein and its appearance are subject to change without any prior notice.
Terminal
Connectors
for power adaptor


RTC Series RTC6500 Series Installation Guide
04-2017-A www.rivatech.de 9
4. INSTALLATION
4.1. Installing Cable Gland
1) Detach the back cover by twisting it counter-clockwise.
2) Disassemble the provided cable gland unit. There will be an electrical nut, a rubber sealing
ring inserted inside the cable gland, a gland body, and a sealing nut.
3) Pass the electrical nut through the ends of the necessary cables.
4) Pass the cables through the holes both on the back and the bottom of the camera by
referring to the image above.
5) Pass the provided O-ring and gland body through the ends of the cables that are on the
backside of the camera.
6) Insert the cables into the rubber sealing ring at the point where about 4.5 inches (11.5 cm)
of the cable ends remains to connect to the corresponding connectors on the back panel later.
7) Push the rubber sealing ring through the claw of the gland body.
8) Insert the sealing nut into the thread of the gland body, and tighten it by turning the nut on
the thread. The rubber sealing ring will be tightened to fill the gap between the rubber sealing
ring and the cables.
9) Push the gland unit through the hole on the back of the camera so that the other end of the
thread on the gland unit will be inserted into the hole for gland near the bottom of the camera
body.
10) Fix the gland unit to the hole by inserting the electrical nut and tightening it on the thread
of the gland unit.
Note
i
When you insert a video out cable together with other cables such as RJ45, DIDO,
and audio cables, a thin type of the BNC cable is recommended as the standard
BNC cable is too thick to be inserted together with the other cables into the
rubber sealing ring.
Caution
!
Use the detachable cable with a separate BNC connector to pass the hole of the
sealing nut. Otherwise, use the female type head of the BNC cable to pass the
hole of the sealing nut.
Hole for gland
Electrical nut
O-ring
Gland body
Sealing nut

RTC Series RTC6500 Series Installation Guide
04-2017-A www.rivatech.de 10
4.2. Connecting Cable(s)
Connect the required cables to the corresponding connectors on the back panel of the camera
body. Refer to 5. CONNECTIONS for more information about each connector.
Note
i
Please use a shielded cable for the RJ45 connection to block radio frequency
interference.
4.3. Installing Base Mount
1) Insert the provided 8 tamper resistant screws to the corresponding screw holes on the base
mount by referring to the image above.
2) Tighten them with a Phillips head #2 screwdriver to fix the base mount to the camera.
Screw &
Plastic Anchor-3pcs
Quick Installation Guide
CABEL CORE
[Base Mount Installation: Upside-Down View]

RTC Series RTC6500 Series Installation Guide
04-2017-A www.rivatech.de 11
4.4. Closing the Back Cover
1) Insert the provided silica gel packet inside the back panel.
2) Close the back panel of the camera by twisting the back cover clockwise on the camera’s
back panel.
3) Insert the two tamper resistant screws into the holes on the back cover, and tighten them
with a Phillips #2 screwdriver to fix the back cover to the camera unit.
4.5. Installing the Sunshield
1) Insert the two provided stem bumpers to the holes at the bottom of the sunshield.
2) Place the sunshield on top of the camera body, and snap the sunshield to the base mount.
4.6. Adjusting Image Focus
The camera is pre-focused at factory to suit each FOV. However, in case you need to adjust the
focus for optimal image quality at your installation site, you can manually set the focus by
rotating the lens with hand.
The lens may be a little difficult to turn due to the O-ring behind the lens. Try to turn the lens
counter-clockwise first to move the lens away from the base. Once the lens moves, start
turning it in either direction for focusing by grabbing the barrel of the lens with one hand and
grabbing the base unit with the other hand.

RTC Series RTC6500 Series Installation Guide
04-2017-A www.rivatech.de 12
4.7. Installing with Bracket
The compatible accessories to mount this camera are as follows.
Model Names & Combinations
WBOVA2 + (WCWA, WSFPA / DBHWGC / PTCC1, or WCPA)
WCM4A2
Refer to the corresponding accessory model’s installation guide for the instructions.
Note
i
The models in the parenthesis, (), may or may not be required depending on
the installation environment.
Model Names
WBOVA2
Wall Mount Bracket
WCM4A2
Ceiling Mount Bracket
WCWA
Corner Mount Adaptor
WSFPA
Pole Mount Adaptor
DBHWGC
Pole Mount Adaptor
PTCC1
Pole Mount Adaptor
WCPA Reinforcing Support Plate
for Poor Consistency Walls

RTC Series RTC6500 Series Installation Guide
04-2017-A www.rivatech.de 13
5. CONNECTIONS
① DIDO (Sensor/Alarm) Connection
Two Alarms (DO1 | DO2)
The camera provides two digital outputs (alarms). The default status of each is respectively
normally open(N.O) and normally closed(N.C) so that you can opt to use one accordingly.
Only the relay type is supported.
- Digital Output 1
Relay Rating: Max 30VDC 1A
Normally Open (N.O) at power off
- Digital Output 2
Relay Rating: Max 30VDC 1A
Normally Closed (N.C) at power off
Caution
!
Do not exceed the maximum relay rating.
DO1
DO2
DI
NO
NC
IN
GND
AUDIO IN
AUDIO OUT
IN
GND
OUT
GND
+
-
DIDO
AUDIO
RS-485
Screw &
Plastic Anchor-3pcs
Quick Installation Guide
CABEL CORE
DIDO
AUDIO
POWER
RS-485
ANALOGUE
VIDEO OUT
RJ45
+
-
GND
POWER
[ Back Panel of Camera ]

RTC Series RTC6500 Series Installation Guide
04-2017-A www.rivatech.de 14
One Sensor (DI)
The camera provides one digital input (sensor).
Sensor (DI) can be connected to either a voltage type sensor or a relay type sensor as the
following figures. Settings can be done through the camera’s webpage.
- Input voltage range: 0VDC minimum to 5VDC maximum, Max 50mA
Relay Rating: Max 30VDC 1A
Caution
!
Do not exceed the maximum input voltage or relay rate.
② Audio Connection
The camera provides a mono audio input and output. Due to low audio output power, an
amplified speaker is recommended for enhanced sound (Refrain from connecting a
headphone or an earphone directly to the camera).
- Microphone In: Max 2Vp-p, 20KΩ (90dB)
- Headphone Out: 60mW, 16Ω (95dB)
Mic
Amp Speaker
ETHERNET
MICRO SD
DC12V
DO
DI
1
OutOut
1
VIDEO
C C
In
AUDIO
+
Reset
SW1 SW2 SW3
SW5 SW6
N / A N / A
N / A N / A
SW1
SW2
SW3
SW4
SW5
SW6
+3.3V
DI
COM
DI
COM
+
-
Relay Type
Voltage Type
+
-
Output of
Sensor
Output of
Sensor
Internal
Internal
+
-

RTC Series RTC6500 Series Installation Guide
04-2017-A www.rivatech.de 15
③ RS-485 Connection
The RS-485 serial port consists of TRX+(RX+) and TRX-(RX-) like the following image.
④ Power Connection
The camera can be powered by either 12VDC, 24VAC, or PoE. If the camera is powered via
PoE, you do not need to connect the power adaptor. For more information about PoE,
refer to “Appendix (C). Power over Ethernet” for more information.
To operate your camera by using 12VDC, make sure the polarity is correct before
connecting the power cable. Incorrect connection may cause damage to the device.
⑤ RJ45 Connection
This is a RJ45 LAN connector for 10/100 Base-T Ethernet. Use the Ethernet cable (RJ45) to
connect the device to a hub or a router in the network. Refer to “Appendix (C). Power
over Ethernet” for more information.
Note
i
Please use a shielded cable for the RJ45 connection to block radio frequency
interference.
⑥ Analogue Video Output Connection
Use a 75 ohm video coaxial cable to connect to a monitor’s analog video input.
The factory default for analogue video output is NTSC. Press once to set the video to PAL,
and press again to set the video to NTSC.
Black
Red
485 Device

RTC Series RTC6500 Series Installation Guide
04-2017-A www.rivatech.de 16
6. CONFIGURATION
6.1. Set up network environment
The default IP address of the device is 192.168.XXX.XXX. Users can identify the IP address of the
device from converting the MAC address’s hexadecimal numbers, which is attached to the
device. Be sure that the device and PC are on a same network before running the installation.
IP address : 192.168.xxx.xxx
Subnet mask: 255.255.0.0
6.1.1. Generic IP Environment
In case of generic private network environment where IP address 192.168.XXX.XXX are used,
users may view the live streaming images on a web page using the device’s default IP address:
1. Convert the device’s MAC address to the IP address. Refer to the Hexadecimal-Decimal
Conversion Chart at the end of the manual.
(The MAC address of the device is attached on the side or bottom of the device.)
2. Start the Microsoft® Internet Explorer web browser and enter the address of the device.
3. Web streaming and device configurations are supported through ActiveX program. When the
ActiveX installation window appears, authorize and install the ActiveX.
MAC address = 00-13-23-01-14-B1 → IP address = 192.168.20.177
Convert the last two sets of hexadecimal numbers to decimal numbers.

RTC Series RTC6500 Series Installation Guide
04-2017-A www.rivatech.de 17
6.1.2. Custom IP Environment
Please access our website and download necessary IPAdminTool first:
http://www.rivatech.de/en/downloads/software
IPAdminTool is a management tool, which automatically scans all of the network products for
users to perform administrative tasks, which includes network configurations, firmware
update, device reboot, and device organizations.
To modify the device’s default IP address for customized network area;
1. Find the device from the IPAdminTool’s list and highlight the device’s name.
2. Right-click the mouse and select IP Address; IP Setup window appears.
* There are two options that are for a single device or for multiple devices respectively. For one device, click “Single”.
3. On the New Information table in the Single IP Change window, modify the last two digits of
the device’s IP address. Make sure to input the correct ID and PW of the device (default:
root / pass).
4. Click Apply to complete the modification.
Give a new unique IP address by
modifying the last two digits.

RTC Series RTC6500 Series Installation Guide
04-2017-A www.rivatech.de 18
6.2. View video on web page
Type the proper IP address to view the live streaming images through a web browser.
The default username and password is root / pass.
6.2.1. ActiveX Installation
1. When the browser asks to install the AxUMF software, click Install to proceed.
2. When Setup installation pop-up window appears, click Install to proceed with rest of
installations.
Note
i
Depending on system OS and Internet Explorer version, installation experience
may differ from one another. Figures described above are from Windows 7,
Internet Explorer 9 environment.

RTC Series RTC6500 Series Installation Guide
04-2017-A www.rivatech.de 19
6.2.2. View video using IPAdmin Tool
IPAdminTool automatically searches all activated network encoders and IP cameras and shows
the product name, IP address, MAC address and etc.
1. From the IPAdminTool’s product list, select the device by highlighting it.
2. Right-click the mouse, and select Web view.
Then, the system’s default web browser opens the device’s address.
Caution
!
Whether directly accessing the streaming video by typing IP address on a web
page or taking steps through IPAdminTool, the ActiveX is needed to be installed
for the Microsoft® Internet Explorer to have the complete configuration
privileges.

RTC Series RTC6500 Series Installation Guide
04-2017-A www.rivatech.de 20
6.3. Reboot
On the Device
Perform the following procedure to reset your device.
1. Press the reset button for 2 seconds when the device is powered on.
2. Wait for the system to reboot.
Caution
!
Do not press the reset button for more than 2 seconds. Otherwise, the camera
may be switched to its factory default settings.
On the Webpage
Reboot the device via the camera’s webpage:
1. Go to Setup > Maintenance > Reboot.
2. Click the Reboot button to reboot the device.
3. Wait for the device to complete booting.
6.4. Factory Default
Resetting the device back to the factory default will initialize all parameters including the IP
address back to the factory defaults.
On the Device
1. Press the reset button for 10 seconds by making sure that booting is complete on the
device.
2. Wait for the system to reboot.
Then, all the parameters of the device will be initialized.
On the webpage
Reset the current settings to the factory default values via the camera’s webpage:
1. Go to Setup > Maintenance > Reset All Settings.
2. Select the items that you want to preserve from the initialization among network
settings, user account information, and time zone setting.
3. Click Reset All Settings.
/