Page is loading ...

Installation and Operating Instructions For
Whole House Water Filters: AP800 Series
Models: AP801 Housing, AP801-C System,
AP802 Housing
Installer: Please leave manual with homeowner.
Homeowner: For complete information on system
operation, maintenance and warranty, please
retain Installation and Operating Manual.

SAFETY INFORMATION
EXPLANATION OF SIGNAL WORD CONSEQUENCES
WARNING
CAUTION
IMPORTANT NOTES
Read, understand, and follow all safety information contained in these instructions prior to installation and use of the
Aqua-Pure
®
AP800 Series Whole House Water Filters. Retain these instructions for future reference.
Intended use:
The Aqua-Pure
®
AP800 Series Whole House Water Filters are intended for use in filtering potable water in homes and have not
been evaluated for other uses. These filters are typically installed at the point of entry, and should be installed by qualified
professional installers according to these installation instructions.
CAUTION
WARNING
Indicates a potentially hazardous situation, which, if not avoided, could result in death or
serious injury and/or property damage.
Indicates a potentially hazardous situation, which, if not avoided, may result in minor or
moderate injury and/or property damage.
Indicates a potentially hazardous situation, which, if not avoided, may result in property damage.
To reduce the risk associated with choking:
•Do not allow children under 3 years of age to have access to small parts during the installation of this product.
To reduce the risk associated with ingestion of contaminants:
•Do not use with water that is microbiologically unsafe or of unknown quality without adequate disinfection before or after
the system.
To reduce the risk associated with hazardous voltage due to an installer drilling through existing electric wiring or
water pipes in the area of installation:
•Do not install near electric wiring or piping which may be in the path of a drilling tool when selecting the position to
mount the filter bracket.
To reduce the risk of physical injury:
•Shutoffinletwatersupplyanddepressurizesystemasshowninmanualpriortocartridgeremoval.
To reduce the risk associated with a hazardous voltage:
•Ifthehomeelectricalsystemrequiresuseofthecoldwatersystemasanelectricalsafetyground,ajumpermust be used
to ensure a sufficient ground connection across the filter installation piping — refer installation to qualified personnel.
To reduce the risk associated with back strain:
•Followsafeliftingprocedures.
To reduce the risk associated with property damage due to water leakage:
• Read and follow Use Instructions before installation and use of this system.
• Installation and use MUST comply with all state and local plumbing codes.
• Protect from freezing. Drain filter when temperatures are expected to drop below 40°F (4.4°C).
• Do not install systems in areas where ambient temperatures may go above 110° F (43.3° C).
• Do not install if water pressure exceeds 100 psi (690 kPa). If your water pressure exceeds 80 psi (552 kPa), you must
install a pressure limiting valve. Contact a plumbing professional if you are uncertain how to check your water pressure.
• Do not install where water hammer conditions may occur. If water hammer conditions exist you must install a
water hammer arrester. Contact a plumbing professional if you are uncertain how to check for this condition.
• Where a backflow prevention device is installed on a water system, a device for controlling pressure due to thermal
expansion must be installed.
• Do not install on hot water supply lines. The maximum operating water temperature of this system is 100°F (37.8°C).
• Do not use a torch or other high temperature sources near system, cartridges, plastic fittings or plastic plumbing.
• On plastic fittings, never use pipe sealant or pipe dope. Use PTFE thread tape only, pipe dope properties may
deteriorate plastic.
• Take care when using pliers or pipe wrenches to tighten plastic fittings, as damage may occur if over tightening occurs.
• Do not install in direct sunlight or outdoors.
• Do not install near water pipes which will be in path of a drilling tool when selecting the position to mount the bracket.
• Mount system in such a position as to prevent it from being struck by other items used in the area of installation.
• Ensure that the location and fasteners will support the weight of the system when installed and full of water.
• Ensure all tubing and fittings are secure and free of leaks.
• SHUT OFF FUEL OR ELECTRIC POWER SUPPLY TO WATER HEATER after water is shut off.
• The disposable cartridge must be replaced every 6 months, at the rated capacity or sooner if a noticeable reduction
in flow rate occurs.
• Failuretofollowinstructionswillvoidwarranty.
• Allowaminimumof2”(5.1cm)clearspaceunderltertofacilitatecartridgechange.
• Installwiththeinletandoutletportsaslabeled.Makesurenottoreverseconnections.
• Somelocalcodesmayrequiretheuseofalicensedplumberorcertiedinstallerwhendisruptingapotablewaterline.
• Beforestartinginstallation,shutoffmainwatersupplyanddrainpipes.
CAUTION
2

Flow
To Household Plumbing
Assembly schematic is based on suggested materials. Assembly of this filter can be modified by using
various adapters.
Parts and Materials Included:
1) Filter Head
2) Housing
3) Housing Wrench
4)MountingBracket(AP801-Cmodelonly)(not shown)
Tools and Materials Required (not included):
Gather the required tools before starting installation.
Read and follow the instructions provided with any tools listed here.
A) Pipe Cutter
B)Two1”MaleCompressionAdapters
C)1”BallValve(CompressionType)
D) PTFE Tape
E) Adjustable Wrench
F) Aqua-Pure AP810 filter cartridge (Included
with AP801-C model only) (see page 5 for
cartridge options)
G) Ground Kit (not shown)
GETTING STARTED
A
B
B
C
D
E
F
1
2
3
City Water Installation
Well Water Installation
Meter
Master
Shut-Off
Valve
To Household
Plumbing
Pump
Master
Shut-Off
Valve
To Household
Plumbing
Pressure
Tank
CAUTION
To reduce the risk associated with property damage due to water leakage:
• InstallationandUseMUSTcomplywithallstateandlocalplumbingcodes.
3

IMPORTANT INSTALLATION INSTRUCTIONS
1. Shut off main water supply. Relieve pressure from water lines.
2. Remove housing from filter head and set aside.
3. WrapPTFEtapearoundthe1”malecompressionadaptors(totheright,see
Figure 1) and install into filter head. Do not use pipe solvent (dope) as
some types may cause damage to plastic fittings. Do not overtighten as it
may cause damage to filter head. Damage to unit may result in property
damage due to water leakage.
4. Calculate proper spacing of components. Measure distance and mark pipe accordingly.
5. Cut pipe to length with pipe cutter.
6. Install filter head and ball shut-off valve onto pipe. Make sure the the filter is connected with the correct flow direc-
tion. Tighten compression nuts.
7. Remove o-ring from housing. Lubricate with water and seat securely on housing.
8. Place cartridge into housing. Install housing onto head.
9. Slowly turn on main water supply. Press red air release button (on filter head) to expel air.
10. Check for leaks.
11. Flush at least 10.5 gallons through system.
CAUTION
WARNING
To reduce the risk associated with hazardous
voltage:
•Ifthehomeelectricalsystemrequiresuseof
thecoldwatersystemasanelectricalsafety
ground,ajumpermustbeusedtoensurea
sufcientgroundconnectionacrossthelter
installationpiping—referinstallationtoquali-
edpersonnel.(seeFigure2)
To reduce the risk associated with property damage due to water leakage:
• Read and follow Use Instructions before installation and use of this system.
• Installation and use MUST comply with all state and local plumbing codes.
• Protect from freezing, remove filter cartridge when temperatures are expected to drop below 40°F (4.4°C).
• SHUT OFF FUEL OR ELECTRIC POWER SUPPLY TO WATER HEATER after water is shut off.
Ground Wire
Ground Clamp Ground Clamp
Figure 2
Figure 1
4

LIMITED WARRANTY
FILTER CARTRIDGE REPLACEMENT INSTRUCTIONS
Filter life depends on local water conditions and the volume of water used. We recommend you change your filter as pre-
scribed by the filter documentation. However, it can be replaced earlier if there is a drop in water pressure.
You can use a variety of cartridges with the AP800 Series housings: AP810, AP811, AP814, AP810-2, AP811-2 and
AP814-2 for particulate and rust; AP817, AP817-2 for particulate, chlorine taste & odor.
NOTE:Beforechangingcartridge,turnoffmainwatersupply.Placeabucketunderfiltertocatchthesmallamountof
water that will run out after housing removal.
1. Turn off the water supply and close shut-off valve after filter head.
2. Relieve pressure in filter housing by pushing red vent button.
3. Unscrew housing (to the left) using housing wrench supplied with the product and discard old cartridge. Wash
housing thoroughly with mild soap and water.
4. Lubricate o-ring with water.
5. Insertnewcartridgeandre-installhousing.Besurecartridgeiscorrectlyinstalledando-ringisseatedonthehous-
ing before tightening onto head.
6. Turn on the water supply and shut off valve. Open main shut-off valve and check for leaks.
7. Ventairandcheckonleaks,tightenhousingasneededwithhousingwrenchsuppliedwiththeproduct.Openshut-
off valve after filter head.
8. Flush at least 10.5 gallons through system.
TROUBLESHOOTING GUIDE
Water Leaks at Fittings:
Tighten slightly until leak stops.
If Leaks Persist:
Shut off water at the main water supply shut-off valve, remove threaded fittings, reapply PTFE tape in a clockwise direc-
tion (to the right) and screw back onto head assembly.
CAUTION
To reduce the risk associated with property damage due to water leakage:
• The disposable cartridge must be replaced every 6 months, at the rated capacity or sooner if a noticeable reduction in flow rate occurs.
3M Purification Inc. warrants this Product will be free from defects in material and manufacture for ten (10) years) from the date of purchase. The filter
cartridge or filter membrane is warranted to be free from defects in material and manufacture for one (1) year. This warranty does not cover failures result-
ing from abuse, misuse, alteration or damage not caused by 3M Purification Inc. or failure to follow installation and use instructions. No warranty is given
as to the service life of any filter cartridge or membrane as it will vary with local water conditions and water consumption. 3M PURIFICATION INC. MAKES
NO OTHER WARRANTIES OR CONDITIONS, EXPRESS OR IMPLIED, INCLUDING, BUT NOT LIMITED TO, ANY IMPLIED WARRANTY OR CONDITION OF
MERCHANTABILITY OR FITNESS FOR A PARTICULAR PURPOSE OR ANY IMPLIED WARRANTY OR CONDITION ARISING OUT OF A COURSE OF DEALING,
CUSTOMER OR USAGE OF TRADE. If the Product fails to satisfy this Limited Warranty during the warranty period, 3M Purification Inc. will, at 3M
Purification Inc.’s option, replace the Product or refund your Product purchase price. This warranty does not cover labor. The remedy stated in this para-
graph is Customer’s sole remedy and 3M Purification Inc.’s exclusive obligation. For additional information, please call 1-800-222-7880.
This warranty gives you specific legal rights, and you may have other rights which may vary from state to state or country to country. For any warranty
questions, please call 1-800-222-7880 or mail your request to: Warranty Claims, 3M Purification Inc., 400 Research Parkway, Meriden, CT 06450. Proof of
purchase (original sales receipt) must accompany the warranty claim, along with a complete description of the Product, model number and alleged defect.
Limitation of Liability. 3M Purification Inc. will not be liable for any loss or damage arising from this 3M Purification Inc. product, whether direct, indirect,
special, incidental, or consequential, regardless of the legal theory asserted, including warranty, contract, negligence or strict liability. Some states and coun-
tries do not allow the exclusion or limitation of incidental or consequential damages, so the above limitation or exclusion may not apply to you.
5
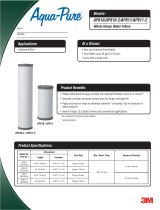
AP800 Series Replacement Cartridge Options
Particulate
Model
Load
Nominal Micron
Rating
Application
Max. Flow Rate
Particulate/Rust
Chlorine
Taste & Odor
AP810 Normal 5
•
20 gpm (75.7 lpm)
AP811 Medium 25
•
20 gpm (75.7 lpm)
AP814 Heavy 50
•
20 gpm (75.7 lpm)
AP817 Normal 25
•
10 gpm (37.9 lpm)
AP810-2 Normal 5
•
45 gpm (170.3 lpm)
AP811-2 Medium 25
•
45 gpm (170.3 lpm)
AP814-2 Heavy 50
•
45 gpm (170.3 lpm)
AP817-2 Normal 25
•
20 gpm (75.7 lpm)

3M Purification Inc.
400 Research Parkway
Meriden, CT 06450 U.S.A.
Toll Free: 800.222.7880
Worldwide: 203.237.5541
Fax: 203.238.8701
www.aquapure.com•www.3Mpurication.com
3M is a trademark of 3M Company.
Aqua-Pure is a trademark of 3M Company used under license.
© 2013 3M Company. All rights reserved.
INSTRAP801 0613
/