Page is loading ...

Masterbuilt Manufacturing, Inc.
1 Masterbuilt Ct.
Columbus, GA 31907
Servicio de atención al cliente: 1-800-489-1581
www.masterbuilt.com
SEA PARTE DE NUESTRO “DADGUM BUENO” COMUNIDAD EN LÍNEA:
www.masterbuilt.com | www.dadgumthatsgood.com | www.facebook.com/masterbuilt
Twitter @Masterbuilt @JohnMcLemore @Dadgum atsGood
CARBON MONOXIDE
HAZARD
WARNING
Burning wood chips gives off carbon
monoxide, which has no odor
and can cause death.
DO NOT burn wood chips inside homes,
vehicles, tents, garages or any enclosed areas.
Use only outdoors where it is
well ventilated.
This manual contains important
information necessary for the proper
and safe use of this unit.
Read and follow all warnings
and instructions before using
smoker and during use.
Keep this manual for future reference.
Some parts may have sharp edges
handle with care.
Failure to follow these warnings and instructions properly could result in
personal injury or death.
Manual Code:9807130082 121213-23SS
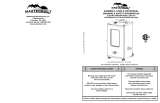
ASSEMBLY, CARE & USE MANUAL WARNING & SAFETY INFORMATION
ELECTRIC SMOKER MODEL: 20072614
THIS PRODUCT IS FOR OUTDOOR USE ONLY
Tool needed for assembly: Phillips Head Screwdriver (not included)
Approximate assembly time : 15 minutes

GENERAL WARNINGS AND SAFETY INFORMATION
1
READ ALL INSTRUCTIONS
When using electrical appliances, basic safety precautions should always be followed in-
cluding the following:
• For outdoor use only. Do not operate in an enclosed area.
• Unit MUST be on the ground. Do not place unit on tables or counters. Do NOT move unit
across uneven surfaces.
• Do not lift unit by rear handle.
• Do not plug in electric smoker until fully assembled and ready for use.
• Use only approved grounded electrical outlet.
• Do not use during an electrical storm.
• Do not expose electric smoker to rain or water at anytime.
• To protect against electrical shock do not immerse cord, plug or control panel in water or
other liquid.
• Do not operate any appliance with a damaged cord or plug, or after appliance malfunc-
tions or has been damaged in any manner. Contact Masterbuilt Customer Service for
assistance at 1-800-489-1581.
• Keep a fi re extinguisher accessible at all times while operating electric smoker.
• Do not let cord hang touch hot surfaces.
• Do not place on or near a hot gas or electric burner, or in a heated oven.
• Keep children and pets away from electric smoker at all times. Do not allow children to
use electric smoker. Close supervision is necessary should children or pets be in area
where electric smoker is being used.
• Fuel, such as charcoal briquettes or heat pellets, are not to be used in electric smoker.
• Never use electric smoker as a heater (READ CARBON MONOXIDE HAZARD ON FRONT
COVER).
• Use electric smoker only on a level, stable surface to prevent tipping.
• Electric smoker is HOT while in use and will remain HOT for a period of time afterwards.
Use caution.
• Do not touch HOT surfaces.
• Do not allow anyone to conduct activities around electric smoker during or following its
use until the unit has cooled. Electric smoker is HOT during operation and remains HOT
for a period of time following use.
• The use of alcohol, prescription or non-prescription drugs may impair the user’s ability
to properly assemble or safely operate electric smoker.
• Avoid bumping or impacting electric smoker.
• Never move electric smoker when in use. Allow electric smoker to cool completely be-
fore moving or storing.
• Be careful when removing food from electric smoker. All surfaces are HOT and may
cause burns.
• Use protective gloves or long, sturdy cooking tools.
WARNINGS & IMPORTANT SAFEGUARDS
CONTINUED ON PAGE 2
18
GARANTÍA LIMITADA
Masterbuilt garantiza que, por un plazo de 90 días contados desde la fecha de la compra original
en el establecimiento minorista, sus productos no tendrán defectos de materiales ni de fabricación,
siempre que se armen, se usen y se cuiden correctamente y como se indica.
La garantía de Masterbuilt no ampara la pintura de acabado, pues ésta se puede deteriorar por el
calor con el uso normal.
La garantía de Masterbuilt no ampara la oxidación de la unidad.
Para hacer reclamos en virtud de la garantía, Masterbuilt exige que se presente una prueba razon-
able de la compra, de modo que le sugerimos que conserve el comprobante. Toda obligación en
virtud de la garantía termina en la fecha de vencimiento de la misma.
Durante el período de vigencia de la garantía, Masterbuilt, a su criterio, reparará o cambiará los
componentes defectuosos, sin costo alguno, y el pago del envío correrá a cargo del propietario del
producto. Si Masterbuilt exige la devolución de los componentes en cuestión para inspeccionarlos,
Masterbuilt pagará los gastos de envío por la devolución de los artículos solicitados.
Esta garantía no incluye los daños a la propiedad causados por el uso indebido, el maltrato y los ac-
cidentes, los daños sufridos durante el transporte, o los daños causados por el uso con fi nes comer-
ciales de este producto.
Esta garantía expresa es la única garantía que ofrece Masterbuilt y reemplaza toda otra garantía,
expresa o implícita, incluyendo las garantías implícitas sobre su idoneidad para su comercialización
o para algún otro fi n en particular.
Ni Masterbuilt ni los establecimientos que venden este producto están autorizados a ofrecer ga-
rantías o a prometer recursos adicionales o incongruentes con los antes especifi cados.
La responsabilidad máxima de Masterbuilt no excederá, en ningún caso, el precio que pagó el
consumidor/comprador original por la compra del producto. En algunos estados no se permite la
exclusión ni la limitación de los daños accesorios o indirectos. En tal caso, es posible que las limita-
ciones y exclusiones anteriores no correspondan a su caso.
Sólo para los residentes de California: No obstante esta limitación de la garantía, se aplicará la
siguiente restricción específi ca: en el caso en que no sea comercialmente viable dar mantenimiento,
reparar o cambiar el producto, el minorista que vende este producto o Masterbuilt le reembolsarán el
precio de compra pagado por el mismo, menos la cantidad directamente atribuible al uso dado por
el comprador original, antes de haber descubierto la falla. El propietario debe llevar el producto al
establecimiento que lo vende, para recibir los servicios en virtud de la garantía.
Esta garantía expresa le otorga derechos específi cos; es posible que usted tenga además otros
derechos que pueden variar de un estado a otro.
Visite www.masterbuilt.com
o llénela y devuélvala a
la atención de: Warranty Registration
Masterbuilt Mfg. Inc.
1 Masterbuilt Court - Columbus, GA31907
Nombre: ____________________________ Dirección:__________________________Ciudad:________________
Estado/provincia: ________ Código postal: ________________Número de teléfono: (_____) - ____________
Dirección de correo electrónico:_________________________________
*Número de modelo: ____________________ *Número de serie: ____________________
Fecha de compra: ____- _____- _______ Lugar de compra: _________________
*El número de modelo y el número de serie fi guran en la etiqueta plateada ubicada en la parte trasera de la unidad.

17
Este dispositivo cumple con la parte 15 de las Normas de la Comisión Federal de Comunicaciones
(FCC, por sus siglas en inglés). Su funcionamiento está sujeto a las siguientes dos condiciones:
(1) No debe provocar interferencia nociva; y
(2) debe aceptar interferencia en la recepción, incluso la que pueda ocasionar problemas de
funcionamiento.
Advertencia de la FCC:
Advertencia: Los cambios o modifi caciones a esta unidad, no autorizados expresamente por la
parte responsable del cumplimiento de las normas, podrían invalidar el permiso al usuario para
hacerla funcionar.
Declaración acerca de las normas de la FCC
NOTA: Este equipo ha sido sometido a pruebas y se ha verifi cado que cumple con los límites
señalados para dispositivos digitales de la Clase B, de acuerdo con la parte 15 del reglamento de
la FCC. Estos límites han sido establecidos para proteger de manera razonable las instalaciones
residenciales contra la interferencia nociva. Este equipo genera, emplea y es capaz de irradiar
energía de radiofrecuencia y, si no se instala de conformidad con las instrucciones, puede producir
interferencia nociva en las comunicaciones por radio.
No obstante, no hay garantía de que no se generará interferencia en instalaciones de
características particulares. Se recomienda al usuario que, en caso de que este equipo genere
interferencia nociva a la recepción de ondas de radio o de televisión, lo que se puede determinar
apagando el equipo y volviéndolo a encender, intente corregir la situación haciendo lo siguiente:
1. Cambiar la orientación o la ubicación de la antena de recepción.
2. Aumentar la distancia entre el equipo y el receptor.
3. Conectar el equipo a un tomacorriente de un circuito distinto al que está conectado el receptor.
4. Consultar con el distribuidor o un técnico especializado en radio y TV.
GENERAL WARNINGS AND SAFETY INFORMATION
2
• Do not cover cooking racks with metal foil. This will trap heat and cause severe damage
to electric smoker.
• Drip tray is only for the bottom of electric smoker. Do not put drip tray on cooking racks
this may damage electric smoker.
• Wood tray is HOT when electric smoker is in use. Use caution when adding wood.
• To disconnect, turn control panel “OFF” then remove plug from outlet.• Unplug from
outlet when not in use and before cleaning. Allow unit to cool completely before adding/
removing grates, tray or water bowl.
• Dispose of cold ashes by placing them in aluminum foil, soaking with water and discard-
ing in a non-combustible container.
• Do not store electric smoker with HOT ashes inside unit. Store only when all surfaces
are cold.
• Accessory attachments not supplied by Masterbuilt Manufacturing, Inc. are not recom-
mended and may cause injury.
• The use of accessory attachments not recommended by the appliance manufacturer may
cause injuries.
• Never use electric smoker for anything other than its intended purpose. This unit is not
for commercial use.
• Always use electric smoker in accordance with all applicable local, state and federal fi re
codes.
• Longer detachable power-supply cords or extension cords are available and may be
used if care is exercised in their use.
• If a longer detachable power-supply cord or extension cord is used: 1. The marked elec-
trical rating of the cord set or extension cord should be at least as great as the electrical
rating of the appliance; and 2. The cord should be arranged so that it will not drape over
the counter top or tabletop where it can be pulled by children or tripped over intentional-
ly.
• The extension cord must be a grounding -type 3-wire cord.
• Outdoor extension cords must be used with outdoor use products and are marked with
suffi x “W” and with the statement “Suitable for Use with Outdoor Appliances.
• CAUTION - To reduce the risk of electric shock, keep extension cord connection dry and
off the ground.
• Extreme caution must be used when moving an appliance containing hot liquids.
• Do not clean this product with a water sprayer or the like.
SAVE THESE INSTRUCTIONS
CALIFORNIA PROPOSITION 65
1. Combustion by-products produced when using this product contain chemicals known to
the State of California to cause cancer, birth defects, and other reproductive harm.
2. This product contains chemicals, including lead and lead compounds, known to the State
of California to cause cancer, birth defects or other reproductive harm.
Wash your hands after handling this product.
WARNING

LET’S GET STARTED!
• This is a slow smoker…allow suffi cient time for cooking. Smoker is for OUTDOOR USE ONLY.
• “Preseason” smoker prior to fi rst use. See page 12.
• Pre-heat smoker for 30 to 45 minutes at max temperature before loading food.
• DO NOT cover racks with aluminum foil as this will not allow heat to circulate properly.
• Do not overload smoker with food. Extra large amounts of food may trap heat, extend cooking
time and cause uneven cooking. Leave space between food on racks and smoker sides to ensure
proper heat circulation. If utilizing cooking pans, place pans on center of rack to ensure even cook-
ing. Please see manual for more detail.
• Close air damper on side of unit to retain moisture and heat. If cooking foods such as fi sh or jerky,
open air damper to release moisture.
• Temperature reading on control panel will fl uctuate + or - 10 to 15 degrees as smoker cycles on
and off.
• Store smoker in a dry area after use.
• Extreme cold temperatures may extend cooking times.
•
CLEAN AFTER EVERY USE. This will extend the life of your smoker and prevent mold and mildew.
ENJOY!
16
PAVO AHUMADO
Rinde de 6 a 8 porciones
INGREDIENTES:
Pavo
10 -14 lb. (4.5 - 6.3 kg
)
Sal 1 cda.
Azúcar 2 cdas.
Canela 1-2 cdtas.
Manzana (deshuesada, pelada y
1 mediana
cortada en cuartos)
Cebolla (cortada en cuartos) 2 medianas
Tallos de apio con hojas 4 tallos
MADERA SUGERIDA PARA EL AHUMADO:
Trocitos de madera de nogal americano o de manzano
INSTRUCCIONES:
Si es necesario, descongele el pavo siguiendo las
instrucciones señaladas en la envoltura. Retire los menudos y
el pescuezo. Enjuáguelo, escúrralo y séquelo con una toallita.
Espolvoree sal en la cavidad del pavo. Mezcle el azúcar y la
canela en un tazón pequeño. Empape los trozos de manzana
en la mezcla. Rellene la cavidad del pavo con la manzana, las
cebollas y el apio. Ciérrela con pinchos de brocheta. Ate los
extremos de las patas a la cola, con cordel de cocina. Levante las
puntas de las alas, páselas hacia atrás y métalas bajo el espinazo
del ave. Caliente el ahumador a 225° F (107° C). Coloque el pavo
sobre la rejilla de cocción y cocínelo durante 8 a 12 horas o hasta
que la temperatura interna de los muslos llegue a 180° F (82° C).
Cubra el pavo y deje que se enfríe o repose 20 minutos antes de
cortarlo. Sírvalo.
RECETAS PARA AHUMAR EN EL MASTERBUILT
RECETAS PARA AHUMAR EN EL MASTERBUILT
RECETAS PARA AHUMAR EN EL MASTERBUILT
RECETAS PARA AHUMAR EN EL MASTERBUILT
SABOR DE MADERA POLLO
PESCADO
JAMÓN RES PUERCO
CORDER O
Nogal americano
Sabor picante, ahumado, parecido al tocino
9 9 9 9
9
Mezquite
Sabor dulce y delicado
9 9 9
Aliso
Sabor ahumado delicado
9 9 9
Pacanero
Sabor fuerte y abundante
9 9 9
Arce
Sabor dulce y sutil
9 9
Manzano
Sabor dulce y delicado
9 9 9
Cerezo
Sabor dulce y delicado
9 9
GUÍA DE AHUMADO CON MADERA PARA CARNES

13
Para cambiar las pilas:
• Para retirar las pilas, deslice la presilla hacia la derecha.
• Presione hacia abajo la pestaña de la tapa y extráigala.
• Instale 2 pilas alcalinas "AAA". En la parte inferior de la pila, fíjese en los símbolos positivo (+) y
negativo (-) para garantizar su instalación correcta.
• Vuelva a colocar la tapa de las pilas.
• Quite las pilas antes de guardar el control remoto.
Para comprobar el alcance de frecuencia:
• Encienda la unidad.
• Con el control remoto encienda y apague la luz a medida que se aleja de la unidad.
•
Cuando la luz ya no se encienda o apague, el control remoto estará fuera del alance de frecuencia.
IMPORTANTE
• No deje el control remoto expuesto a la luz solar durante largos períodos de tiempo.
• El control remoto tienen un alcance de hasta 100 ft (30 m).
• Compruebe el alcance de frecuencia antes y durante el uso de la unidad.
SOLUCIÓN DE PROBLEMAS
Si el control remoto no funciona correctamente o no correctamente la interfaz con el controlador, puede ser la batería esté
baja, las baterías están correctamente instalados o el control remoto no está correctamente vinculado al controlador.
Solución posible
• Cambie las pilas e instale de acuerdo a la imagen en la batería de la vivienda
• Vincular a distancia y el controlador por:
a. Gire controlador remoto y “ON”,
b. Presione “SET TEMP” de la controladora durante 3 segundos.
c. En la prensa remoto “CARNE DE SONDA”, “light”, “MEATPROBE”, “LIGHT” (todos los botones
se debe pulsar en 5 segundos el uno del otro) un pitido corto se producirá después de cada
pulsación de botón.
CÓMO UTILIZAR EL PANEL DE CONTROL Y EL CONTROL REMOTO
ADVERTENCIA
• Guarde las pilas lejos del alcance de los niños pequeños. Si alguien se traga una pila, consulte
de inmediato con un médico.
• Verifi que que haya colocado correctamente las pilas. Las pilas mal instaladas pueden provocar
fugas y/o riesgo de explosión.
• No tire las pilas al fuego.
• No mezcle pilas nuevas y viejas..
• No mezclar pilas alcalinas, pilas estándar (carbón-zinc) o recargables (ni-cad, ni-mh, etc.).
*Baterías no
incluidas
6
ASSEMBLY
• BEFORE ASSEMBLY READ ALL INSTRUCTIONS CAREFULLY.
• ASSEMBLE UNIT ON A CLEAN, FLAT SURFACE.
• TOOL NEEDED: PHILLIPS HEAD SCREWDRIVER
STEP 1
Position wheel (5) on bottom of
smoker body (1) as shown.
Insert adjustable screw leg (4)
into bottom of wheel (5).
Secure wheel (5) to bottom of
smoker body (1) using phillips
screws (A).
Repeat step for opposite side.
Note: Set adjustable screw leg
height by turning clockwise/coun-
terclockwise so that smoker is
level when unit is upright. Once
level, secure back leg positions
with attached tension nuts.
STEP 2a
Position control panel (6) on top of
smoker body (1) as shown.
Align slots on wire connecter from
control panel with tabs on wire
connecter on smoker as shown
and connect together.
STEP 2b
Mount control panel by inserting
stabilizing screw head into
keyhole.
Note: Stabilizing screw may need
slight adjustment for snug fi t.
1
6
Stabilizing
Screw
Keyhole
A
5
A
1
4
Tension
Nut

9
ASSEMBLY
STEP 7
Place wood chip tray (10) in
smoker as shown.
Note: Wood chip tray and wood
chip loader MUST be in place
when using smoker. This
minimizes the chance of fl are ups.
STEP 8
Place drip pan (12) inside smoker
below heating element as shown.
Make sure drip pan hole aligns with
hole in bottom of smoker.
10
12
10
ARMADO
PASO 9
Deslice los soportes de la parte
trasera de la bandeja para grasa
(15) sobre las lengüetas ubi-
cadas en la parte posterior del
ahumador, (1) hasta que no se
deslicen más.
Nota: Las ruedas no funcionará
mientras la bandeja de grasa
está en su lugar. Elimine la grasa
bandeja de empujar fumador.
PASO 10
Introduzca el cargador de
trocitos de madera (11) en el
costado del ahumador, como se
muestra en la ilustración.
1
15
11

9
ARMADO
PASO 7
Coloque el recipiente para
trocitos de madera (10) en el
ahumador, como se ilustra.
Nota: Al utilizar el ahumador, el
cargador y el recipiente de
trocitos de madera TIENEN que
estar en su sitio. Esto reduce
al mínimo la posibilidad de que
se produzcan llamaradas en la
madera.
PASO 8
Coloque el colector (12) dentro
del ahumador, debajo del
elemento calefactor, como
se ilustra. Asegúrese de que
el orifi cio del colector quede
alineado con el orifi cio ubicado
en el fondo del ahumador.
10
12
10
ASSEMBLY
STEP 9
Slide brackets on back of grease
tray (15) onto tabs on back of
smoker body (1) until grease tray
stops.
Note: Wheels will not operate
while grease tray is in place.
Remove grease tray to push/pull
smoker.
STEP 10
Insert wood chip loader (11) into
side of smoker as shown.
1
15
11

How to use wood chip loader:
• Before starting unit, place ½ cup of wood chips
in chip loader.
• Never use more than ½ cup of wood chips at a
time. Never use wood chunks.
• Insert wood chip loader into smoker. Wood
chips should be level with top rim of wood chip
loader.
• Turn handle clockwise in direction of arrow mark
on smoker to unload wood. Wood will drop into
wood chip tray. Turn handle counterclockwise,
to the upright position, and leave wood chip
loader in place.
• Check wood chip tray periodically to see if wood
has burned down by removing wood chip loader
and looking into smoker through hole. Add
more chips as needed.
• Wood chip loader must be pulled out completely
from smoker when checking wood chip level.
Adding more wood during smoking
process:
• Pull wood chip loader from smoker.
• Place wood chips in wood chip loader and insert
into smoker.
• Turn handle clockwise in direction of arrow mark
on smoker to unload wood. Wood will drop into
wood chip tray.
• Temperature may spike briefly after wood is
added. It will stabilize after a short time. Do not
adjust temperature setting.
Caution:
• Keep smoker door closed when adding wood
chips.
• Wood chip loader will be HOT even if handle is
not.
11
PRE-SEASON INSTRUCTIONS
PRE-SEASON SMOKER PRIOR TO FIRST USE.
Some smoke may appear during this time, this is normal.
1. Make sure water pan is in place with NO WATER.
2. Set temperature to 275°F (135°C) and run unit for 3 hours. During last 45 minutes, add 1 cup of
wood chips in chip loader to complete pre-seasoning.
3. Shut down and allow to cool.
HOW TO USE WOOD CHIP LOADER
CAUTION
When door is opened a fl are up may occur. Should wood
chips fl are up, immediately close door, wait for wood chips
to burn down then open door again. Do not spray with water.
8
ARMADO
THE INFORMATION
CONTAINED IN THIS
PASO 5
Deslice bastidores fumadores
(13) en las guías de ayuda que
fuma bastidor (21).
PASO 6
Coloque el tazón para (9) el
agua en el soporte inferior,
dentro del ahumador.
Nota: El tazón para el agua
debe estar colocado siempre en
su lugar durante el proceso de
ahumado, incluso si está vacío.
El tazón impedirá que restos de
alimento caigan sobre la tapa
de los trocitos de madera.
9
13
21

7
ARMADO
PASO 3
Con tornillos Phillips (A), fi je el
panel de control (6) al cuerpo
del ahumador (1).
Nota: No los apriete demasiado.
PASO 4
Con un tornillo Phillips (A),
fi je la manilla trasera (7) a la
parte posterior del cuerpo del
ahumador (1), como se muestra
en la ilustración.
NOTA: No levante la unidad por
la manija posterior
6
A
A
A
1
7
12
HOW TO USE CONTROL PANEL & REMOTE CONTROL
Note: Direct sunlight may interfere with ability to read LED display, block light if needed.
To set temperature:
• Press ON button.
• Press SET TEMP button once-LED display will blink.
• Use +/- to set temperature.
• Press SET TEMP button again to lock in temperature.
Note: Heating will not begin until timer is set.
To set timer:
• Press SET TIME button once-LED display for hours will blink.
• Use +/- to set hours.
• Press SET TIME button again to lock in hours. The minutes LED will start blinking.
• Use +/- to set minutes.
• Press SET TIME to lock in minutes and start cook cycle.
Heat will turn off when time has expired.
To use meat probe:
• Insert meat probe into center of meat to get most accurate reading.
• Press and hold MEAT PROBE button-LED display will show internal temperature of meat.
• Once MEAT PROBE button is released-LED display will return to set temperature or set time.
To use light:
• Press LIGHT button to turn light on.
• Press LIGHT button to turn light off.
To RESET control panel:
If control panel shows an error message, turn electric smoker off, unplug unit from outlet, wait
ten seconds, plug unit back into outlet, then turn electric smoker on. This will reset control panel.

13
To replace batteries:
• Slide belt clip to the left to remove.
• Press tab down on battery cover and pull out.
• Install 2 “AAA” Alkaline batteries. Check positive (+) and negative (-) symbols, on the case and
battery, to insure proper installation.
• Replace the battery cover.
• Remove batteries before storing remote control.
To test frequency range:
• Turn unit on.
• Use remote to turn light on and off as you move away from unit.
• Remote control is out of frequency range when light will no longer turn on and off.
IMPORTANT
• Do not leave remote control exposed to sunlight for prolonged periods of time.
• Remote control has frequency range of up to 100ft (30m).
• Test frequency range before and during use.
TROUBLESHOOTING
If the remote is not working properly or not interfacing correctly with the controller, it may be due to
weak batteries, batteries being incorrectly installed or the remote is not correctly linked to controller.
Possible solutions
• Replace batteries and install according to image in battery housing
• Link remote and controller by:
a. Turn Controller & Remote “ON”,
b. Press and HOLD “SET TEMP” on controller for 3 seconds.
c. On the Remote press “MEAT PROBE”, “LIGHT”, “MEATPROBE”, “LIGHT” (all buttons must be
pressed within 5 seconds of each other) A short beep will occur after each button press.
HOW TO USE CONTROL PANEL & REMOTE CONTROL
CAUTION
• Keep batteries away from small children. If battery is swallowed consult a physician immediately.
•
Be sure to insert batteries correctly. Improper installation may result in leaks and/or possible explosion
.
• Do not dispose of batteries in fi re.
• Do not mix old and new batteries.
• Do not mix alkaline, standard (carbon-zinc), or rechargeable (ni-cad, ni-mh,etc) batteries.
*Batteries not
included
6
ARMADO
• ANTES DE ARMARLA, LEA DETENIDAMENTE TODAS LAS INSTRUCCIONES.
• ARME LA UNIDAD EN UNA SUPERFICIE LIMPIA Y PLANA.
• HERRAMIENTAS NECESARIAS: DESTORNILLADOR PHILLIPS
PASO 1
Ubique la rueda (5) en la parte
inferior del ahumador (1), como
muestra la ilustración.
Inserte el pata roscada ajustable (4)
en la parte inferior de la rueda (5)
Fije la rueda (5) a la parte inferior
del ahumador (1), utilizando tornillos
Phillips (A).
Repita el mismo paso en el lado
opuesto.
Nota: Ajuste la altura del pata
roscada ajustable, girándolo hacia la
derecha o izquierda, de modo que el
ahumador quede nivelado. Una vez
que esté nivelado, fi je la posición de
las patas traseras con las tuercas de
tensión.
PASO 2a
Coloque el panel de control (6) en-
cima del cuerpo del ahumador (1),
como se ilustra.
Alinee las ranuras del conector del
panel de control con las pestañas
del conector del ahumador, y realice
la conexión entre ellos, como se
ilustra.
PASO 2b
Monte el panel de control al insertar
la cabeza del tornillo estabilizador
en la ranura.
Nota: Es probable que el tornillo
estabilizador necesite ajustarse
ligeramente para que quede a la
perfección.
A
5
A
1
4
Tuercas
de tensión
1
6
Tornillo
Estabilizador
Ranura

5
¡ALTO!
NO DEVUELVA EL PRODUCTO AL MINORISTA: Si necesita asistencia
con el armado, le faltan piezas o tiene piezas dañadas, llame al Servicio
de atención al cliente de MASTERBUILT, al 1-800-489-1581.
Cuando llame, tenga a mano el número de modelo y el número de serie.
Estos números fi guran en una etiqueta plateada ubicada en la parte trasera de la unidad.
(A)
M5x14
Tornillo Phillips
Cant.: 12
LISTA DE PIEZAS
LISTA DE HERRAJES
PART NO REPLACEMENT PART ITEM NO PART NO REPLACEMENT PART ITEM NO
1
Juego de la parte principal
9907100002 15 Bandeja para la grasa 910060047
2 Puerta con ventana 9907130014 16 Remate de la pata 910050009
3
Juego de regulador de
ventilación
990060221 17
Control remoto inalám-
brico
9007100008
4 Pata roscada ajustable 910050006 18
Termómetro para la
carne
9007080006
5 Juego de ruedas 9907100004 19
Juego de la cubierta de
bombilla
9907090035
6
Juego de tablero de
control digital
9907100001 20
Juego de piezas del
elemento
9907090033
7
Juego de la manilla
trasera
9907100015 21
Piezas de apoyo para
rejillas de cocción
Juego de rejilla
990050049
8
Juego del cerrojo de la
puerta
990070018 22
Juego de la tapa para
los trocitos de madera
9907100013
9 Tazón para el agua 910050030
Juego de los soportes
de la bandeja para la
grasa
9900500024
10
Recipiente para los
trocitos de madera
9007100018
Juego de elemento
soporte de cremallera
kit
990070020
11
Cargador de trocitos de
madera
9007090093 Fumador cubierta 20080110
12 Colector de residuos 910070028 Juego de herrajes 9907100006
13 Rejilla de ahumado 910050029
Juego de herrajes de
control digital
998050010
14
Juego de la bisagra de
la puerta
9907090041
Manual de instruc-
ciones
9807130082
14
TROUBLESHOOTING GUIDE
SYMPTOM CAUSE POSSIBLE SOLUTION
Power light won’t come on
Not plugged into wall Check wall connection
House fuse tripped
Make sure other appliances are not
operating on the same electrical
circuit. Check household fuses.
Wire connector on controller not
properly connected to smoker
See Step 2 on Page 6
Controller malfunctioning Contact Masterbuilt at 1.800.489.1581
Unit takes excessive amount
of time to heat up
(longer than 60-70 min)
Unit plugged into an extension cord
Set unit so an extension cord does
not have to be used
Door not closed properly Close door and fasten latch securely
Controller malfunctioning Contact Masterbuilt at 1.800.489.1581
There is a gap between the
door and the smoker when
in use and door latch has no
more
adjustment
Door alignment
Contact Masterbuilt at 1.800.489.1581
Damaged door seal
Grease is leaking out of smok-
er through door and legs
Drip pan not in place Reposition so hole lines up with drain
hole in bottom of unit
Excess grease or oil build-up in unit Clean unit
Drain tube in back of unit is not
draining
Check drain tube positioning at back
of unit
No smoke No wood chips Add wood chips (See Page 11)
Temperature rapidly de-
creased, or shut down after
few hours of use
Internal wiring issue Contact Masterbuilt at 1.800.489.1581
Controller displaying error
message
Temperature sensor
malfunctioning
Contact Masterbuilt at 1.800.489.1581
Power light is on, unit isn’t
heating
Element failure Contact Masterbuilt at 1.800.489.1581
Controller does not adjust heat
Controller/unit malfunctioning
Contact Masterbuilt at 1.800.489.1581
Interior light does not come on
Bulb burned out
Replace bulb with 15W-25W bulb
made for ovens
Switch is in off position Turn switch on
Meat probe temperature does
not show on display
Probe malfunctioning Contact Masterbuilt at 1.800.489.1581
Remote will not control smoker
Batteries are weak or installed wrong
Refer to page 13 instructions
Remote is not linked properly to
controller
Contact Masterbuilt at 1.800.489.1581
Remote malfunctioning

15
• Maximum temperature setting is 275°F (135°C).
• Do NOT move unit across uneven surfaces.
• Rear handle is NOT for lifting.
• Wood chip loader and wood chip tray MUST be in place when using smoker. This minimizes the
chance of wood fl are ups.
• Wood chips must be used in order to produce smoke and create the smoke fl avor. See “Wood
Smoking Guide for Meats” section in this manual.
• Check grease tray on back of unit often during cooking. Empty grease tray before it gets full.
Grease tray may need to be emptied periodically during cooking.
• Do not open smoker door unless necessary. Opening smoker door causes heat to escape and
may cause wood to fl are up. Closing the door will re-stabilize the temperature and stop fl are up.
• Do not leave old wood ashes in the wood tray. Once ashes are cold empty tray. Tray should be
cleaned out prior to and after each use to prevent ash buildup.
• Glass in door is tempered and will not break under normal operation.
• This is a smoker. There will be a lot of smoke produced when using wood chips. Smoke will es-
cape through seams and turn the inside of smoker black. This is normal. To minimize smoke loss
around door, door latch can be adjusted to further tighten door seal against body.
IMPORTANT FACTS ABOUT USING SMOKER
For smoking racks, water bowl and drip tray use a mild dish detergent. Rinse and dry thoroughly.
For wood chip tray and wood chip loader, clean frequently to remove ash build-up, residue and dust.
For the interior, glass in door, light cover, meat probe, and exterior of smoker simply wipe down with
a damp cloth. Do not use a cleaning agent. Make sure to dry thoroughly.
Door seal and inside seam that seal attaches to MUST be cleaned after each use to keep seal in
proper working condition.
ALWAYS MAKE SURE UNIT IS UNPLUGGED AND COOL
TO THE TOUCH BEFORE CLEANING AND STORING.
HOW TO CLEAN SMOKER
•
To adjust door latch, loosen hex nut on door latch. Turn hook clock-
wise to tighten as shown. Secure hex nut fi rmly against door latch.
• Opening smoker door during cooking process may extend cooking
time due to heat loss.
• When outside temperature is cooler than 65°F (18°C) and/or
altitude is above 3,500 feet (1067m), additional cooking time may
be required. To insure that meat is completely cooked use a meat
thermometer to test internal temperature.
4
LISTA DE PIEZAS
PIEZA
No.
CANT. DESCRIPCIÓN PIEZA
No.
CANT. DESCRIPCIÓN
11
Parte principal del
ahumador
12 1
Colector de residuos
2 1 Puerta del ahumador 13 4 Rejilla de ahumado
3 1 Regulador de ventilación 14 1 Bisagra de la puerta
4 2 Pata roscada ajustable 15 1 Bandeja para la grasa
5 2 Ruedas 16 2 Remate de la pata
6 1 Control digital 17 1 Control remoto inalámbrico
7 1 Manilla trasera 18 1 Termómetro para la carne
8 1 Cerrojo de la puerta 19 1 Juego de la cubierta de bombilla
9 1 Tazón para el agua 20 1 Elemento
10 1
Recipiente para los trocitos
de madera
21 2 Soporte de la rejilla de cocción
11 1
Cargador de trocitos de
madera
22 1
Tapa para los trocitos de
madera
¡ALTO!
NO DEVUELVA EL PRODUCTO AL MINORISTA: Si necesita asistencia
con el armado, le faltan piezas o tiene piezas dañadas, llame al Servicio
de atención al cliente de MASTERBUILT, al 1-800-489-1581.
Cuando llame, tenga a mano el número de modelo y el número de serie.
Estos números fi guran en una etiqueta plateada ubicada en la parte trasera de la unidad.
1
21
12
11
10
9
13
19
8
18
3
14
2 7
6
17
16
5
15
22
20
4

¡COMENCEMOS!
• Este ahumador funciona a fuego lento... Calcule su tiempo de modo que disponga del tiempo sufi ciente
para cocinar. El ahumador SÓLO SE PUEDE USAR AL AIRE LIBRE.
• “Cure” el ahumador antes de usarlo por primera vez. Vea la página 11.
• Antes de colocar los alimentos, caliente el ahumador a temperatura máxima, por 30 a 45 minutos.
• NO cubra las rejillas con papel de aluminio, pues esto impedirá que el calor circule correctamente.
• No sobrecargue el ahumador con alimentos. Las cantidades muy grandes de alimentos pueden absorber
el calor, prolongar el tiempo de cocción y causar una cocción dispareja. Deje espacio entre los alimentos
colocados en las rejillas y los lados del ahumador para asegurar que el calor circule adecuadamente.
Si utiliza ollas, colóquelas en el centro de la rejilla para asegurar una cocción pareja. Para obtener más
detalles, consulte el manual.
• Cierre el regulador ubicado al superior de la unidad para retener la humedad y el calor. Si está cocinando
alimentos como pescado o cecinas, abra el regulador para liberar la humedad.
• La lectura de temperatura en el tablero de control fl uctuará entre más o menos 10 y 15 grados a medida
que el ahumador se conecte y desconecte.
• Guarde el ahumador en un área seca después de usarlo.
• Las temperaturas extremadamente frías pueden aumentar los tiempos de cocción.
• LÍMPIELO DESPUÉS DE CADA USO. De esta forma, prolongará la vida útil de su ahumador y evitará la
aparición de moho y hongos.
¡DISFRÚTELO !
3
16
MASTERBUILT SMOKIN’ RECIPES
MASTERBUILT SMOKIN’ RECIPES
MASTERBUILT SMOKIN’ RECIPES
MASTERBUILT SMOKIN’ RECIPES
SMOKED TURKEY
Servings for 6-8
INGREDIENTS:
Turkey
10 - 14 lbs (4.5-6.3 kgs
)
Salt 1 tbsp
Sugar 2 tbsp
Cinnamon 1-2 tsps
Apple (cored, peeled, and quartered)
1 average
Onion (quartered) 2 medium
Celery stalks with leaves 4 stalks
SUGGESTED WOOD FOR SMOKING:
Hickory or Apple Chips
INSTRUCTIONS:
Thaw turkey according to package directions if necessary.
Remove giblets and neck. Rinse and pat dry. Sprinkle
turkey cavity with salt. Combine sugar and cinnamon in
small bowl. Dredge apple in mixture. Stuff apple, onion
and celery into cavity. Close with skewers. Tie ends of
legs to tail with kitchen string. Lift wing tips up and over the
back to tuck under. Set smoker to 225°F (107°C). Place
turkey on cooking rack and cook for 8 to 12 hours or until
inner thigh temperature reaches 180°F (82°C). Cover
turkey and chill or let stand 20 minutes before carving.
Serve.
WOOD FLAVOR POULTRY FISH HAM BEEF PORK LAMB
Hickory
Pungent, smoky, bacon-like flavor
9 9 9 9
9
Mesquite
Sweet and delicate flavor
9 9 9
Alder
Delicate, wood smoke flavor
9 9 9
Pecan
Bold and hearty flavor
9 9 9
Maple
Sweet, subtle flavor
9 9
Apple
Sweet, delicate flavor
9 9 9
Cherry
Sweet, delicate flavor
9 9
WOOD SMOKING GUIDE FOR MEATS

17
This device complies with Part 15 of the FCC Rules. Operation is subject to the following two
conditions :
(1) this device may not cause harmful interference, and
(2) this device must accept any interference received, including interference that may cause
undesired operation.
FCC Warning
Warning: Changes or modifi cations to this unit not expressly approved by the party responsible for
compliance could void the user’s authority to operate the equipment.
FCC Statement
NOTE: This equipment has been tested and found to comply with the limits for a Class B digital de-
vice, pursuant to Part 15 of the FCC Rules. These limits are designed to provide reasonable
protection against harmful interference in a residential installation. This equipment generates uses
and can radiate radio frequency energy and, if not installed and used in accordance with the
instructions, may cause harmful interference to radio communications.
However, there is no guarantee that interference will not occur in a particular installation. If this
equipment does cause harmful interference to radio or television reception, which can be
determined by turning the equipment off and on, the user is encouraged to try to correct the
interference by one or more of the following measures:
1. Reorient or relocate the receiving antenna.
2. Increase the separation between the equipment and receiver.
3. Connect the equipment into an outlet on a circuit different from that to which the receiver is
connected.
4. Consult the dealer or an experienced radio/TV technician for help.
2
ADVERTENCIAS E INFORMACIÓN GENERAL DE SEGURIDAD
• No cubra las rejillas de cocción con papel aluminio. Esto retendrá el calor y puede
dañar gravemente el ahumador.
• El colector de residuos sólo se debe usar en la parte inferior del ahumador eléctrico.
No ponga el colector sobre las rejillas de cocción, pues esto puede dañar el ahumador.
• La bandeja para la madera está CALIENTE cuando el ahumador está en uso. Tenga
cuidado al colocar los trocitos de madera.
• Para desconectar la unidad, mueva la perilla de control a la posición de apagado
(“OFF"), luego desconéctela del tomacorriente.
• Desconéctela del tomacorriente cuando no la use y antes de limpiarla. Deje que la uni-
dad se enfríe completamente antes de colocar o retirar las rejillas o los recipientes.
• Para botar las cenizas frías, colóquelas en papel aluminio, remójelas con agua y
deséchelas dentro de un recipiente de material no combustible.
• No guarde el ahumador con las cenizas CALIENTES dentro. Guárdelo cuando todas las
superfi cies se hayan enfriado.
• Se recomienda no usar accesorios que no sean los suministrados por Masterbuilt Man-
ufacturing, Inc., pues estos pueden producir lesiones.
•
El empleo de accesorios no recomendados por el fabricante del aparato puede ocasionar lesiones.
• Nunca use el ahumador eléctrico para un fi n para el que no ha sido diseñado. Esta uni-
dad no está destinada al uso comercial.
• Úsela siempre de conformidad con los códigos de prevención de incendios locales,
estatales y federales correspondientes.
• Se dispone de cables de prolongación más largos o extensiones removibles, que
pueden usarse si se lo hace con precaución.
•
Si usa un cable de prolongación más largo o una extensión: 1. La clasifi cación eléctrica mar-
cada del cable o la extensión debe ser por lo menos igual de grande que la clasifi cación eléc-
trica de la unidad y 2. El cable debe acomodarse de manera que no quede en la cubierta o en la
mesa, donde lo puedan jalar los niños o donde alguien se pueda tropezar intencionalmente.
• El cordón de prolongación debe tener un cable de puesta a tierra tipo 3.
•
Con los productos de uso al aire libre debe utilizar cordones de prolongación para uso al aire libre, que
lleven marcado el sufi jo “W" y la indicación de que son adecuados para usarlos con aparatos al aire libre.
• PRECAUCIÓN: Para disminuir el riesgo de descarga eléctrica, mantenga la conexión del
cordón de prolongación seca y alejada del suelo.
•
Es necesario tener extrema precaución al mover un aparato que contenga líquidos calientes.
• No limpie este aparato con un pulverizador rociador de agua o similar.
GUARDE ESTAS INSTRUCCIONES
PROPUESTA 65 DE CALIFORNIA
1. Los productos que se generan por combustión al usar este aparato, contienen substan-
cias químicas que en el estado de California se consideran causantes de defectos con-
génitos, daños al aparato reproductor o cáncer.
2. Este producto puede contener plomo, una substancia química que, en el estado de Cal-
ifornia, se considera causante de defectos congénitos y de otros trastornos al sistema
reproductor.
Lávese las manos después de manejar este producto.
ADVERTENCIA

1
ADVERTENCIAS E INFORMACIÓN GENERAL DE SEGURIDAD
LEA TODAS LAS INSTRUCCIONES
Cuando use aparatos eléctricos, debe cumplir siempre ciertas medidas de seguridad esen-
ciales, incluyendo las siguientes:
• Sólo para usar al aire libre. No los haga funcionar nunca en ambientes cerrados.
• La unidad DEBE colocarse sobre el suelo. No la coloque sobre mesas ni mostradores.
NO mueva la unidad por superfi cies irregulares.
• No levante la unidad por la manija posterior.
•
No enchufe el ahumador eléctrico hasta que esté totalmente ensamblado y listo para usar.
• Use únicamente tomacorrientes autorizados con conexión a tierra.
• No use el ahumador durante tormentas eléctricas.
• Nunca exponga el ahumador eléctrico a la lluvia ni al agua.
• Para protegerse de las descargas eléctricas, no sumerja el cordón, los enchufes ni el
panel de control en agua ni en ningún otro líquido.
• No haga funcionar ningún aparato que tenga dañado el cable eléctrico o el enchufe, ni
después que haya presentado fallas o se haya dañado de modo alguno. Si necesita ayu-
da, llame al Servicio de atención al cliente de Masterbuilt, al 1-800-489-1581.
•
Tenga a mano en todo momento un extintor de incendios cuando esté usando el ahumador eléctrico.
• No deje que el cable eléctrico entre en contacto con superfi cies calientes.
• No coloque el ahumador sobre ni cerca de quemadores calientes, a gas o eléctricos, ni
en un horno caliente.
•
Mantenga a los niños y las mascotas alejados en todo momento del ahumador eléctrico. No
permita que los niños lo usen. Cuando haya niños o mascotas presentes en el área donde se
está usando el ahumador eléctrico, debe mantenerse una supervisión rigurosa de los mismos.
• No debe usar materiales combustibles en el ahumador, como las briquetas de carbón o
las pastillas para encender chimeneas.
• Nunca use el ahumador eléctrico como calentador (LEA EL RIESGO DE EMISIÓN DE
MONÓXIDO DE CARBONO EN LA PORTADA).
• Use el ahumador eléctrico únicamente sobre superfi cies estables y niveladas, para evi-
tar que se vuelque.
• El ahumador estará CALIENTE mientras se esté usando y seguirá CALIENTE por un
tiempo después que se apague. Tenga cuidado.
• No toque las superfi cies CALIENTES.
•
No permita a nadie realizar ningún tipo de actividad alrededor del ahumador mientras esté en
uso, o luego de usarlo, hasta que se haya enfriado. Este ahumador eléctrico se mantiene CALI-
ENTE cuando se usa y sigue estando CALIENTE durante cierto tiempo después que se usa.
• El consumo de alcohol y el uso de medicamentos, ya sean adquiridos con receta o no,
pueden afectar la capacidad del usuario para armar correctamente y manipular de forma
segura el ahumador eléctrico.
• Evite tropezarse con o golpear el ahumador eléctrico.
•
Nunca lo mueva cuando lo esté usando. Deje que se enfríe antes de moverlo o guardarlo.
•
T
enga cuidado cuando retire la comida del ahumador. Todas sus superfi cies estarán CALIENTES
y puede quemarse. Use guantes protectores o utensilios de cocina resistentes y de mango largo.
LAS ADVERTENCIAS Y MEDIDAS DE PRECAUCIÓN
IMPORTANTES CONTINÚAN EN LA PÁGINA 2.
18
LIMITED WARRANTY
Masterbuilt warrants its products to be free from defects in material and workmanship under proper
assembly, normal use and recommended care for 90 days from the date of original retail purchase.
Masterbuilt warranty does not cover paint fi nish as it may burn off during normal use.
Masterbuilt warranty does not cover rust of the unit.
Masterbuilt requires reasonable proof of purchase for warranty claims and suggests that you keep
your receipt. Upon the expiration of such warranty, all such liability shall terminate.
Within the stated warranty period, Masterbuilt, at its discretion, shall repair or replace defective com-
ponents free of charge with owner being responsible for shipping. Should Masterbuilt require return
of component(s) in question for inspection Masterbuilt will be responsible for shipping charges to
return requested item.
This warranty excludes property damage sustained due to misuse, abuse, accident, damage arising
out of transportation, or damage incurred by commercial use of this product.
This expressed warranty is the sole warranty given by Masterbuilt and is in lieu of all other warran-
ties, expressed or implied including implied warranty, merchantability, or fi tness for a particular pur-
pose.
Neither Masterbuilt nor the retail establishment selling this product, has authority to make any war-
ranties or to promise remedies in addition to or inconsistent with those stated above.
Masterbuilt’s maximum liability, in any event, shall not exceed the purchase price of the product paid
by the original consumer/ purchaser. Some states do not allow the exclusion or limitation of incidental
or consequential damages. In such a case, the above limitations or exclusions may not be applica-
ble.
California residents only: Not withstanding this limitation of warranty, the following specifi c restric-
tions apply; if service, repair, or replacement of the product is not commercially practical, the retailer
selling the product or Masterbuilt will refund the purchase price paid for the product, less the amount
directly attributable to use by the original buyer prior to the discovery of the nonconformity. Owner
may take the product to the retail establishment selling this product in order to obtain performance
under warranty.
This expressed warranty gives you specifi c legal rights, and you may also have other rights which
vary from state to state.
Go Online www.masterbuilt.com
or complete and return to
Attn: Warranty Registration
Masterbuilt Mfg. Inc.
1 Masterbuilt Court - Columbus, GA 31907
Name: _______________________________ Address :___________________________ City:________________
State/Province: ________ Postal Code: ________________Phone Number: (_____) - ____________
E-mail Address:_______________________________________
*Model Number: ____________________ *Serial Number: ____________________
Purchase Date: _____- ______-_______ Place of Purchase: ____________________________________
*Model Number and Serial Number are located on silver label on back of unit.
/